
Retroactive KZ750E Project Thread
- 650ed
-
- Offline
- User
-

Registered
- Posts: 15334
- Thanks: 2832
Re: Retroactive KZ750E Project Thread
04 Aug 2017 14:01
No eBay APP ID and/or Cert ID defined in Kunena configurationYes indeed. In fact, you can buy a 256gb SanDisk thumb (flash) drive for $50 (see below). So for $400 a year you could buy 2 terabytes of storage every year!
I switched to Imgur a couple years ago when PB started sticking pop-ups all over everything and slowed their site way down. Imgur is free, easy to use, and fast. Of course I keep photos on my own media in case Imgur decides to follow the PB example. Ed
I switched to Imgur a couple years ago when PB started sticking pop-ups all over everything and slowed their site way down. Imgur is free, easy to use, and fast. Of course I keep photos on my own media in case Imgur decides to follow the PB example. Ed
1977 KZ650-C1 Original Owner - Stock (with additional invisible FIAMM horn)
Please Log in or Create an account to join the conversation.
- TexasKZ
-

- Offline
- Platinum Member
-

Registered
- Posts: 8269
- Thanks: 2723
Re: Retroactive KZ750E Project Thread
04 Aug 2017 14:08
Or if you need a bit more storage.......
www.bestbuy.com/site/seagate-backup-plus...4503.p?skuId=2944503
www.bestbuy.com/site/seagate-backup-plus...4503.p?skuId=2944503
1982 KZ1000 LTD parts donor
1981 KZ1000 LTD awaiting resurrection
2000 ZRX1100 not ridden enough
www.kzrider.com/forum/11-projects/620336...amateur-build-thread
1981 KZ1000 LTD awaiting resurrection
2000 ZRX1100 not ridden enough
www.kzrider.com/forum/11-projects/620336...amateur-build-thread
Please Log in or Create an account to join the conversation.
- 650ed
-
- Offline
- User
-
Registered
- Posts: 15334
- Thanks: 2832
Re: Retroactive KZ750E Project Thread
04 Aug 2017 14:19TexasKZ wrote: Or if you need a bit more storage.......
www.bestbuy.com/site/seagate-backup-plus...4503.p?skuId=2944503
Excellent point! In fact, using the Seagate product one can buy 15 terabytes of storage (3 * 5 tb) for the cost of one year's PB fee! Ed
www.amazon.com/Seagate-Backup-Portable-E...0/dp/B01LZP2B23?th=1
1977 KZ650-C1 Original Owner - Stock (with additional invisible FIAMM horn)
Please Log in or Create an account to join the conversation.
- Scirocco
-
- Offline
- Premium Member
-

Registered
- Never change a running system
- Posts: 4397
- Thanks: 2262
Re: Retroactive KZ750E Project Thread
04 Aug 2017 14:28 - 04 Aug 2017 14:39
$400/year, never. Buy a cheap NAS and a free DynDNS account and get free access to your pics world wide for $100 for a live span.
NAS with Raspberry Pi cost under $100
NAS with Raspberry Pi cost under $100
My 1975 Z 1 B 900 Project
www.kzrider.com/forum/11-projects/605133...ears-deep-sleep-mode
www.kzrider.com/forum/11-projects/605133...ears-deep-sleep-mode
Last edit: 04 Aug 2017 14:39 by Scirocco.
The following user(s) said Thank You: GPz550D1
Please Log in or Create an account to join the conversation.
- Nessism
-
 Topic Author
- Away
- Sustaining Member
-
Registered
- Posts: 8118
- Thanks: 3503
Re: Retroactive KZ750E Project Thread
04 Aug 2017 15:07Scirocco wrote: $400/year, never. Buy a cheap NAS and a free DynDNS account and get free access to your pics world wide for $100 for a live span.
NAS with Raspberry Pi cost under $100
This is an option! For now I'm all set with Flickr though.
I've got plenty of home storage space, but webhosting is what I didn't have (thus the use of Photobucket and now Flickr).
Ed
Carb O-ring Kits : www.kzrider.com/forum/14-vendor-forum/62...rburetor-o-ring-kits
www.kzrider.com/forum/faq-wiki/618026-new-owner-things-to-know
1981 KZ750E2
www.kzrider.com/forum/11-projects/604901...z750e-project-thread
Carb O-ring Kits : www.kzrider.com/forum/14-vendor-forum/62...rburetor-o-ring-kits
www.kzrider.com/forum/faq-wiki/618026-new-owner-things-to-know
1981 KZ750E2
www.kzrider.com/forum/11-projects/604901...z750e-project-thread
Please Log in or Create an account to join the conversation.
- martin_csr
-

- Offline
- User
-
Registered
- Posts: 7993
- Thanks: 1646
Re: Retroactive KZ750E Project Thread
04 Aug 2017 15:15
Was it very difficult or time consuming restoring all of the photos in this topic?
Please Log in or Create an account to join the conversation.
- Nessism
-
Topic Author
- Away
- Sustaining Member
-
Registered
- Posts: 8118
- Thanks: 3503
Re: Retroactive KZ750E Project Thread
04 Aug 2017 16:39martin_csr wrote: Was it very difficult or time consuming restoring all of the photos in this topic?
Yes. Had to find the original photo, post on flickr, then come back and cut and paste each link. Photobucket has a better user interface compared to flickr. This site is quirky too since it reads each flickr/photobucket link as several links even when it's only one. Have to parse down the link to the bare minimum or the site will think you posted a lot more photos than you are.
Ed
Carb O-ring Kits : www.kzrider.com/forum/14-vendor-forum/62...rburetor-o-ring-kits
www.kzrider.com/forum/faq-wiki/618026-new-owner-things-to-know
1981 KZ750E2
www.kzrider.com/forum/11-projects/604901...z750e-project-thread
Carb O-ring Kits : www.kzrider.com/forum/14-vendor-forum/62...rburetor-o-ring-kits
www.kzrider.com/forum/faq-wiki/618026-new-owner-things-to-know
1981 KZ750E2
www.kzrider.com/forum/11-projects/604901...z750e-project-thread
Please Log in or Create an account to join the conversation.
- Nessism
-
Topic Author
- Away
- Sustaining Member
-
Registered
- Posts: 8118
- Thanks: 3503
Re: Retroactive KZ750E Project Thread
06 Aug 2017 09:59 - 18 Aug 2017 13:46
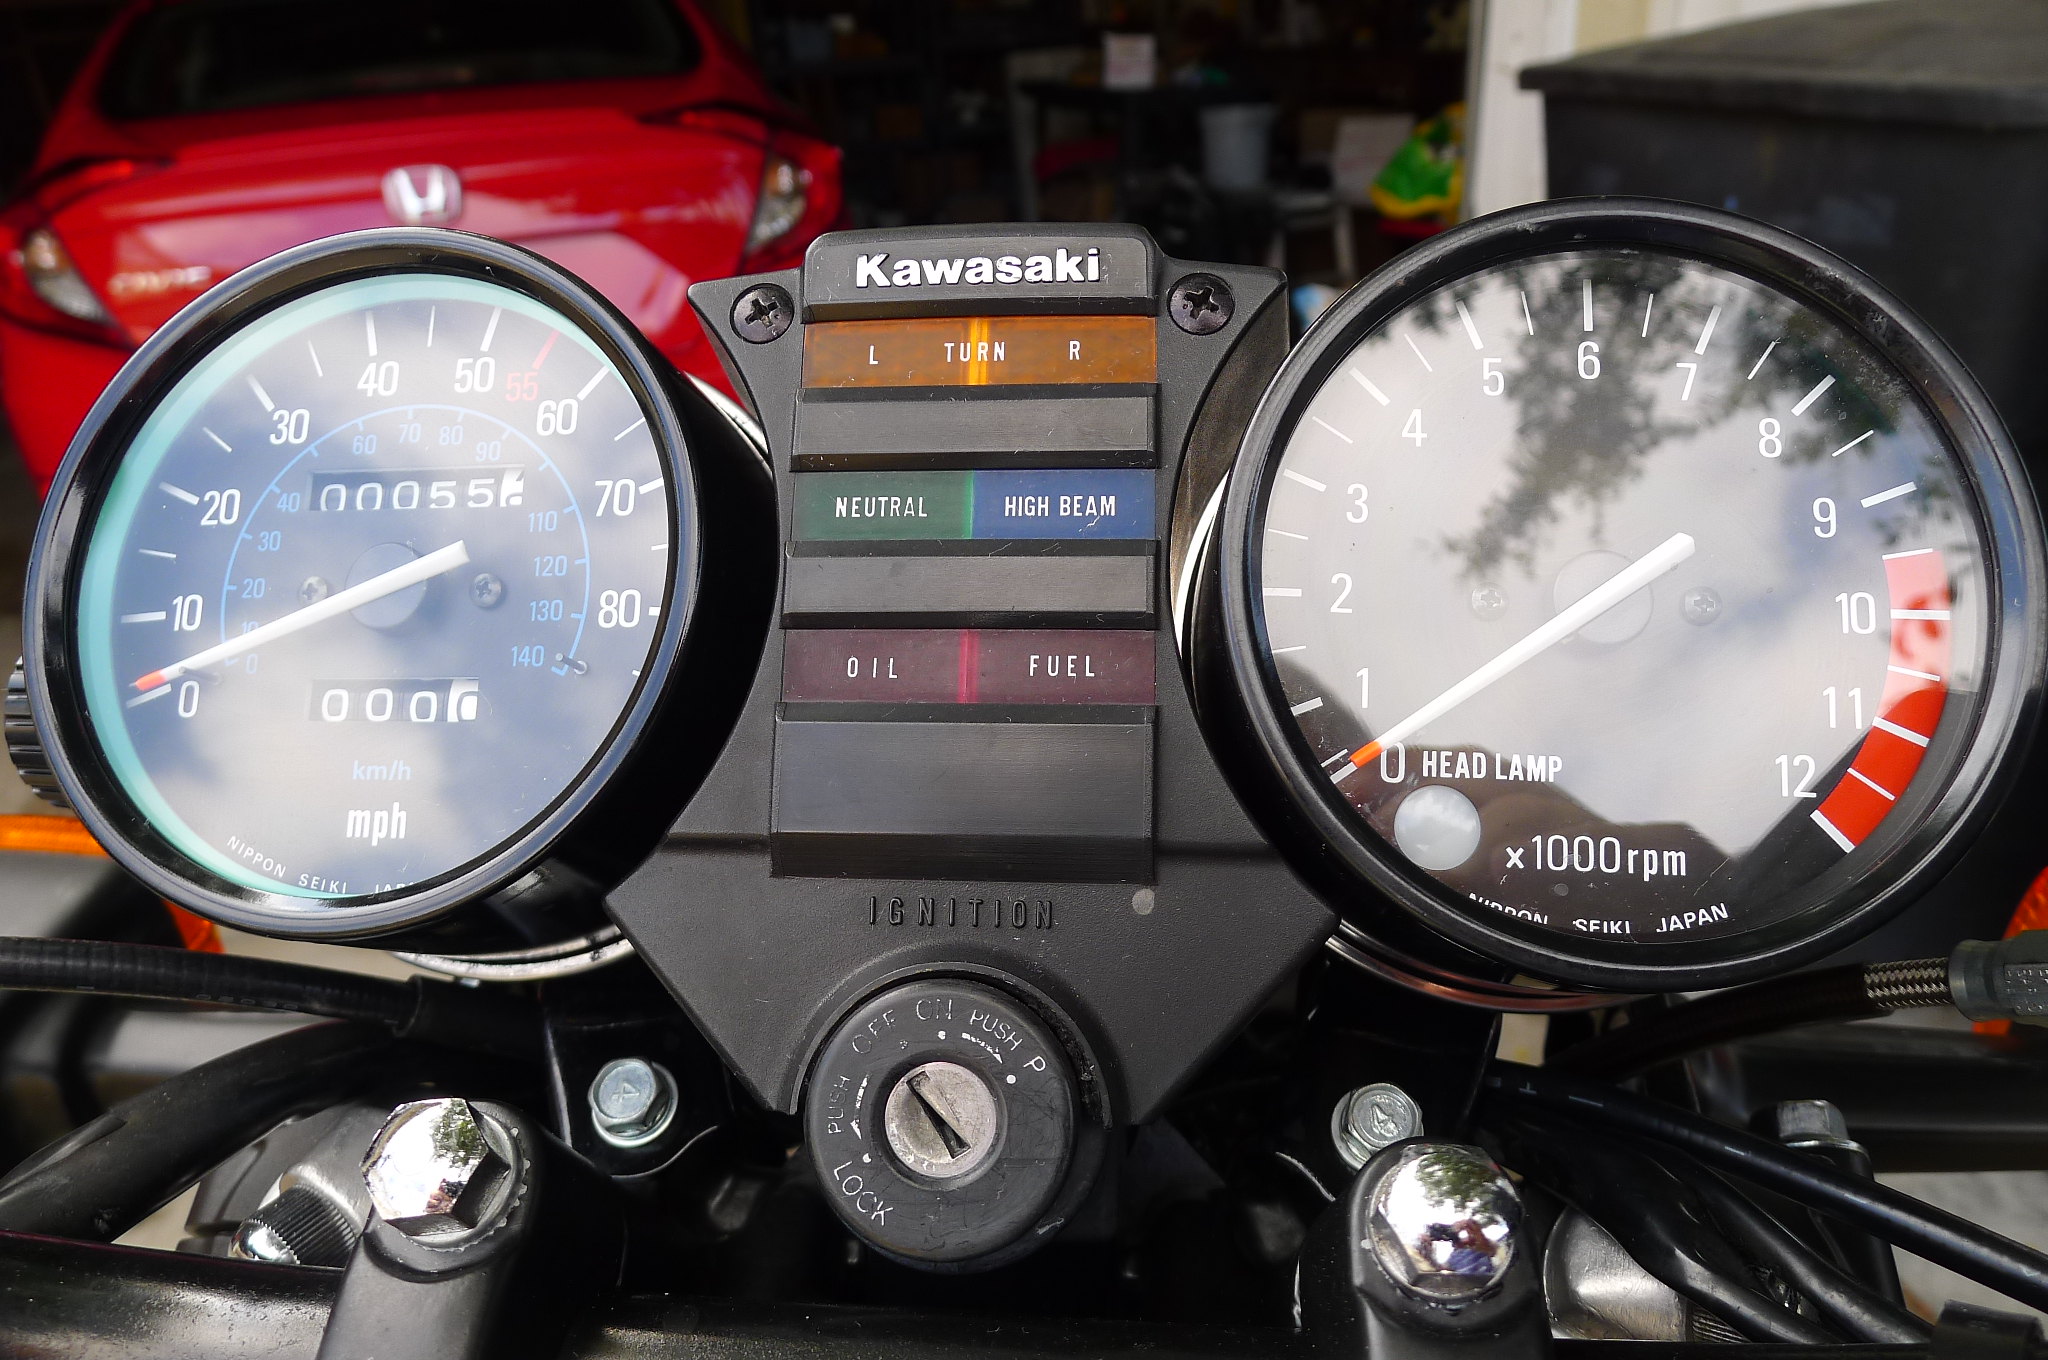
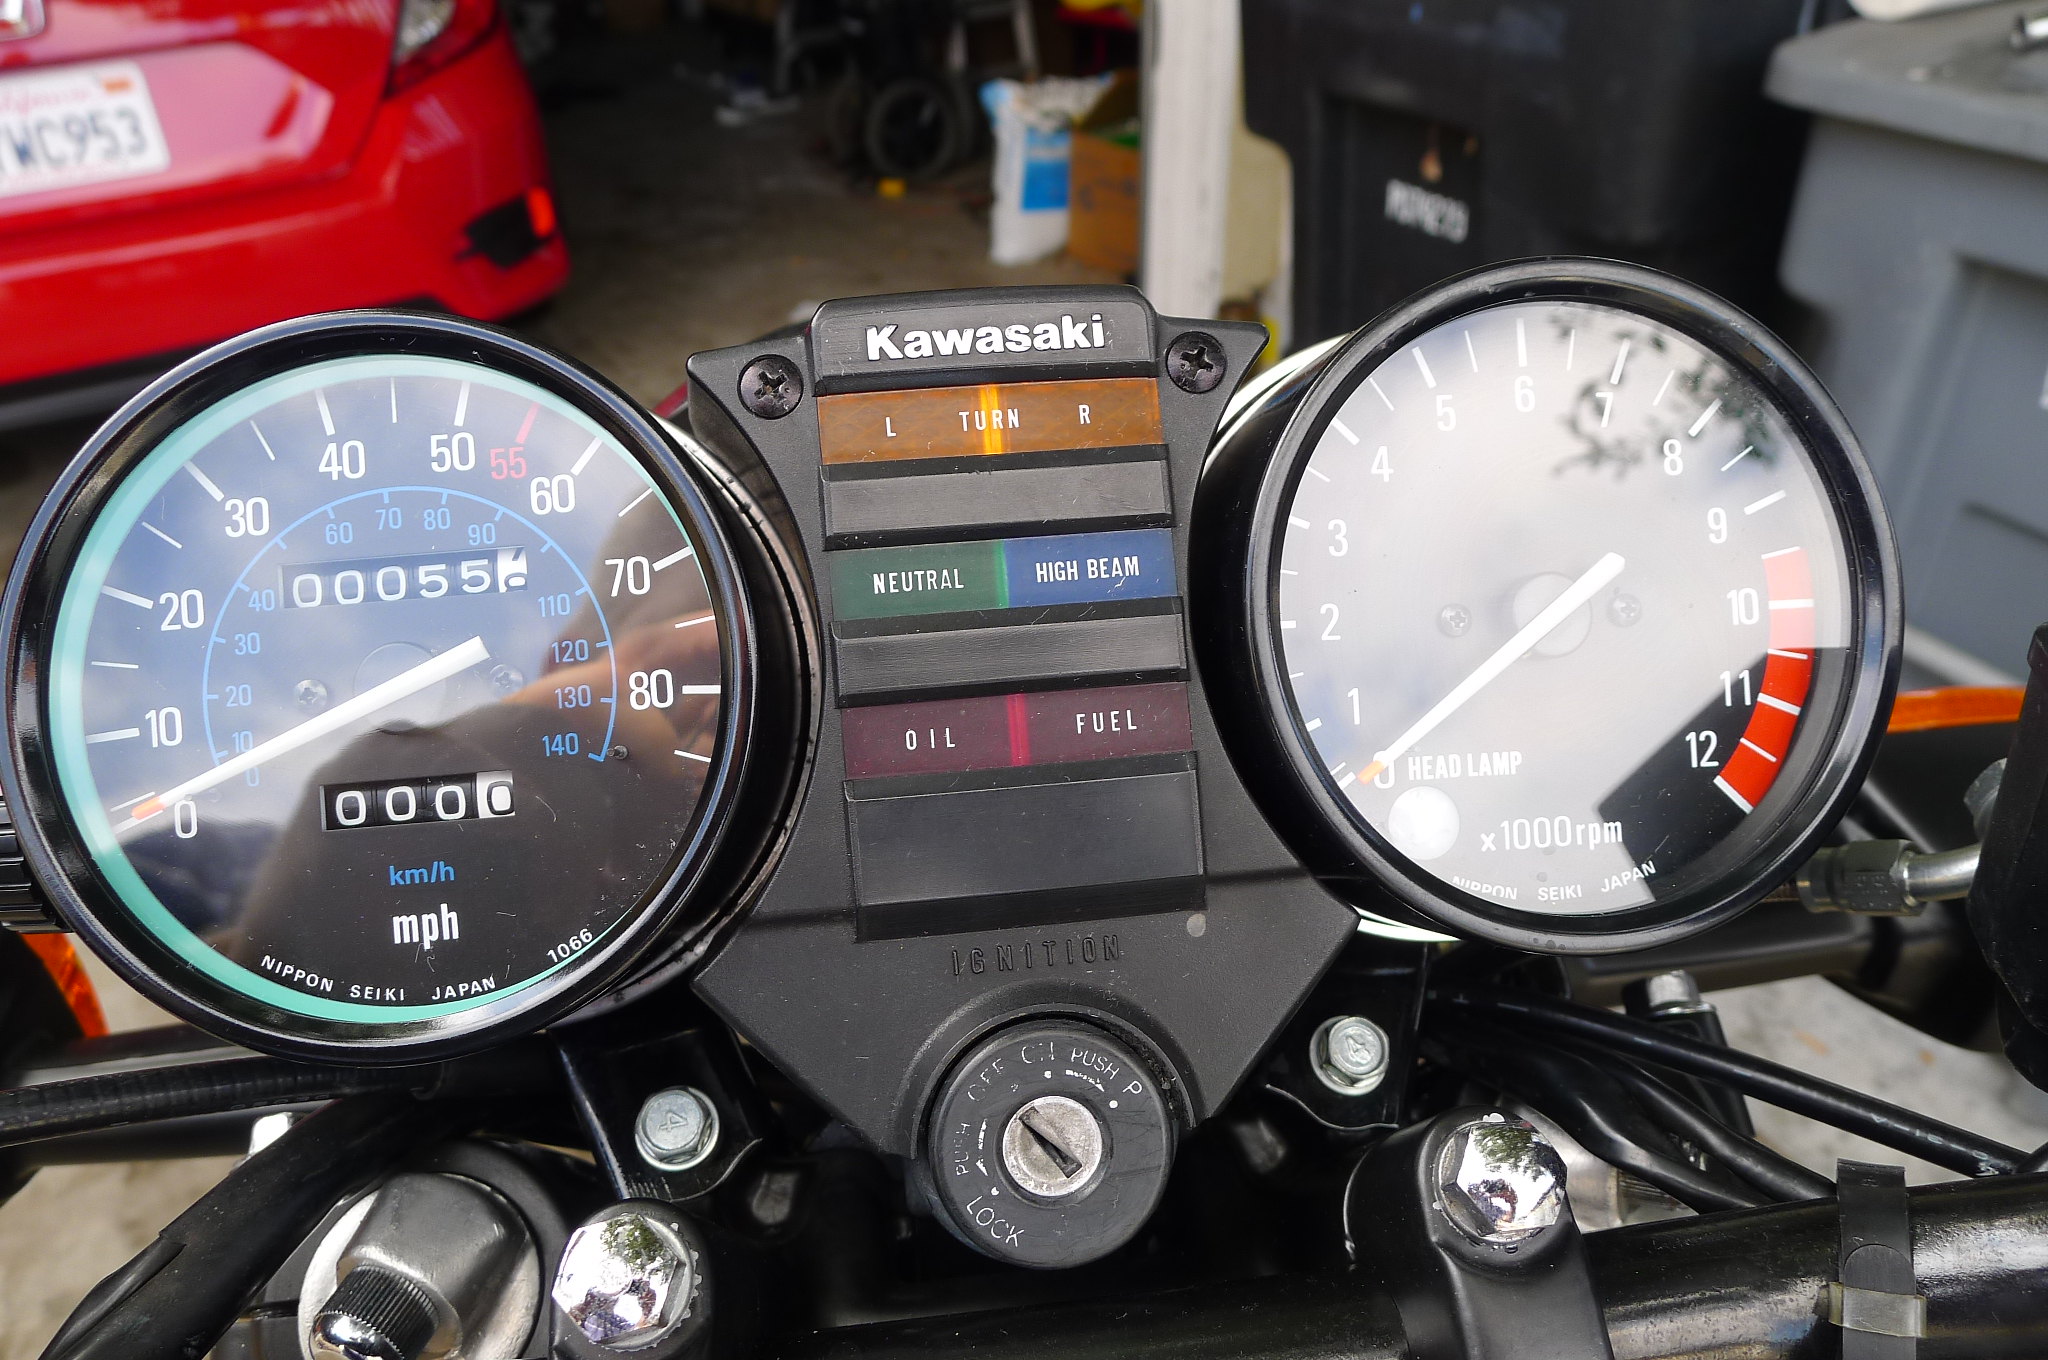
One of my last projects with this bike was to update the gauges. As shown earlier in the thread I cleaned up the housings and the gauges looked nice and all, however, the needles sort of wobbled around more than I liked. Did a deep dive on gauge part numbers and got all kinds of confused. Kawasaki used a bunch of different part number gauges which threw me for a loop. The 550's used the same gauges on at least some years too which increased confusion.
In the end I've come to realize that the E2/3 bikes use a different tach than the E1 in that has a "headlamp" warning light built in. . The gauges for my bike have a black bezel around the face but some other bikes came with green bezel gauges. I found a NOS tach with a black bezel but the only speedo I could find has a green bezel. Guess I'll have to open up one of them to swap things around to get them to match. Later though...
Sorry for all the photo glare...
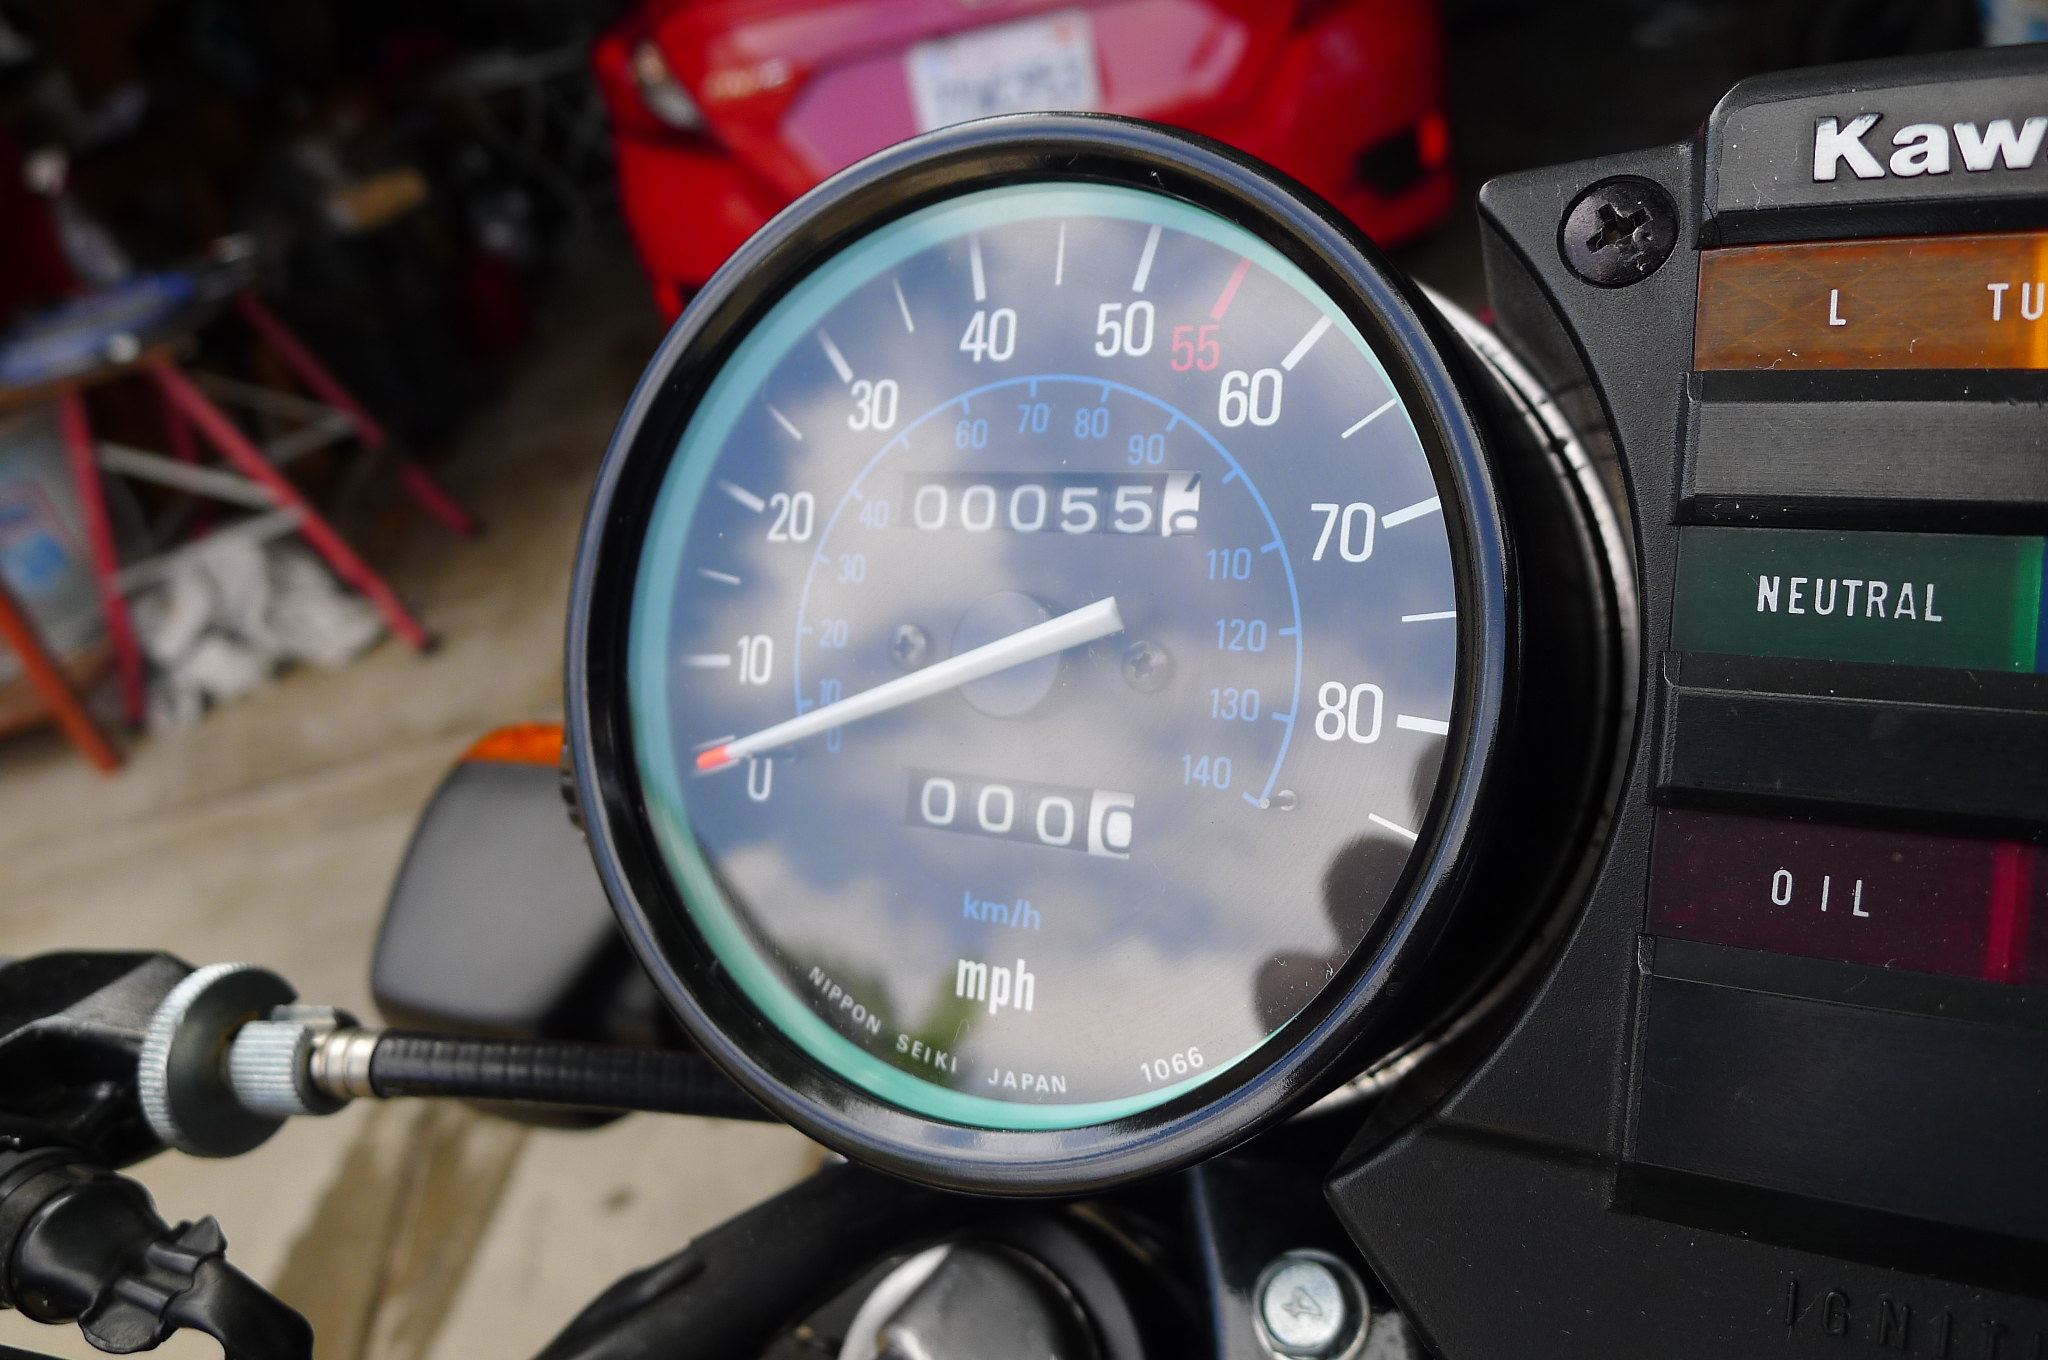
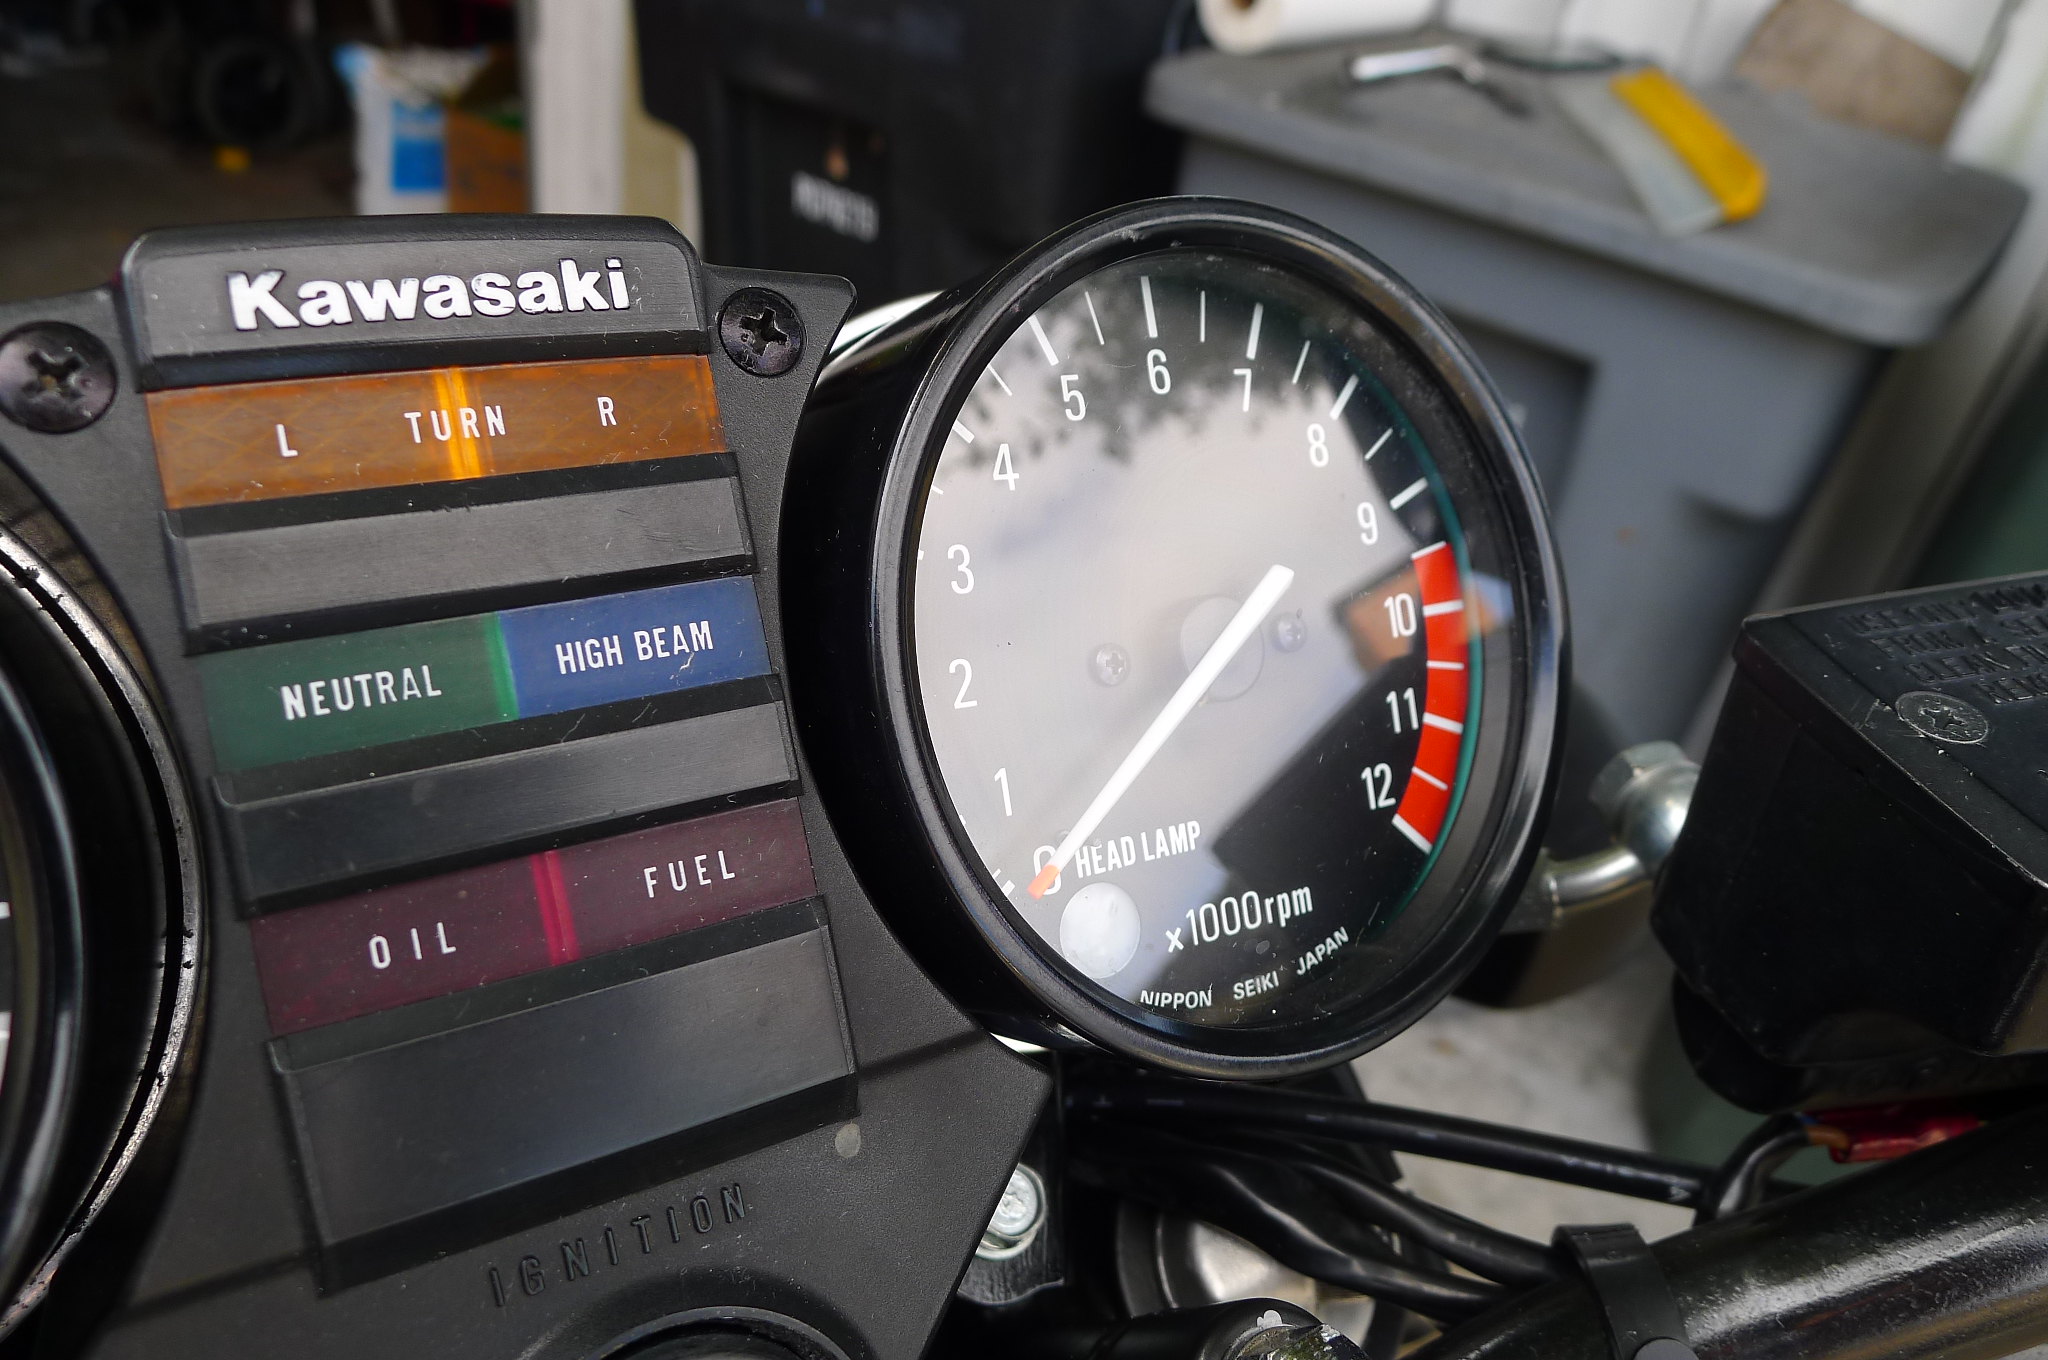
Ed
Carb O-ring Kits : www.kzrider.com/forum/14-vendor-forum/62...rburetor-o-ring-kits
www.kzrider.com/forum/faq-wiki/618026-new-owner-things-to-know
1981 KZ750E2
www.kzrider.com/forum/11-projects/604901...z750e-project-thread
Carb O-ring Kits : www.kzrider.com/forum/14-vendor-forum/62...rburetor-o-ring-kits
www.kzrider.com/forum/faq-wiki/618026-new-owner-things-to-know
1981 KZ750E2
www.kzrider.com/forum/11-projects/604901...z750e-project-thread
Last edit: 18 Aug 2017 13:46 by Nessism.
Please Log in or Create an account to join the conversation.
- SWest
-

- Offline
- Sustaining Member
-
Registered
- 10 22 2014
- Posts: 23739
- Thanks: 3020
Re: Retroactive KZ750E Project Thread
06 Aug 2017 10:08
Looks good. Been there, done that.:whistle:
Steve
Steve
Z1b1000 1975 Z1b
kzrider.com/forum/11-projects/598262-kz-...-will-it-live#672882
kzrider.com/forum/2-engine/597654-poser?start=240#704229
kzrider.com/forum/11-projects/598262-kz-...-will-it-live#672882
kzrider.com/forum/2-engine/597654-poser?start=240#704229
Please Log in or Create an account to join the conversation.
- Ed_in_Miami
-

- Offline
- User
-
Registered
- Posts: 259
- Thanks: 46
Re: Retroactive KZ750E Project Thread
17 Aug 2017 12:41
Looks amazing..
My hamfisted attempt at rebuilding my gauges left me with both broken needles...
I had to devise a crafty replacement, but definitely ended up with a NON-OEM look...
My hamfisted attempt at rebuilding my gauges left me with both broken needles...
I had to devise a crafty replacement, but definitely ended up with a NON-OEM look...
Nessism wrote: One of my last projects with this bike was to update the gauges. As shown earlier in the thread I cleaned up the housings and the gauges looked nice and all, however, the needles sort of wobbled around more than I liked. Did a deep dive on gauge part numbers and got all kinds of confused. Kawasaki used a couple different part number gauges which threw me for a loop. The 550's used the same size gauges too which increased confusion.
In the end I've come to realize that the E2 bikes use a somewhat unique tach that has the "headlamp" warning light built in. This gauge also uses a black gauge bezel inside the housing. The speedometer for my bike also has a matching black bezel. I found a NOS tach which is correct but couldn't find a speedo. The speedo I bought has a green bezel so the gauges don't match. Guess I'll have to open my new speedo and paint the bezel. It's just that I've got heartburn opening a NOS gauge that I paid so much for.
Sorry for all the photo glare...
This is my build:
kzrider.com/forum/11-projects/600312-ano...rtment-build?start=0
There are many more like it, but this one is mine... news to come!
kzrider.com/forum/11-projects/600312-ano...rtment-build?start=0
There are many more like it, but this one is mine... news to come!
Please Log in or Create an account to join the conversation.
- old_kaw
-

- Offline
- User
-
Registered
- Posts: 929
- Thanks: 270
Re: Retroactive KZ750E Project Thread
01 Oct 2017 13:44 - 01 Oct 2017 13:45Nessism wrote: One of my last projects with this bike was to update the gauges. As shown earlier in the thread I cleaned up the housings and the gauges looked nice and all, however, the needles sort of wobbled around more than I liked. Did a deep dive on gauge part numbers and got all kinds of confused. Kawasaki used a bunch of different part number gauges which threw me for a loop. The 550's used the same gauges on at least some years too which increased confusion.
In the end I've come to realize that the E2/3 bikes use a different tach than the E1 in that has a "headlamp" warning light built in. . The gauges for my bike have a black bezel around the face but some other bikes came with green bezel gauges. I found a NOS tach with a black bezel but the only speedo I could find has a green bezel. Guess I'll have to open up one of them to swap things around to get them to match. Later though...
Sorry for all the photo glare...
That is just an amazing job you did on this restoration. I do agree with the brittle engine paint chipping and it kinda makes all the prep work that it takes to make things look this nice, all a waste IMHO. I used an epoxy appliance black rattle can on my seat pan and front master cylinder.. and it looks great when I open my seat, but my front master cylinder looks like crap.. again. It doesn't hold up to brake fluid.
I love what you did with the gauges. You pried these open, then resealed them again? I hate the thought, but have done it myself on a XS1100 I brought back to life. It is hard to get the rings back on, then made to look right. Any pointers on this? I need to disassemble my tach, and would love to find a way to modify my speedo into a 160mph instrument for obvious reasons.
1981 Kawasaki Kz1000K1
Located in the Saint Louis, Missouri Area.
Located in the Saint Louis, Missouri Area.
Last edit: 01 Oct 2017 13:45 by old_kaw.
Please Log in or Create an account to join the conversation.
- Nessism
-
Topic Author
- Away
- Sustaining Member
-
Registered
- Posts: 8118
- Thanks: 3503
Re: Retroactive KZ750E Project Thread
01 Oct 2017 15:19old_kaw wrote: That is just an amazing job you did on this restoration. I do agree with the brittle engine paint chipping and it kinda makes all the prep work that it takes to make things look this nice, all a waste IMHO. I used an epoxy appliance black rattle can on my seat pan and front master cylinder.. and it looks great when I open my seat, but my front master cylinder looks like crap.. again. It doesn't hold up to brake fluid.
I love what you did with the gauges. You pried these open, then resealed them again? I hate the thought, but have done it myself on a XS1100 I brought back to life. It is hard to get the rings back on, then made to look right. Any pointers on this? I need to disassemble my tach, and would love to find a way to modify my speedo into a 160mph instrument for obvious reasons.
Thanks for the kudos!
I pried open the original gauges and restored them. There are photos showing the process earlier in the thread; basically take a small screwdriver and pry a little at a time and work around and around. Took about 4 times around prying as you go. To seal them back up all you have to do is tap the ring back down. The gauge has a rubber seal to keep out water.
I haven't opened up the new gauges yet to fix the bezel color mismatch.
I can't advise on how to mod the gauge other than you may be able to transplant the guts of one gauge inside your original housings. If you go down that road please post some photos showing the process.
")
Ed
Carb O-ring Kits : www.kzrider.com/forum/14-vendor-forum/62...rburetor-o-ring-kits
www.kzrider.com/forum/faq-wiki/618026-new-owner-things-to-know
1981 KZ750E2
www.kzrider.com/forum/11-projects/604901...z750e-project-thread
Carb O-ring Kits : www.kzrider.com/forum/14-vendor-forum/62...rburetor-o-ring-kits
www.kzrider.com/forum/faq-wiki/618026-new-owner-things-to-know
1981 KZ750E2
www.kzrider.com/forum/11-projects/604901...z750e-project-thread
Please Log in or Create an account to join the conversation.
Moderators: Street Fighter LTD