
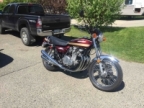
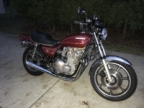
Trying to Rescue a Late 1970s (1977??) Kawasaki KZ1000
- wdhewson
-
 Topic Author
- Offline
- User
-

Registered
- Posts: 162
- Thanks: 58
Re: Trying to Rescue a Late 1970s (1977??) Kawasaki KZ1000
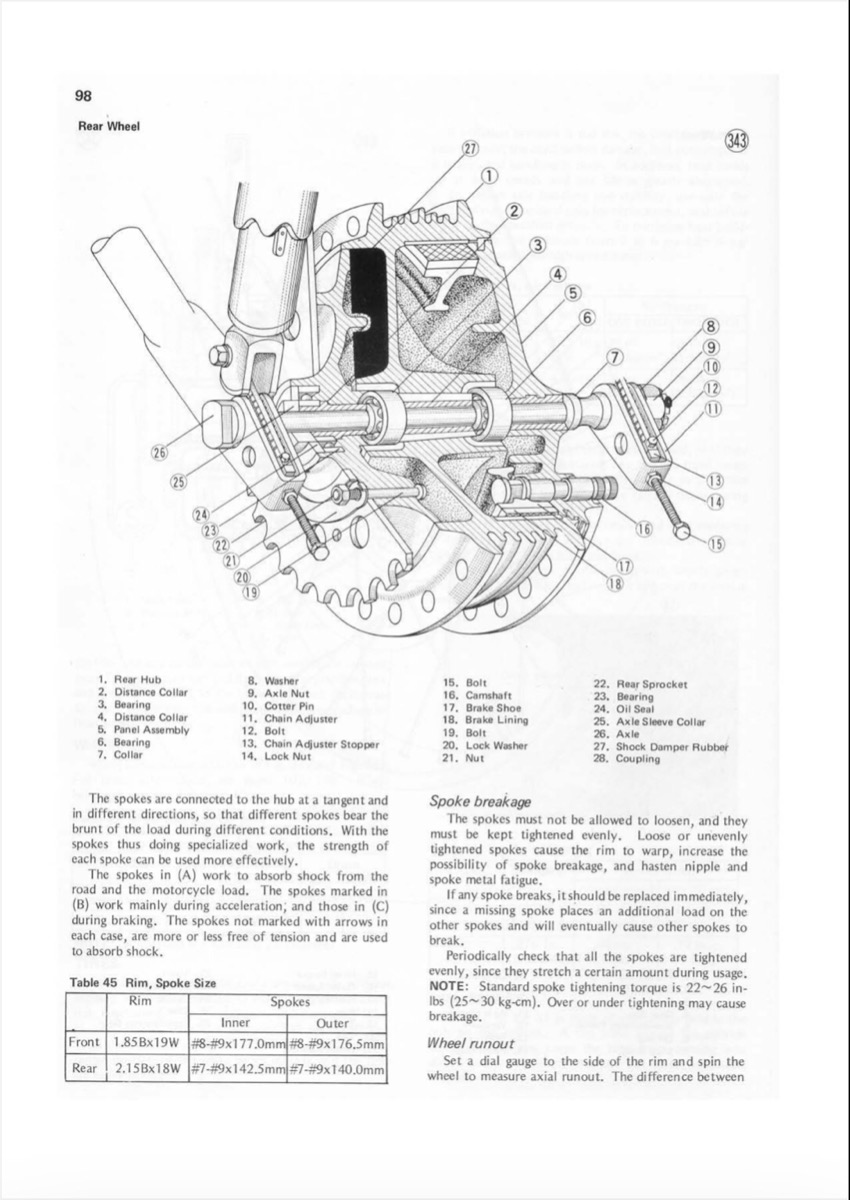
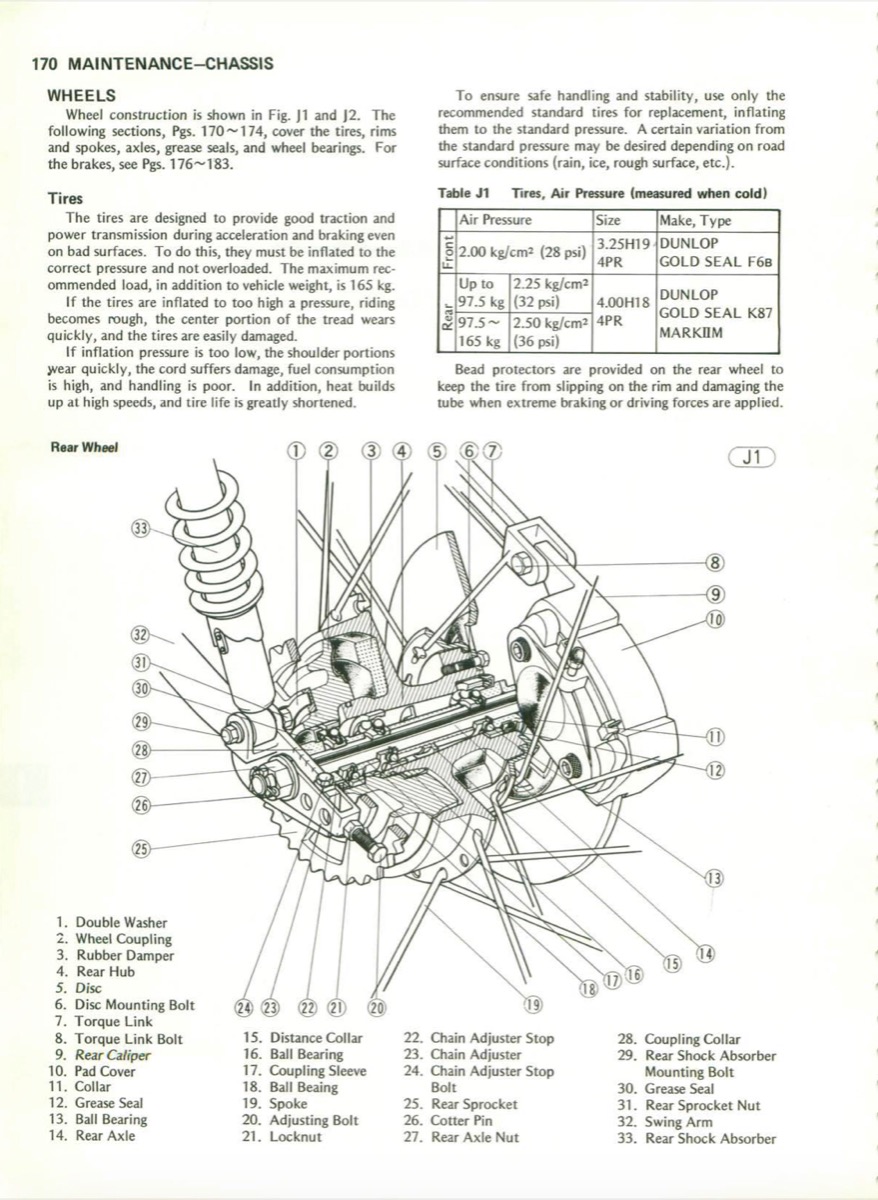
10 Sep 2023 19:34The front sprocket must be the one with a shoulder on the inside to provide enough space for a 630 o-ring chain. If the sprocket doesn't have the shoulder the chain will rub the heads off the screws holding the transmission cover in place.
Thanks Hardrock. She had a 530 conversion kit when she came to me. The gearbox sprocket was in good shape so I'll reuse it. 17-Tooth and flat on bot sides.
My case screws are ok, but I see there has been a little "in-situ machining" from the lower run of the chain at some point. I'll try to be good about maintaining chain adjustment.
Nothing quite like the rip of a Big KZ
Please Log in or Create an account to join the conversation.
- hardrockminer
-
- Offline
- Sustaining Member
-

Registered
- Posts: 3127
- Thanks: 1234
Re: Trying to Rescue a Late 1970s (1977??) Kawasaki KZ1000
11 Sep 2023 04:12
530 chain is almost 2 mm narrower, so you should not have any wear issues on the screws. But the flat sided front sprocket will sit closer to the edge of the transmission cover than the original one, which means (I think) it would not be aligned with the rear sprocket. The mis-aliignment will cause a sideways torque, and will prematurely wear the drive system.
I have several restored bikes along with a 2006 Goldwing with a sidecar.
Please Log in or Create an account to join the conversation.
- Mikaw
-
- Offline
- Sustaining Member
-
Registered
- Posts: 4825
- Thanks: 1852
Re: Trying to Rescue a Late 1970s (1977??) Kawasaki KZ1000
11 Sep 2023 08:52 - 11 Sep 2023 09:00
Axle shaft/bolt orrintation might be a good topic for debate. I have always installed the axle left to right with nut on the right. I checked a couple FSM’s and the Z1/Kz has it that way.
The Kz1000 manual has it with nut on the left. Which is correct?
The 530 front sprocket conversion will need a 3mm shim/washer behind it. On the Z-Power site HRM posted is a picture of it and some good data which I have linked to here www.z-power.co.uk/530-chain-and-sprocket-conversion-kit-z1000 . Here is a link for the 900’s as well. www.z-power.co.uk/530-chain-and-sprocket...t-z1-z1a-z1b-z900-a4
1976 KZ 900 A4
kzrider.com/forum/11-projects/613548-1976-kz-900-a4
1976 KZ 900 B1 LTD
1978 KZ 1000 B2 LTD
1980 KZ 750 E1
Kowledge Speaks, But Wisdom Listens.
Jimi Hendrix.
1976 KZ 900 B1 LTD
1978 KZ 1000 B2 LTD
1980 KZ 750 E1
Kowledge Speaks, But Wisdom Listens.
Jimi Hendrix.
Last edit: 11 Sep 2023 09:00 by Mikaw.
The following user(s) said Thank You: wdhewson, sf4t7
Please Log in or Create an account to join the conversation.
- sf4t7
-

- Offline
- Sustaining Member
-
Registered
- Posts: 1002
- Thanks: 830
Re: Trying to Rescue a Late 1970s (1977??) Kawasaki KZ1000
11 Sep 2023 09:17
My Z1A had the nut on the right side when I bought it (from original owner) so I've always installed it that way. Also, with a 4 into 1 exhaust it 's easier to remove and install the axle. Probably doesn't matter which way you install it as long as it's tightened correctly.
Scotty
Scotty
Scotty
1974 Z1A
Yoshimura 987, 10.25:1
welded Z1 crank
Andrews 1X Cams
Delkevic 4 into 1
Superbike bars
530 conversion
1974 Z1A
Yoshimura 987, 10.25:1
welded Z1 crank
Andrews 1X Cams
Delkevic 4 into 1
Superbike bars
530 conversion
The following user(s) said Thank You: wdhewson, Mikaw, Wookie58, Kelly E
Please Log in or Create an account to join the conversation.
- wdhewson
-
Topic Author
- Offline
- User
-
Registered
- Posts: 162
- Thanks: 58
Re: Trying to Rescue a Late 1970s (1977??) Kawasaki KZ1000
11 Sep 2023 11:23 - 11 Sep 2023 13:33530 chain is almost 2 mm narrower, so you should not have any wear issues on the screws. But the flat sided front sprocket will sit closer to the edge of the transmission cover than the original one, which means (I think) it would not be aligned with the rear sprocket. The mis-aliignment will cause a sideways torque, and will prematurely wear the drive system.
Thanks HardRock, the shim behind the engine sprocket seems like good advice. There was not one there, but the Z1-Enterprise page on convsersion kits shows a 1.5 mm thick shim. I'll dig through my collections and see what I can find.
Nothing quite like the rip of a Big KZ
Last edit: 11 Sep 2023 13:33 by wdhewson.
Please Log in or Create an account to join the conversation.
- wdhewson
-
Topic Author
- Offline
- User
-
Registered
- Posts: 162
- Thanks: 58
Re: Trying to Rescue a Late 1970s (1977??) Kawasaki KZ1000
11 Sep 2023 13:41 - 11 Sep 2023 13:47Axle shaft/bolt orrintation might be a good topic for debate. I have always installed the axle left to right with nut on the right. I checked a couple FSM’s and the Z1/Kz has it that way.
The Kz1000 manual has it with nut on the left. Which is correct?
The 530 front sprocket conversion will need a 3mm shim/washer behind it. On the Z-Power site HRM posted is a picture of it and some good data which I have linked to here www.z-power.co.uk/530-chain-and-sprocket-conversion-kit-z1000 . Here is a link for the 900’s as well. www.z-power.co.uk/530-chain-and-sprocket...t-z1-z1a-z1b-z900-a4
Thanks Mikaw.
Interesting that the ZPower and Z1-E are providing front sprocket shims of 3 and 1.5 mm ,respectively. I suppose this means that their sprockets are of different thicknesses, or just an error lurking somewhere.
Bottom line I suppose is that I'll just have to do the measurement with something better than an old wooden arrow, and fit whatever she calls for.
On rear axle fitment, I think my aftermarket exhaust can hangs on the right, and if it interferes with withdrawing the axle, I'll put the "bolt head" on the left, like Scotty noted earlier.
Nothing quite like the rip of a Big KZ
Last edit: 11 Sep 2023 13:47 by wdhewson.
Please Log in or Create an account to join the conversation.
- hardrockminer
-
- Offline
- Sustaining Member
-
Registered
- Posts: 3127
- Thanks: 1234
Re: Trying to Rescue a Late 1970s (1977??) Kawasaki KZ1000
12 Sep 2023 04:21 - 12 Sep 2023 04:22
With the chain installed I stand behind the bike and look down the chain to see if there is any warp.
I think I put the axle bolt on the right but I haven't had the bike out this year so that's just a guess. It's easier to install on that side on a Z1.
I think I put the axle bolt on the right but I haven't had the bike out this year so that's just a guess. It's easier to install on that side on a Z1.
I have several restored bikes along with a 2006 Goldwing with a sidecar.
Last edit: 12 Sep 2023 04:22 by hardrockminer.
The following user(s) said Thank You: wdhewson
Please Log in or Create an account to join the conversation.
- wdhewson
-
Topic Author
- Offline
- User
-
Registered
- Posts: 162
- Thanks: 58
Re: Trying to Rescue a Late 1970s (1977??) Kawasaki KZ1000
12 Sep 2023 16:40With the chain installed I stand behind the bike and look down the chain to see if there is any warp.
I think I put the axle bolt on the right but I haven't had the bike out this year so that's just a guess. It's easier to install on that side on a Z1.
Thanks Hardrock, the eye is pretty sensitive to judging straightness, especially when hanging a picture for my daughter in her house!!
Nothing quite like the rip of a Big KZ
Please Log in or Create an account to join the conversation.
- wdhewson
-
Topic Author
- Offline
- User
-
Registered
- Posts: 162
- Thanks: 58
Re: Trying to Rescue a Late 1970s (1977??) Kawasaki KZ1000
12 Sep 2023 16:55 - 12 Sep 2023 17:09
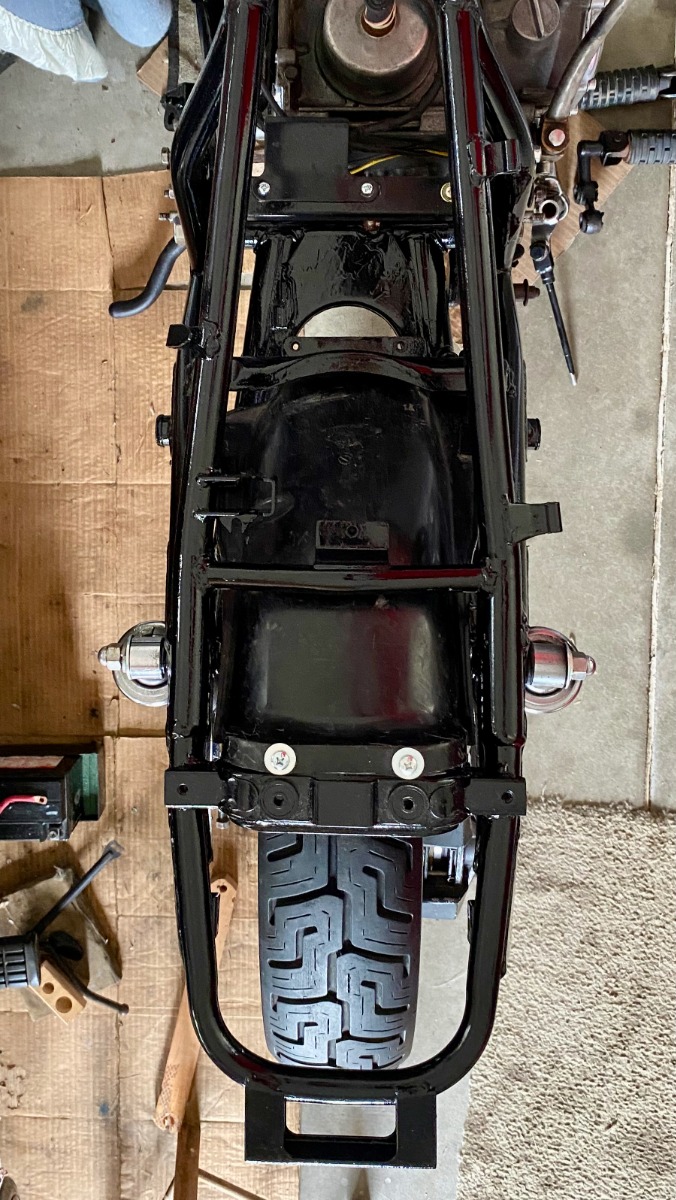
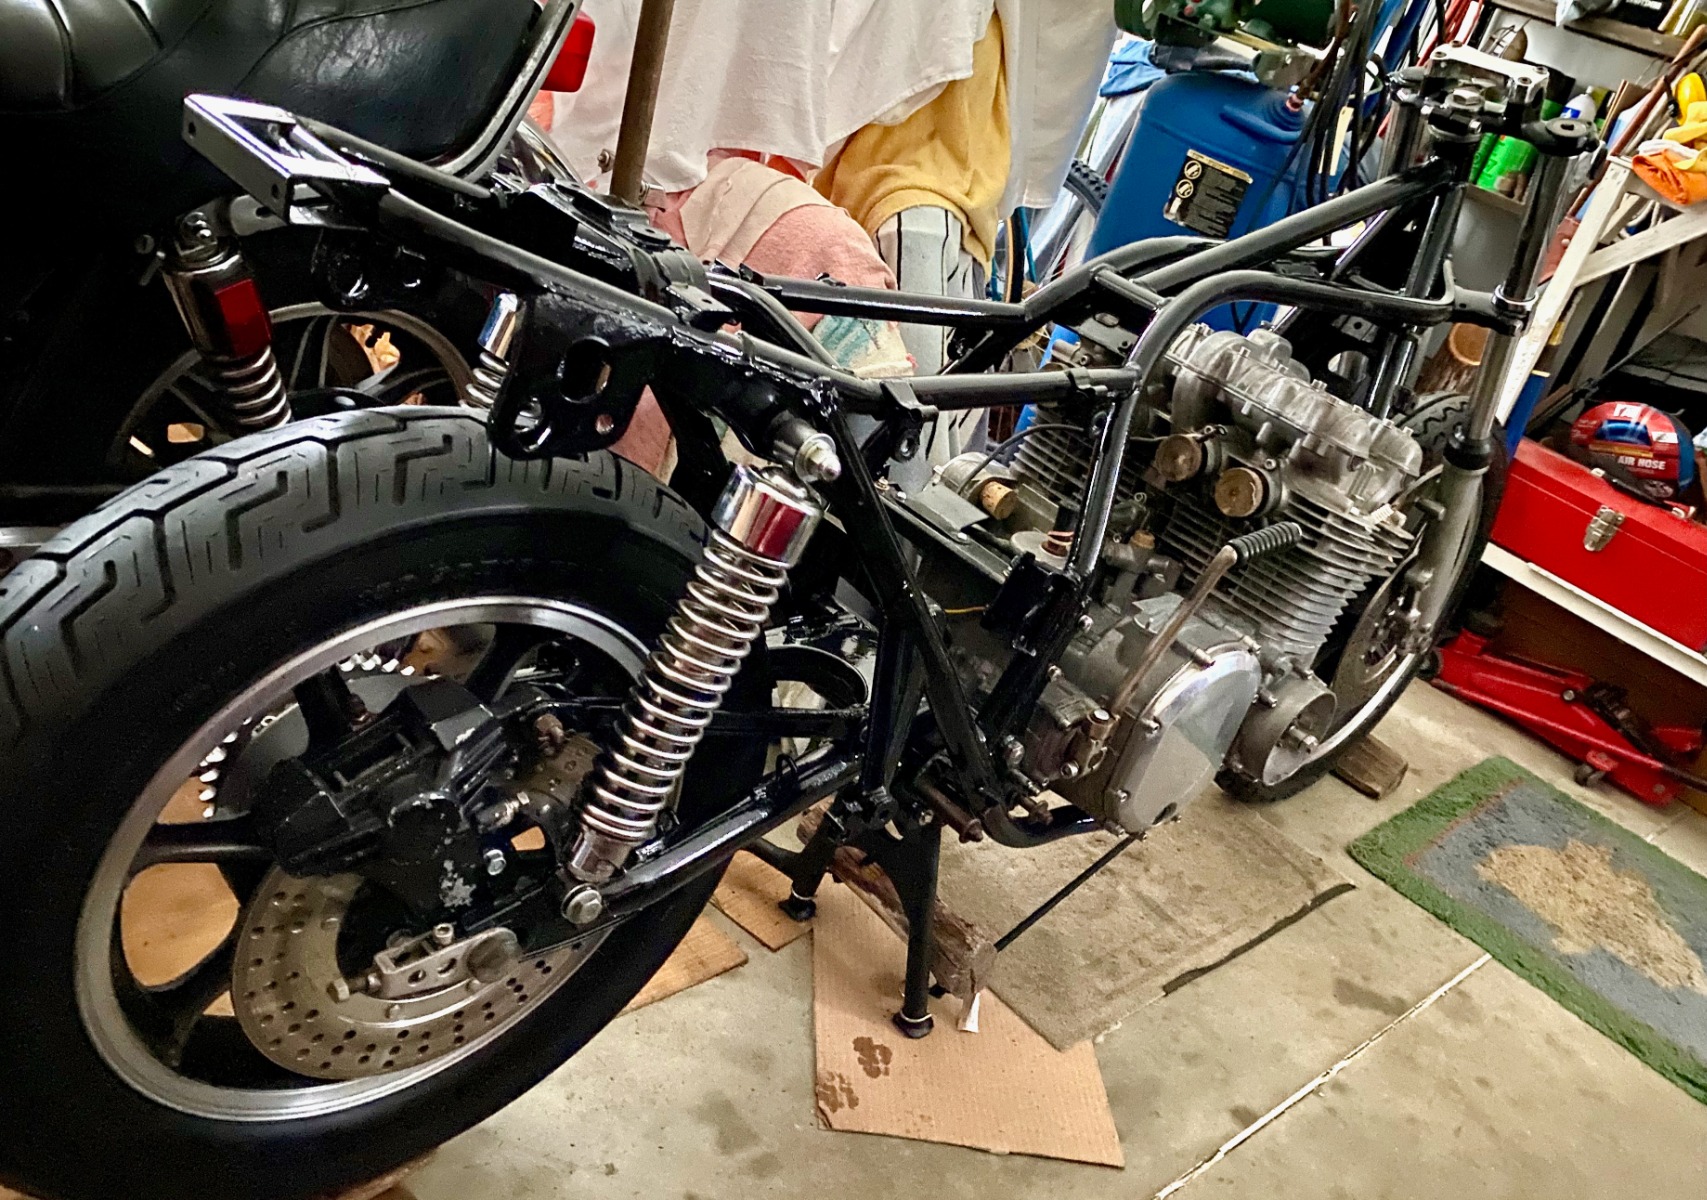
The shocks went on without too much drama. Not OEM, but Showa, so we'll just see how they work. My spine likes a cushy ride.
The front section of the rear fender was a nice fit, and benefitted from some fender washers. Pretty clever how it's held in with the tabs of the frame rails.
And the brake pedal went on with the usual cussing that accompanies a stiff spring. The linkage between the rear brake pedal and the stop light switch is a convoluted affair with lots of bends and twists. I'll try to compare my installation with the parts fiche for correctness. It doesn't compare well in my mind??
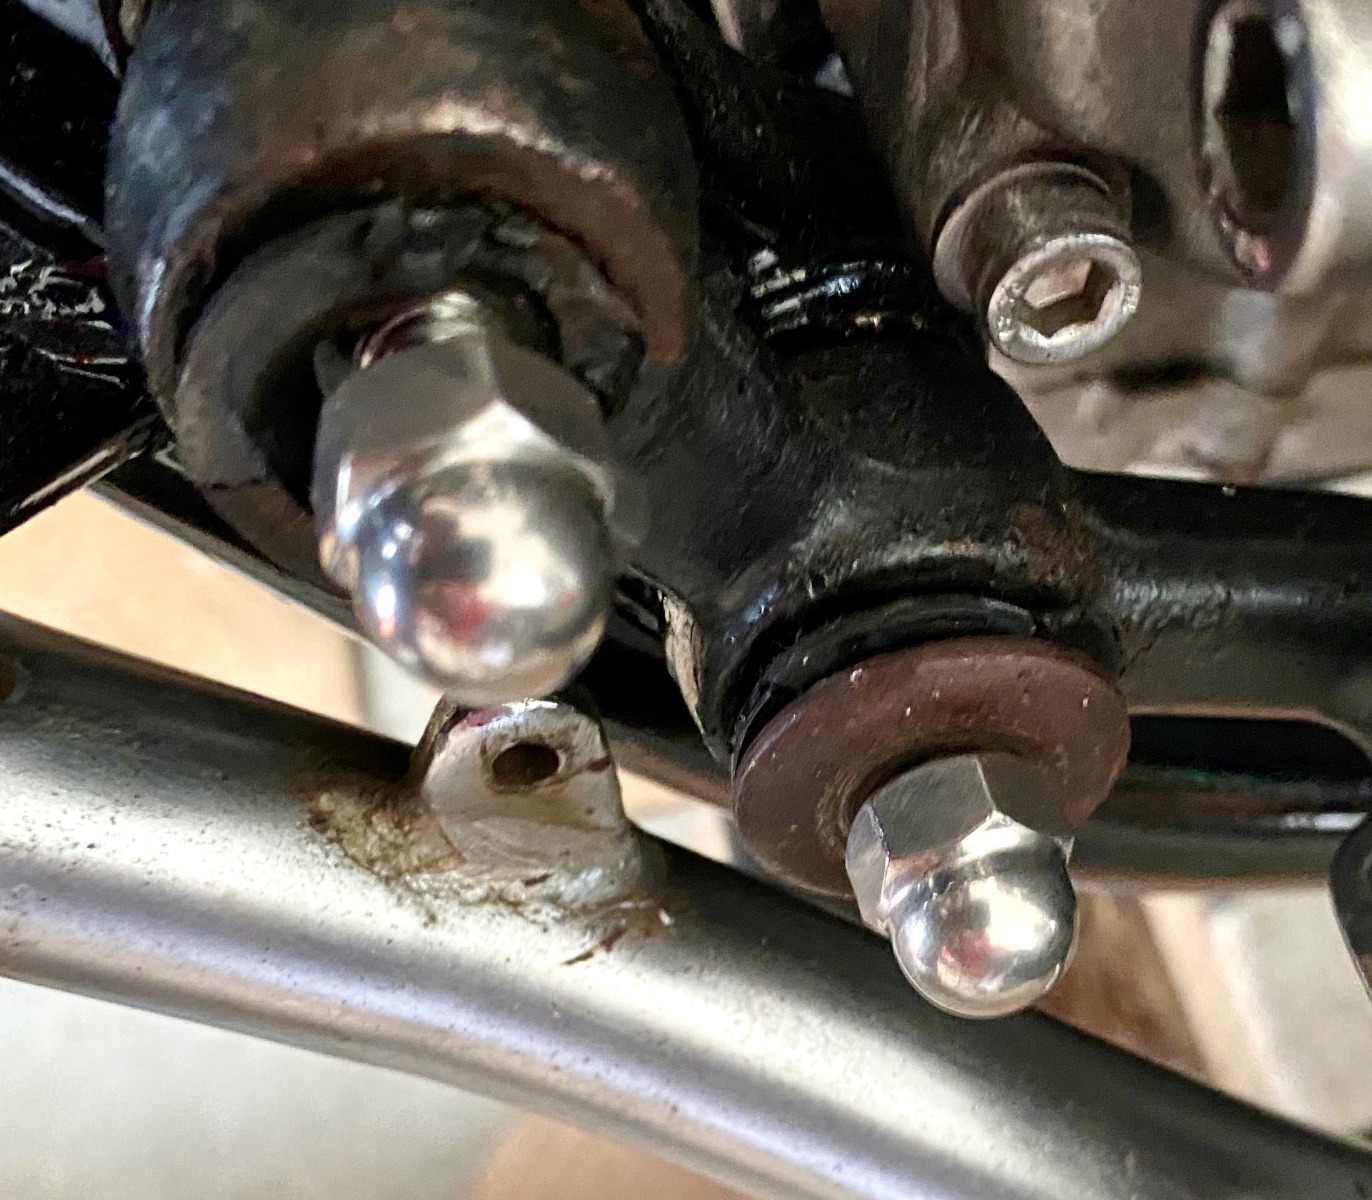
The right foot peg mount slips on with some silicone on the rubber inserts. I have new acorn nuts for the foot peg studs, but the threads on the studs were poor so I re-cut them M8 x 1.25, which I hope is correct. It matches the nuts anyway. I might try to brighten up those cupped washers for the foot peg studs.
I've have to build up the left side of the engine at the gearbox sprocket before mounting the left foot peg.
The front section of the rear fender was a nice fit, and benefitted from some fender washers. Pretty clever how it's held in with the tabs of the frame rails.
And the brake pedal went on with the usual cussing that accompanies a stiff spring. The linkage between the rear brake pedal and the stop light switch is a convoluted affair with lots of bends and twists. I'll try to compare my installation with the parts fiche for correctness. It doesn't compare well in my mind??
The right foot peg mount slips on with some silicone on the rubber inserts. I have new acorn nuts for the foot peg studs, but the threads on the studs were poor so I re-cut them M8 x 1.25, which I hope is correct. It matches the nuts anyway. I might try to brighten up those cupped washers for the foot peg studs.
I've have to build up the left side of the engine at the gearbox sprocket before mounting the left foot peg.
Nothing quite like the rip of a Big KZ
Last edit: 12 Sep 2023 17:09 by wdhewson.
Please Log in or Create an account to join the conversation.
- Mikaw
-
- Offline
- Sustaining Member
-
Registered
- Posts: 4825
- Thanks: 1852
Re: Trying to Rescue a Late 1970s (1977??) Kawasaki KZ1000
12 Sep 2023 17:33
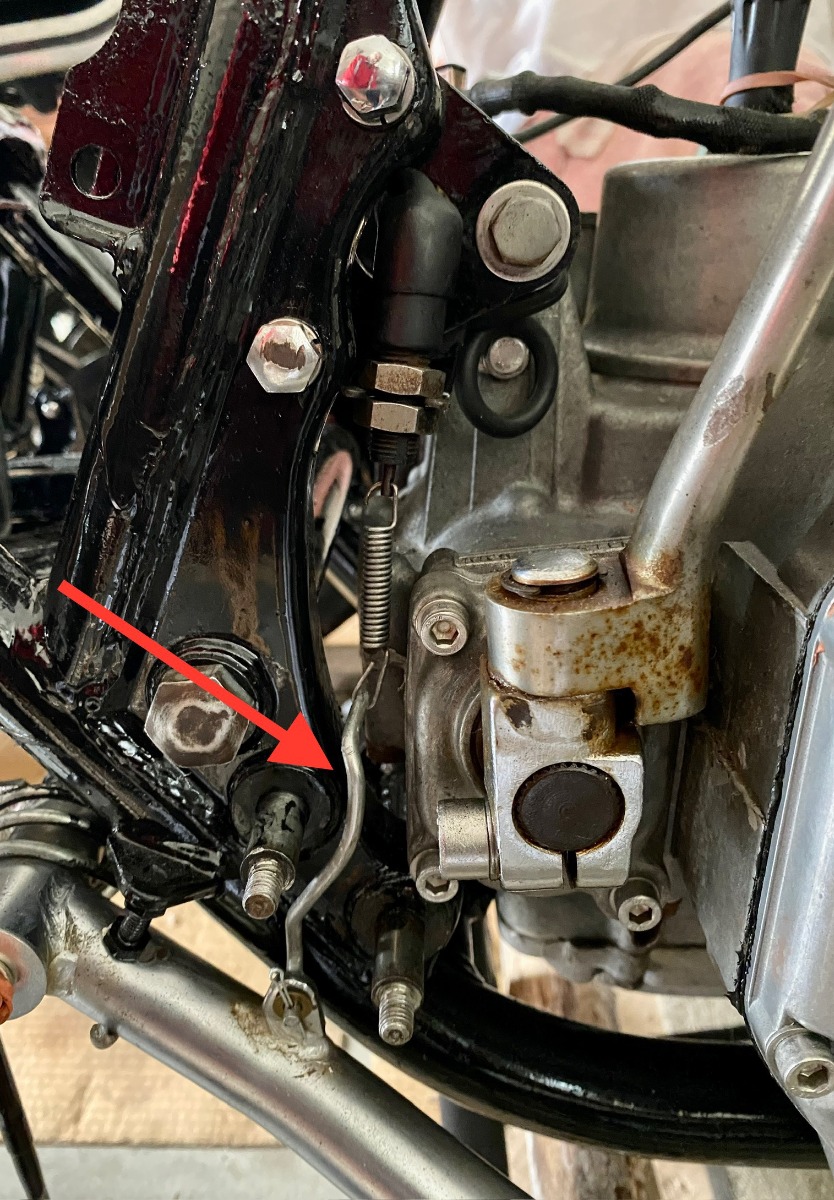
You have the brake light switch connecting rod upside down. There is one end that has wings pressed into it. That end goes through the boss on the pedal. Then a cotter pin holds it in place. Then the spring hook goes through the top hole
1976 KZ 900 A4
kzrider.com/forum/11-projects/613548-1976-kz-900-a4
1976 KZ 900 B1 LTD
1978 KZ 1000 B2 LTD
1980 KZ 750 E1
Kowledge Speaks, But Wisdom Listens.
Jimi Hendrix.
1976 KZ 900 B1 LTD
1978 KZ 1000 B2 LTD
1980 KZ 750 E1
Kowledge Speaks, But Wisdom Listens.
Jimi Hendrix.
The following user(s) said Thank You: wdhewson, sf4t7
Please Log in or Create an account to join the conversation.
- hardrockminer
-
- Offline
- Sustaining Member
-
Registered
- Posts: 3127
- Thanks: 1234
Re: Trying to Rescue a Late 1970s (1977??) Kawasaki KZ1000
13 Sep 2023 04:35
Looking good, but why not remove the rust from the kickstart? It would look much better. And do you plan to put the stickers on the inner rear fender?
I have several restored bikes along with a 2006 Goldwing with a sidecar.
The following user(s) said Thank You: wdhewson
Please Log in or Create an account to join the conversation.
- wdhewson
-
Topic Author
- Offline
- User
-
Registered
- Posts: 162
- Thanks: 58
Re: Trying to Rescue a Late 1970s (1977??) Kawasaki KZ1000
13 Sep 2023 04:56 - 13 Sep 2023 04:57You have the brake light switch connecting rod upside down. There is one end that has wings pressed into it. That end goes through the boss on the pedal. Then a cotter pin holds it in place. Then the spring hook goes through the top hole
Thanks Mikaw, I know what you mean by the pressed in wings on that squirrely brake light rod. Those wings are behind the tab on the arm of the brake pedal. You'll note that the wings are not at the switch end with a zoom.
The wee washer between the tab and cotter was my doing and doesn't seem to appear in the parts fiche.
Thanks.
Nothing quite like the rip of a Big KZ
Last edit: 13 Sep 2023 04:57 by wdhewson.
Please Log in or Create an account to join the conversation.
Moderators: Street Fighter LTD