
1973 Z1 rebuild
- Wookie58
-

- Offline
- Moderator
-

Registered
- Posts: 6050
- Thanks: 3797
Re: 1973 Z1 rebuild
09 Oct 2022 09:56
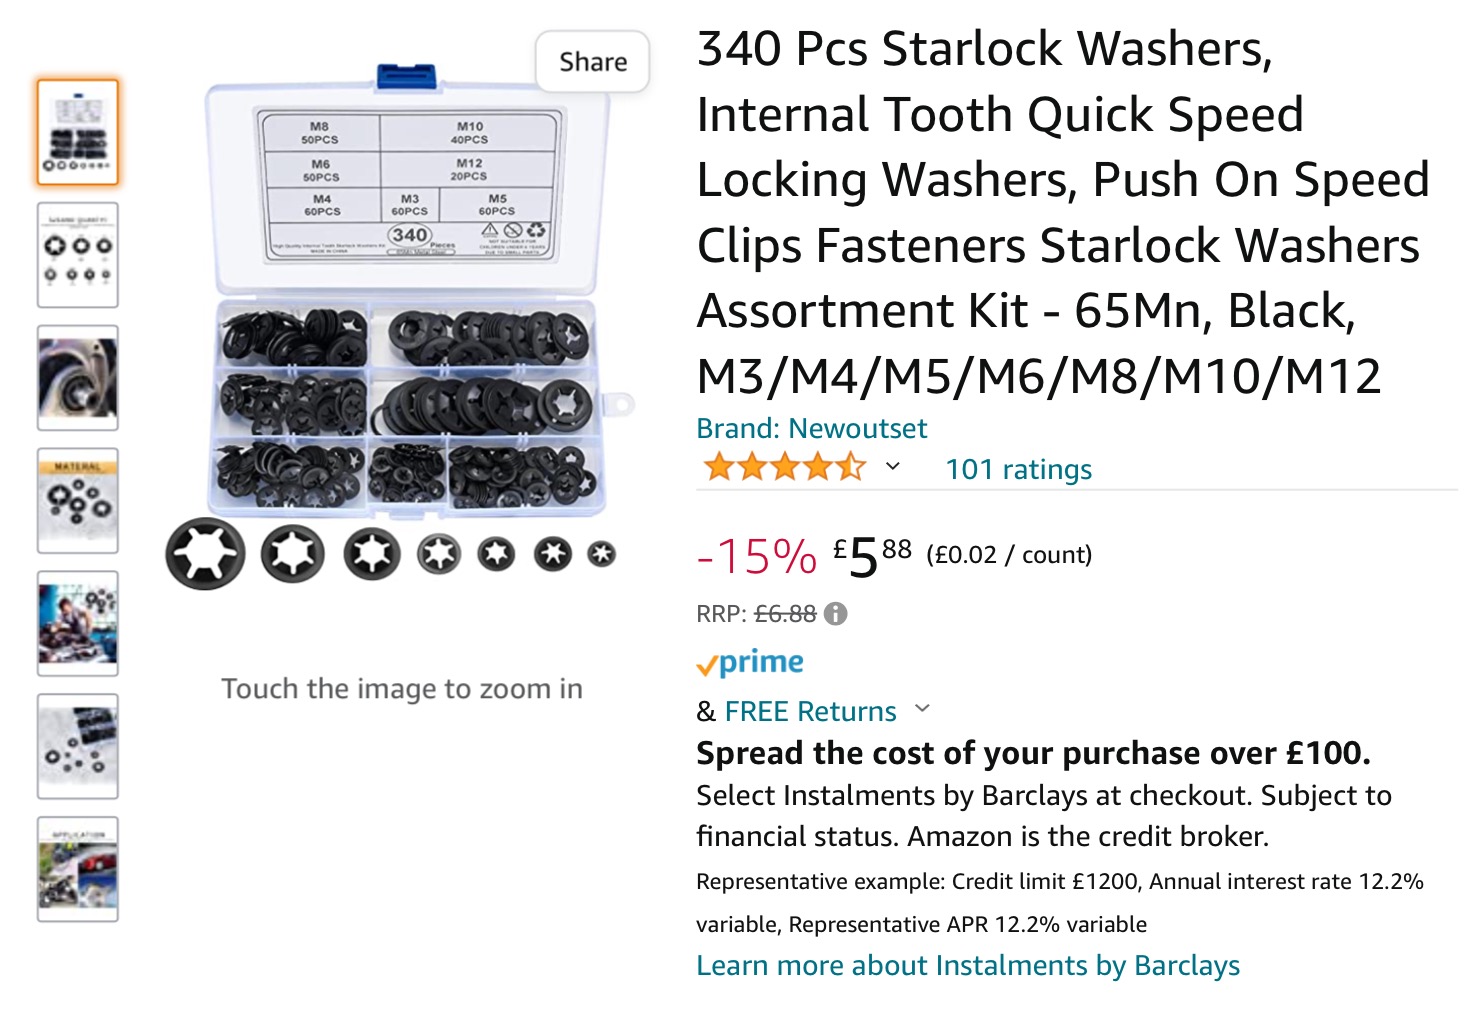
What size is the pin, these go down to 3mm from Amazon
1982 KZ1000 Ltd
www.kzrider.com/forum/11-projects/617631...-82-begins?start=192
kzrider.com/filebase-alias?view=download...d-fault-diagnosis&ca
www.kzrider.com/forum/11-projects/617631...-82-begins?start=192
kzrider.com/filebase-alias?view=download...d-fault-diagnosis&ca
Please Log in or Create an account to join the conversation.
- blackozvet
-
 Topic Author
- Offline
- User
-

Registered
- Posts: 193
- Thanks: 79
Re: 1973 Z1 rebuild
09 Oct 2022 22:57
The small part of the pin (that is sticking thru) is only 1.8 mm - so too small for a clip.
I ended up putting a piece of double sided tape on the front pins and clips on all the others.
I ended up putting a piece of double sided tape on the front pins and clips on all the others.
1973 Z1 900 Kawasaki
The following user(s) said Thank You: Wookie58
Please Log in or Create an account to join the conversation.
- willemZ900
-

- Offline
- User
-
Registered
- Z1B 4 ever
- Posts: 197
- Thanks: 59
Re: 1973 Z1 rebuild
10 Oct 2022 12:23
I did the same brace solution on my bike and welded the cracks also. My impression was after this job that the steering karakter was also a little better/more stable
Please Log in or Create an account to join the conversation.
- KZJOE900
-
- Offline
- Administrator
-

Super Users
- Posts: 1984
- Thanks: 455
Re: 1973 Z1 rebuild
10 Oct 2022 16:24
Great project! Just drooling over the body work and re-chrome. Really looing forward to your progress.
Current project 76 KZ900 (This was a Vetter model)
76 KZ900
81 XJ550H SECA (Current Project)
82 XJ550R SECA
Past:
86 FJ1200
74 Z1900
72 CB450
76 KZ900
81 XJ550H SECA (Current Project)
82 XJ550R SECA
Past:
86 FJ1200
74 Z1900
72 CB450
The following user(s) said Thank You: blackozvet
Please Log in or Create an account to join the conversation.
- blackozvet
-
Topic Author
- Offline
- User
-
Registered
- Posts: 193
- Thanks: 79
Re: 1973 Z1 rebuild
11 Oct 2022 00:37
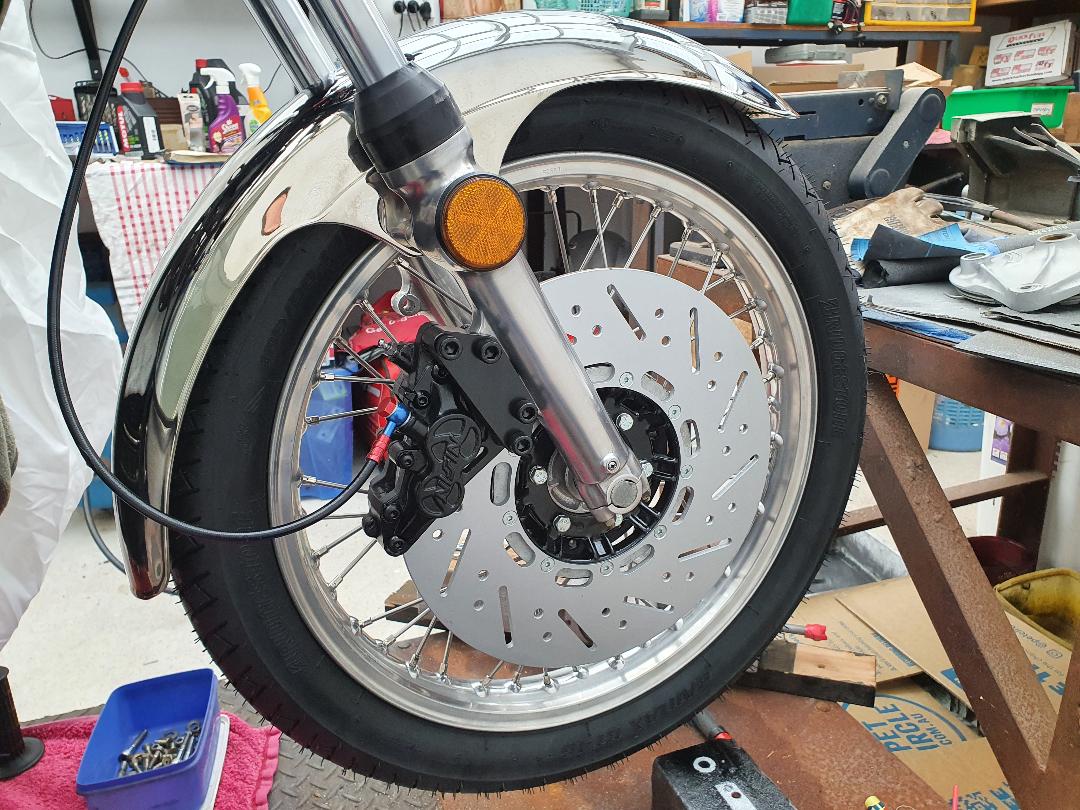
I needed to get the front wheel back on so I could get rid of the strap holding the frame down to the bench. Unfortunately I had also dropped the left side fork out of the clamp when i was fitting it resulting in 2 deep scratches to the front of the alloy, so had to do some wet and dry starting at 80 grit to get the scratches out

Once that was done the wheel hub assembly was fitted and the wheel bolted into place. Now the tie down strap could be removed and access to the front of the frame to get the wiring loom moving.
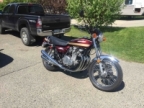
Once I got the loom up near the headstem I got the headlight shell and fitted that and the indicators to start finding connections.

Once that was done the wheel hub assembly was fitted and the wheel bolted into place. Now the tie down strap could be removed and access to the front of the frame to get the wiring loom moving.
Once I got the loom up near the headstem I got the headlight shell and fitted that and the indicators to start finding connections.
1973 Z1 900 Kawasaki
Please Log in or Create an account to join the conversation.
- blackozvet
-
Topic Author
- Offline
- User
-
Registered
- Posts: 193
- Thanks: 79
Re: 1973 Z1 rebuild
11 Oct 2022 00:45 - 11 Oct 2022 01:09
Now another electrical question - I think i have found most connections now.
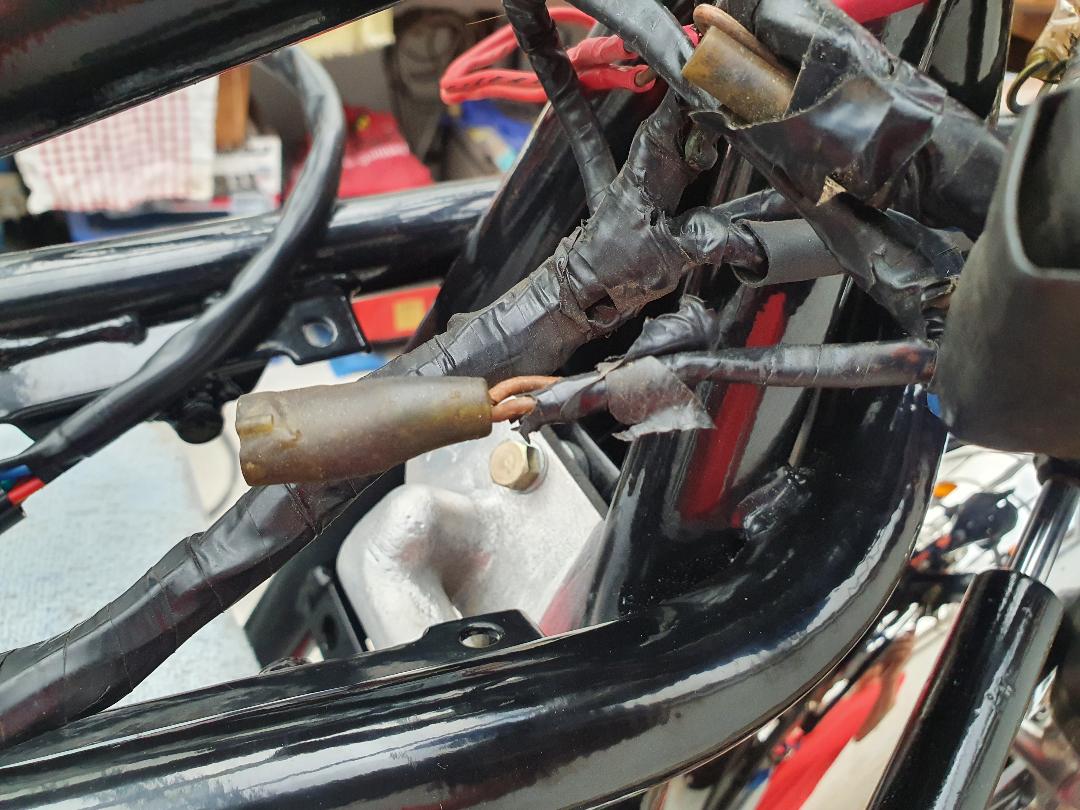
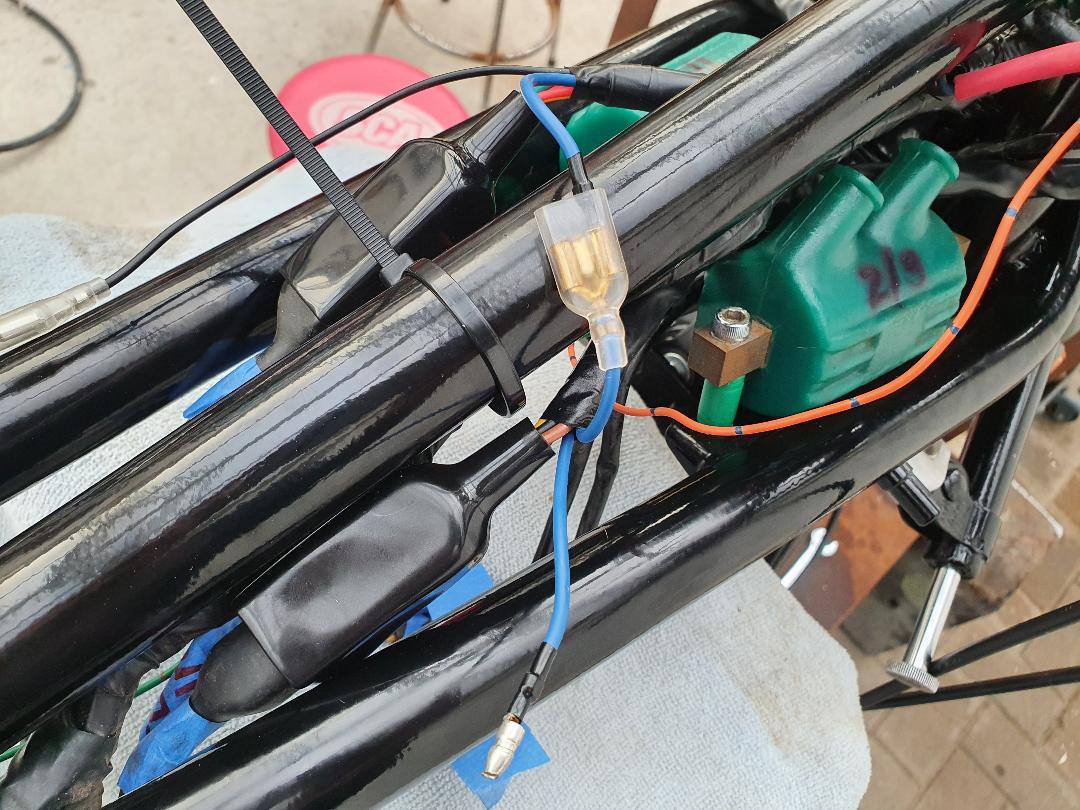
I am retro fitting a horn to the bike and looking at the loom near the headstem there are 2 fittings left - a double brown and a single brown (seen poking out above it.)
From looking at the workshop manual wiring diagram it shows the horn button wire goes to one horn wire. The other horn wire goes to brown wire connector.
The wiring diagram shows a double brown connector in that circuit but it is not connected to anything.
there is one black wire for the horn coming out of the left side switch block and 2 wires coming from the horn.
1973 Z1 900 Kawasaki
Last edit: 11 Oct 2022 01:09 by blackozvet.
Please Log in or Create an account to join the conversation.
- Wookie58
-
- Offline
- Moderator
-
Registered
- Posts: 6050
- Thanks: 3797
Re: 1973 Z1 rebuild
11 Oct 2022 01:25As far as I am aware the "double" brown is an accessory feed (not used) so the single brown will be the feed, the other side of the horn goes to the black wire from the switch (the switch is in the earth side) which then earths through the handlebar when the button is pushedNow another electrical question - I think i have found most connections now.
I am retro fitting a horn to the bike and looking at the loom near the headstem there are 2 fittings left - a double brown and a single brown (seen poking out above it.)
From looking at the workshop manual wiring diagram it shows the horn button wire goes to one horn wire. The other horn wire goes to brown wire connector.
The wiring diagram shows a double brown connector in that circuit but it is not connected to anything.
there is one black wire for the horn coming out of the left side switch block and 2 wires coming from the horn.
1982 KZ1000 Ltd
www.kzrider.com/forum/11-projects/617631...-82-begins?start=192
kzrider.com/filebase-alias?view=download...d-fault-diagnosis&ca
www.kzrider.com/forum/11-projects/617631...-82-begins?start=192
kzrider.com/filebase-alias?view=download...d-fault-diagnosis&ca
Please Log in or Create an account to join the conversation.
- blackozvet
-
Topic Author
- Offline
- User
-
Registered
- Posts: 193
- Thanks: 79
Re: 1973 Z1 rebuild
11 Oct 2022 02:24Thanks Wookie - its good to have some clarification.As far as I am aware the "double" brown is an accessory feed (not used) so the single brown will be the feed, the other side of the horn goes to the black wire from the switch (the switch is in the earth side) which then earths through the handlebar when the button is pushed
1973 Z1 900 Kawasaki
Please Log in or Create an account to join the conversation.
- hardrockminer
-
- Offline
- Sustaining Member
-

Registered
- Posts: 3119
- Thanks: 1231
Re: 1973 Z1 rebuild
11 Oct 2022 05:22
Brown and black to the horn. The double brown is a spare on the US model.
I have several restored bikes along with a 2006 Goldwing with a sidecar.
The following user(s) said Thank You: blackozvet
Please Log in or Create an account to join the conversation.
- blackozvet
-
Topic Author
- Offline
- User
-
Registered
- Posts: 193
- Thanks: 79
Re: 1973 Z1 rebuild
12 Oct 2022 18:27
I had to get another top brake line made (old was gouged and rusty) and picked it up today.
Gave it a test fit up (the line will go through the round hole in the headlight bracket when the headlight gets bolted up a bit higher)
I did a test fit up with the Nissin 4 piston brake caliper just to make sure it fits and the wheel spins ok.
Gave it a test fit up (the line will go through the round hole in the headlight bracket when the headlight gets bolted up a bit higher)
I did a test fit up with the Nissin 4 piston brake caliper just to make sure it fits and the wheel spins ok.
1973 Z1 900 Kawasaki
The following user(s) said Thank You: slayer61
Please Log in or Create an account to join the conversation.
- blackozvet
-
Topic Author
- Offline
- User
-
Registered
- Posts: 193
- Thanks: 79
Re: 1973 Z1 rebuild
13 Oct 2022 22:23
A couple more electrical questions
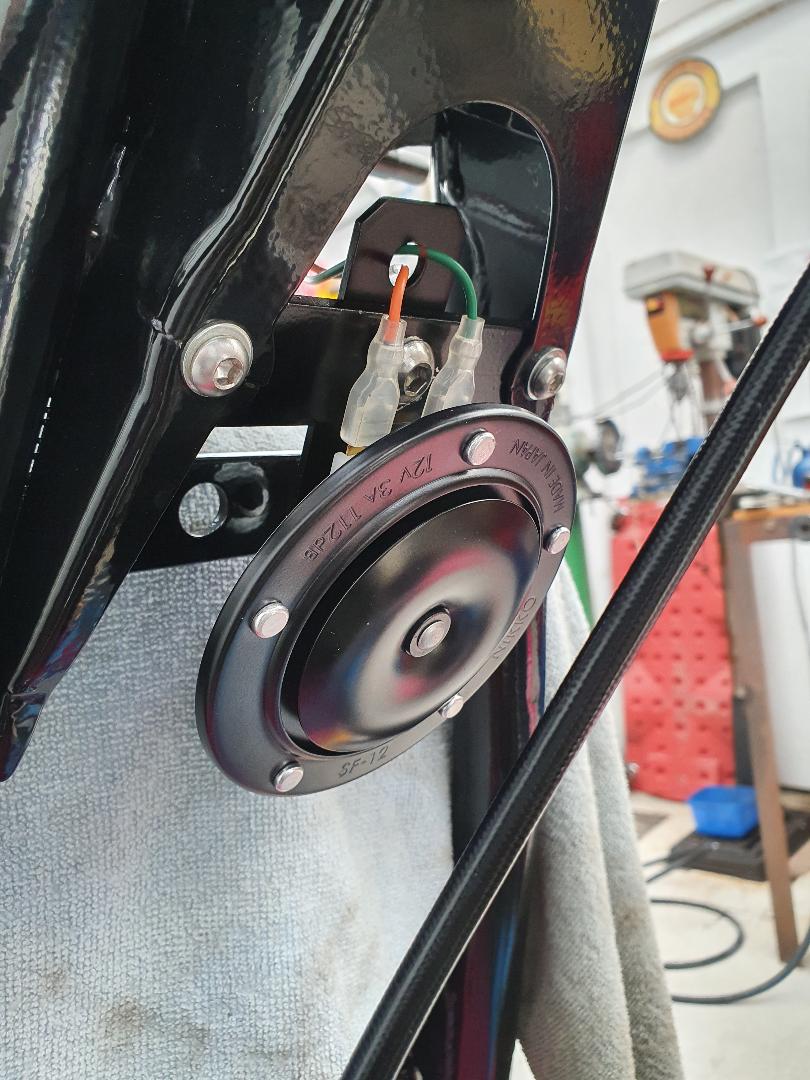
I have wired the horn up, one wire going to the single brown, one wire to the black horn wire coming out of the LH switch block.
Does it matter which wire goes to which, I gather the horn can be wired either way ? It has no markings on the horn in relation to the 2 terminals.
the single blue wire from the LH switch block according to the wiring diagram shows it connecting to the double connector from the RH switch block - and the single blue wire from the RH switch block is unused. Does that look correct ?
1973 Z1 900 Kawasaki
Please Log in or Create an account to join the conversation.
- Wookie58
-
- Offline
- Moderator
-
Registered
- Posts: 6050
- Thanks: 3797
Re: 1973 Z1 rebuild
14 Oct 2022 01:33
The horn polarity should not matter as it is only powering a coil inside the horn (however if it doesn't work or sounds like a strangled duck swop them round )
The second blue wire appears to only be used on US spec bikes and is connected to the double connector (if you are not using it make sure it is insulated as it is connected to the "side light/panel light" circuit at the switch end)
The second blue wire appears to only be used on US spec bikes and is connected to the double connector (if you are not using it make sure it is insulated as it is connected to the "side light/panel light" circuit at the switch end)
1982 KZ1000 Ltd
www.kzrider.com/forum/11-projects/617631...-82-begins?start=192
kzrider.com/filebase-alias?view=download...d-fault-diagnosis&ca
www.kzrider.com/forum/11-projects/617631...-82-begins?start=192
kzrider.com/filebase-alias?view=download...d-fault-diagnosis&ca
The following user(s) said Thank You: blackozvet
Please Log in or Create an account to join the conversation.
Moderators: Street Fighter LTD