
KZ1000A1 Spare Parts Project
- calum
-
 Topic Author
- Offline
- User
-

Registered
- Posts: 1144
- Thanks: 415
Re: KZ1000A1 Spare Parts Project
19 Feb 2023 13:18 - 19 Feb 2023 13:19
Thanks Steve, that's what I wanted to hear ")
@Scirocco: The idler sprockets are all pretty good. Some of the ones I pulled out of one of the engines were pretty bad, though. So the engine may have been run for a while with the cam chain misaligned.
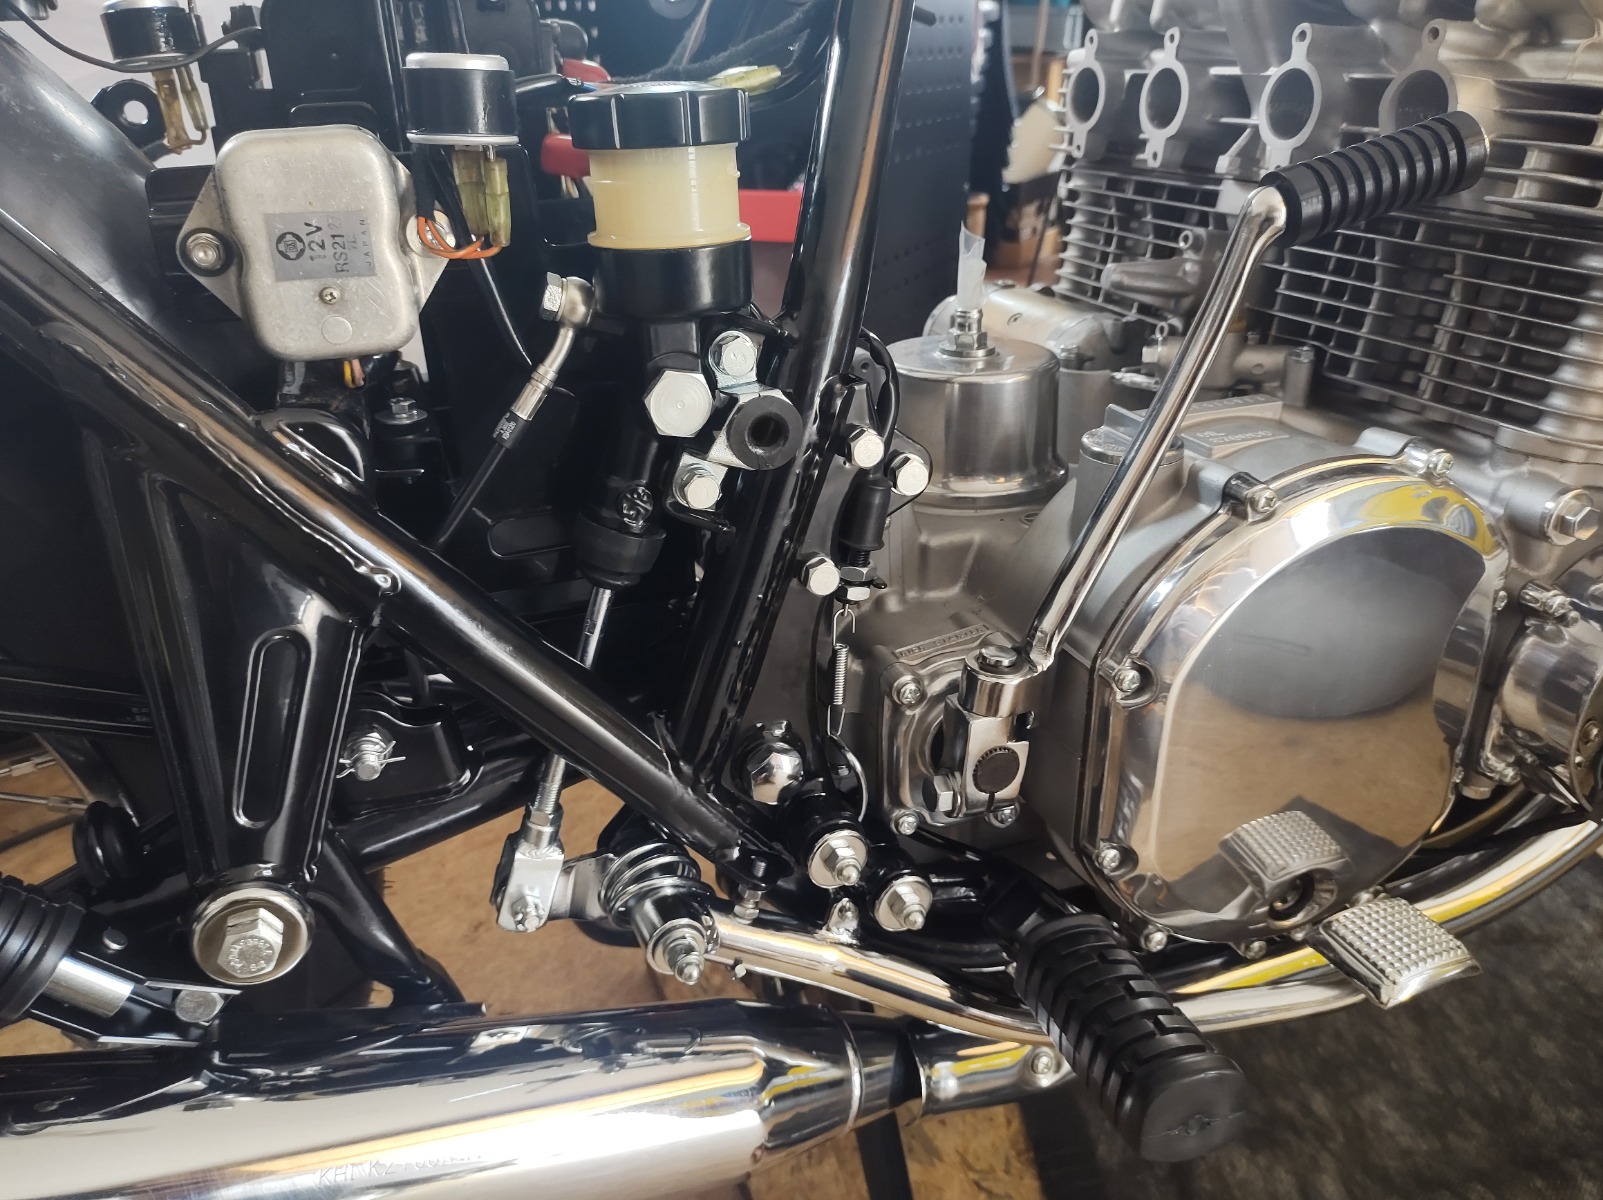
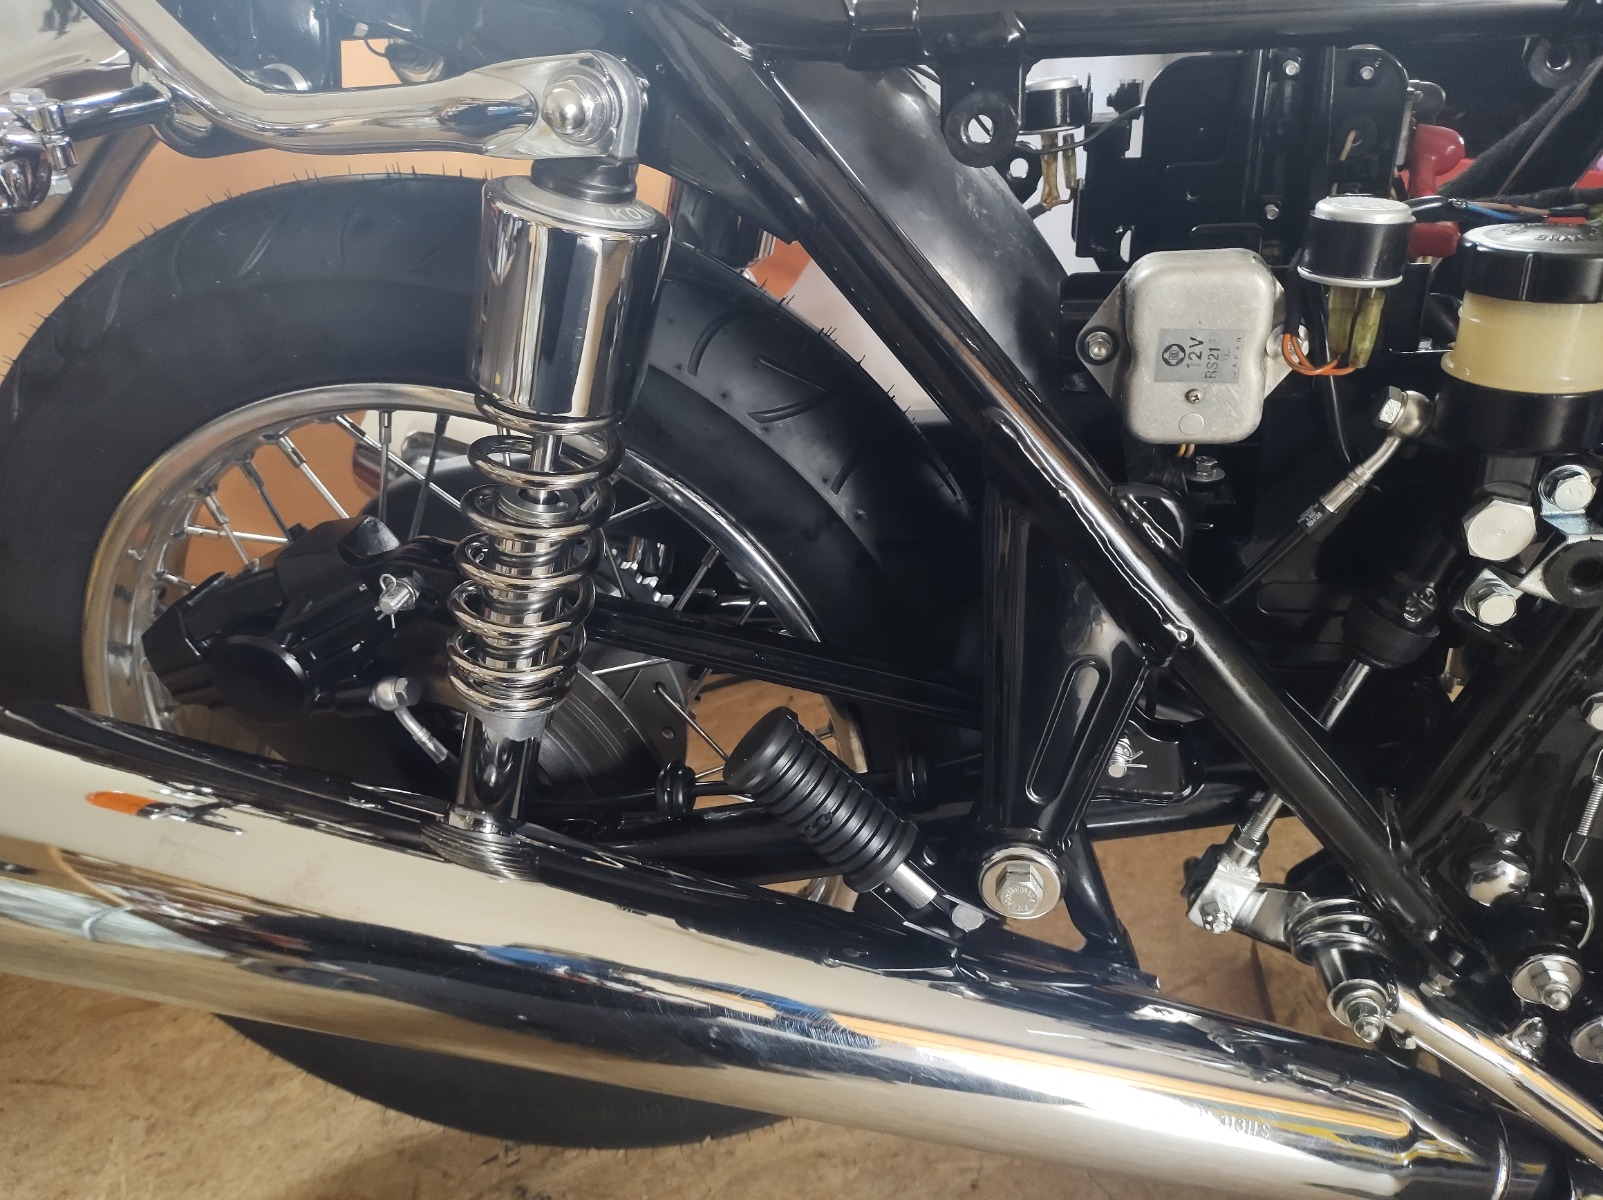
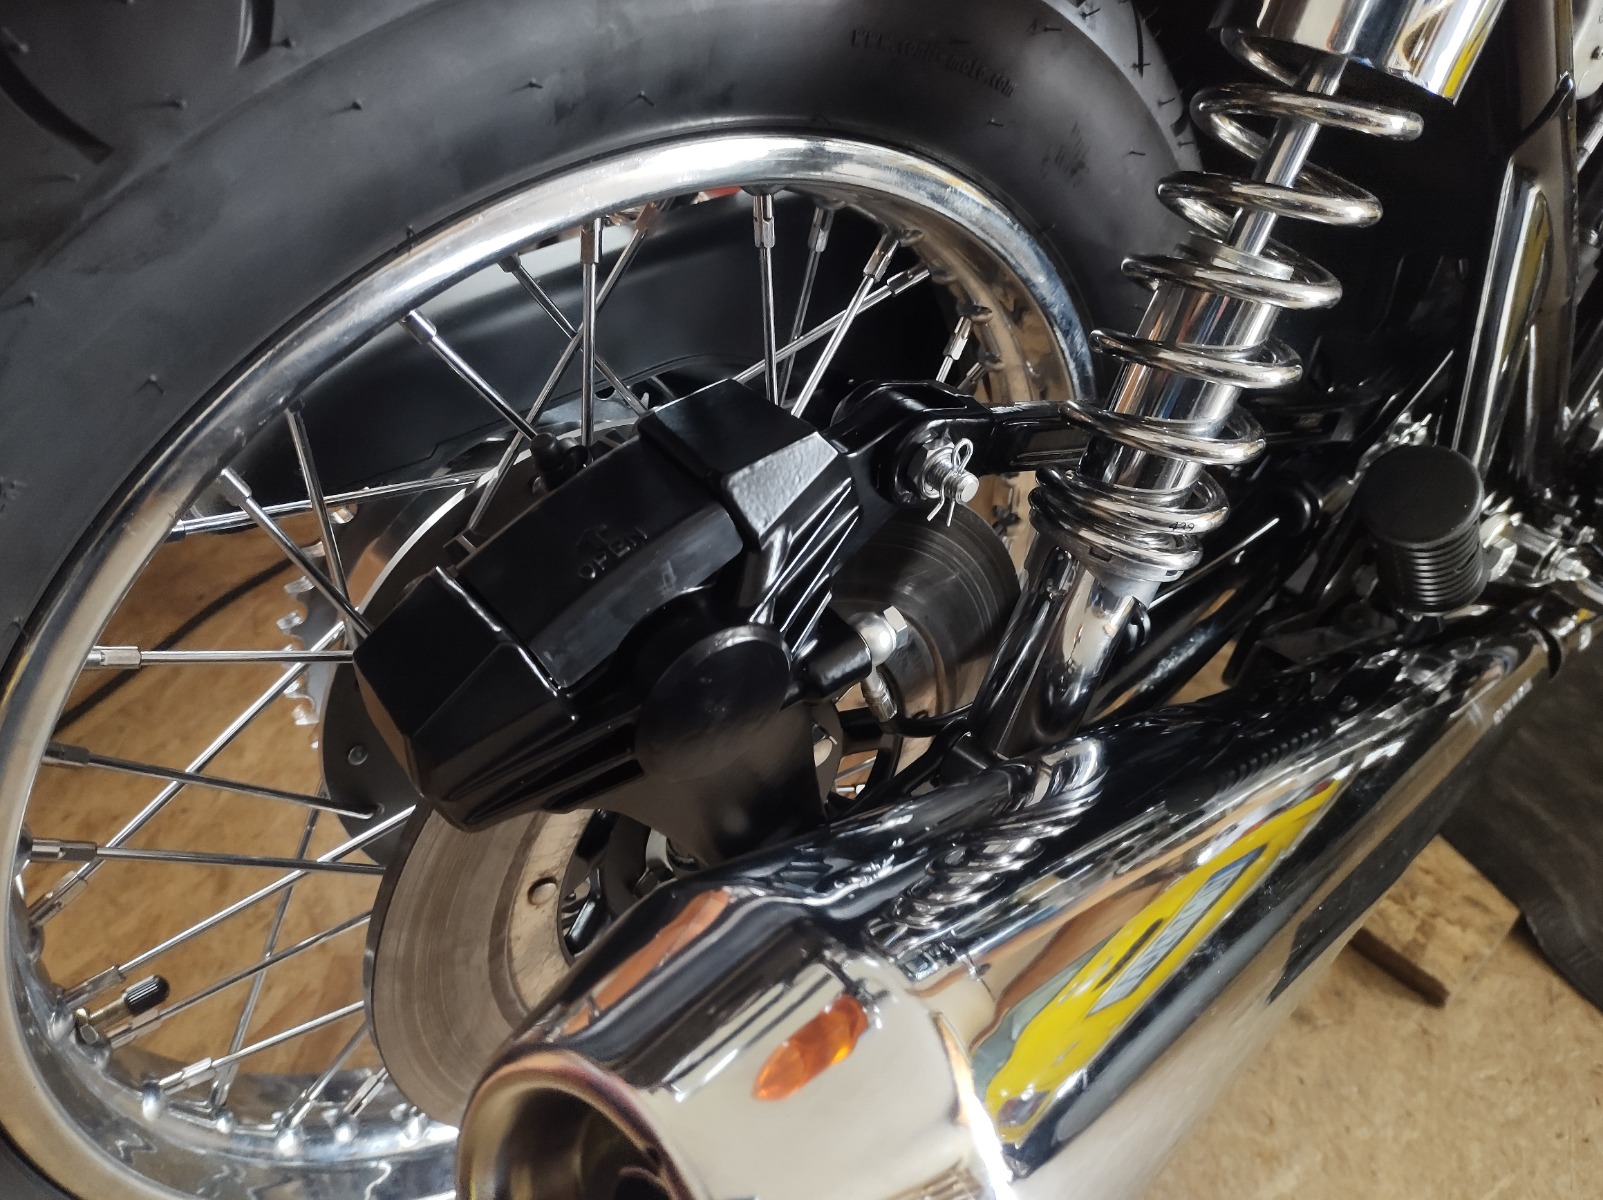
Back to the bike... Got the rear brakes done today. Bleach worked pretty well on the master cylinder reservoir. Front brakes are on the workbench and ready for assembly on Tuesday (no time tomorrow).
@Scirocco: The idler sprockets are all pretty good. Some of the ones I pulled out of one of the engines were pretty bad, though. So the engine may have been run for a while with the cam chain misaligned.
Back to the bike... Got the rear brakes done today. Bleach worked pretty well on the master cylinder reservoir. Front brakes are on the workbench and ready for assembly on Tuesday (no time tomorrow).
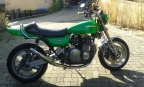
KZ1000 Restomod (
www.kzrider.com/forum/11-projects/614517-1977-kz1000-restomod
)
1977 KZ1000A1 ( www.kzrider.com/forum/11-projects/616901...-spare-parts-project )
1980 KZ750H ( kzrider.com/forum/11-projects/612054-kz750h-restoration )
2000 BMW F650GS
1977 KZ1000A1 ( www.kzrider.com/forum/11-projects/616901...-spare-parts-project )
1980 KZ750H ( kzrider.com/forum/11-projects/612054-kz750h-restoration )
2000 BMW F650GS
Last edit: 19 Feb 2023 13:19 by calum.
The following user(s) said Thank You: howardhb, Wookie58
Please Log in or Create an account to join the conversation.
- Mikaw
-
- Offline
- Sustaining Member
-

Registered
- Posts: 4825
- Thanks: 1852
Re: KZ1000A1 Spare Parts Project
19 Feb 2023 13:22
Bleach? did you soak it. Looks great.
1976 KZ 900 A4
kzrider.com/forum/11-projects/613548-1976-kz-900-a4
1976 KZ 900 B1 LTD
1978 KZ 1000 B2 LTD
1980 KZ 750 E1
Kowledge Speaks, But Wisdom Listens.
Jimi Hendrix.
1976 KZ 900 B1 LTD
1978 KZ 1000 B2 LTD
1980 KZ 750 E1
Kowledge Speaks, But Wisdom Listens.
Jimi Hendrix.
Please Log in or Create an account to join the conversation.
- calum
-
Topic Author
- Offline
- User
-
Registered
- Posts: 1144
- Thanks: 415
Re: KZ1000A1 Spare Parts Project
19 Feb 2023 13:34
Yeah, used the stuff from a video Scirocco posted a few pages back. It was some 12% hydrogen peroxide for that bleach blonde look. I just coated the reservoir and then wrapped it up in some cling film for a day or two. Then unwrap, rinse, repeat ")
KZ1000 Restomod (
www.kzrider.com/forum/11-projects/614517-1977-kz1000-restomod
)
1977 KZ1000A1 ( www.kzrider.com/forum/11-projects/616901...-spare-parts-project )
1980 KZ750H ( kzrider.com/forum/11-projects/612054-kz750h-restoration )
2000 BMW F650GS
1977 KZ1000A1 ( www.kzrider.com/forum/11-projects/616901...-spare-parts-project )
1980 KZ750H ( kzrider.com/forum/11-projects/612054-kz750h-restoration )
2000 BMW F650GS
The following user(s) said Thank You: Wookie58
Please Log in or Create an account to join the conversation.
- Mikaw
-
- Offline
- Sustaining Member
-
Registered
- Posts: 4825
- Thanks: 1852
Re: KZ1000A1 Spare Parts Project
19 Feb 2023 16:26
Could you post the ingredients and percentages. I don’t speak German and I didn’t see anything in the closed caption.
1976 KZ 900 A4
kzrider.com/forum/11-projects/613548-1976-kz-900-a4
1976 KZ 900 B1 LTD
1978 KZ 1000 B2 LTD
1980 KZ 750 E1
Kowledge Speaks, But Wisdom Listens.
Jimi Hendrix.
1976 KZ 900 B1 LTD
1978 KZ 1000 B2 LTD
1980 KZ 750 E1
Kowledge Speaks, But Wisdom Listens.
Jimi Hendrix.
Please Log in or Create an account to join the conversation.
- Scirocco
-
- Offline
- Premium Member
-

Registered
- Never change a running system
- Posts: 4397
- Thanks: 2260
Re: KZ1000A1 Spare Parts Project
19 Feb 2023 22:41
Only 12% hydrogen peroxide cream bleach and min. 24 hours in the sunshine (UV rays).
amzn.to/3jwQOFK
You have to repeat the procedere multiple times if nessesary.
amzn.to/3jwQOFK
You have to repeat the procedere multiple times if nessesary.
My 1975 Z 1 B 900 Project
www.kzrider.com/forum/11-projects/605133...ears-deep-sleep-mode
www.kzrider.com/forum/11-projects/605133...ears-deep-sleep-mode
The following user(s) said Thank You: Mikaw
Please Log in or Create an account to join the conversation.
- calum
-
Topic Author
- Offline
- User
-
Registered
- Posts: 1144
- Thanks: 415
Re: KZ1000A1 Spare Parts Project
17 Mar 2023 13:45 - 17 Mar 2023 13:45
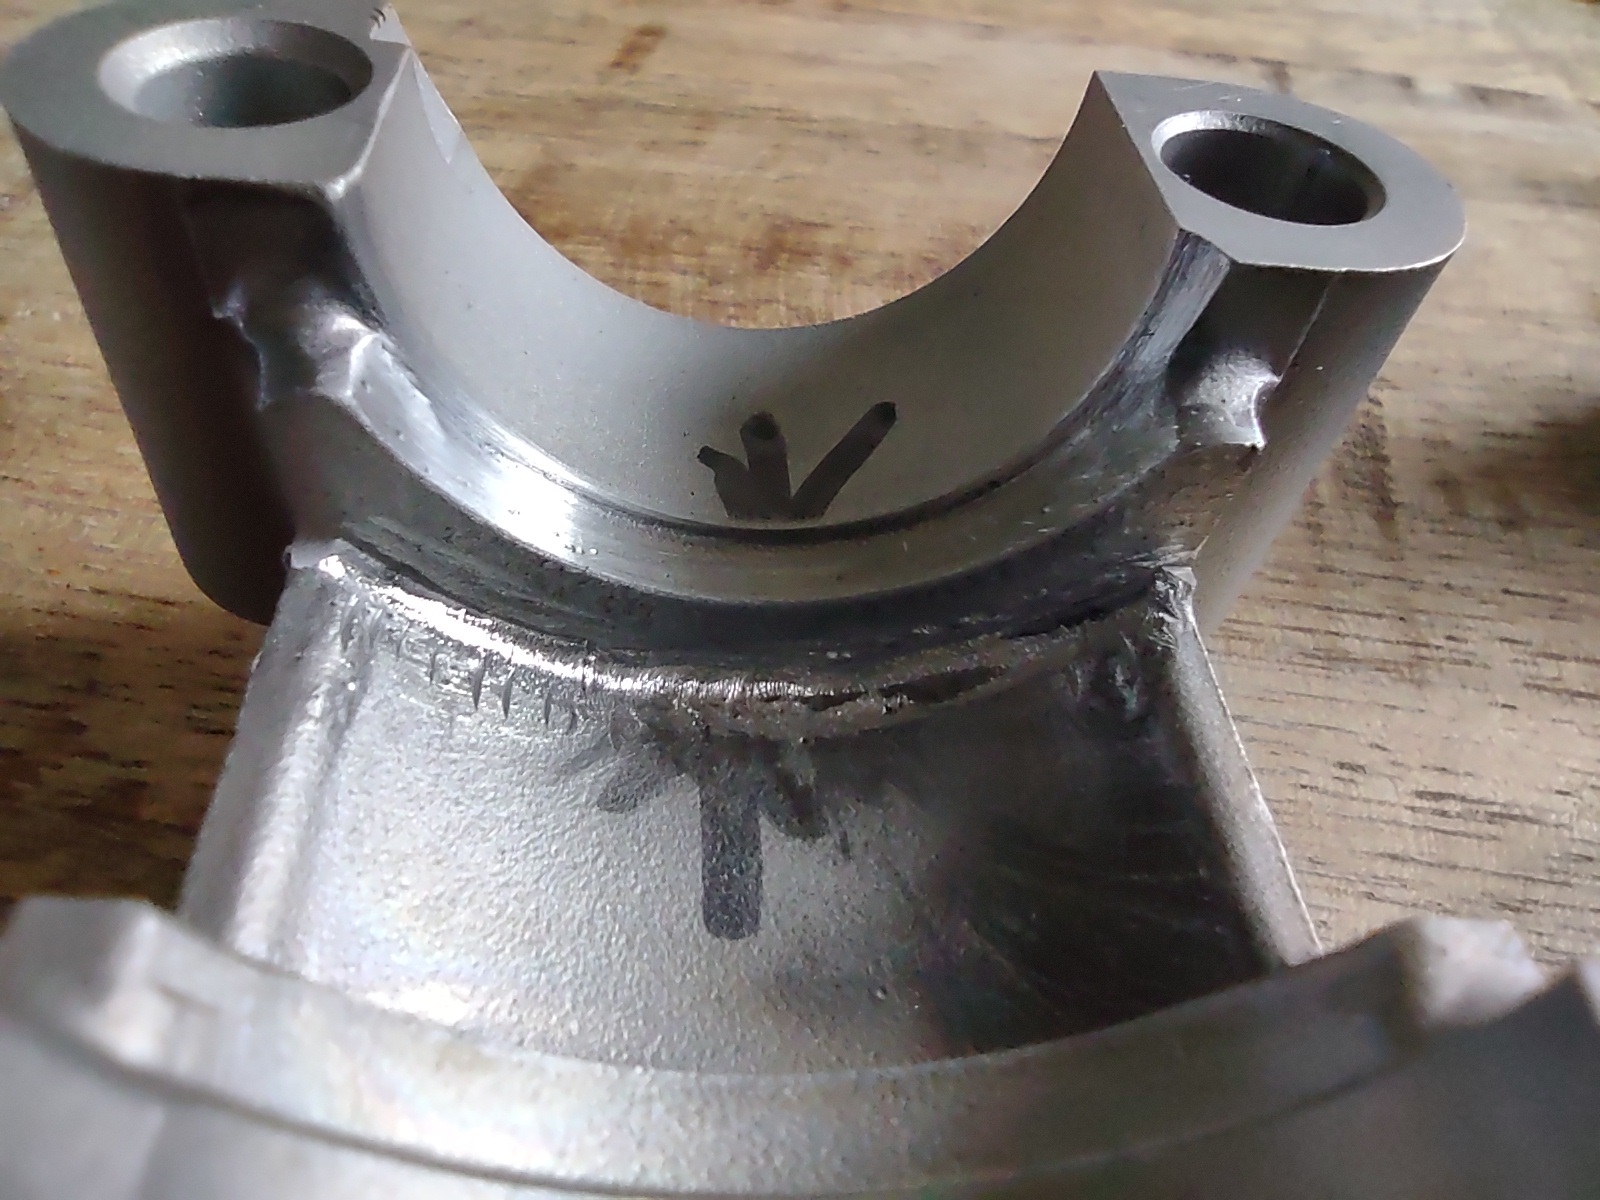
Took the cam caps to my engine guy. A bit of aser welding and some miling (and 100€) and now the end float is back to normal. I'll see if I can get the engine closed up tomorrow, but I have become a bit distrated by my other project...
KZ1000 Restomod (
www.kzrider.com/forum/11-projects/614517-1977-kz1000-restomod
)
1977 KZ1000A1 ( www.kzrider.com/forum/11-projects/616901...-spare-parts-project )
1980 KZ750H ( kzrider.com/forum/11-projects/612054-kz750h-restoration )
2000 BMW F650GS
1977 KZ1000A1 ( www.kzrider.com/forum/11-projects/616901...-spare-parts-project )
1980 KZ750H ( kzrider.com/forum/11-projects/612054-kz750h-restoration )
2000 BMW F650GS
Last edit: 17 Mar 2023 13:45 by calum.
The following user(s) said Thank You: Nessism, Scirocco, howardhb, Wookie58
Please Log in or Create an account to join the conversation.
- Scirocco
-
- Offline
- Premium Member
-
Registered
- Never change a running system
- Posts: 4397
- Thanks: 2260
Re: KZ1000A1 Spare Parts Project
17 Mar 2023 15:37
Looks perfect to me, best money investment on an old Kawasaki bike to get on the road again.
My 1975 Z 1 B 900 Project
www.kzrider.com/forum/11-projects/605133...ears-deep-sleep-mode
www.kzrider.com/forum/11-projects/605133...ears-deep-sleep-mode
The following user(s) said Thank You: calum
Please Log in or Create an account to join the conversation.
- calum
-
Topic Author
- Offline
- User
-
Registered
- Posts: 1144
- Thanks: 415
Re: KZ1000A1 Spare Parts Project
28 Apr 2023 12:21
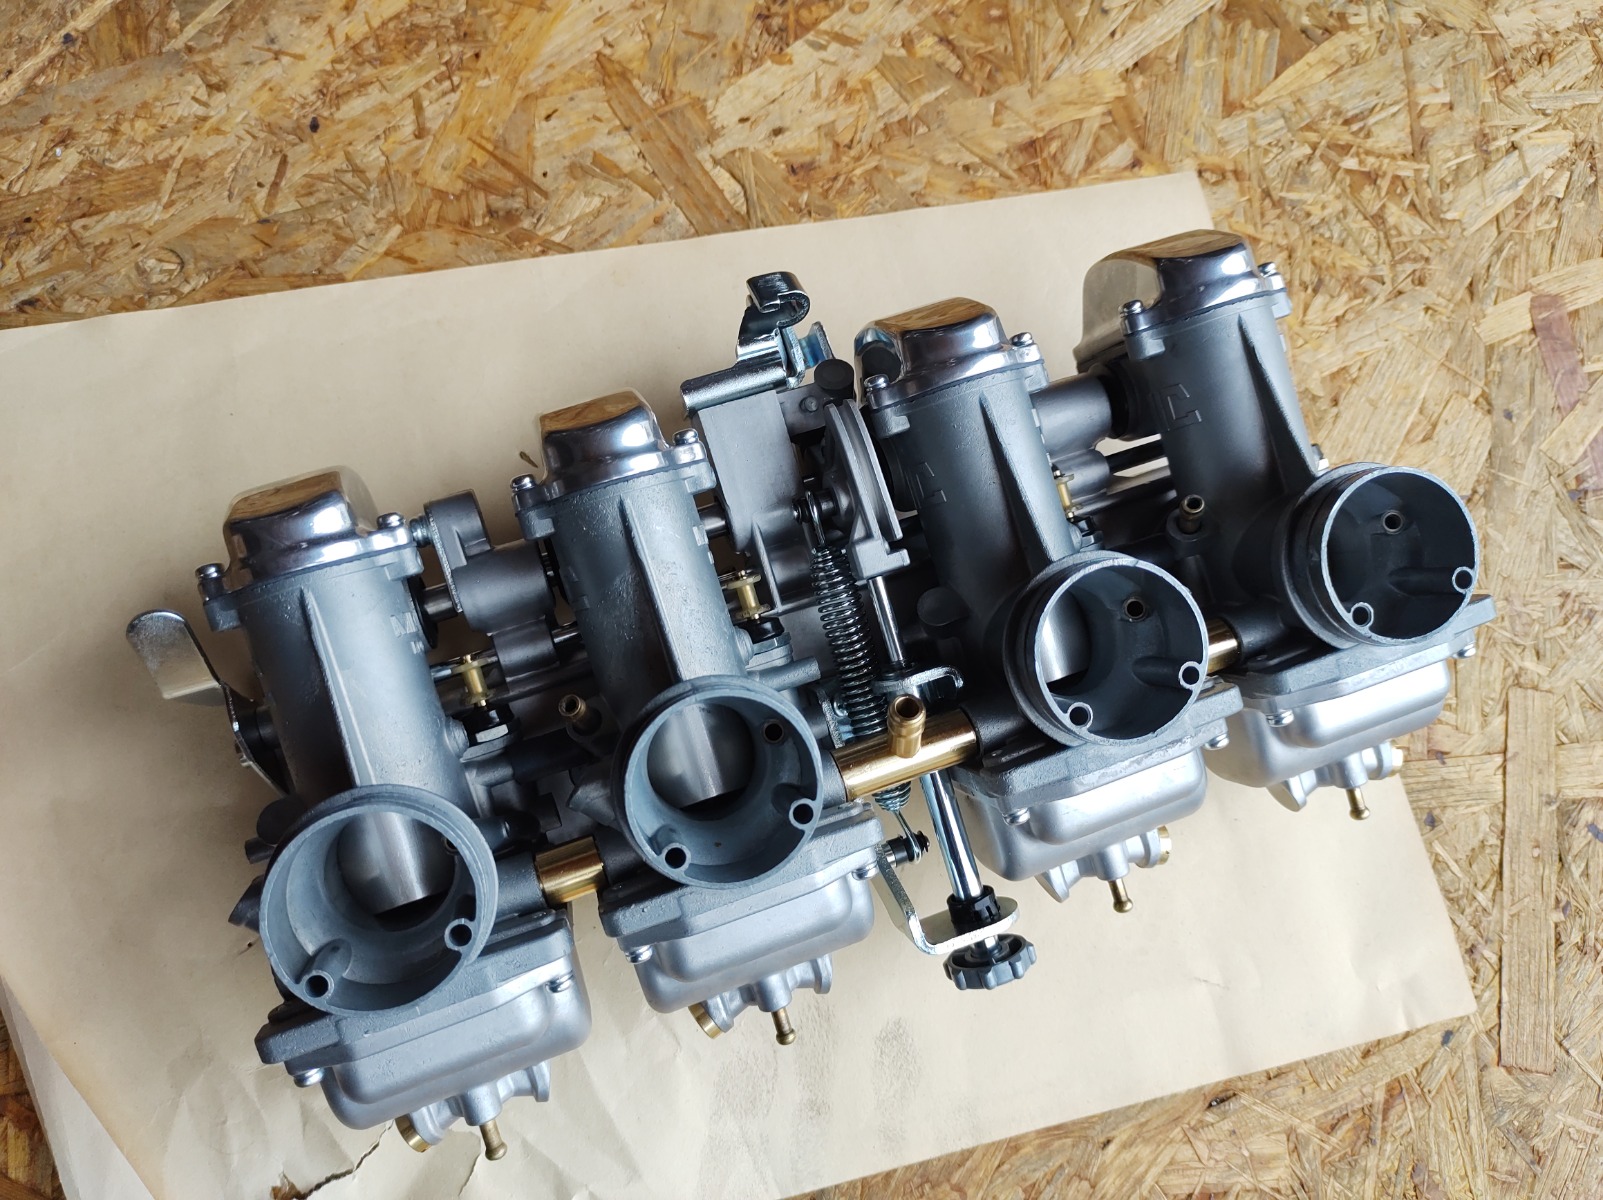
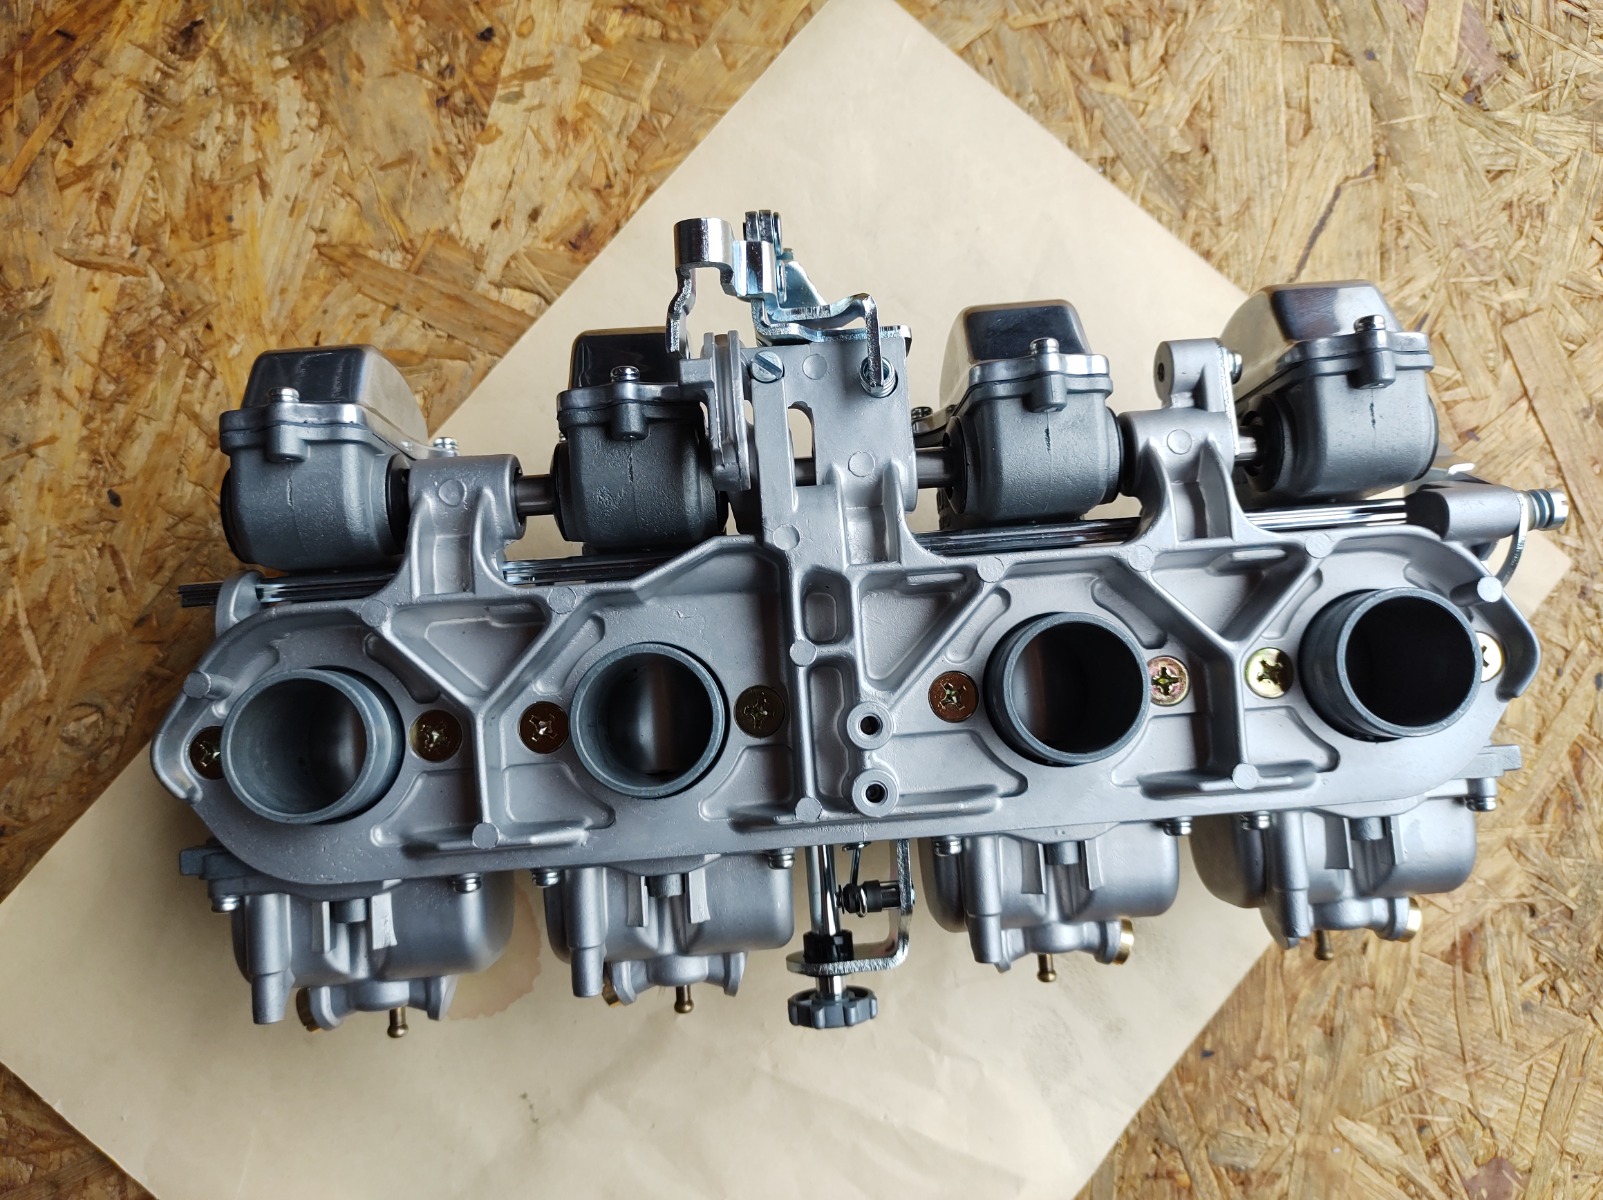
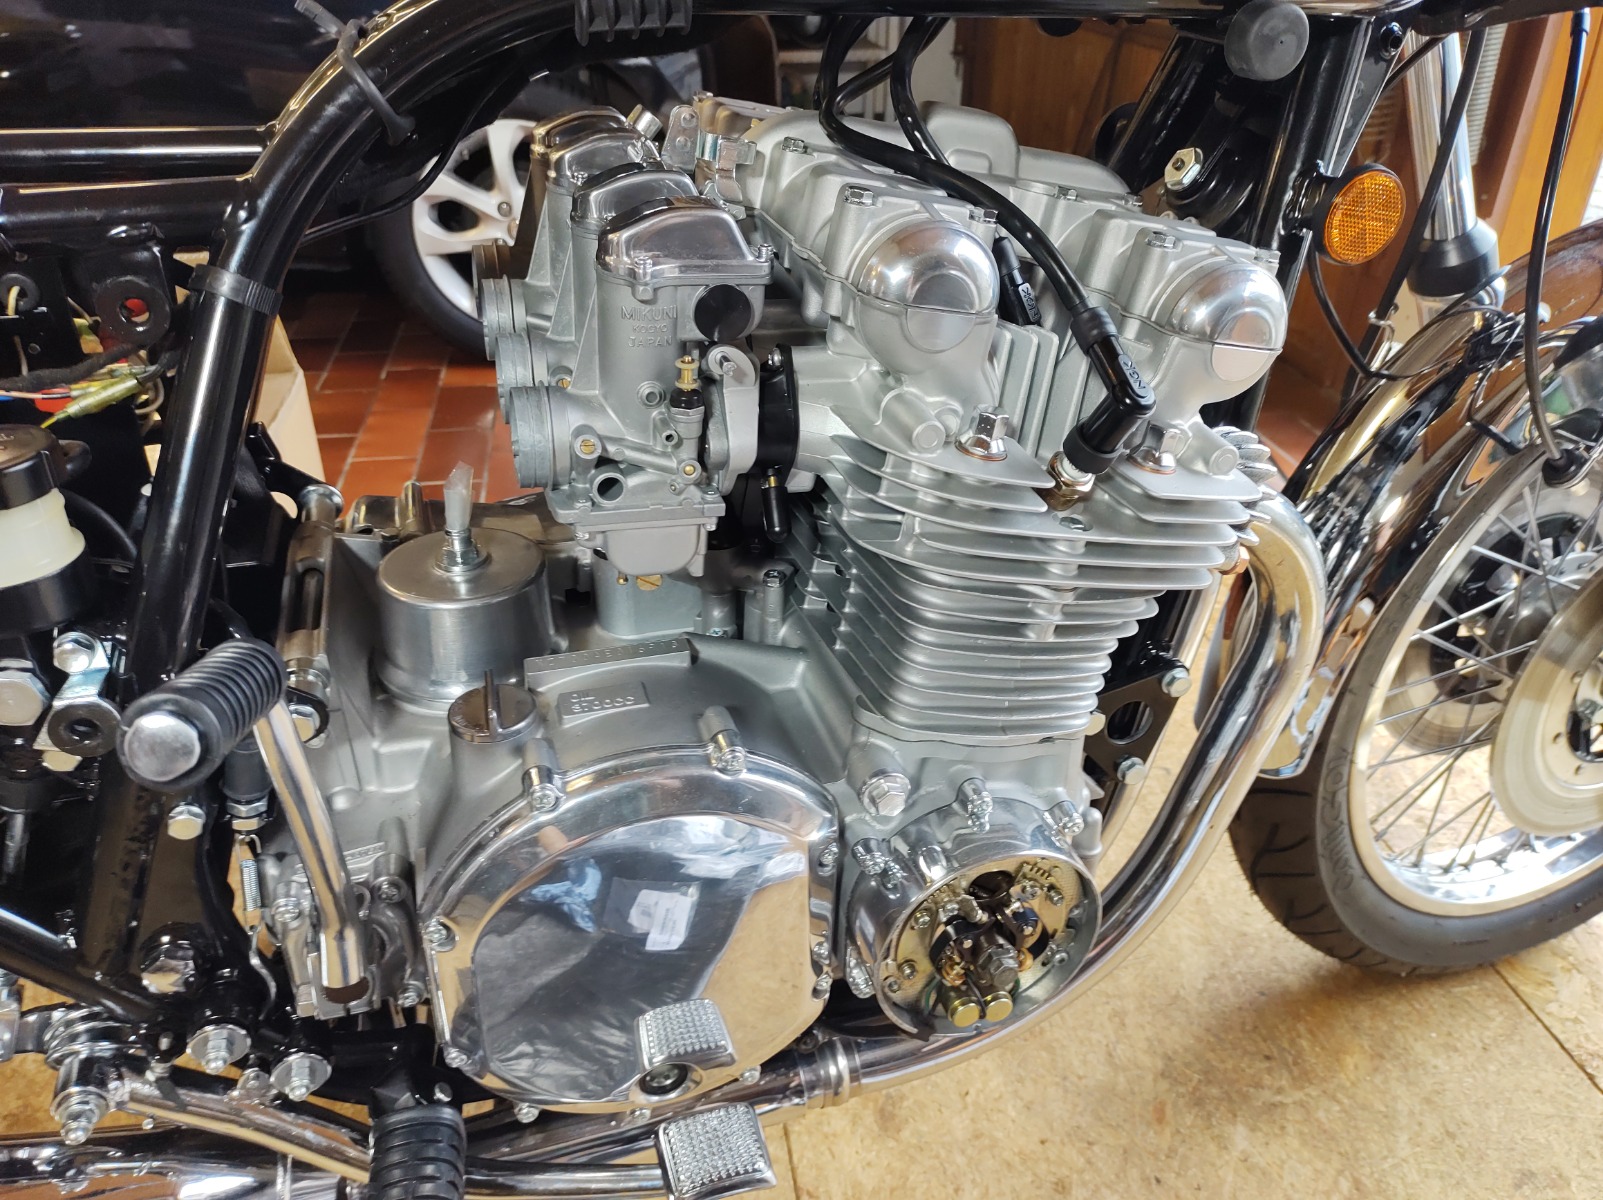
Got back into things this week while I'm waiting for some parts for the other bike. Got the top end finished and the carbs back together. Still waiting on the choke levers so put the carbs back on the shelf for now.
Am I right that balancing these things is going to be a PITA? I'm assuming I'll need to take the cap off, adjust, replace the cap and re-check?
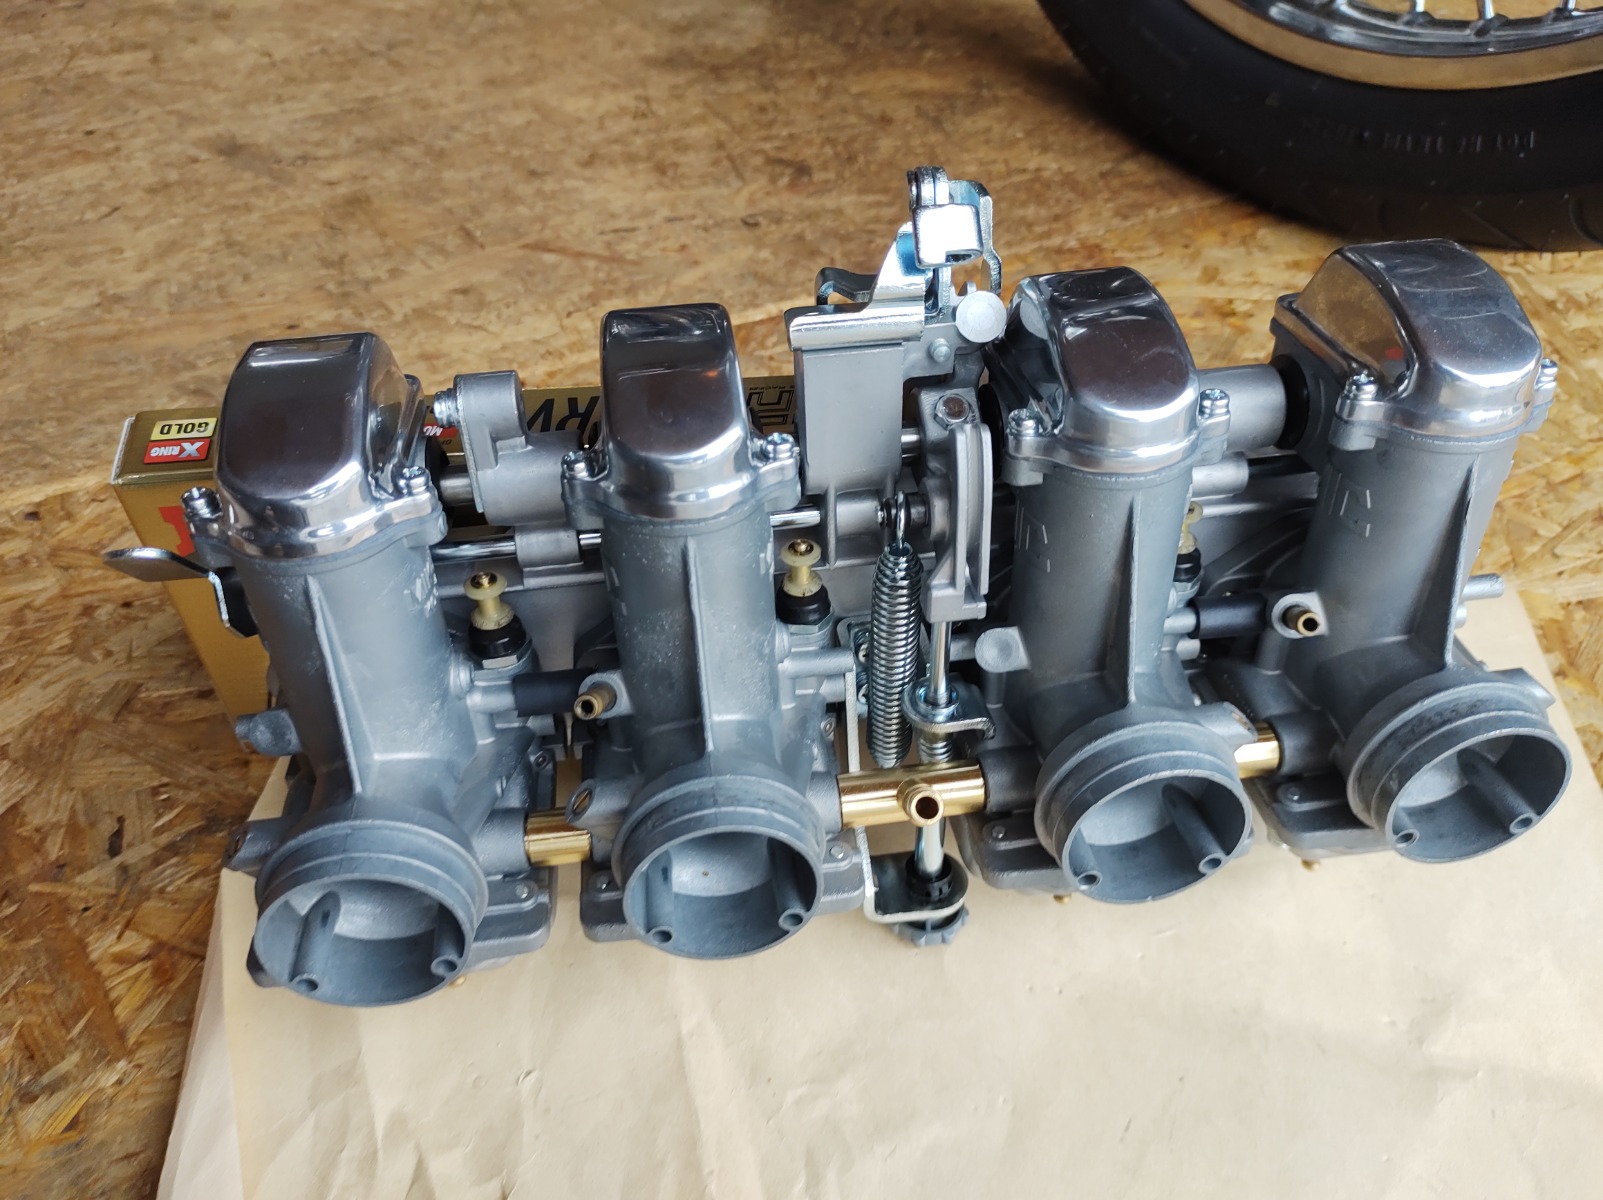
Am I right that balancing these things is going to be a PITA? I'm assuming I'll need to take the cap off, adjust, replace the cap and re-check?
KZ1000 Restomod (
www.kzrider.com/forum/11-projects/614517-1977-kz1000-restomod
)
1977 KZ1000A1 ( www.kzrider.com/forum/11-projects/616901...-spare-parts-project )
1980 KZ750H ( kzrider.com/forum/11-projects/612054-kz750h-restoration )
2000 BMW F650GS
1977 KZ1000A1 ( www.kzrider.com/forum/11-projects/616901...-spare-parts-project )
1980 KZ750H ( kzrider.com/forum/11-projects/612054-kz750h-restoration )
2000 BMW F650GS
The following user(s) said Thank You: Nessism, howardhb
Please Log in or Create an account to join the conversation.
- Scirocco
-
- Offline
- Premium Member
-
Registered
- Never change a running system
- Posts: 4397
- Thanks: 2260
Re: KZ1000A1 Spare Parts Project
28 Apr 2023 12:40
No need to take the caps on/off, do sync the carbs cap off and start with the lowest vaccum value.
My 1975 Z 1 B 900 Project
www.kzrider.com/forum/11-projects/605133...ears-deep-sleep-mode
www.kzrider.com/forum/11-projects/605133...ears-deep-sleep-mode
The following user(s) said Thank You: calum
Please Log in or Create an account to join the conversation.
- Mikaw
-
- Offline
- Sustaining Member
-
Registered
- Posts: 4825
- Thanks: 1852
Re: KZ1000A1 Spare Parts Project
28 Apr 2023 18:11
Very nice looking. Gonna be a bitch to start. I don’t see the lifting arms for the choke plungers.
1976 KZ 900 A4
kzrider.com/forum/11-projects/613548-1976-kz-900-a4
1976 KZ 900 B1 LTD
1978 KZ 1000 B2 LTD
1980 KZ 750 E1
Kowledge Speaks, But Wisdom Listens.
Jimi Hendrix.
1976 KZ 900 B1 LTD
1978 KZ 1000 B2 LTD
1980 KZ 750 E1
Kowledge Speaks, But Wisdom Listens.
Jimi Hendrix.
Please Log in or Create an account to join the conversation.
- calum
-
Topic Author
- Offline
- User
-
Registered
- Posts: 1144
- Thanks: 415
Re: KZ1000A1 Spare Parts Project
29 Apr 2023 00:46I'm still waiting on themVery nice looking. Gonna be a bitch to start. I don’t see the lifting arms for the choke plungers.
- that's why the carbs are back on the shelf for now. I just put the choke shaft in so everything is in one place.
KZ1000 Restomod (
www.kzrider.com/forum/11-projects/614517-1977-kz1000-restomod
)
1977 KZ1000A1 ( www.kzrider.com/forum/11-projects/616901...-spare-parts-project )
1980 KZ750H ( kzrider.com/forum/11-projects/612054-kz750h-restoration )
2000 BMW F650GS
1977 KZ1000A1 ( www.kzrider.com/forum/11-projects/616901...-spare-parts-project )
1980 KZ750H ( kzrider.com/forum/11-projects/612054-kz750h-restoration )
2000 BMW F650GS
The following user(s) said Thank You: Mikaw
Please Log in or Create an account to join the conversation.
- calum
-
Topic Author
- Offline
- User
-
Registered
- Posts: 1144
- Thanks: 415
Re: KZ1000A1 Spare Parts Project
30 Apr 2023 11:50 - 30 Apr 2023 11:50
Getting a few more things done on this build. Pulled the petcock off the shelf today - the last part that I hadn't looked at yet. Does anyone know what original finish was on these or how I can get as close to it as possible?
Also, does the tool tray just sit on the airbox or should I be tying it down? I've seen some with cable ties around them but was wondering if there was a stock tie for them.
Also, does the tool tray just sit on the airbox or should I be tying it down? I've seen some with cable ties around them but was wondering if there was a stock tie for them.
KZ1000 Restomod (
www.kzrider.com/forum/11-projects/614517-1977-kz1000-restomod
)
1977 KZ1000A1 ( www.kzrider.com/forum/11-projects/616901...-spare-parts-project )
1980 KZ750H ( kzrider.com/forum/11-projects/612054-kz750h-restoration )
2000 BMW F650GS
1977 KZ1000A1 ( www.kzrider.com/forum/11-projects/616901...-spare-parts-project )
1980 KZ750H ( kzrider.com/forum/11-projects/612054-kz750h-restoration )
2000 BMW F650GS
Last edit: 30 Apr 2023 11:50 by calum.
Please Log in or Create an account to join the conversation.
Moderators: Street Fighter LTD