
REFUSES TO START
- kawadruida
-
 Topic Author
- Offline
- User
-

Registered
- Posts: 153
- Thanks: 1
Re: REFUSES TO START
29 Nov 2006 12:45
Wiredgeorge/Stpauler: Thanks for chiming in! I´ve heard from Z1 enterprises in this forum and browsed their website a few times. Will ask if they have the carb boots for my bike, how much they cost and shipping costs/time.
BTW, the boots are different -apparently- than those for your bike, Stpauler: buykawasaki.com lists them as 14073-1158, even if in the diagrams they look pretty much the same.
Thanks again folks, will keep you posted!
BTW, the boots are different -apparently- than those for your bike, Stpauler: buykawasaki.com lists them as 14073-1158, even if in the diagrams they look pretty much the same.
Thanks again folks, will keep you posted!
Please Log in or Create an account to join the conversation.
- pyxen
-
- Offline
- User
-
Registered
- Posts: 488
- Thanks: 7
Re: REFUSES TO START
30 Nov 2006 07:34
kawadruida wrote:
Hey..sorry to disappear on ya. Yeah, that's pretty much it. You can add a little bit more so that you can be sure it covers it, but 1cm will definitely do.
Hope it works! Its cheap, and effective - a damn good combination!
Thanks Pyxen! You just showed me the light! Can´t wait to go to the bycicle shop to get my own inner tube!
As I understand, you "wrapped" the boots with the inner tube pieces, allowing about 1 cm. of "free inner tube" to slide over the carb, right? Simple, clean and good looking too!
Thanks again man.
Hey..sorry to disappear on ya. Yeah, that's pretty much it. You can add a little bit more so that you can be sure it covers it, but 1cm will definitely do.
Hope it works! Its cheap, and effective - a damn good combination!
84 KZ550-F2 LTD
93 ZR550-B4
93 ZR550-B4
Please Log in or Create an account to join the conversation.
- kawadruida
-
Topic Author
- Offline
- User
-
Registered
- Posts: 153
- Thanks: 1
Re: REFUSES TO START
30 Nov 2006 16:12
Pyxen, thanks again man. Just got my inner tube today, this weekend I´m gonna work in my carbs,put the "overboots" on  and see what happens. If all goes well, I´m taking her for a spin on sunday.
I´ll post my results and a couple of pics of my reborn GPz.
Wish me luck!
and see what happens. If all goes well, I´m taking her for a spin on sunday.I´ll post my results and a couple of pics of my reborn GPz.
Wish me luck!
Please Log in or Create an account to join the conversation.
- kawadruida
-
Topic Author
- Offline
- User
-
Registered
- Posts: 153
- Thanks: 1
Re: REFUSES TO START
03 Dec 2006 15:43
This is what my carb boots look like. I can´t believe these rock-hard things were soft and actually made of rubber sometime in the past...
As you can see, their condition is just miserable, don´t you agree? I think I´ll file and sand the boots lips to smoot things out and slip the inner tubes a little easier.
Just took the carbs off, gonna disassemble them, take a good look (especially at #2) clean them again with carb cleaner and pressurized air and hope this time all goes well.
Wish me luck, I´ll keep you posted.
PS: You can see better pictures of my ride and the new paintjob (including details) in the Paint & Bodywork Forum.

Post edited by: kawadruida, at: 2006/12/03 18:45
As you can see, their condition is just miserable, don´t you agree? I think I´ll file and sand the boots lips to smoot things out and slip the inner tubes a little easier.
Just took the carbs off, gonna disassemble them, take a good look (especially at #2) clean them again with carb cleaner and pressurized air and hope this time all goes well.
Wish me luck, I´ll keep you posted.
PS: You can see better pictures of my ride and the new paintjob (including details) in the Paint & Bodywork Forum.
Post edited by: kawadruida, at: 2006/12/03 18:45
Please Log in or Create an account to join the conversation.
- pyxen
-
- Offline
- User
-
Registered
- Posts: 488
- Thanks: 7
Re: REFUSES TO START
03 Dec 2006 19:01
wow..those're definitely out of shape.
Hope you get it fired up soon!
Hope you get it fired up soon!
84 KZ550-F2 LTD
93 ZR550-B4
93 ZR550-B4
Please Log in or Create an account to join the conversation.
- trippivot
-
- Offline
- User
-
Registered
- Posts: 399
- Thanks: 3
Re: REFUSES TO START
06 Dec 2006 06:30
use a hair dryer or heat gun to get the hard rubber pliable that will save the skin on your knuckles
Please Log in or Create an account to join the conversation.
- kawadruida
-
Topic Author
- Offline
- User
-
Registered
- Posts: 153
- Thanks: 1
Re: REFUSES TO START
06 Dec 2006 11:02
Trippivot, thanks for your advice, but I will do the inner tube trick and leave those boots as they are now.
Cheers
Cheers
Please Log in or Create an account to join the conversation.
- kawadruida
-
Topic Author
- Offline
- User
-
Registered
- Posts: 153
- Thanks: 1
Re: REFUSES TO START
09 Dec 2006 09:41
A couple of pics before putting things back together.
The inner tube "overboots" already installed...

The inner tube "overboots" already installed...
Please Log in or Create an account to join the conversation.
- kawadruida
-
Topic Author
- Offline
- User
-
Registered
- Posts: 153
- Thanks: 1
Re: REFUSES TO START
09 Dec 2006 09:43
And a close-up of one rolled up, ready to slip over the carb´s body.
Wish me luck!

Wish me luck!
Please Log in or Create an account to join the conversation.
- pyxen
-
- Offline
- User
-
Registered
- Posts: 488
- Thanks: 7
Re: REFUSES TO START
09 Dec 2006 19:22
Good luck!
Hopefully the fact you haven't posted means you're out riding!")
")
Btw - next time you have the bike apart/tank off, you may want to put a fuel filter on your gas line.
Post edited by: pyxen, at: 2006/12/09 22:25
Hopefully the fact you haven't posted means you're out riding!
Btw - next time you have the bike apart/tank off, you may want to put a fuel filter on your gas line.
Post edited by: pyxen, at: 2006/12/09 22:25
84 KZ550-F2 LTD
93 ZR550-B4
93 ZR550-B4
Please Log in or Create an account to join the conversation.
- kawadruida
-
Topic Author
- Offline
- User
-
Registered
- Posts: 153
- Thanks: 1
Re: REFUSES TO START
10 Dec 2006 15:48
No, I haven´t posted because I was too busy cursing in every language I know, and some others I don´t :pinch: :sick: 
Carb leaking stopped (after disassembling and cleaning again) and everything seems fine: timing, spark, fuel flows OK (I already have a fuel line filter installed, thanks Pyxen), but it just won´t start. I´ve even tried spraying liberal amounts of WD40 in the carbs while cranking the engine, but it refuses to start, not even a cough or some sign of life. After several tries, battery lost charge, so I had to quit even if didn´t want to.
I don´t know what else I can do, I´m just about to give up and call a mechanic to bring it back to life, just don´t wanna think about the bill...
Please Log in or Create an account to join the conversation.
- kawadruida
-
Topic Author
- Offline
- User
-
Registered
- Posts: 153
- Thanks: 1
Re: REFUSES TO START
10 Dec 2006 16:50
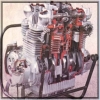
Just a detail that comes up from my mind: When I disassembled the top end, I marked the exhaust cam just to be sure cams won´t get mixed when reassembling the engine.
When I started putting things back together, I found this illustration in the Clymer KZ500/550 manual, page 258, ENGINE supplement, 1982 and later service information.
But to my surprise, the only way the intake cam sprocket got aligned with the head top & back was with the letter marks upside down. (See illustrtion on next Reply)
I took that as a print mistake and finished assembling the cams. As a precaution I looked at some other pics that showed cam lobe position when aligning cams, #4 exhaust lobe pointing backwards and #4 intake lobe pointing forward (figures 25 & 26, page 70 of the same manual, CHAPTER FOUR -ENGINE) After that and before putting the valve cover back on, I manually rotated the engine several times just to be sure that there was no binding.
Can this be my problem? Maybe I´ve assembled the cams so badly that timing is too far-off? I´m pretty sure that everything was done by the book, but those upside down marks are driving me crazy...
Please Log in or Create an account to join the conversation.
Moderators: Street Fighter LTD