
Wayne Gardner tribute {not replica}
- zed1015
-

- Offline
- User
-

Registered
- Posts: 3237
- Thanks: 1926
Re: Wayne Gardner tribute {not replica}
21 Jun 2021 22:18Be careful using the head gasket to gain compression., I'm chasing as much compression as I can get, Thinner head gaskets help. Every little bit counts right...
You are looking to achieve zero deck height and no more or less.
You need around 043" (1mm) piston to head "squish" clearance to prevent contact at high rpm's due to rod stretch and heat expansion.
This is why pretty much all stock head gaskets are that thickness.
If you need more comp on the current pistons then a head skim is the next step.
AIR CORRECTOR JETS FOR VM CARBS AND ETHANOL RESISTANT VITON CHOKE PLUNGER SEAL REPLACMENT FOR ALL CLASSIC AND MODERN MOTORCYCLE CARBURETTORS
www.kzrider.com/forum/23-for-sale/611992...lide-mikunis?start=1
www.kzrider.com/forum/23-for-sale/611992...lide-mikunis?start=1
Please Log in or Create an account to join the conversation.
- 750 R1
-
 Topic Author
- Offline
- User
-
Registered
- Posts: 1150
- Thanks: 389
Re: Wayne Gardner tribute {not replica}
22 Jun 2021 02:13Be careful using the head gasket to gain compression., I'm chasing as much compression as I can get, Thinner head gaskets help. Every little bit counts right...
You are looking to achieve zero deck height and no more or less.
You need around 043" (1mm) piston to head "squish" clearance to prevent contact at high rpm's due to rod stretch and heat expansion.
This is why pretty much all stock head gaskets are that thickness.
If you need more comp on the current pistons then a head skim is the next step.
Hi Zed, thanks. The heads getting a skim, around 020", I haven't checked deck height on the pistons yet, I'm not using Wiseco pistons so I'm working with less dome height , just thought I could get a small bump out of a thinner gasket. I haven't talked to my engine builder yet about head gaskets, probably should have done that first....
Please Log in or Create an account to join the conversation.
- 750 R1
-
Topic Author
- Offline
- User
-
Registered
- Posts: 1150
- Thanks: 389
Re: Wayne Gardner tribute {not replica}
17 Jul 2021 15:35
Well I've managed to get all the bodywork mounted, what a mission..! Made a bracket to mount the tail light assembly, not easy as I had to have the seat base mounted to get spacing correct, as well as remove the mounts from the atil light bracket and fab new ones, the tail piece I bought from Webike had different mounts to the stock ones. Made brackets to fit the tail piece, these were tricky due to using the 750 R1 seat lock and that the seat base rubbers foul the body work, also had to move all the side cover mounts and remove the tank mounts and fab up new ones. I've removed a pile of brackets from the frame but won't be able to clean them up until I strip all the suspension off the frame. Pics later in the week....
Please Log in or Create an account to join the conversation.
- 750 R1
-
Topic Author
- Offline
- User
-
Registered
- Posts: 1150
- Thanks: 389
Re: Wayne Gardner tribute {not replica}
26 Jul 2021 15:43 - 26 Jul 2021 15:44
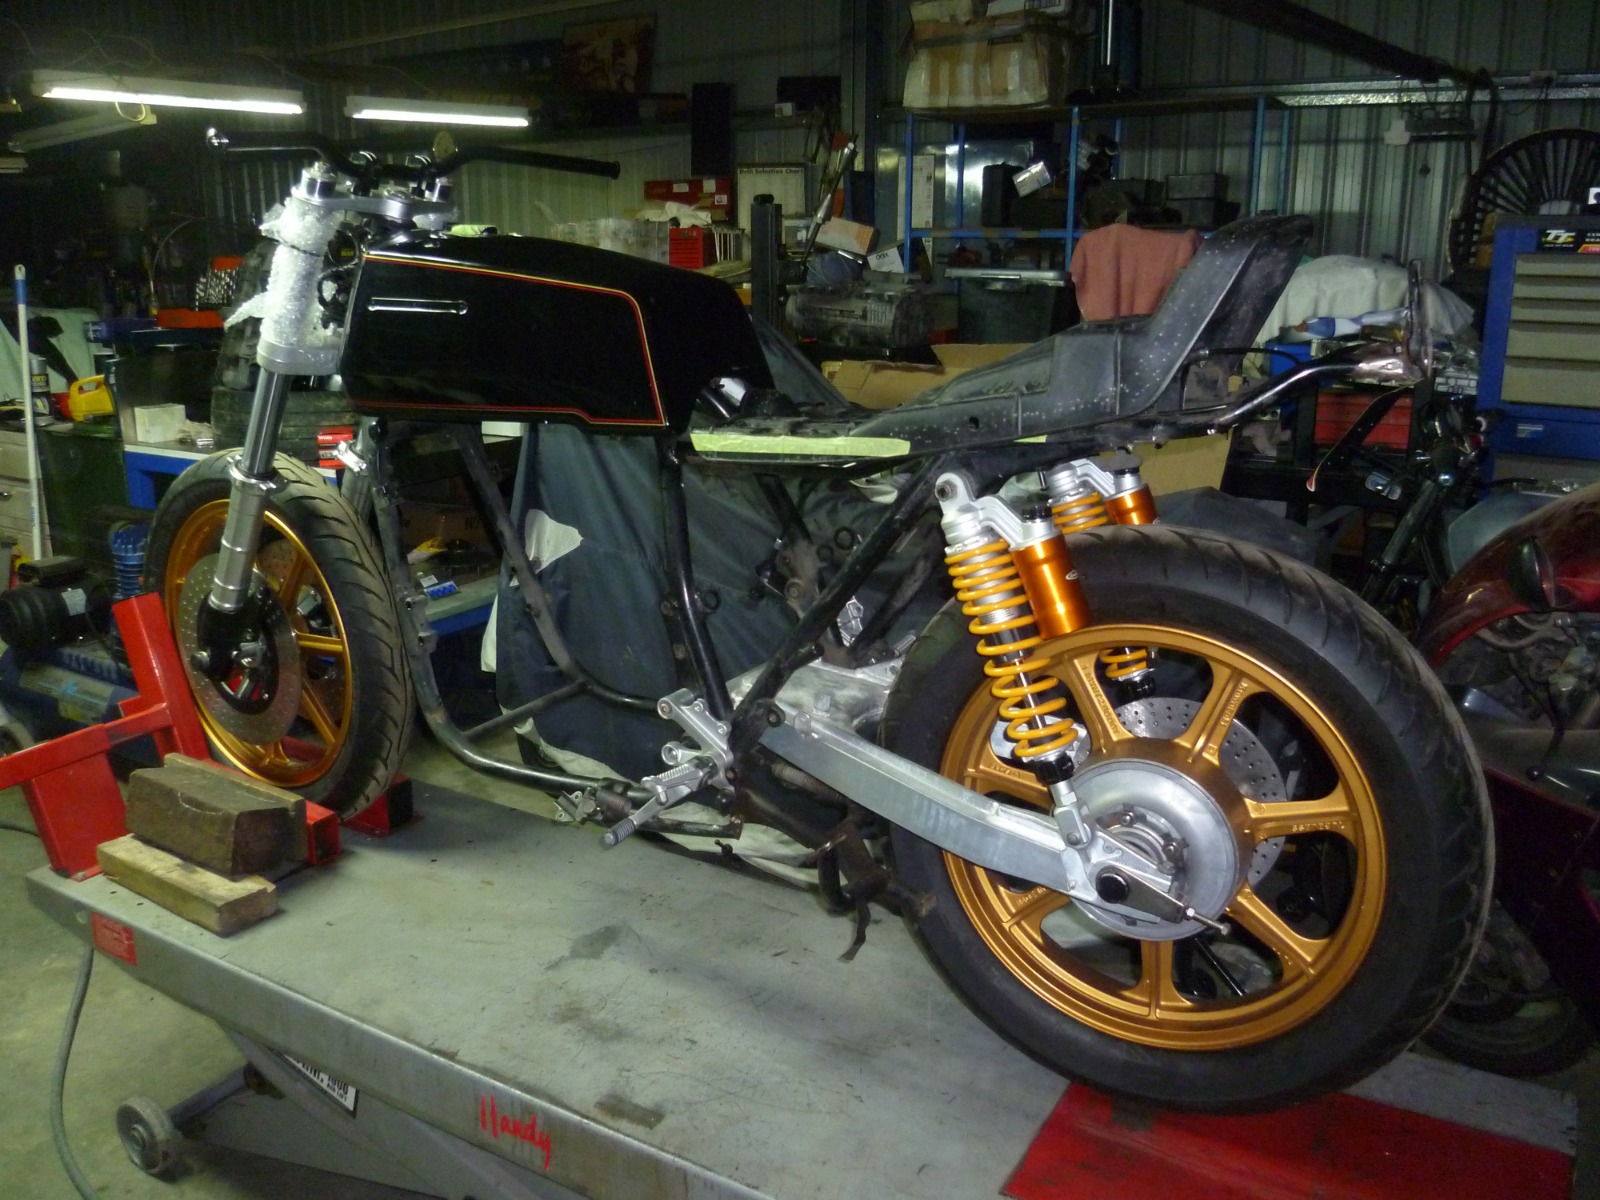
A couple of pics of where i'm at... Progress is slow ...
Rear shocks are on just to see how they looked on the bike, I'll be moving the top shock mounts further forward.. Tape on the seat base is where I have to trim the seat to fit the body work, the area under the tape will be removed.
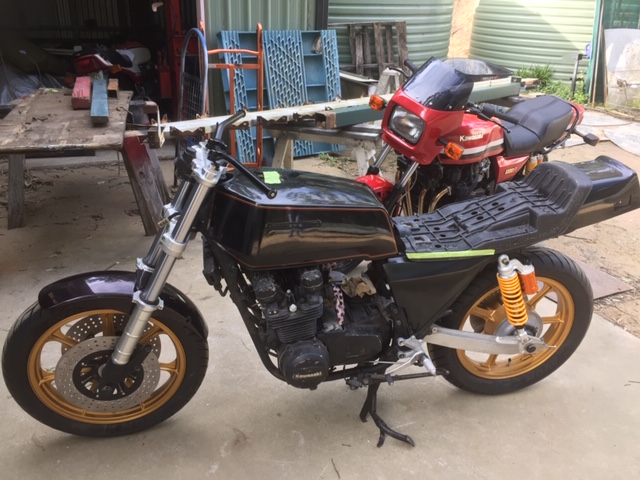
Rear shocks are on just to see how they looked on the bike, I'll be moving the top shock mounts further forward.. Tape on the seat base is where I have to trim the seat to fit the body work, the area under the tape will be removed.
Last edit: 26 Jul 2021 15:44 by 750 R1.
The following user(s) said Thank You: slayer61
Please Log in or Create an account to join the conversation.
- 750 R1
-
Topic Author
- Offline
- User
-
Registered
- Posts: 1150
- Thanks: 389
Re: Wayne Gardner tribute {not replica}
13 Aug 2021 16:36
No more pictures yet but I now have the engine out and are finishing off the rear set mounts..... Slow and steady wins the race...!!! {or so I keep telling myself}.....
Please Log in or Create an account to join the conversation.
- 750 R1
-
Topic Author
- Offline
- User
-
Registered
- Posts: 1150
- Thanks: 389
Re: Wayne Gardner tribute {not replica}
30 Aug 2021 15:32
Not much progress, I made up some small brackets to fit my rear guard, made up top mounts for my rear sets and made some mounts for my rear indicators, I left my camera at home so no pics of those yet, I'll try and remember next week.
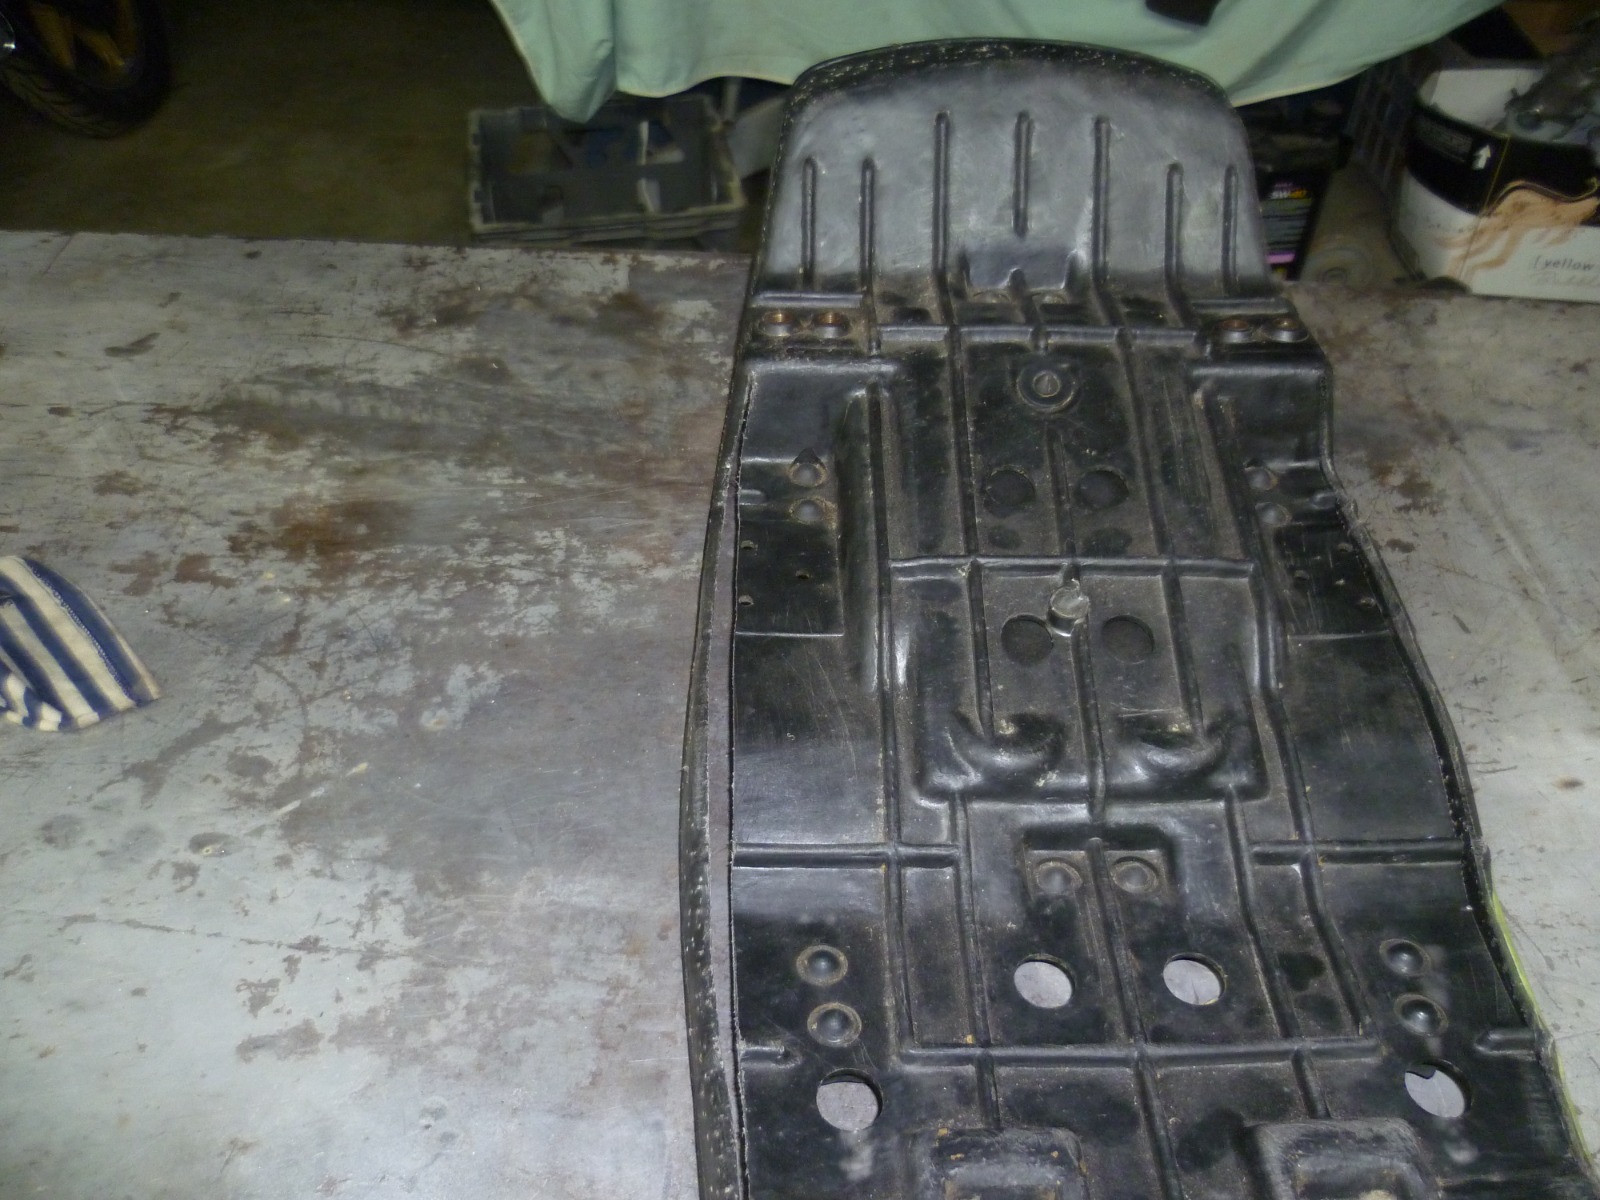
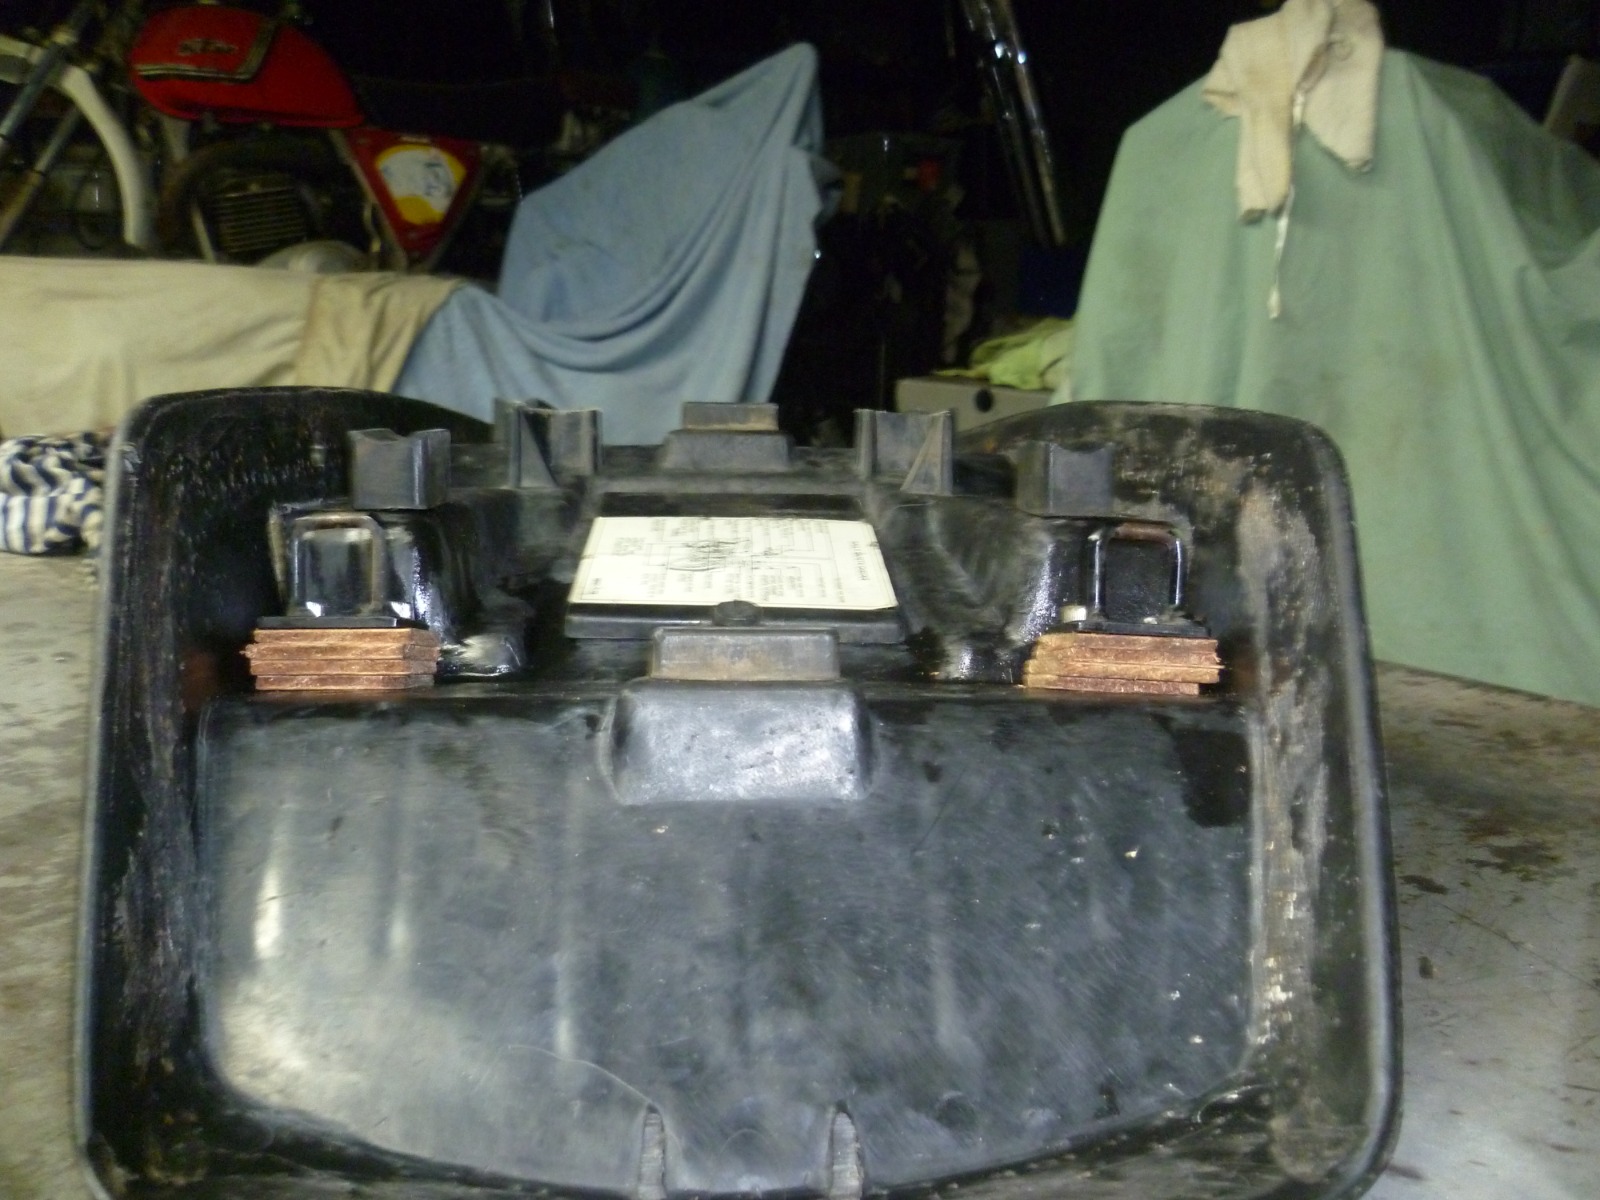
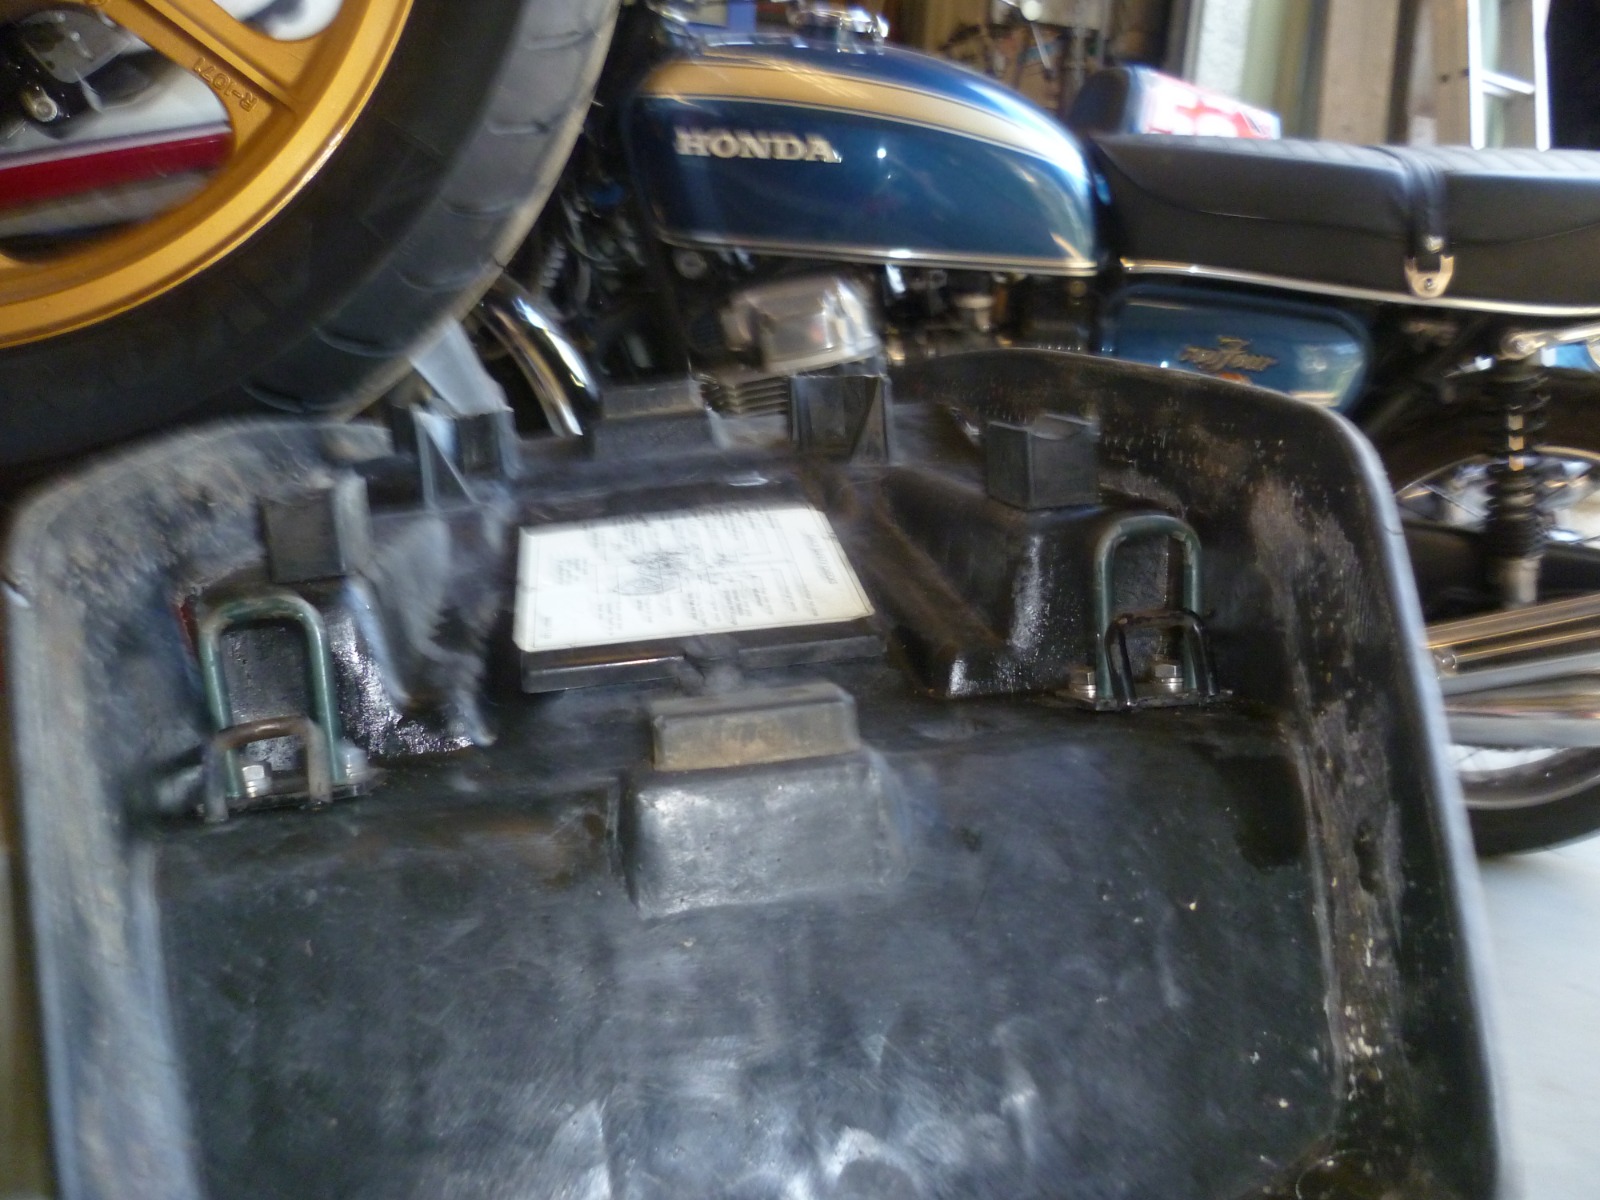
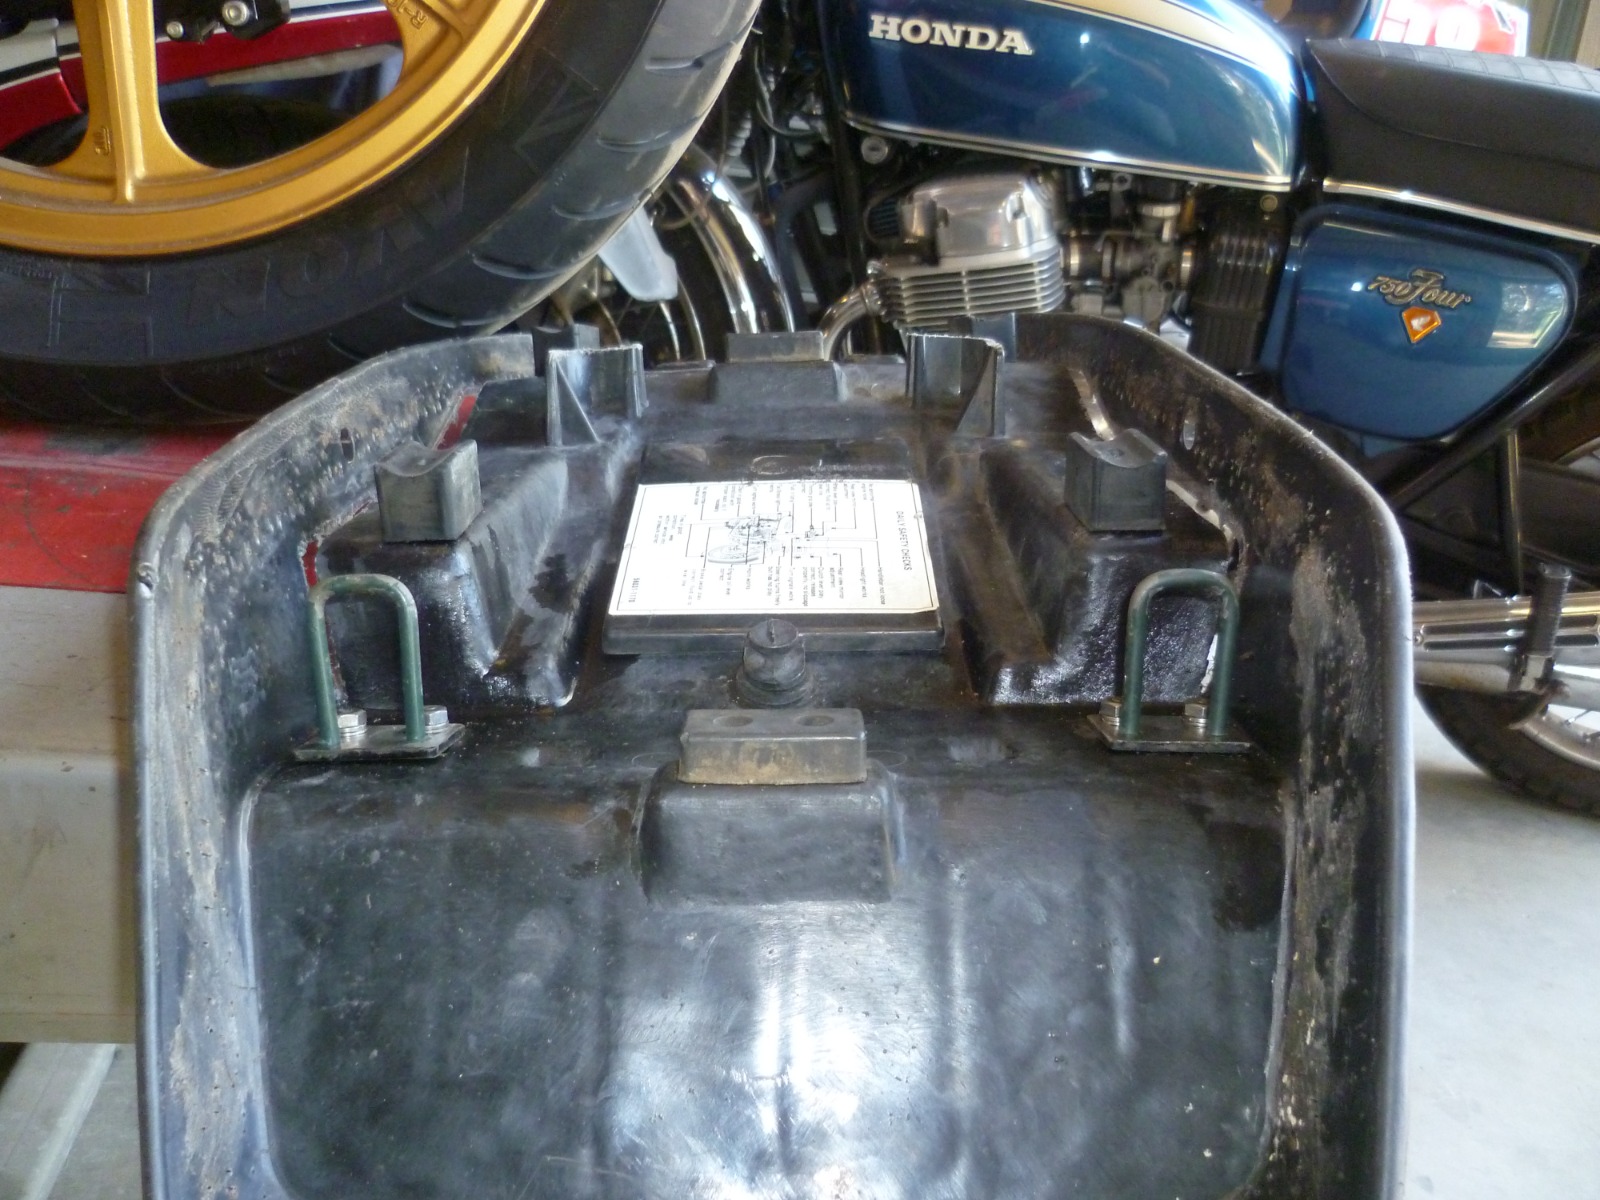
Next problem, I bought the rear KZ1000MKII tailpiece from Webike Japan, not realising until I received it that it has different shaped holes to support the tail light, stock has oval shaped holes, My new tail has round, anyway I shaved off the mounts on the tail light bracket and tacked on 2 pieces of threaded rod for mock up purposes, with the plan to make 2 nice weld on inserts and weld them on later. Now to my problem, as I went to remove the threaded rod I'd tacked on earlier I noticed that the rear of the tail light mount is cracked right across, If anyone has one of these I'd love to purchase it... I'm stuck finishing the rear of the bike until I get one.... I took some pics of the offending part when I got home last night.
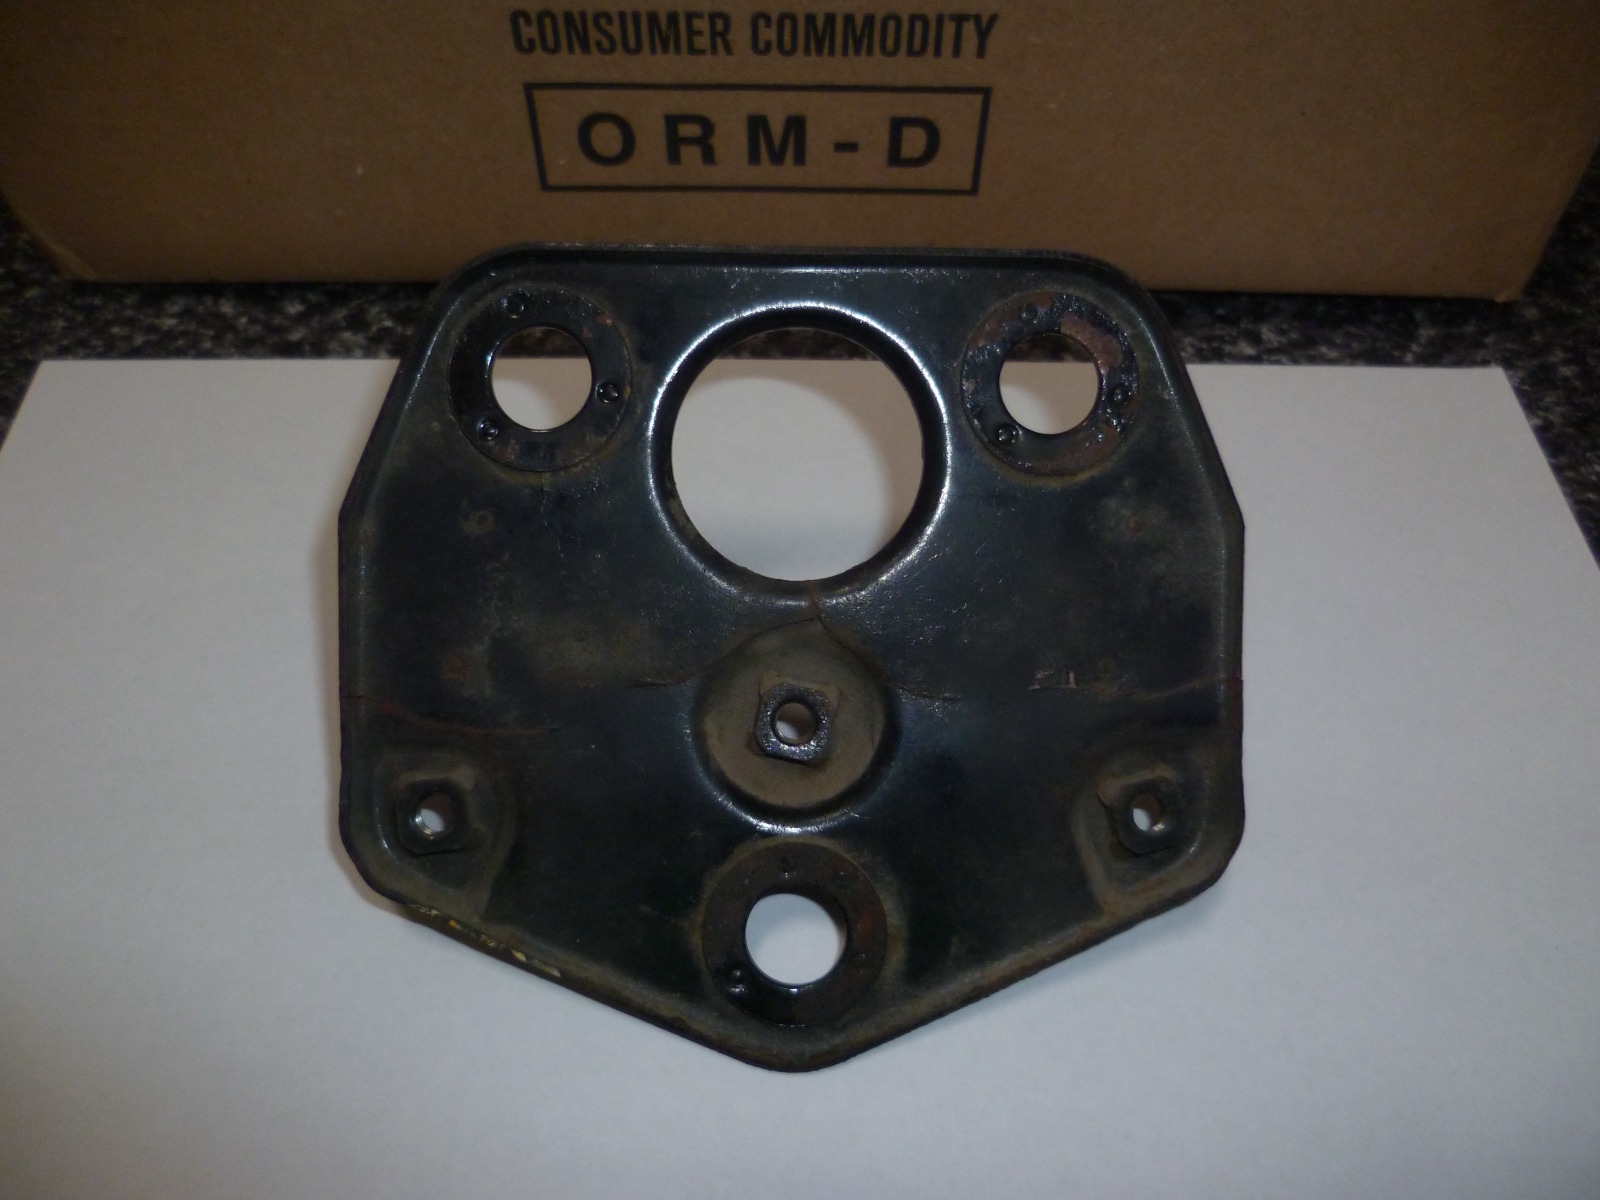
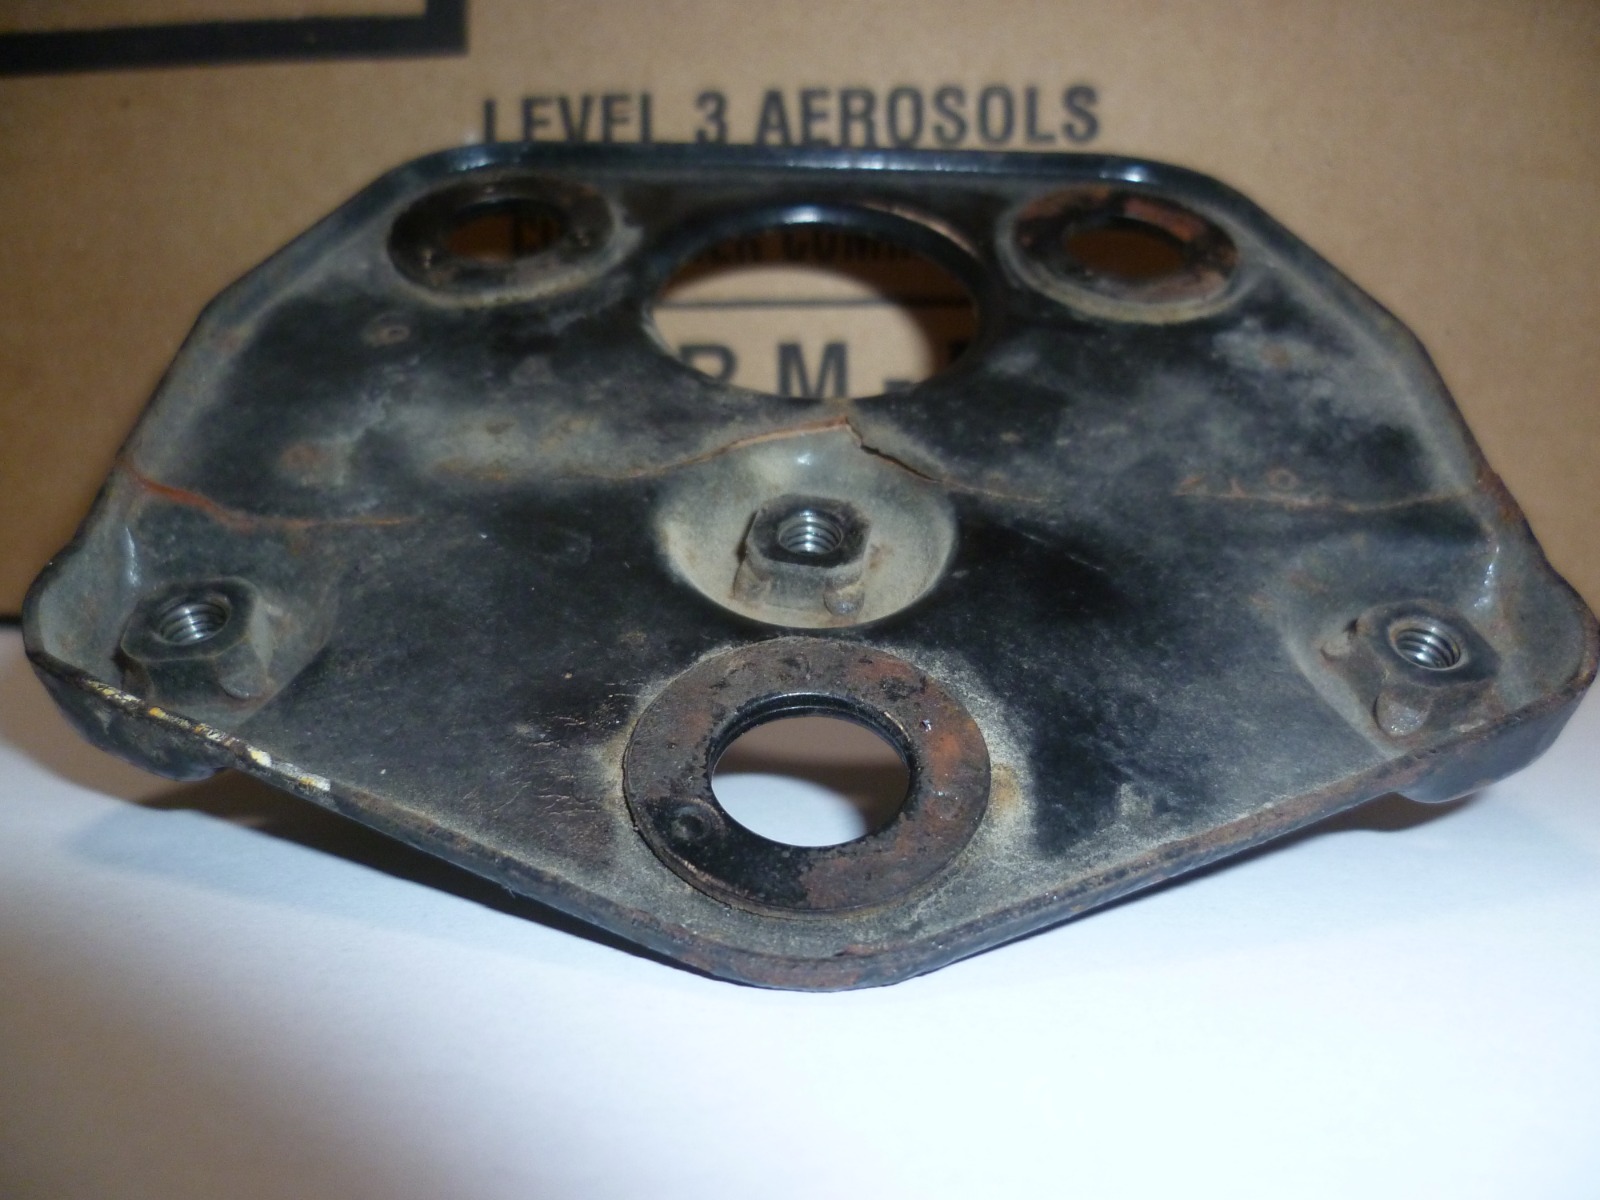
Next problem, I bought the rear KZ1000MKII tailpiece from Webike Japan, not realising until I received it that it has different shaped holes to support the tail light, stock has oval shaped holes, My new tail has round, anyway I shaved off the mounts on the tail light bracket and tacked on 2 pieces of threaded rod for mock up purposes, with the plan to make 2 nice weld on inserts and weld them on later. Now to my problem, as I went to remove the threaded rod I'd tacked on earlier I noticed that the rear of the tail light mount is cracked right across, If anyone has one of these I'd love to purchase it... I'm stuck finishing the rear of the bike until I get one.... I took some pics of the offending part when I got home last night.
Please Log in or Create an account to join the conversation.
- 750 R1
-
Topic Author
- Offline
- User
-
Registered
- Posts: 1150
- Thanks: 389
Re: Wayne Gardner tribute {not replica}
31 Aug 2021 18:39
Thanks to Martin CSR I now have a new backing plate, or I will have when it gets here.... Thanks Martin, very much appreciate the help....!
Please Log in or Create an account to join the conversation.
- 750 R1
-
Topic Author
- Offline
- User
-
Registered
- Posts: 1150
- Thanks: 389
Re: Wayne Gardner tribute {not replica}
13 Sep 2021 16:27 - 13 Sep 2021 16:28
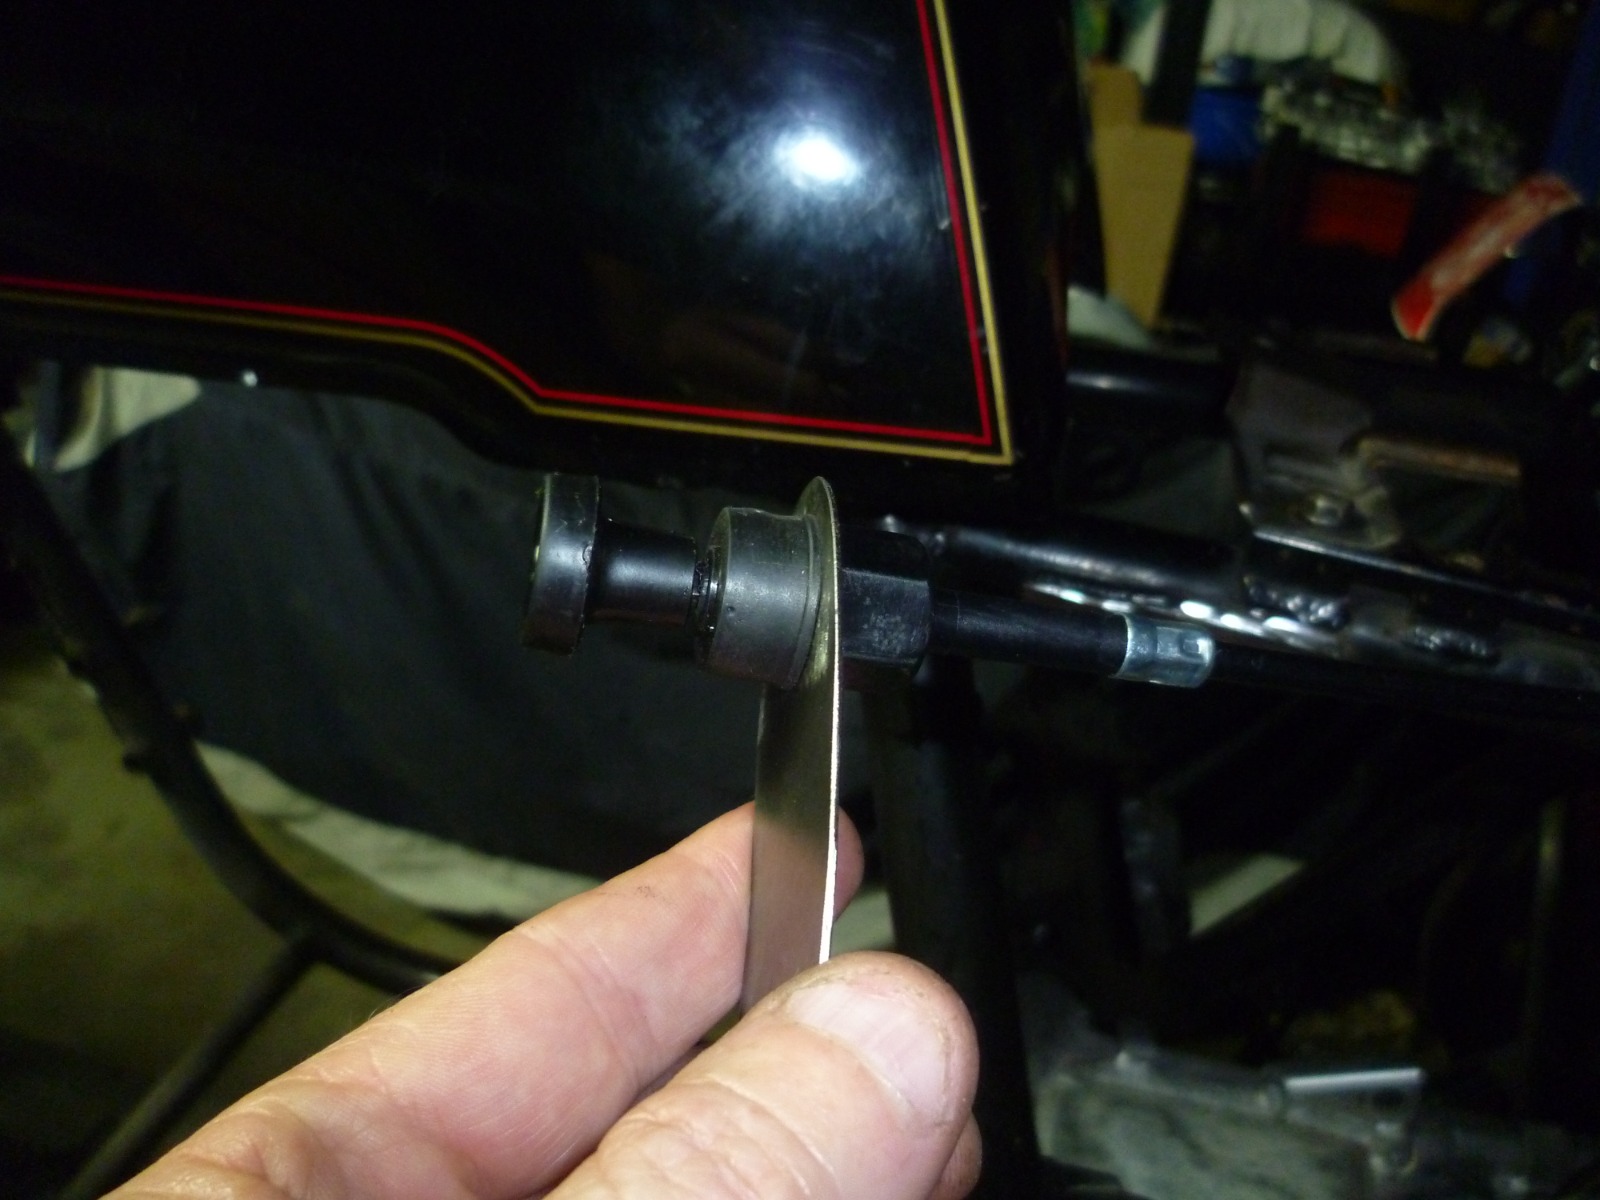
Well, some small advances to the bike. I had to work out a new seat latch, using the MKII tailpiece meant cutting off the handle to the seat latch. I decided to use a choke cable , I looked for a dedicated seat cable but they were all a bit to short, I needed something about 900mm long, so choke cable it is. I fabbed up a little cable clamp to hold the cable end under the seat using the corner of a piece of 25mm box steel, then used a cold chisel to create the bend that cradles the cable, ended up looking pretty good .
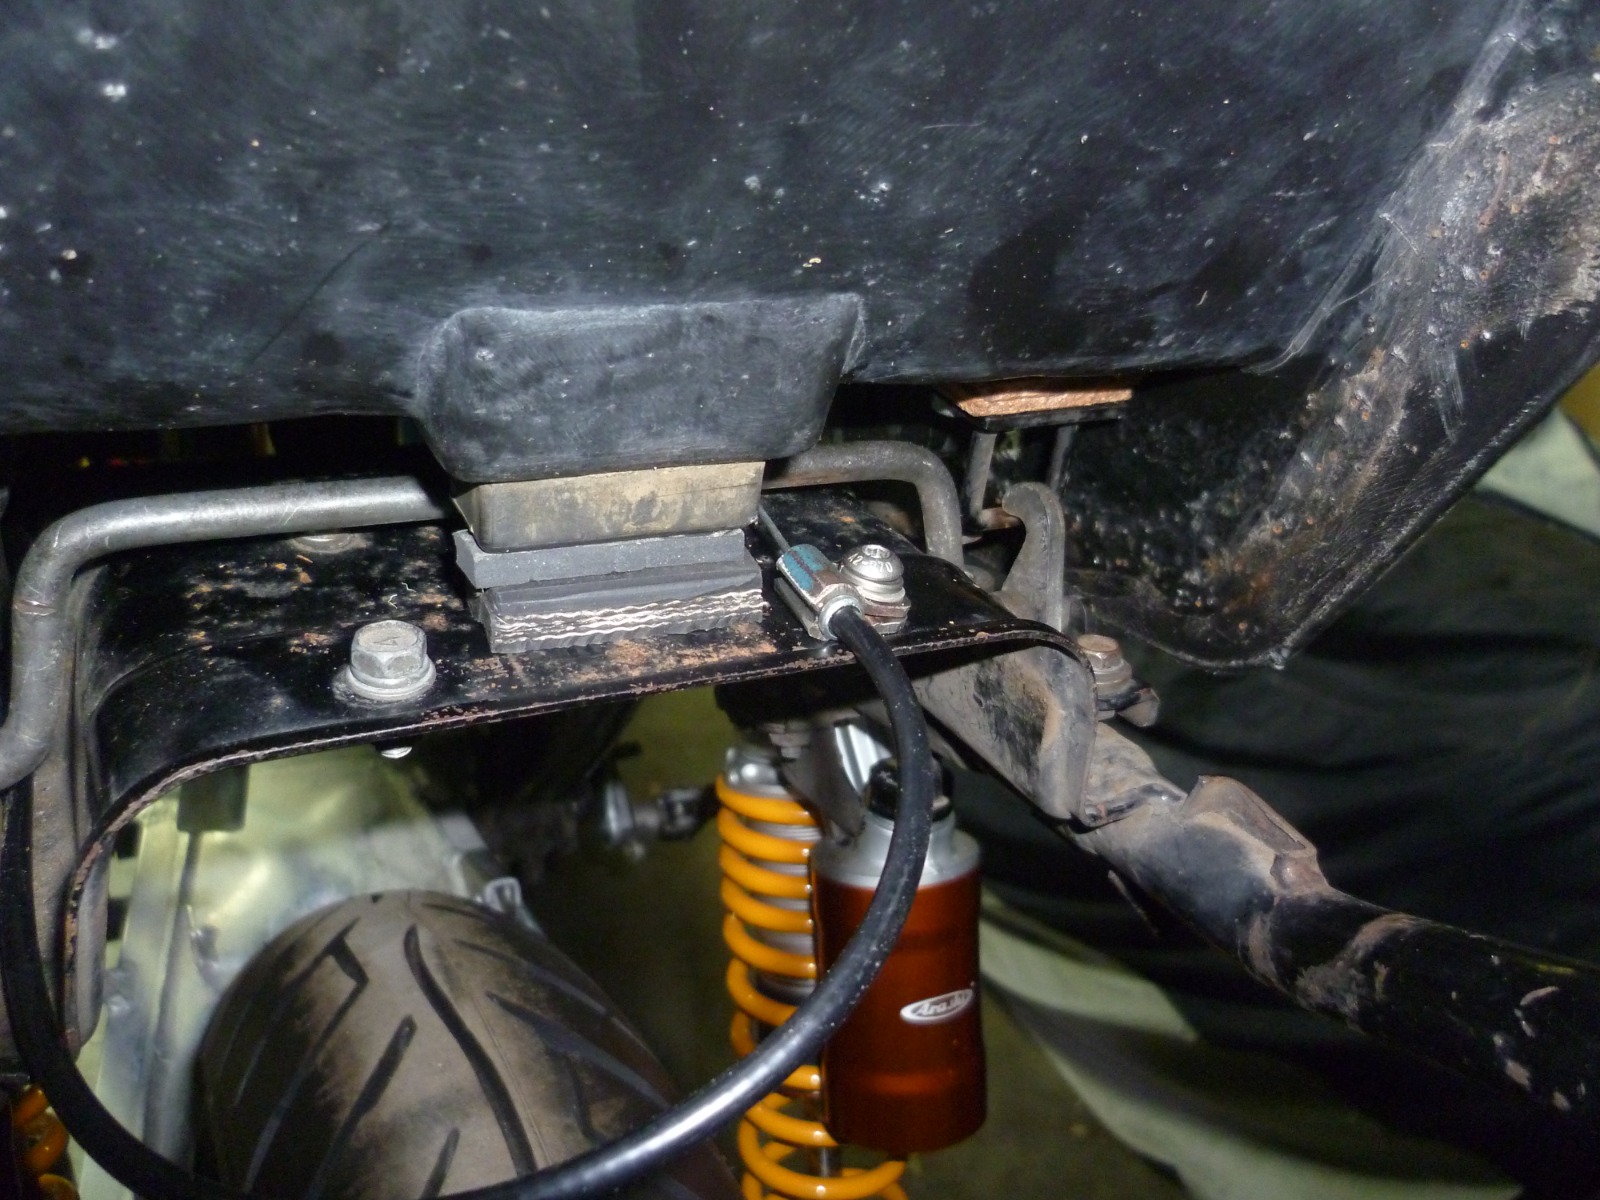
 I also made up some mounts to fit the tank, again I used some box tube, these were a bit fiddly but turned out ok, they are only tacked on and the gaps underneath will be filled and ground back into shape

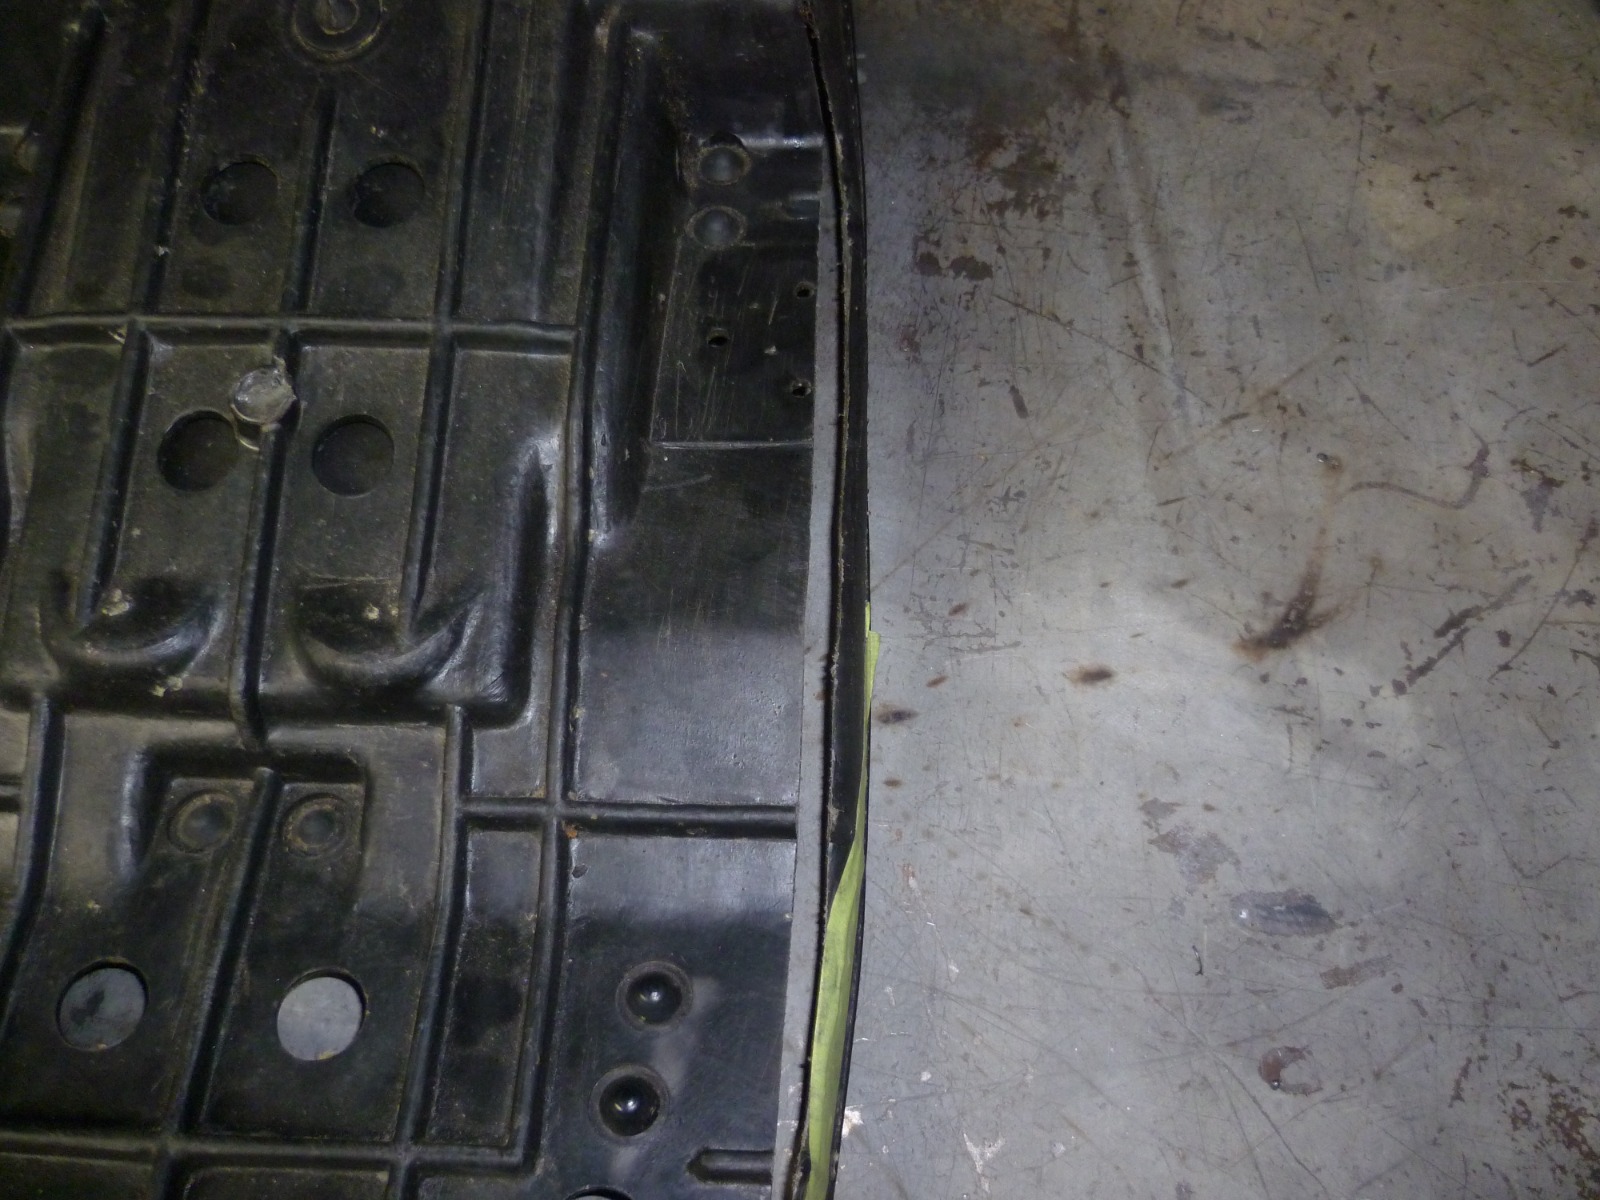
This is what I ended up doing to narrow the seat, its not much but makes a difference, it will be plastic welded back together...
I used some 3 ply pieces to work out where to mount the hooks under the seat for the latch, you move one thing and every thing else moves too...!!!
This is what I ended up doing to narrow the seat, its not much but makes a difference, it will be plastic welded back together...
I used some 3 ply pieces to work out where to mount the hooks under the seat for the latch, you move one thing and every thing else moves too...!!!
Last edit: 13 Sep 2021 16:28 by 750 R1.
Please Log in or Create an account to join the conversation.
- 750 R1
-
Topic Author
- Offline
- User
-
Registered
- Posts: 1150
- Thanks: 389
Re: Wayne Gardner tribute {not replica}
13 Sep 2021 16:45
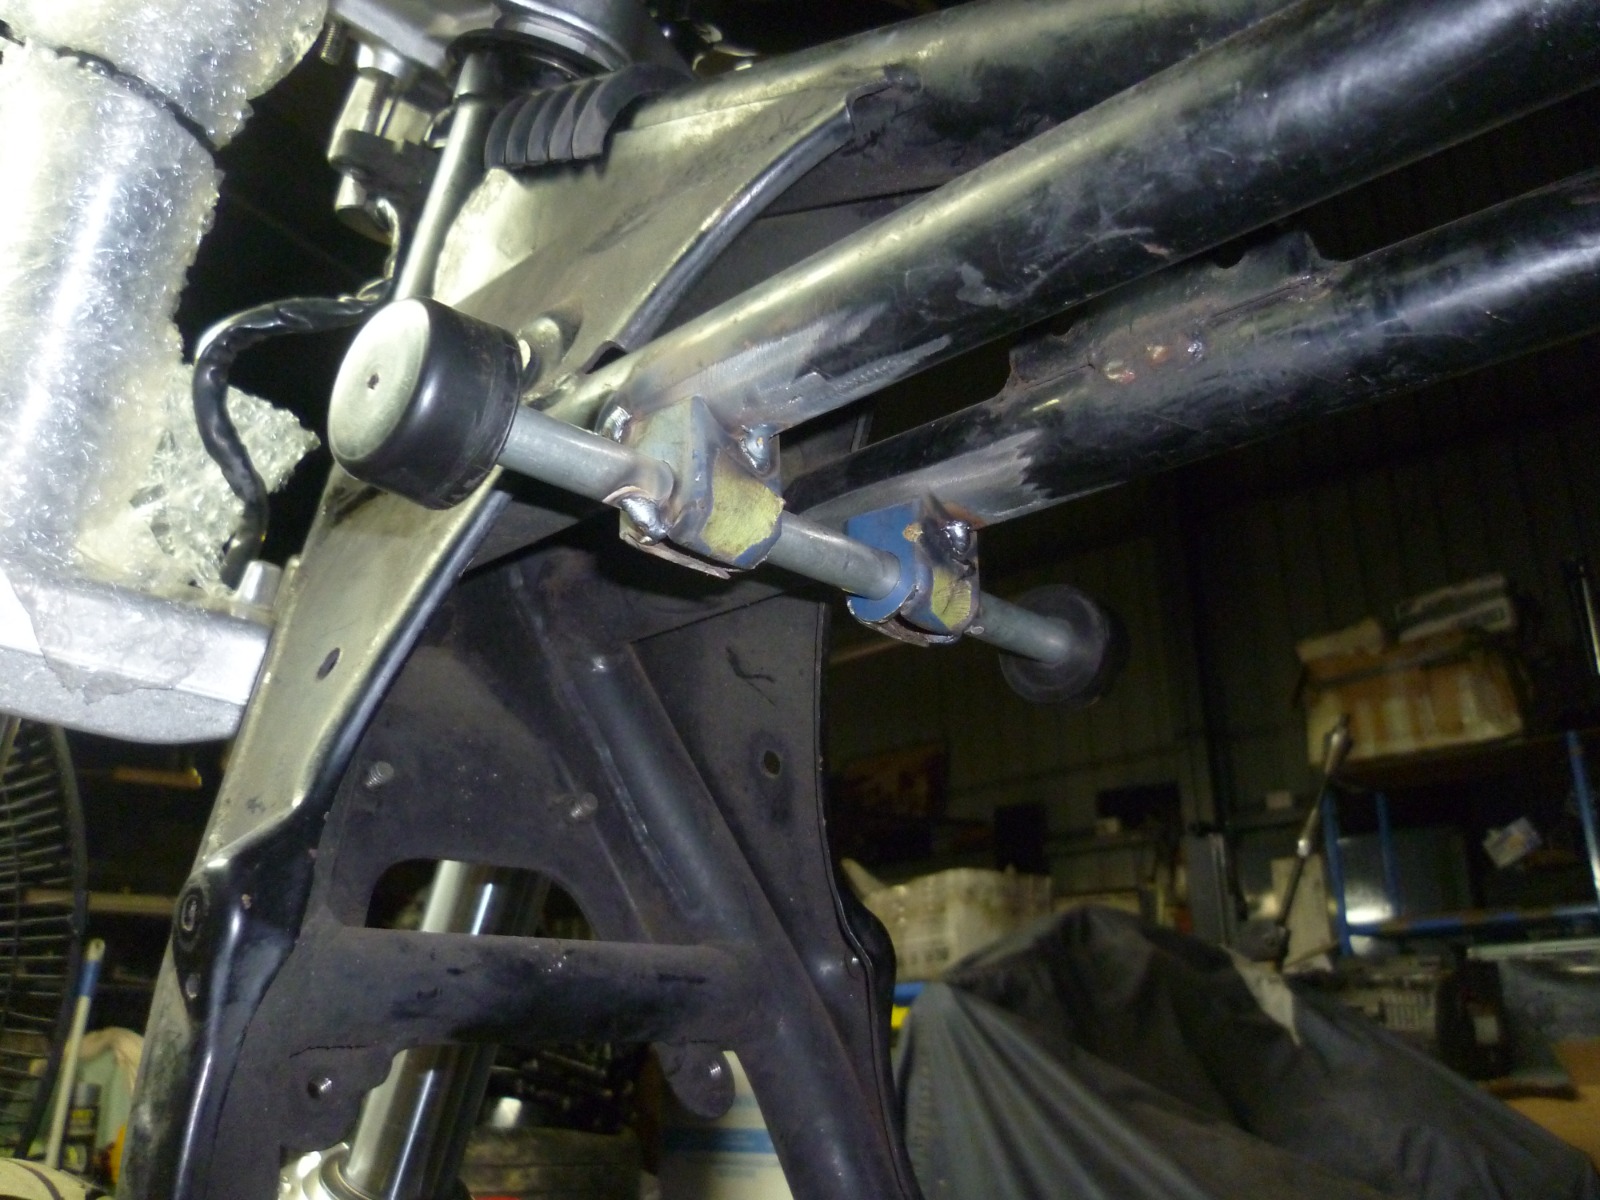
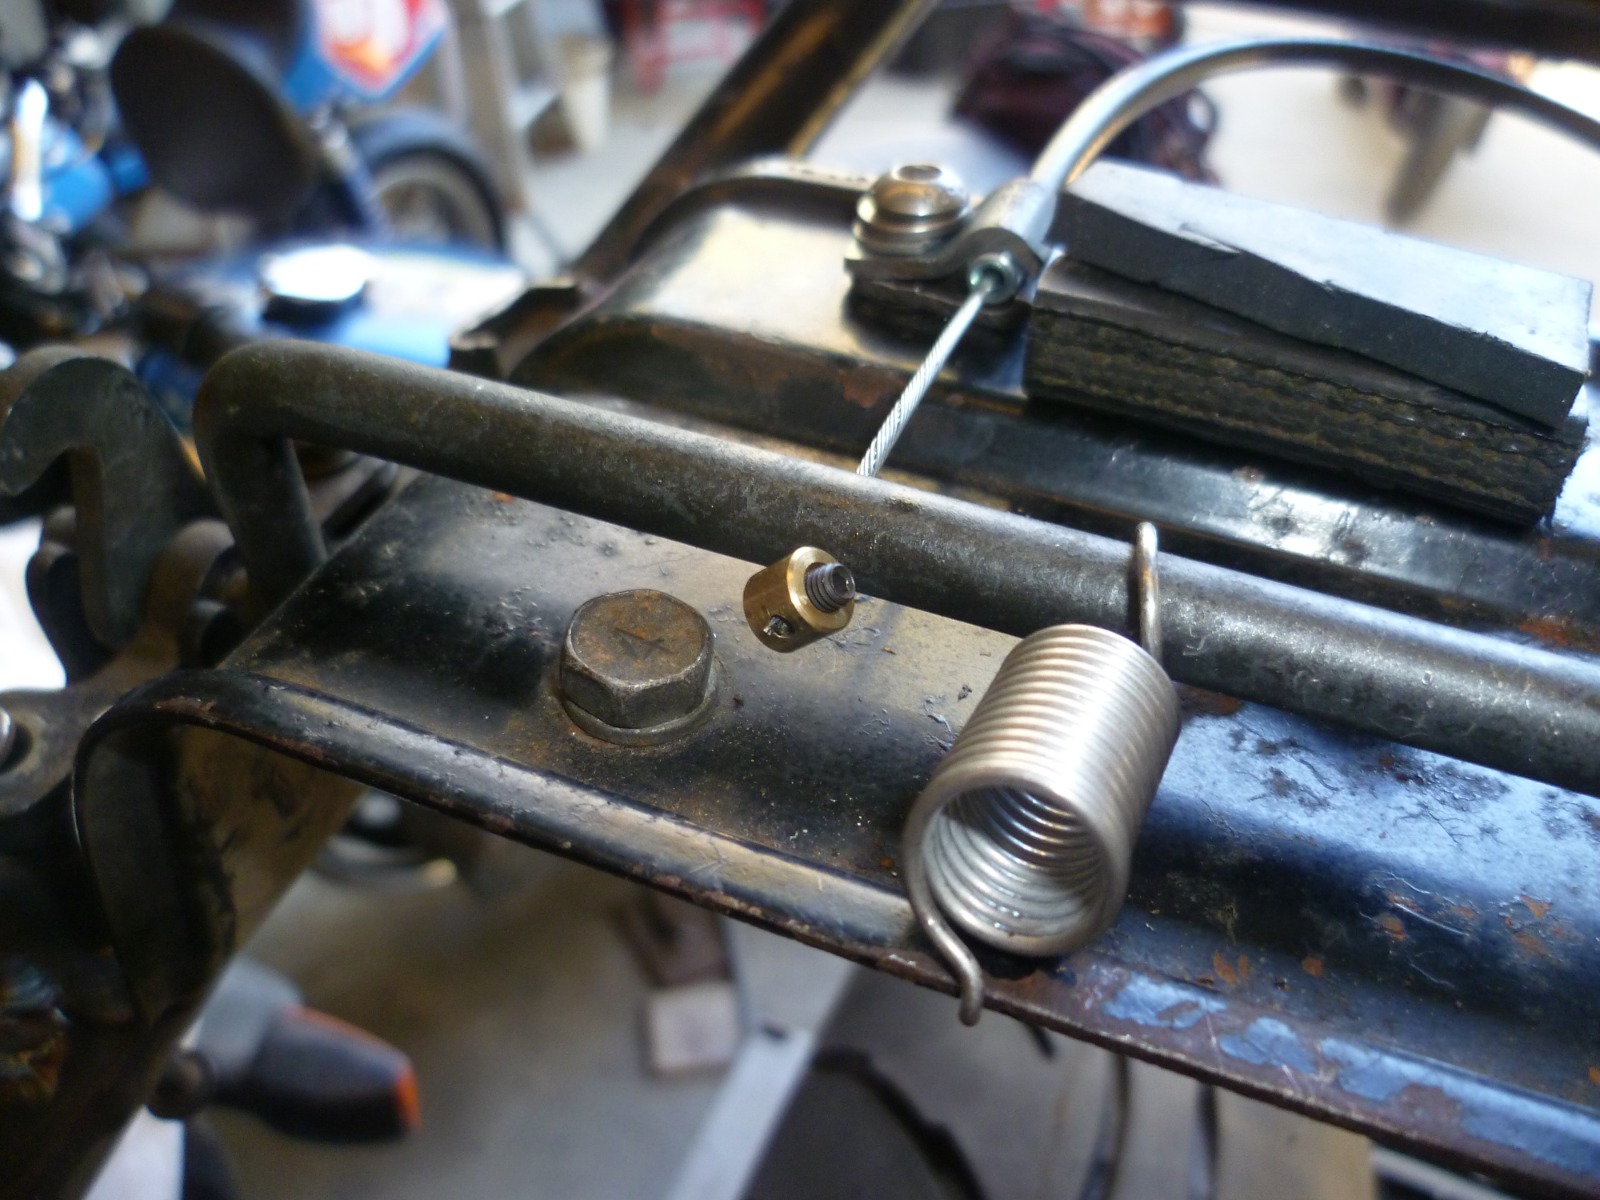
Fitted the rear sets to the frame. I used the original top footpeg mount for the bottom mount for the rear sets, I cut the threaded end off, drilled and tapped a hole so I could use some button head allen bolts to holt it on. For the top mount I used the other footpeg mount, I stuck it in the lathe, cut it down, machined the end own so it had a smaller diameter end on it, drilled and tapped the other end, drilled a hole in each side of the frame and welded them into the frame, I them made up 2 alloy pieces to go between the rear sets and the frame, again I am using 2 45mm long button head bolts to fix them to the frame, I have to make the top mounts removable because the needed to be notched to clear the swingarm pivot bolt. I think I'll make 2 alloy sleeves for the bottom mounts to match the top ones, just for looks, they are strong enough as they are but I think they'd look better, what do you think ?

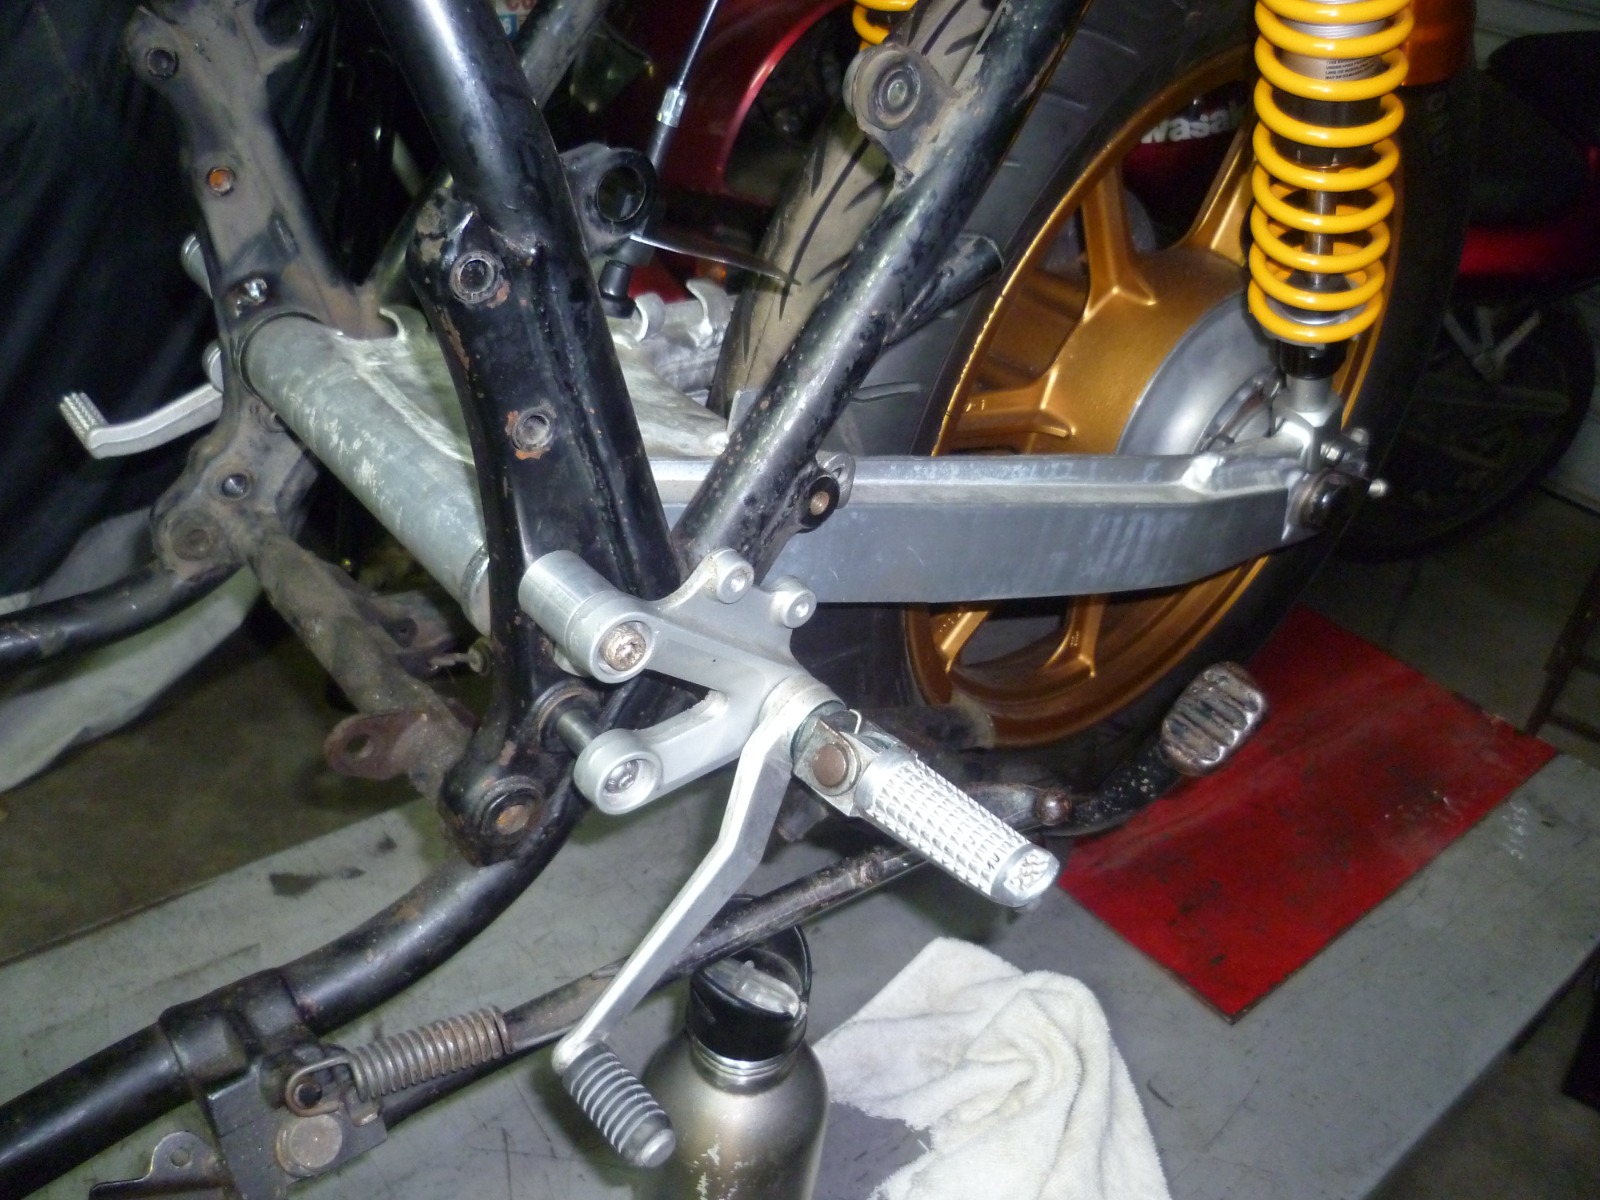
Nothing is completely welded on the frame yet, most of it is just tacked on, I also have a lot of un needed brackets to be cut off but I don't want to do that till I remove the front and rear suspensions, then I can take the frame outside and spray sparks till my hearts content !!
Still waiting on engine parts to arrive from the UK, my friend that's helping me get some harder to get parts had his Mother pass recently and its hit them pretty hard, No Will and family sh1t fight , so I don't mind waiting till he gets that all sorted....
I'd also like to apologise for the lack of detailed pics, I'm not used to documenting anything with pics and keep leaving the bloody camera at home, If anyone wants some more detailed pics, let me know and I'll see what I can do...
The following user(s) said Thank You: calum, ghostdive
Please Log in or Create an account to join the conversation.
- 750 R1
-
Topic Author
- Offline
- User
-
Registered
- Posts: 1150
- Thanks: 389
Re: Wayne Gardner tribute {not replica}
15 Sep 2021 03:18 - 15 Sep 2021 03:21
Finished off the cable connection to the seat lock, simple but effective..

Also made new tabs for the seat to latch down, first pic is the old tabs sitting in front of the new ones
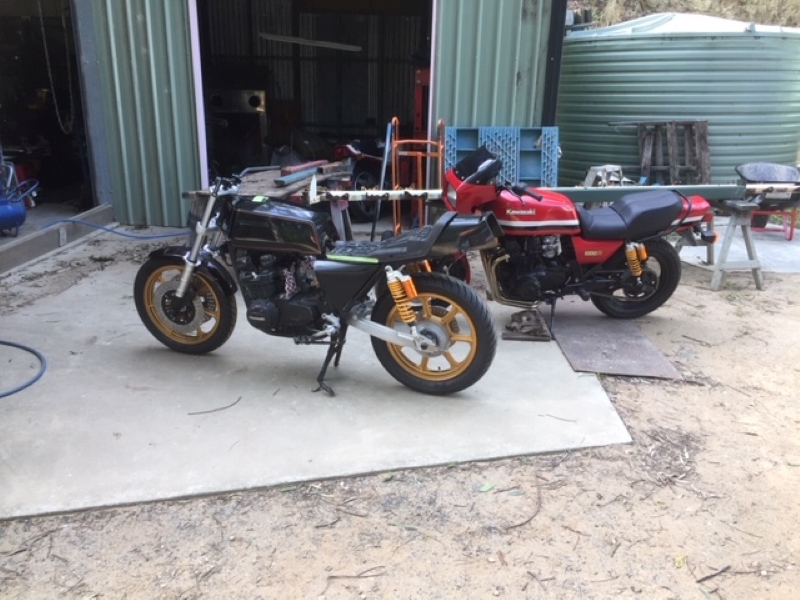
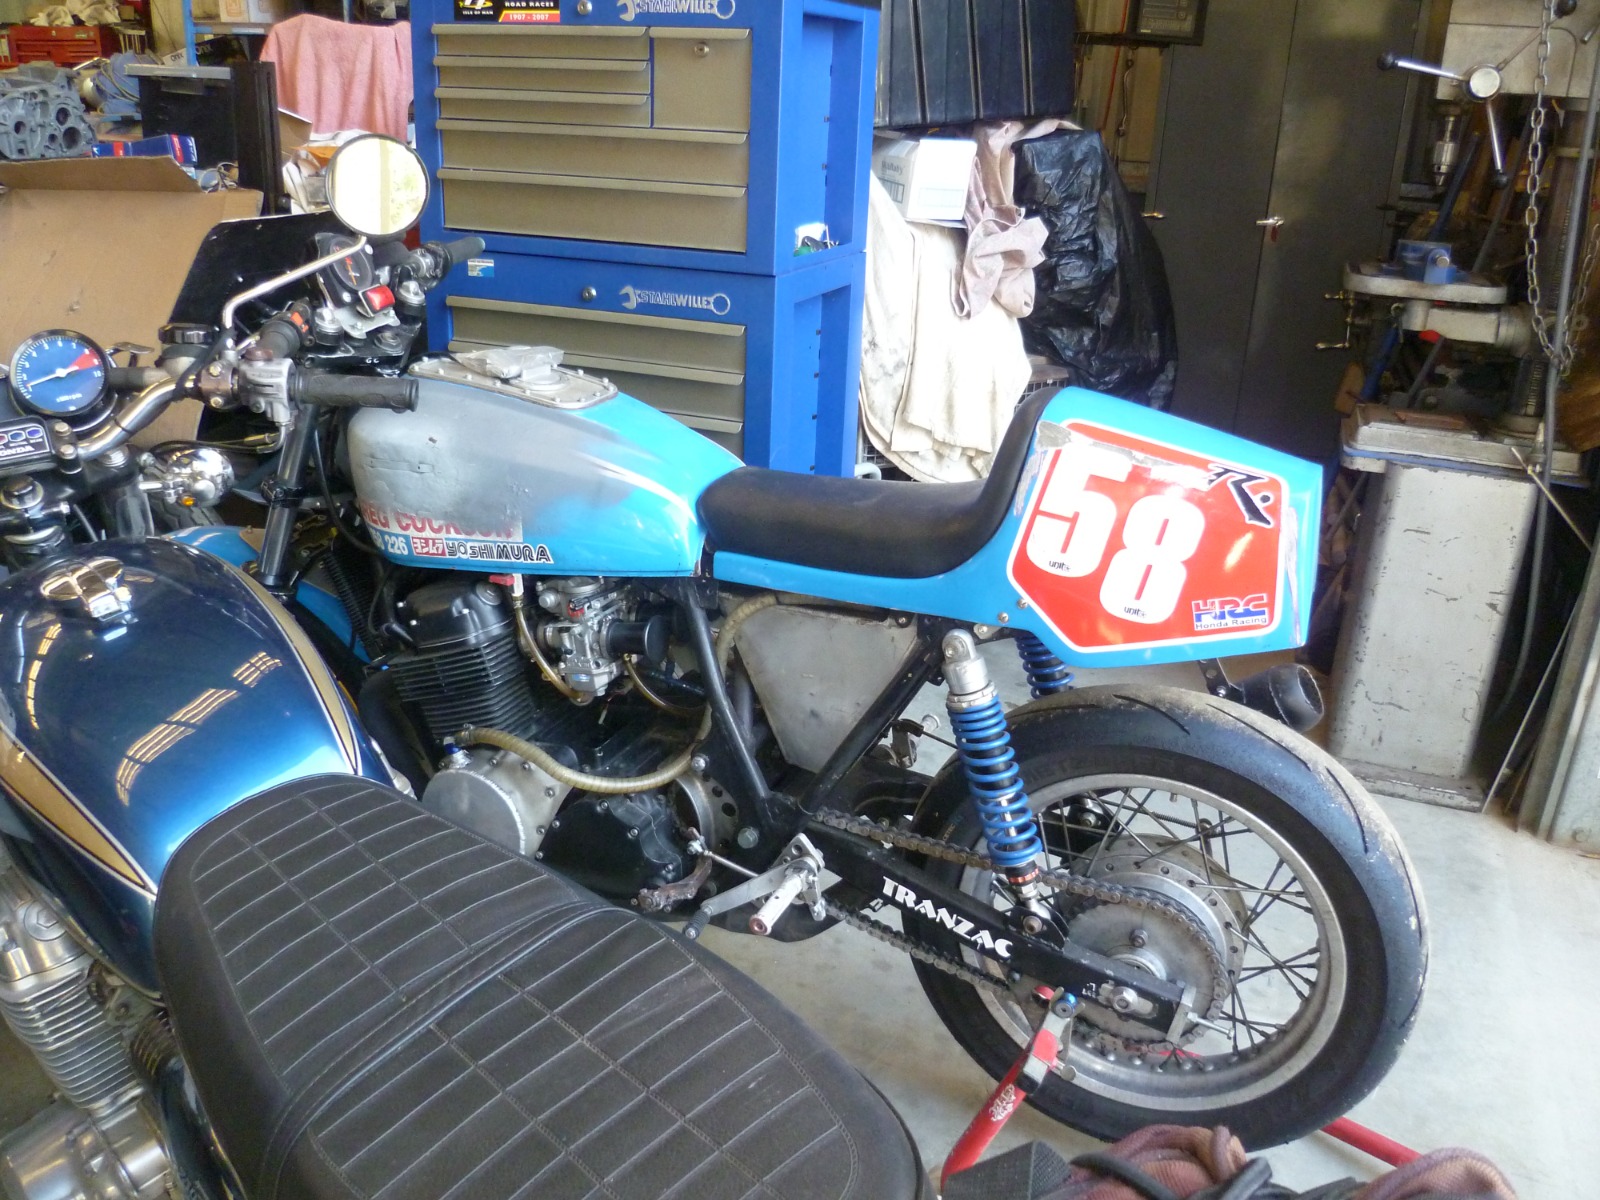
My Bikes in good company, these are just a couple of the bikes in my friends shop, what you can't see is a GT750 water bottle, a Rickman CB750, another couple of Honda 750/4 race bikes, a GPZ1100, and a few I've forgotten
Also made new tabs for the seat to latch down, first pic is the old tabs sitting in front of the new ones
My Bikes in good company, these are just a couple of the bikes in my friends shop, what you can't see is a GT750 water bottle, a Rickman CB750, another couple of Honda 750/4 race bikes, a GPZ1100, and a few I've forgotten
Last edit: 15 Sep 2021 03:21 by 750 R1.
Please Log in or Create an account to join the conversation.
- 750 R1
-
Topic Author
- Offline
- User
-
Registered
- Posts: 1150
- Thanks: 389
Re: Wayne Gardner tribute {not replica}
21 Oct 2021 16:18
I haven't taken any more pics, I always find a way to forget the bloody camera, I'd forget my head if it wasn't screwed on ! But there has been progress.
I made up alloy sleeves to match the top mount for the rear sets, they now look like they should. I've removed all the mounts for the side covers and cut out all new mounts to be welded on this coming week, I had to remove some material from the side covers and become a little industrious with fitment options. I also made up new steering stops.
I haven't yet decided on where or what ignition switch to use yet, mount it in the centre of the top clamp or somewhere else, I have to work out where the gauges will finally sit before making a final decision. I have the frame stripped bare at the moment while I mount everything up, I couldn't have made a harder path to a new bike but it is fun working out how to fit everything, my OCD makes it a little challenging but I'll survive... Pics next week....
Please Log in or Create an account to join the conversation.
- Wookie58
-

- Offline
- Moderator
-

Registered
- Posts: 6036
- Thanks: 3791
Re: Wayne Gardner tribute {not replica}
08 Nov 2021 05:39
Great looking bike and uniquely yours
1982 KZ1000 Ltd
www.kzrider.com/forum/11-projects/617631...-82-begins?start=192
kzrider.com/filebase-alias?view=download...d-fault-diagnosis&ca
www.kzrider.com/forum/11-projects/617631...-82-begins?start=192
kzrider.com/filebase-alias?view=download...d-fault-diagnosis&ca
The following user(s) said Thank You: 750 R1
Please Log in or Create an account to join the conversation.
Moderators: Street Fighter LTD