
Gradually turning rich..?
- Holraven
-
 Topic Author
- Offline
- User
-

Registered
- Posts: 8
- Thanks: 0
Gradually turning rich..?
16 Aug 2011 12:43
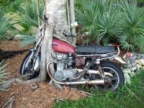
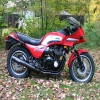
Hi! Got a new clutch cable for my KZ550C1 yesterday, so naturally I took it to work today. I haven't had the bike for more than three weeks or so, but there's definitely something fishy going on...
It seems the fuel mixture has gradually turned richer. The first days I drove some 600 kms without issues, though I noticed it wasn't too fond of your full choke when starting it. When starting from cold this morning, I had to turn the chocke down less than half way to get it running. It ran okay all the way to work, but when I went home it started gurgling at the end of the journey. It runs unevenly on idle - eventually it stops, and it "drowns" somewhat on throttle - clearly getting too much juice.
Now I am planning a serious overhaul this winter, so a carb or even (part) engine rebuild might be in store, but I'd really like to keep it running for the rest of the season without too much work. It seems to sweat a little from the cylinders, but not too bad. Uses a little oil, but nothing out of the ordinary for an old bike. When revving it in neutral I can't really notice anything unusual as far as I can tell - apart from the slight gurgle.
Simple things to try, anyone?
+Holraven+
Please Log in or Create an account to join the conversation.
- MFolks
-

- Offline
- User
-
Registered
- Posts: 6650
- Thanks: 541
Re: Gradually turning rich..?
16 Aug 2011 15:51
Many riders may think they have a carb problem when it may be an ignition problem causing the rich condition.
Sparkplug Cross Index (Tried another brand of sparkplug?Ive had New NGK's fail right out of the box)
www.gadgetjq.com/spark_plug_cross_reference_motorcycle.htm
Ignition Systems Testers(Use these to check the spark,it should be hot,fat,& blue)
www.lislecorp.com/divisions/products/?pr...ivision=1&category=8
www.lislecorp.com/divisions/products/?pr...ivision=1&category=8
Check the input side of the ignition coils(small wires side),it should be the same as battery voltage, if not, post back the readings.
Also do this:
Cleaning Motorcycle Electrics
Get some of the De-Oxit electrical contact cleaner and figure on spending a good day going from the front of the bike to the back. It’s a plastic safe cleaner/preservative. www.deoxit.com is their website.
On the older Kawasaki's, a majority of electrical connectors are inside the headlight housing requiring removal of the headlight, then the fun begins.
Do one set of electrical connectors at a time to avoid mixing up what connects to where. Usually disconnecting, spraying with De-Oxit and reconnecting is about all you'll need.
However, when encountering the green crud of corrosion, a brass wire brush may be needed on the pins you can reach.
Some 400-600 grit wet and dry sandpaper strips rolled into a tube should reach the male and female pins in the more difficult to clean connectors.
Smoker’s pipe cleaners, cotton swabs and wooden toothpicks work as cleaning aids.
Really small electrical connectors may require the use of a welders tip cleaning tool assortment.
Most pins in the connectors are coated with a thin plating of tin, and others may be nothing more than copper or brass.
If moisture is added, the resulting corrosion lowers the voltage/current being carried causing dim lights, slow engine cranking, slow turn signal responce and lower input voltage to the ignition coils resulting in weak spark.
The left and right handlebar switch pods will need attention too as they have circuit functions like turn, horn, run/stop, and start.
Usually a spritz or two with actuation of the switch is about all needed for these switches unless corrosion is detected and then careful disassembly is required.
The ignition switch may or may be not sealed to allow spraying the internal contacts. I urge caution if attempting to open this up as springs, and ball bearings may fly out never to be seen again!
If your bike has the older style glass tubed fuses, I suggest replacing them as vibration can cause internal failure. AGX is the type used, and most auto parts stores can get them for you.
Clean the fuse holder clips, looking for signs of overheating(discolored insulation, signs of melting).
I use metal polish on a cotton swab, followed by spraying another clean swab with the De-Oxit and then rubbing the inside of the fuse clip.
All battery cables must be clean and tight for maximum current transfer. Check the cables going from the Negative(-) battery terminal/post to the engine mounting bolt
Also the one going from the Positive(+) terminal to the starter solenoid and from there to the starter motor.
If any battery cable feels ”Crunchy” when flexed, replace it as possible corrosion is inside the insulation.
Each "Bullet Connector" will have to be sprayed to ensure good connectivity, especially the ones going to the energizing coil of the starter solenoid.
The alternator output “Bullet Connectors” are usually behind the engine sprocket cover and will need inspecting and cleaning too.
The turn signal light sockets will benefit from a spritz from the contact cleaner along with the tail light/brake light socket.
Some brake light switches can be sprayed on the actuating rod, with the spray running down inside to the electrical contacts, others may be sealed requiring replacement if the switch is intermittent in operation.
Some people put the Di-Electric Grease on cleaned terminations/connectors, I don’t, as I’ve read/heard it can cause problems when it gets hot, actually insulating the connections, so the choice is yours to use or not.
I think I've covered about all of the electrical systems on the bike.........
1982 GPZ1100 B2
General Dynamics/Convair 1983-1993
GLCM BGM-109 Tomahawk, AGM-129A Advanced Cruise Missile (ACM)
General Dynamics/Convair 1983-1993
GLCM BGM-109 Tomahawk, AGM-129A Advanced Cruise Missile (ACM)
The following user(s) said Thank You: Holraven
Please Log in or Create an account to join the conversation.
- Holraven
-
Topic Author
- Offline
- User
-
Registered
- Posts: 8
- Thanks: 0
Re: Gradually turning rich..?
16 Aug 2011 16:21
Cor! That's a hefty to-do-list! Makes sense though, and I actually just came in from changing the main fuse to a modern flat type, as it blows more than occasionally when engaging the starter. I'll have fun with wiring in the winter... Thanks!
I have however discovered something else; it's not the mixture that's causing the hiccups, it actually runs on three cylinders, more or less. Number four exhaust barely gets hot when idling for five minutes, the others burn my fingers off. This one isn't electric though, I checked the plug and it was sparking clear and proper. So I fear it's down to carbs anyhow, like a stuck floater or something... Thankful for further tips!
+H+
Please Log in or Create an account to join the conversation.
- MFolks
-
- Offline
- User
-
Registered
- Posts: 6650
- Thanks: 541
Re: Gradually turning rich..?
16 Aug 2011 16:28
Check this procedure for testing the ignition coils(the 550's,650's, & 750's are toward the bottom)
Ignition Coil Primary And Secondary Wiring
Ignition coils on the 80’s Kz1000,Kz1100’s and Gpz1100’s are wired the same, that is as you sit on the bike, the LEFT ignition coil primary(small wires) are two wires, RED and BLACK. The secondary (or sparkplug wires) go to #1 and #4 sparkplugs(your primary wiring may be different).
The cylinders are numbered left to right as you sit on the seat; #1,#2,#3, and #4.
For the RIGHT ignition coil, the primary wires, again are two wires, RED and GREEN, with the secondary going to #2 and #3.
The RED wire gets it’s voltage from the run/stop switch on the right handlebar switch pod. Your primary wiring may have a different color.
The BLACK and GREEN wires connect to the IC Igniter(if the bike has the Kawasaki supplied electronic ignition) it actually gives the coils their grounds to fire the sparkplugs.
Primary(small wires) side of the coils will read between 1.8 to 3.0 ohms.
Secondary(sparkplug wire ports)side of the coil will read between 10.4K to 15.6K ohms. These ports are wired together, so it makes no difference which is used, as long as the correct coil to sparkplug configuration is followed.
The sparkplug caps should read 5K OHMS(5000), any higher, or a reading of infinity means new caps should be ordered.
To stress the ignition coils, take a hair dryer, heat the coils and see if the ohm readings change from cold to hot . If they do, it’s time to buy new coils.
Keep in mind, the wiring is reversed for the 550’s 650‘s and 750‘s, that is the RIGHT coil primary will be two wires, RED and BLACK with the secondary(sparkplugs) going to #1 and #4.
The LEFT coils primary wiring would be again two wires, RED and GREEN, with the secondary(sparkplugs) going to #2 and #3.
These engines have what is known as a “Wasted Spark” that is, a sparkplug will fire during an exhaust stroke. It does no damage and many other motorcycle engines have this design.
1982 GPZ1100 B2
General Dynamics/Convair 1983-1993
GLCM BGM-109 Tomahawk, AGM-129A Advanced Cruise Missile (ACM)
General Dynamics/Convair 1983-1993
GLCM BGM-109 Tomahawk, AGM-129A Advanced Cruise Missile (ACM)
Please Log in or Create an account to join the conversation.
- Patton
-

- Offline
- KZr Legend
-

Registered
- Posts: 18567
- Thanks: 2103
Re: Gradually turning rich..?
16 Aug 2011 19:41
Could try leaner pilot circuits by turning each pilot air screw counter-clockwise, say 1/2 turn, and see if that makes any difference.
Good Fortune!")
Good Fortune!
1973 Z1
KZ900 LTD
KZ900 LTD
Please Log in or Create an account to join the conversation.
- moneypit
-
- Offline
- User
-
Registered
- Posts: 389
- Thanks: 35
Re: Gradually turning rich..?
16 Aug 2011 23:10
Hey guys K.I.S.S
keep it simple stu@*&
Check your air filter to, if it s plugged it will do that too. But you still have carb issues with that dead cylinder. So follow Pattons advise as well. Good luck
keep it simple stu@*&
Check your air filter to, if it s plugged it will do that too. But you still have carb issues with that dead cylinder. So follow Pattons advise as well. Good luck
2-76 kz900
St Paul MN
St Paul MN
Please Log in or Create an account to join the conversation.
- Holraven
-
Topic Author
- Offline
- User
-
Registered
- Posts: 8
- Thanks: 0
Re: Gradually turning rich..?
17 Aug 2011 10:45
Oh well, this might be a bigger issue... :blink:
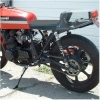
I had a look at the carbs today, first attempt resulted in carb #3 constantly flooding, 2nd attempt seemed to help. Getting those carbs off, not to mention back ON is tight, though. Forget tight, that would be an insult to all things tight (including yo' mama). It was a downright PAIN. But I got it back together, and I've been driving for two hours more or less straight. Still gets fuzzy when warm, smells a bit of oil - and it has started using a SIGNIFICANT amount of it. Cyl #4 is not at it's peak, and when cruising at 4000 rpm it sounds like an old beetle. So I'm guessing #4 has lost compression and sucks up oil - if that makes sense?
Too bad I got two hours back home as well...
+Holraven+
Please Log in or Create an account to join the conversation.
- loudhvx
-
- Offline
- KZr Legend
-
Registered
- Posts: 10863
- Thanks: 1622
Re: Gradually turning rich..?
17 Aug 2011 11:10
Before messing with carbs and electrical (it should not be blowing fuses), you should do a compression test and check valve clearance. There is a manual in my signaure, and a bunch of details on the valve timing. It has a very important warning regarding the valve cover and cam chain tensioner.
1981 KZ550 D1 gpz.
Kz550 valve train warning.
Other links.
Kz550 valve train warning.
Other links.
Please Log in or Create an account to join the conversation.
- Polar_Bus
-
- Offline
- User
-
Registered
- Posts: 256
- Thanks: 7
Re: Gradually turning rich..?
17 Aug 2011 13:17 - 17 Aug 2011 13:19Holraven wrote: Hi! Got a new clutch cable for my KZ550C1 yesterday, so naturally I took it to work today. I haven't had the bike for more than three weeks or so, but there's definitely something fishy going on...
It seems the fuel mixture has gradually turned richer. The first days I drove some 600 kms without issues, though I noticed it wasn't too fond of your full choke when starting it. When starting from cold this morning, I had to turn the chocke down less than half way to get it running. It ran okay all the way to work, but when I went home it started gurgling at the end of the journey. It runs unevenly on idle - eventually it stops, and it "drowns" somewhat on throttle - clearly getting too much juice.
Now I am planning a serious overhaul this winter, so a carb or even (part) engine rebuild might be in store, but I'd really like to keep it running for the rest of the season without too much work. It seems to sweat a little from the cylinders, but not too bad. Uses a little oil, but nothing out of the ordinary for an old bike. When revving it in neutral I can't really notice anything unusual as far as I can tell - apart from the slight gurgle.
Simple things to try, anyone?
+Holraven+
Do you have stock OEM jetting ? Verify your air screws are set correctly (should be about 1.5 turns CCW from seated). You could have a bad carb needle passing extra raw fuel choking off one cylinder. Do you have a temp gun to measure the exhaust header pipe temps ? This is a quick easy test to isolate a suspect cylinder.
If your air screws are too rich your idle over time will slowly decrease. If your too lean your idle with surge up and down unevenly.
Bikes:
'84 GPz1100
'06 HD Fatboy
'84 GPz1100
'06 HD Fatboy
Last edit: 17 Aug 2011 13:19 by Polar_Bus.
Please Log in or Create an account to join the conversation.
- Holraven
-
Topic Author
- Offline
- User
-
Registered
- Posts: 8
- Thanks: 0
Re: Gradually turning rich..?
18 Aug 2011 17:34 - 18 Aug 2011 17:36
Will do a compression test as soon as I get the chance. Just need to find someone with the right equipment. If I'm feeling brave I might try to understand the mystery of "valves" as well. Complicated little buggers. :laugh:
I haven't fooled around with the jetting, but I have no idea what previous owners may have done. I don't have a temp gun, but a one minute idle from cold reveals a stark differance between #4 and the three others, I can touch it no problem while the three others burn my skin off.
I drove the bike to work today as well, and I'm gathering more tidbits of information: Firstly, it doesn't use as much oil as I initially feared. Second, when I run it at stable speed, say 80-90 kph, it runs smoothly. When I slow down, however, it starts coughing and spitting like an old pirate. I wonder if it actually overheats when I'm running it slow? Though that would indicate lean mix, right? And it sure as hell don't run any better with the choke turn on - neither full nor half way.
So it starts fairly easy, it's charmingly rough when cold, runs okay when heating up, and runs lke crap at its hottest. When it's warm, it seems to work the best in midrange with very light throttle use, it gets an asthma attack if I floor it.
+Holraven+
Last edit: 18 Aug 2011 17:36 by Holraven. Reason: iPad spelling errors...
Please Log in or Create an account to join the conversation.
Moderators: Street Fighter LTD