
Rebuild of KZ1000J engine
- Jonas_Z1000j
-
 Topic Author
- Offline
- User
-

Registered
- Posts: 94
- Thanks: 31
Rebuild of KZ1000J engine
20 Jul 2022 00:37 - 20 Jul 2022 06:52
Hi!
My bike has had this mysterious rattle now for a couple of years (since I bought it). I have read hundred of threads here and done all the tune up things to it, but with no effect on the rattle. The cam chain tensioner sits to far in (3 mm left on the wedge) so my assumption now is that the cam chain is stretched to much. Bike has 70 000 Km on the odo.
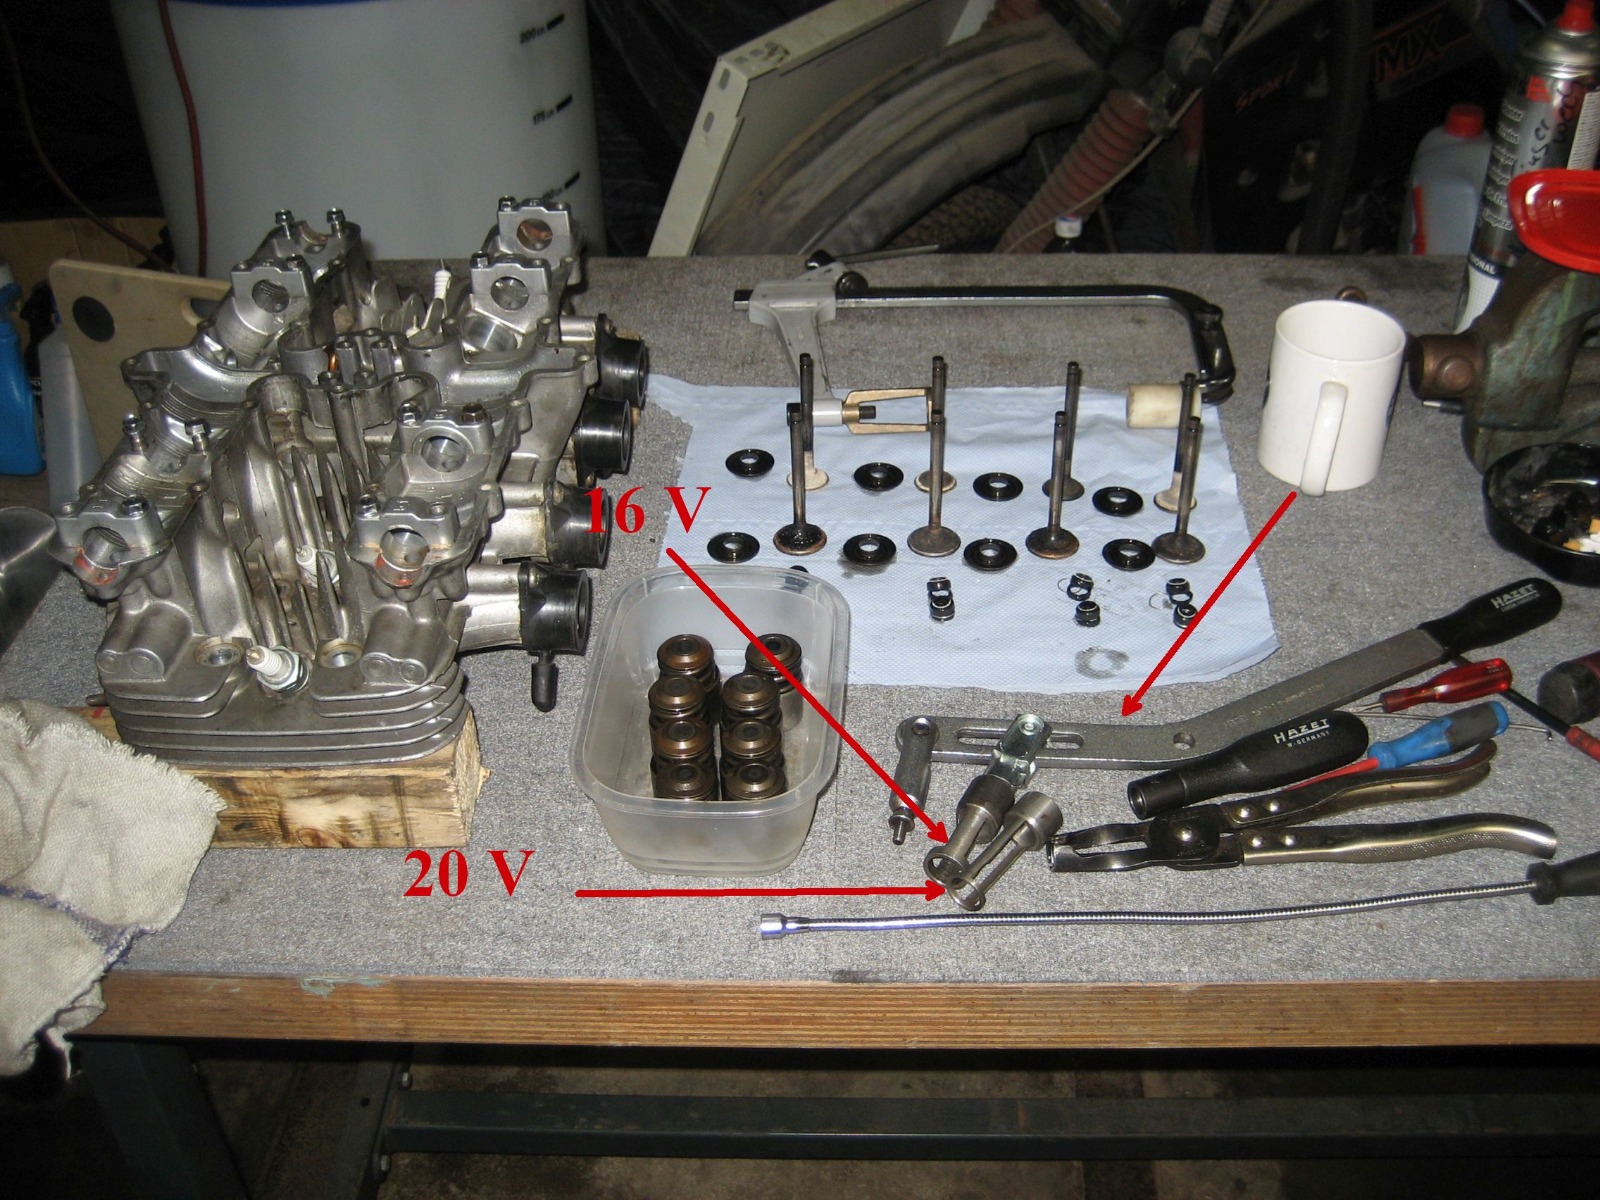
My plan is to change the cam chain and its guides. New valve seals and lap the valves (depending on condition) and get the bores measured to decide what to do there (rings/hone or new pistons/bore).
So I started pulling the engine the other day and have begun working with the head.
Before I pulled the engine I did a cold compression test. Result was (in Bar): 1: 11.6, 2: 10.1, 3: 10, 4:11,4. With a little oil all cylinders had around 11,5.
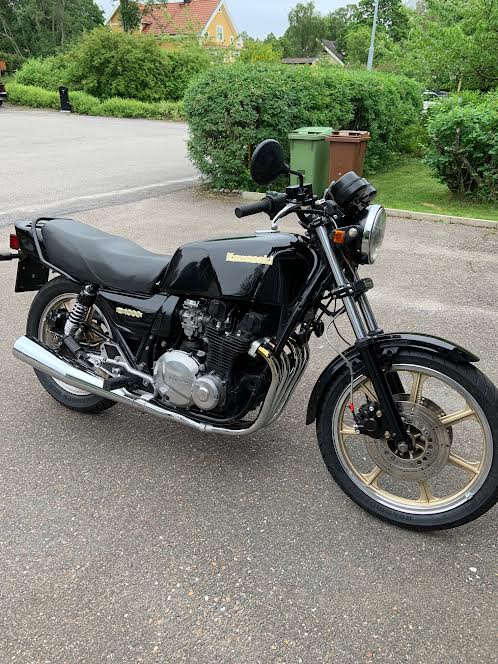
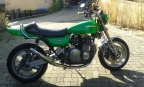
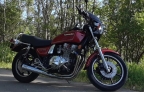
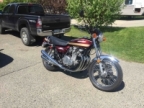
Picture of bike before I began removing engine:
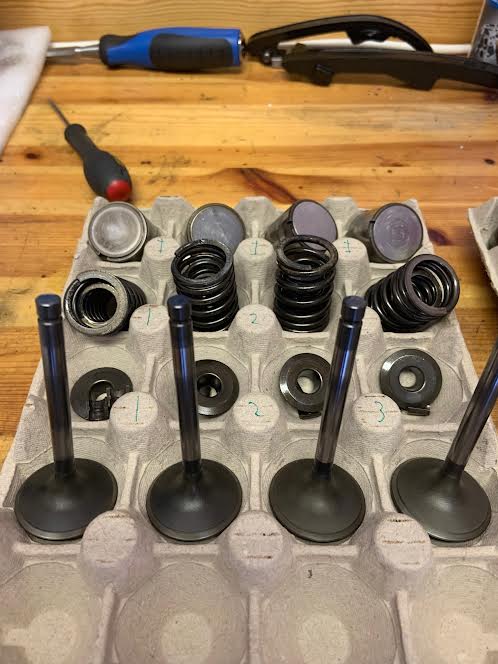
Intake valves looks nice?
Question: 2 of the exhaust valves, cyl 2-3, has this glazing that the wire wheel dont remove:
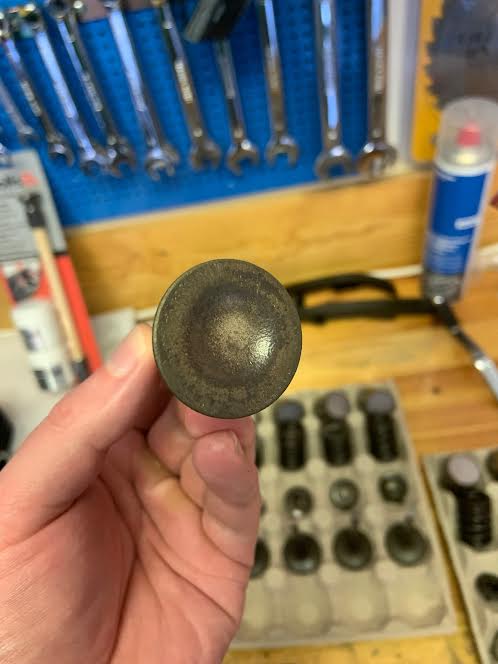
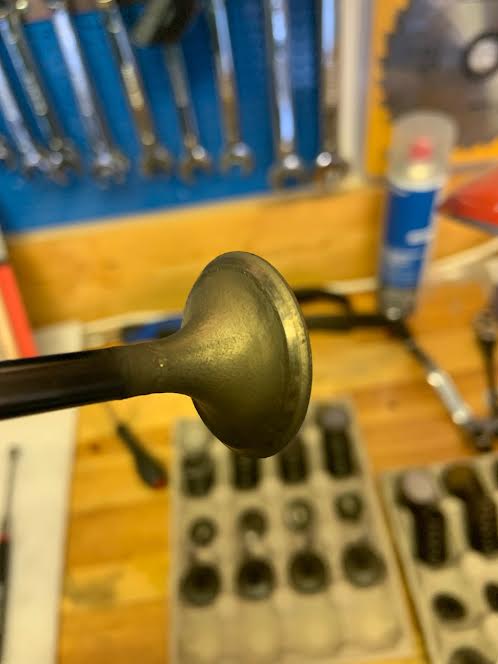
What do you think about the condition of these? Maybe normal that cyl 2-3 is warmer?
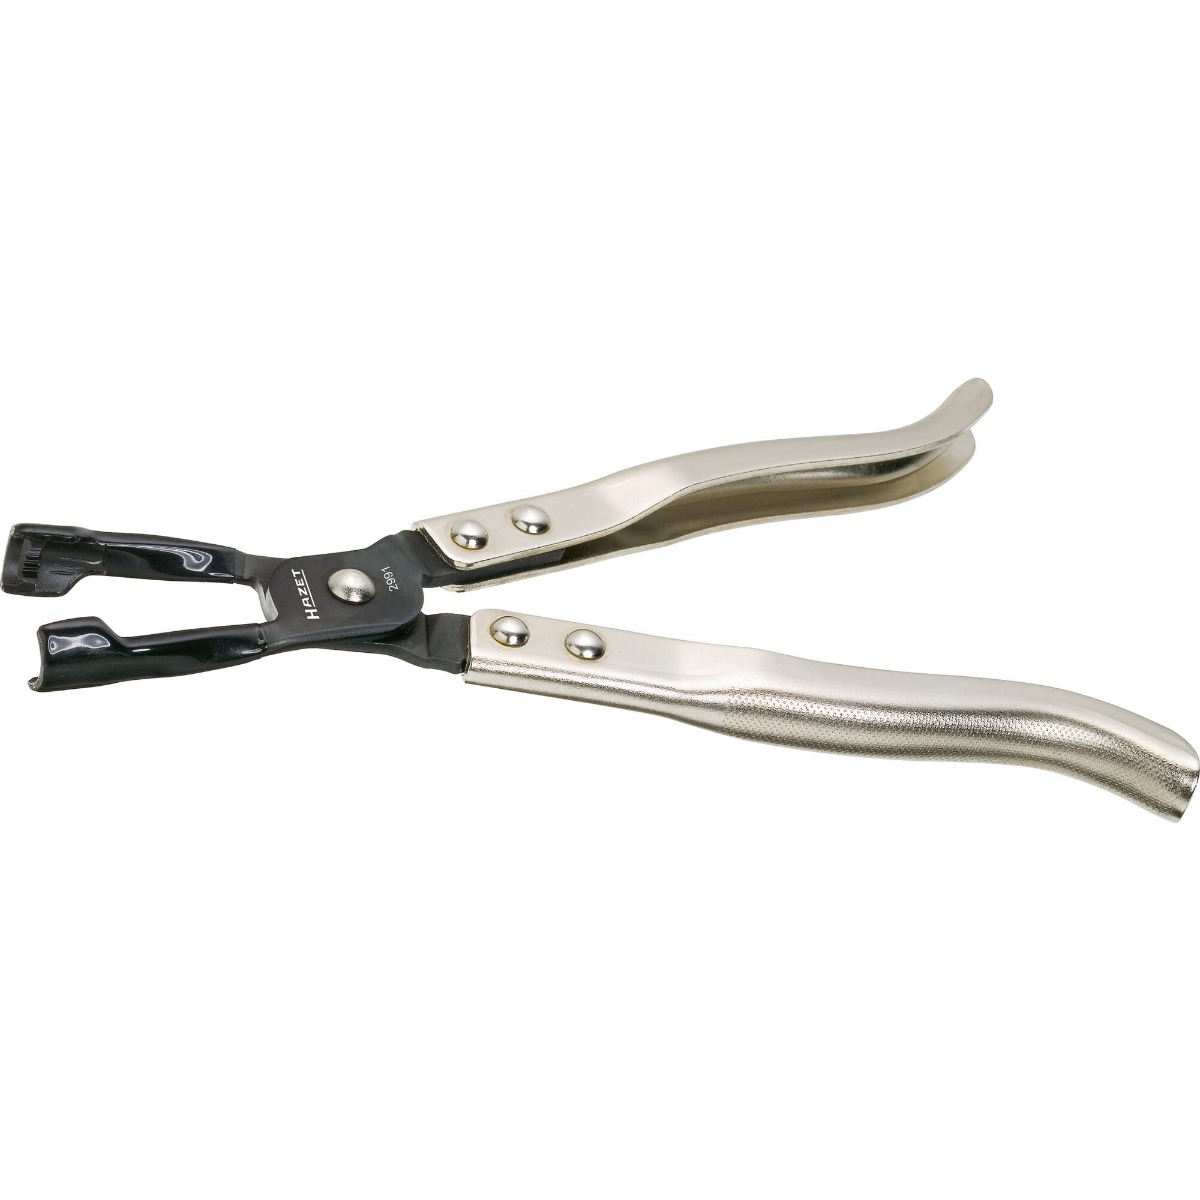
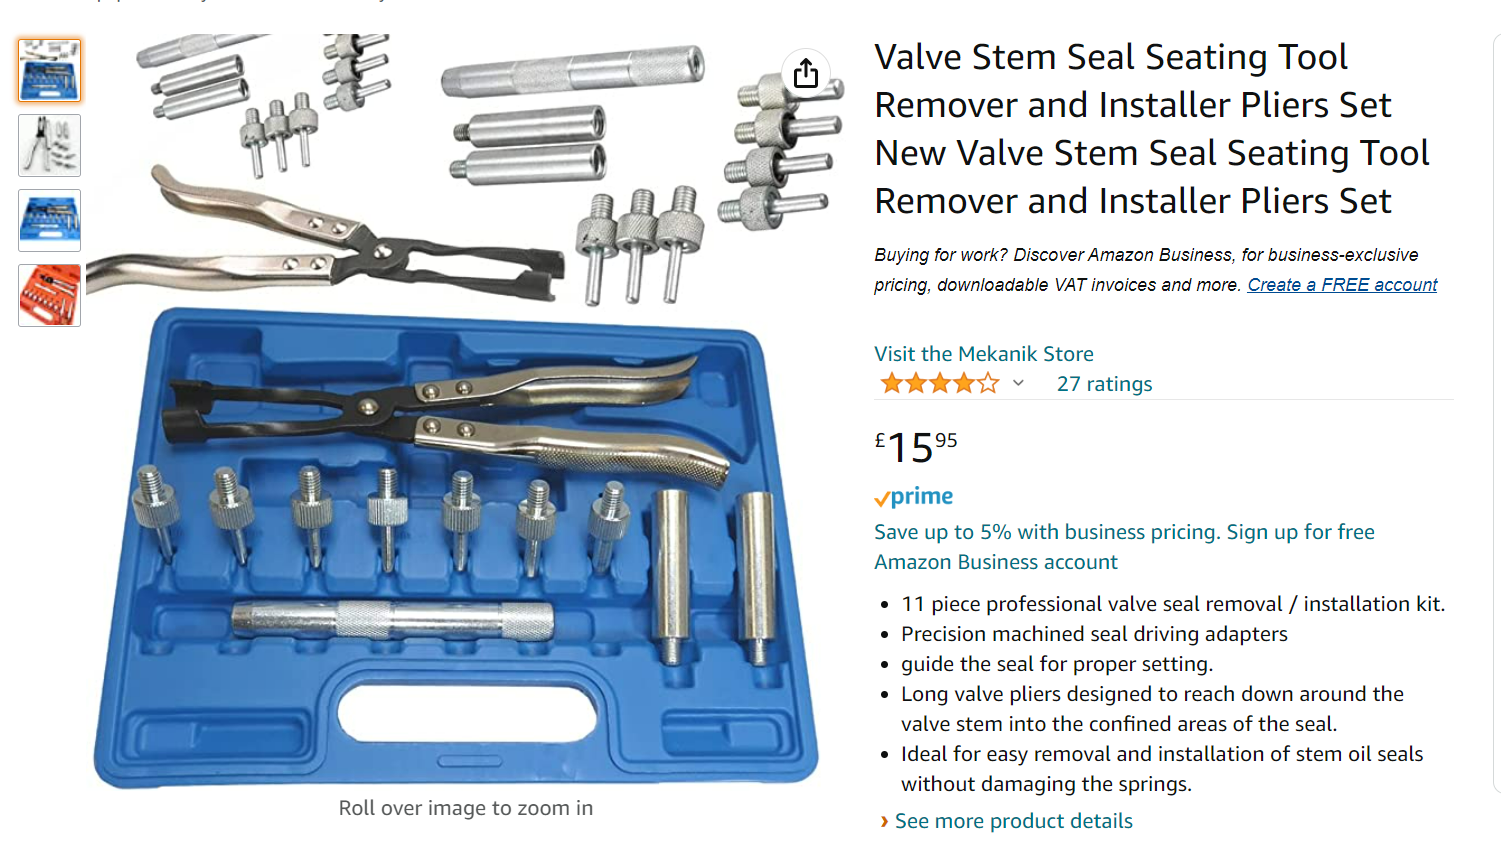
Another question, how do you remove the valve seals without damaging the guides with a plier or similar?
I should mention that this is my first engine rebuild.
Thanks!
/Jonas
My bike has had this mysterious rattle now for a couple of years (since I bought it). I have read hundred of threads here and done all the tune up things to it, but with no effect on the rattle. The cam chain tensioner sits to far in (3 mm left on the wedge) so my assumption now is that the cam chain is stretched to much. Bike has 70 000 Km on the odo.
My plan is to change the cam chain and its guides. New valve seals and lap the valves (depending on condition) and get the bores measured to decide what to do there (rings/hone or new pistons/bore).
So I started pulling the engine the other day and have begun working with the head.
Before I pulled the engine I did a cold compression test. Result was (in Bar): 1: 11.6, 2: 10.1, 3: 10, 4:11,4. With a little oil all cylinders had around 11,5.
Picture of bike before I began removing engine:
Intake valves looks nice?
Question: 2 of the exhaust valves, cyl 2-3, has this glazing that the wire wheel dont remove:
What do you think about the condition of these? Maybe normal that cyl 2-3 is warmer?
Another question, how do you remove the valve seals without damaging the guides with a plier or similar?
I should mention that this is my first engine rebuild.
Thanks!
/Jonas
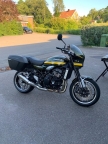
Z1000 J2 -82 not so running restoration object anymore
Z900RS -21 Green/Yellow
Z900RS -21 Green/Yellow
Last edit: 20 Jul 2022 06:52 by Jonas_Z1000j.
Please Log in or Create an account to join the conversation.
- Scirocco
-
- Offline
- Premium Member
-

Registered
- Never change a running system
- Posts: 4397
- Thanks: 2260
Re: Rebuild of KZ1000J engine
20 Jul 2022 02:47 - 20 Jul 2022 02:50
This is the special plier for pulling out the valve seals.
My 1975 Z 1 B 900 Project
www.kzrider.com/forum/11-projects/605133...ears-deep-sleep-mode
www.kzrider.com/forum/11-projects/605133...ears-deep-sleep-mode
Last edit: 20 Jul 2022 02:50 by Scirocco.
The following user(s) said Thank You: Mikaw, howardhb, Jonas_Z1000j
Please Log in or Create an account to join the conversation.
- Wookie58
-

- Away
- Moderator
-

Registered
- Posts: 6450
- Thanks: 4079
Re: Rebuild of KZ1000J engine
20 Jul 2022 02:54
Something like this will get it done without breaking the bank and it comes with drifts to fit the new seals
1982 KZ1000 Ltd
www.kzrider.com/forum/11-projects/617631...-82-begins?start=192
kzrider.com/filebase-alias?view=download...d-fault-diagnosis&ca
www.kzrider.com/forum/11-projects/617631...-82-begins?start=192
kzrider.com/filebase-alias?view=download...d-fault-diagnosis&ca
The following user(s) said Thank You: Mikaw, Jonas_Z1000j
Please Log in or Create an account to join the conversation.
- Jonas_Z1000j
-
Topic Author
- Offline
- User
-
Registered
- Posts: 94
- Thanks: 31
Re: Rebuild of KZ1000J engine
20 Jul 2022 08:14 - 20 Jul 2022 08:24
Ah, I had somehow missed out on the fact that a special tool is needed both ways. I was able to source that exact tool here in Sweden!
I cleaned the combustion chambers today, prepping them for lapping. I did 3 rounds of degreasing and scrubbed with a scotch brite, then a gentle round with the brass wire wheel:

Do you think its enough before lapping? Is it ok to go tougher with the brass wheel or will that be too abrasive?
Edit: better picture:
/Jonas
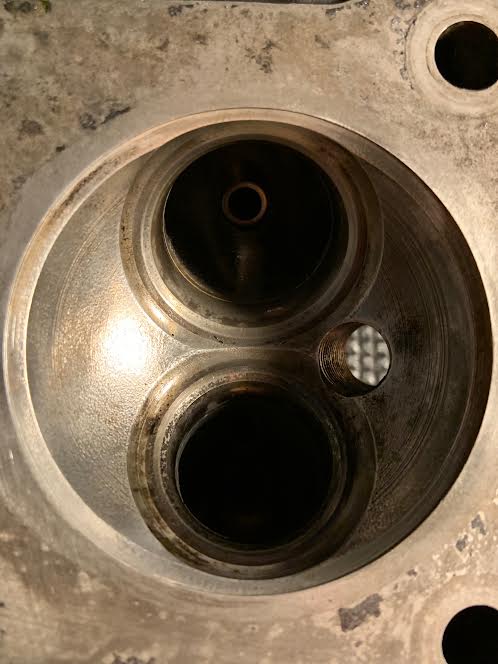
I cleaned the combustion chambers today, prepping them for lapping. I did 3 rounds of degreasing and scrubbed with a scotch brite, then a gentle round with the brass wire wheel:
Do you think its enough before lapping? Is it ok to go tougher with the brass wheel or will that be too abrasive?
Edit: better picture:
/Jonas
Z1000 J2 -82 not so running restoration object anymore
Z900RS -21 Green/Yellow
Z900RS -21 Green/Yellow
Last edit: 20 Jul 2022 08:24 by Jonas_Z1000j.
Please Log in or Create an account to join the conversation.
- daveo
-
- Offline
- Premium Member
-
Registered
- Posts: 3150
- Thanks: 888

The following user(s) said Thank You: Jonas_Z1000j
Please Log in or Create an account to join the conversation.
- zed1015
-

- Offline
- User
-
Registered
- Posts: 3291
- Thanks: 1991
Re: Rebuild of KZ1000J engine
20 Jul 2022 09:48 - 20 Jul 2022 09:50
Valves and seats appear to be in good condition with only a light lap needed.
Seats look a little wide and could do with a cut on the 60 and 30 to get the correct width and seat pressure but it'll run ok as is.
Stem seals don't need any special tool to remove the old and fit new ones unless you lkie wasting money.
Use an angled pick to remove the old and pop on the new with your finger.
A little oil on the guide top helps them slip on easier.
You won't damage the guide.
AIR CORRECTOR JETS FOR VM CARBS AND ETHANOL RESISTANT VITON CHOKE PLUNGER SEAL REPLACMENT FOR ALL CLASSIC AND MODERN MOTORCYCLE CARBURETTORS
www.kzrider.com/forum/23-for-sale/611992...lide-mikunis?start=1
www.kzrider.com/forum/23-for-sale/611992...lide-mikunis?start=1
Last edit: 20 Jul 2022 09:50 by zed1015.
The following user(s) said Thank You: slayer61, Jonas_Z1000j
Please Log in or Create an account to join the conversation.
- Jonas_Z1000j
-
Topic Author
- Offline
- User
-
Registered
- Posts: 94
- Thanks: 31
Re: Rebuild of KZ1000J engine
23 Jul 2022 05:07 - 23 Jul 2022 06:24
Thanks for the input!
I have lapped 4 valves now, it was more work with this than I anticipated

A bit late, I performed the wiggle test on all the valves. Every valve wiggle is my conclusion. The exhaust valves a bit less, intake more. I tried both at barely open and somewhere close to full opening. With oil on the shafts and barely open, there is no wiggle.
I have read threads here about replacing these and I understand that the normal procedure is to replace guide, grind seat and new valve?
Does anyone know how much of the wear is typically the guide and how much is on the valve shaft? I tried measuring the shafts with a digital caliper (not accurate enough) and the valve shafts do seem to have measurable wear.
It would be easy to simply buy new valves and lap them, if the result would be good enough. Any thoughts on this?
Also the wiggle test, with or without oil?
thanks!
/Jonas
I have lapped 4 valves now, it was more work with this than I anticipated
A bit late, I performed the wiggle test on all the valves. Every valve wiggle is my conclusion. The exhaust valves a bit less, intake more. I tried both at barely open and somewhere close to full opening. With oil on the shafts and barely open, there is no wiggle.
I have read threads here about replacing these and I understand that the normal procedure is to replace guide, grind seat and new valve?
Does anyone know how much of the wear is typically the guide and how much is on the valve shaft? I tried measuring the shafts with a digital caliper (not accurate enough) and the valve shafts do seem to have measurable wear.
It would be easy to simply buy new valves and lap them, if the result would be good enough. Any thoughts on this?
Also the wiggle test, with or without oil?
thanks!
/Jonas
Z1000 J2 -82 not so running restoration object anymore
Z900RS -21 Green/Yellow
Z900RS -21 Green/Yellow
Last edit: 23 Jul 2022 06:24 by Jonas_Z1000j.
Please Log in or Create an account to join the conversation.
- Nessism
-

- Offline
- Sustaining Member
-

Registered
- Posts: 8114
- Thanks: 3495
Re: Rebuild of KZ1000J engine
23 Jul 2022 05:53
Wobble clearance:
Intake < .22mm
Exhaust < .24mm
This info is in the factory manual for your bike.
Intake < .22mm
Exhaust < .24mm
This info is in the factory manual for your bike.
Ed
Carb O-ring Kits : www.kzrider.com/forum/14-vendor-forum/62...rburetor-o-ring-kits
www.kzrider.com/forum/faq-wiki/618026-new-owner-things-to-know
1981 KZ750E2
www.kzrider.com/forum/11-projects/604901...z750e-project-thread
Carb O-ring Kits : www.kzrider.com/forum/14-vendor-forum/62...rburetor-o-ring-kits
www.kzrider.com/forum/faq-wiki/618026-new-owner-things-to-know
1981 KZ750E2
www.kzrider.com/forum/11-projects/604901...z750e-project-thread
Please Log in or Create an account to join the conversation.
- zed1015
-
- Offline
- User
-
Registered
- Posts: 3291
- Thanks: 1991
Re: Rebuild of KZ1000J engine
23 Jul 2022 06:04
Wiggle test dry.
Use a dial gauge on the stem with the valve head off the seat to determine wear if you haven't a small bore gauge for measuring the guide bore and micrometer for the stem,.
The factory service manual has the lift figure and deflection tolerances for the wobble method and wear limits etc.
New guides should be 7mm bore and the clearance is on the valve stems.
New guides require reaming or honing to 7mm after fitment to aquire correct guide/stem clearance and (unless you are very lucky) the seats will need recutting and a light lap.
Old valves can be used in new guides if in good condition and vice versa.
Extreme care needs to be taken when recutting or lapping valves as this affects stem height and valve clearances which can result in running out of shim sizes and the stems requiring the tips grinding.
AIR CORRECTOR JETS FOR VM CARBS AND ETHANOL RESISTANT VITON CHOKE PLUNGER SEAL REPLACMENT FOR ALL CLASSIC AND MODERN MOTORCYCLE CARBURETTORS
www.kzrider.com/forum/23-for-sale/611992...lide-mikunis?start=1
www.kzrider.com/forum/23-for-sale/611992...lide-mikunis?start=1
The following user(s) said Thank You: Jonas_Z1000j
Please Log in or Create an account to join the conversation.
- Jonas_Z1000j
-
Topic Author
- Offline
- User
-
Registered
- Posts: 94
- Thanks: 31
Re: Rebuild of KZ1000J engine
24 Jul 2022 11:36 - 24 Jul 2022 11:37
I did the wobble test again according to the factory manual, right off the seats, and I can notice wobble on every valve with my eyes. That has to be more than quarter of a mm. I will get a micrometer next and measure the valve stems, if they check out I need to wait for the vacation period to end and get help from the local japanese-bike expert.
A bit annoying when the seats and valves cleaned up nicely but it is what it is. I want it to perform as new.
I will turn my attention now to the crankcase and the camchain!
/Jonas
A bit annoying when the seats and valves cleaned up nicely but it is what it is. I want it to perform as new.
I will turn my attention now to the crankcase and the camchain!
/Jonas
Z1000 J2 -82 not so running restoration object anymore
Z900RS -21 Green/Yellow
Z900RS -21 Green/Yellow
Last edit: 24 Jul 2022 11:37 by Jonas_Z1000j.
Please Log in or Create an account to join the conversation.
- Jonas_Z1000j
-
Topic Author
- Offline
- User
-
Registered
- Posts: 94
- Thanks: 31
Re: Rebuild of KZ1000J engine
25 Jul 2022 12:42
I removed the valve seals today. Had no luck with the special plier set I bought. An ordinary needle nose plier did the trick however, confirming what zed1015 said
 So dont by any special tool for removing and installing the seals...
After that I used the car power washer to clean up the head some more, especially around the valve guides. Worked pretty well and the runners cleaned up nicely.
Read the clymer manual about splitting the crankcase now, so that is the next task
After that I used the car power washer to clean up the head some more, especially around the valve guides. Worked pretty well and the runners cleaned up nicely.
Read the clymer manual about splitting the crankcase now, so that is the next task
Z1000 J2 -82 not so running restoration object anymore
Z900RS -21 Green/Yellow
Z900RS -21 Green/Yellow
Please Log in or Create an account to join the conversation.
- hardrockminer
-
- Offline
- Sustaining Member
-
Registered
- Posts: 3136
- Thanks: 1235
Re: Rebuild of KZ1000J engine
25 Jul 2022 13:19
It can be tricky to install new seals. I use a pencil like device that I put in the center of the guide and then drop a seal over the device. Once it's on the guide it can be pressed on with your thumb.
I have several restored bikes along with a 2006 Goldwing with a sidecar.
Please Log in or Create an account to join the conversation.
Moderators: Street Fighter LTD