
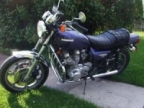
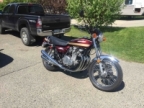
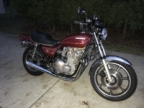
1977 KZ1000 LTD
- TheFlyingFreemole
-
 Topic Author
- Offline
- User
-

Registered
- Posts: 87
- Thanks: 8
1977 KZ1000 LTD
25 Jun 2020 15:41
Hi All,
I've got another thread started in the projects section asking about input for parts, pieces, advice, and upgrades. Feel free to check that out and add anything. It can be found here !
I'm going to use this thread to do some simple updates on the process and progress of what I'm working on. I'm no professional, but hoping that my best effort is good enough.
1977 KZ1000 LTD B1 (needs minor fine tuning)
Please Log in or Create an account to join the conversation.
- TheFlyingFreemole
-
Topic Author
- Offline
- User
-
Registered
- Posts: 87
- Thanks: 8
Re: 1977 KZ1000 LTD
25 Jun 2020 15:47
So I am starting with the gas tank while I put together an order list.
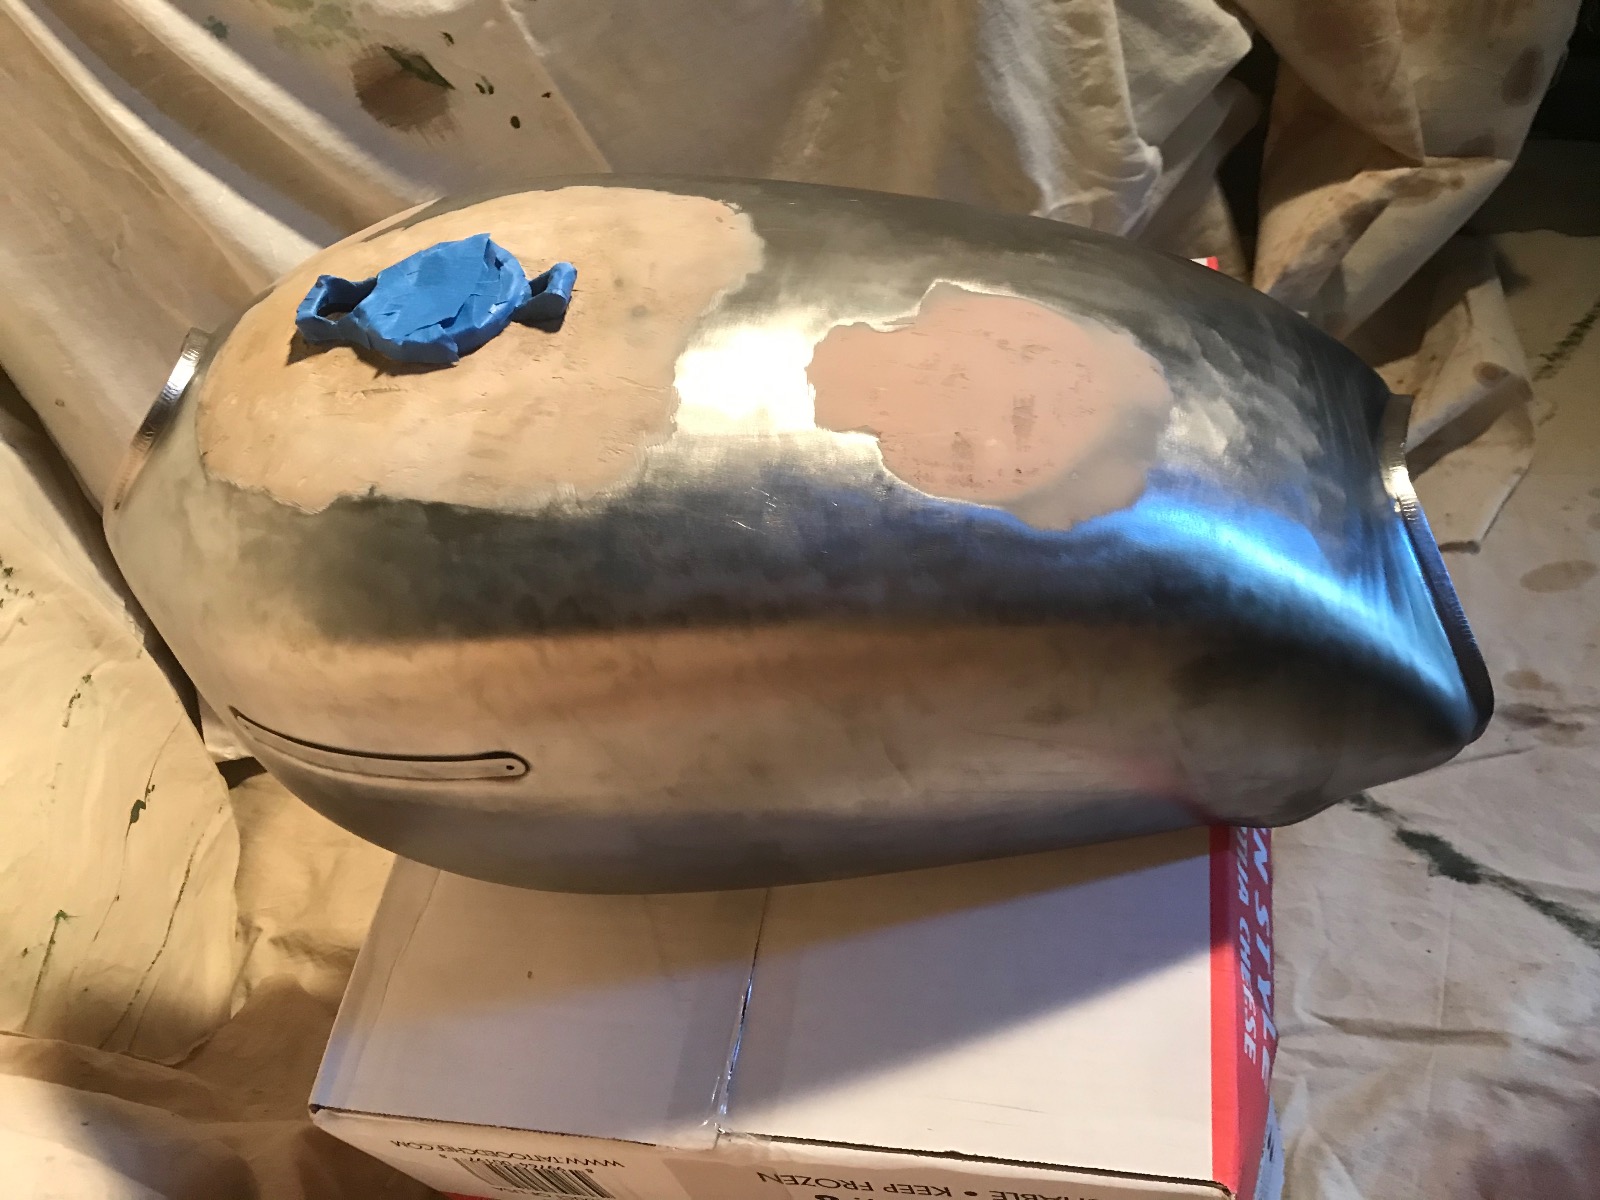
Used a wire wheel and took all the previous paint and rust off from the outside. Found a few bondo spots hidden from the previous owner.

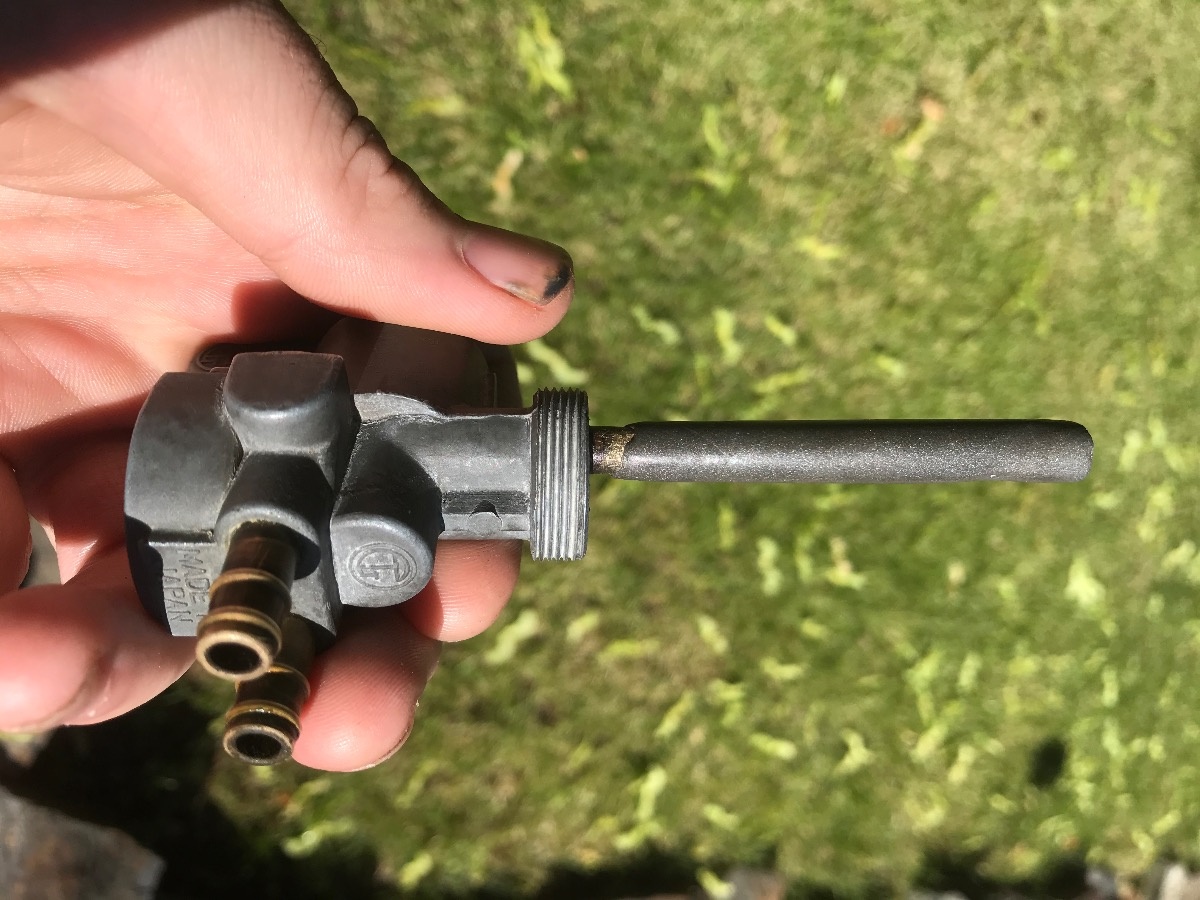
From the looks of the gas cap and petcock I have my work cut out. The petcock intake stem is corroded and cracked and I cannot get any air flow through it in any position. Might have to replace the whole unit.
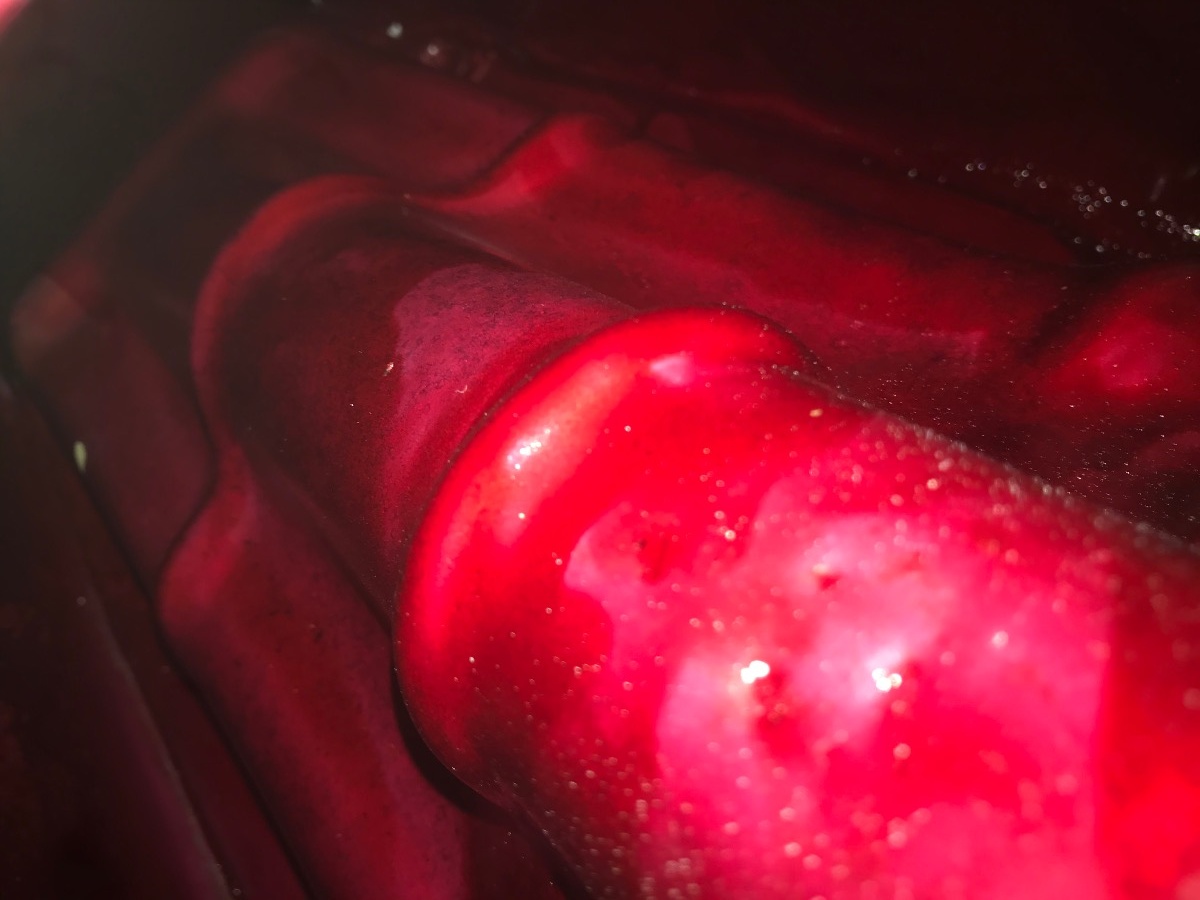
Will start tackling the inside of the tank soon. Aiming to remove the previous tank liner pieces, and get as much of the rust out as possible. Once cleaned up I plan to add Red Kote for future rust prevention.
Used a wire wheel and took all the previous paint and rust off from the outside. Found a few bondo spots hidden from the previous owner.
From the looks of the gas cap and petcock I have my work cut out. The petcock intake stem is corroded and cracked and I cannot get any air flow through it in any position. Might have to replace the whole unit.
Will start tackling the inside of the tank soon. Aiming to remove the previous tank liner pieces, and get as much of the rust out as possible. Once cleaned up I plan to add Red Kote for future rust prevention.
1977 KZ1000 LTD B1 (needs minor fine tuning)
Please Log in or Create an account to join the conversation.
- TheFlyingFreemole
-
Topic Author
- Offline
- User
-
Registered
- Posts: 87
- Thanks: 8
Re: 1977 KZ1000 LTD
25 Jun 2020 17:01
Was going to follow some advice from here and use phosphoric acid to clean up the inside of the tank prior to resealing it. I wasn’t able to find any phosphoric acid or POR 15... the woes of small town inventory options.
I got a wild hair and decided I would try to get the tank prepped without using chemicals. Instead I went with electrolysis, using the tank itself to hold the electrolytes.
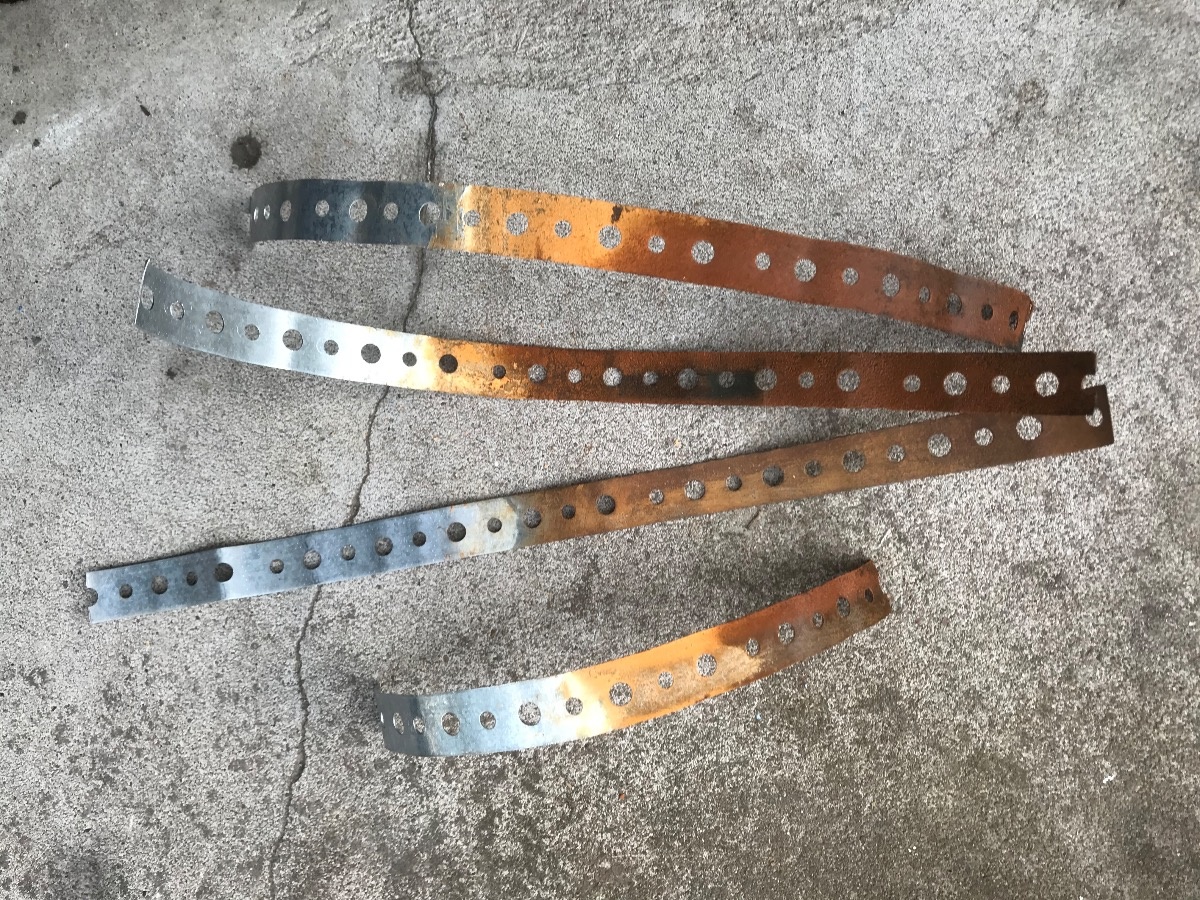
Sealed off the drain, filled the tank with water adding 1 tablespoon of baking soda per gallon (soda wash/borax is more caustic and faster, but both will work fine). Cut a tennis ball for insulation between the tank and put sacrificial steel strips as an anode in it and put that on top of the gas cap hole.
After 4 hours running at 2 amps off of a trickle charger I replaced the water solution and ran it again for 4 hours at 10 amps.
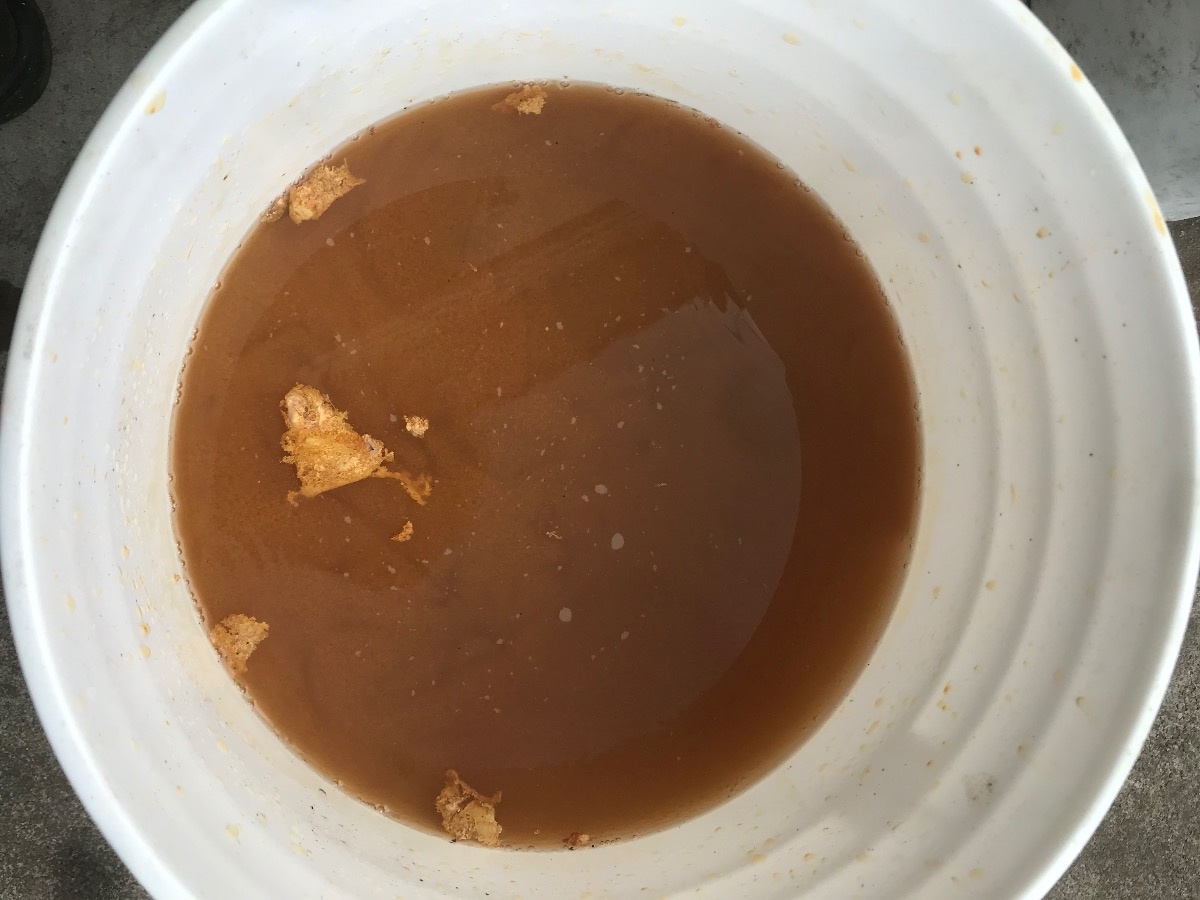
The steel bars attract rust and protect the tank, as long as the steel is attached to the positive terminal and the tank is connected to the negative. Changed the steel over at the halfway mark too, they tend to get pretty chewed up.
Followed this with a water flush, a degreaser flush, and then did an acetone rinse to speed drying and help avoid flash rusting. There were some pretty large chunks/“puddles” of the old liner that came free from the process.
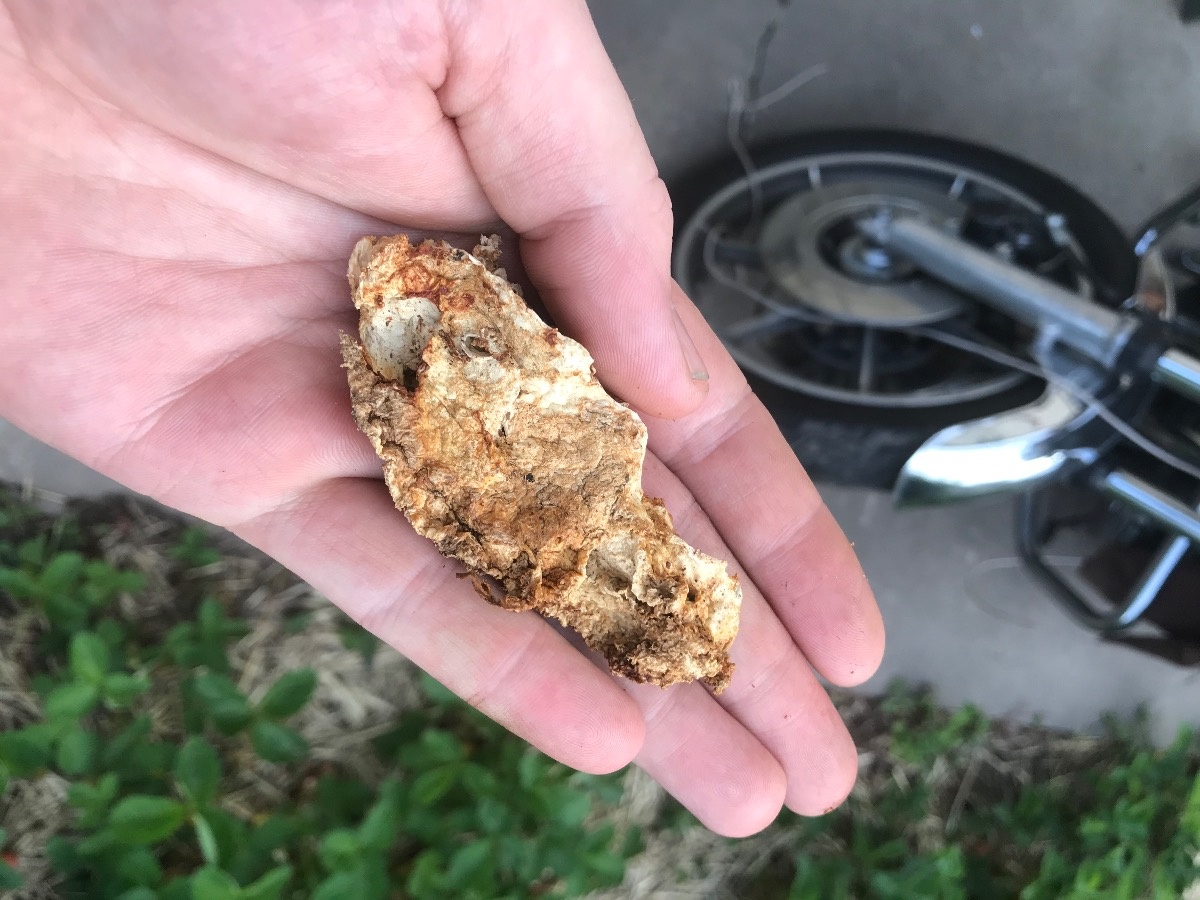
All said and done this was a cheap, easy, and effective process for cleaning the rust and old chunky liner from inside of the tank. I think it came out pretty great.
I got a wild hair and decided I would try to get the tank prepped without using chemicals. Instead I went with electrolysis, using the tank itself to hold the electrolytes.
Sealed off the drain, filled the tank with water adding 1 tablespoon of baking soda per gallon (soda wash/borax is more caustic and faster, but both will work fine). Cut a tennis ball for insulation between the tank and put sacrificial steel strips as an anode in it and put that on top of the gas cap hole.
After 4 hours running at 2 amps off of a trickle charger I replaced the water solution and ran it again for 4 hours at 10 amps.
The steel bars attract rust and protect the tank, as long as the steel is attached to the positive terminal and the tank is connected to the negative. Changed the steel over at the halfway mark too, they tend to get pretty chewed up.
Followed this with a water flush, a degreaser flush, and then did an acetone rinse to speed drying and help avoid flash rusting. There were some pretty large chunks/“puddles” of the old liner that came free from the process.
All said and done this was a cheap, easy, and effective process for cleaning the rust and old chunky liner from inside of the tank. I think it came out pretty great.
1977 KZ1000 LTD B1 (needs minor fine tuning)
The following user(s) said Thank You: Bent Trigger
Please Log in or Create an account to join the conversation.
- hardrockminer
-
- Offline
- Sustaining Member
-

Registered
- Posts: 3122
- Thanks: 1232
Re: 1977 KZ1000 LTD
25 Jun 2020 18:47
I think that's pretty neat!
I have several restored bikes along with a 2006 Goldwing with a sidecar.
Please Log in or Create an account to join the conversation.
- TheFlyingFreemole
-
Topic Author
- Offline
- User
-
Registered
- Posts: 87
- Thanks: 8
Re: 1977 KZ1000 LTD
05 Jul 2020 13:58 - 05 Jul 2020 14:06
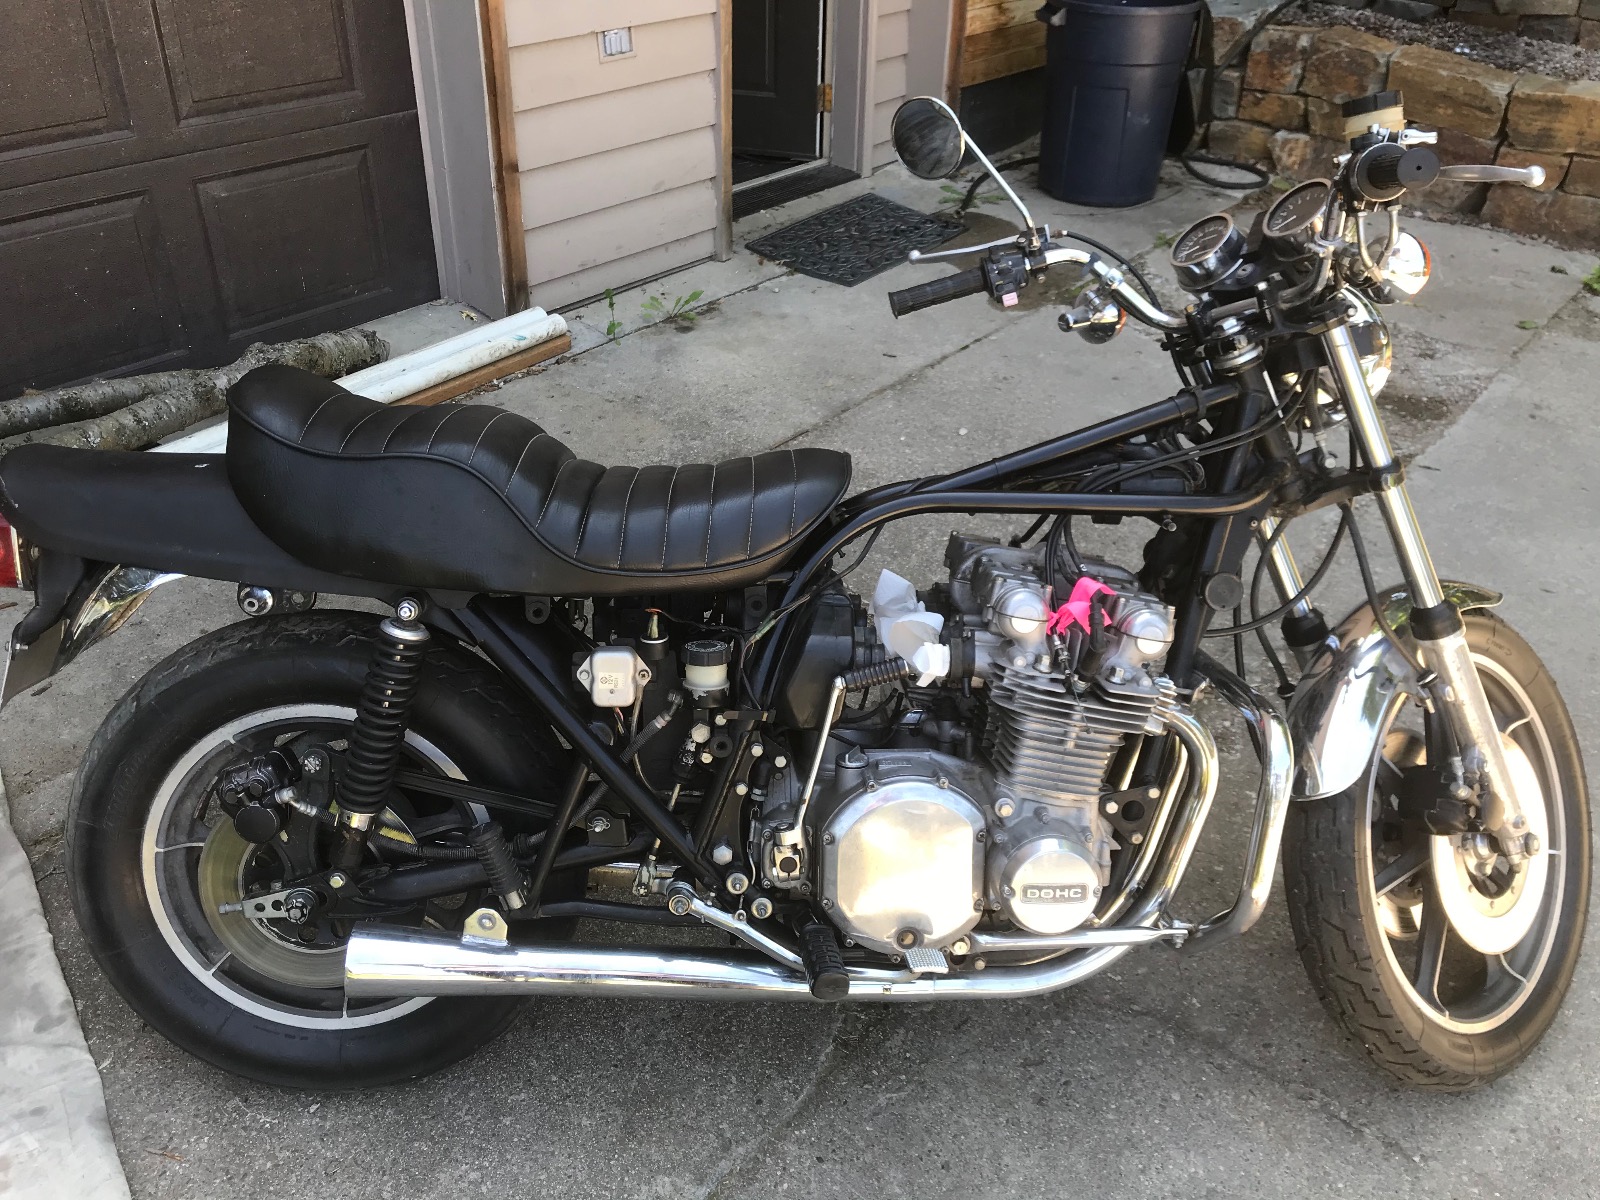
Been a few days away from the project with the holiday weekend and moving the bike to a different location. In the meantime I have put in an initial order for gaskets and other miscellaneous things I knew I needed.
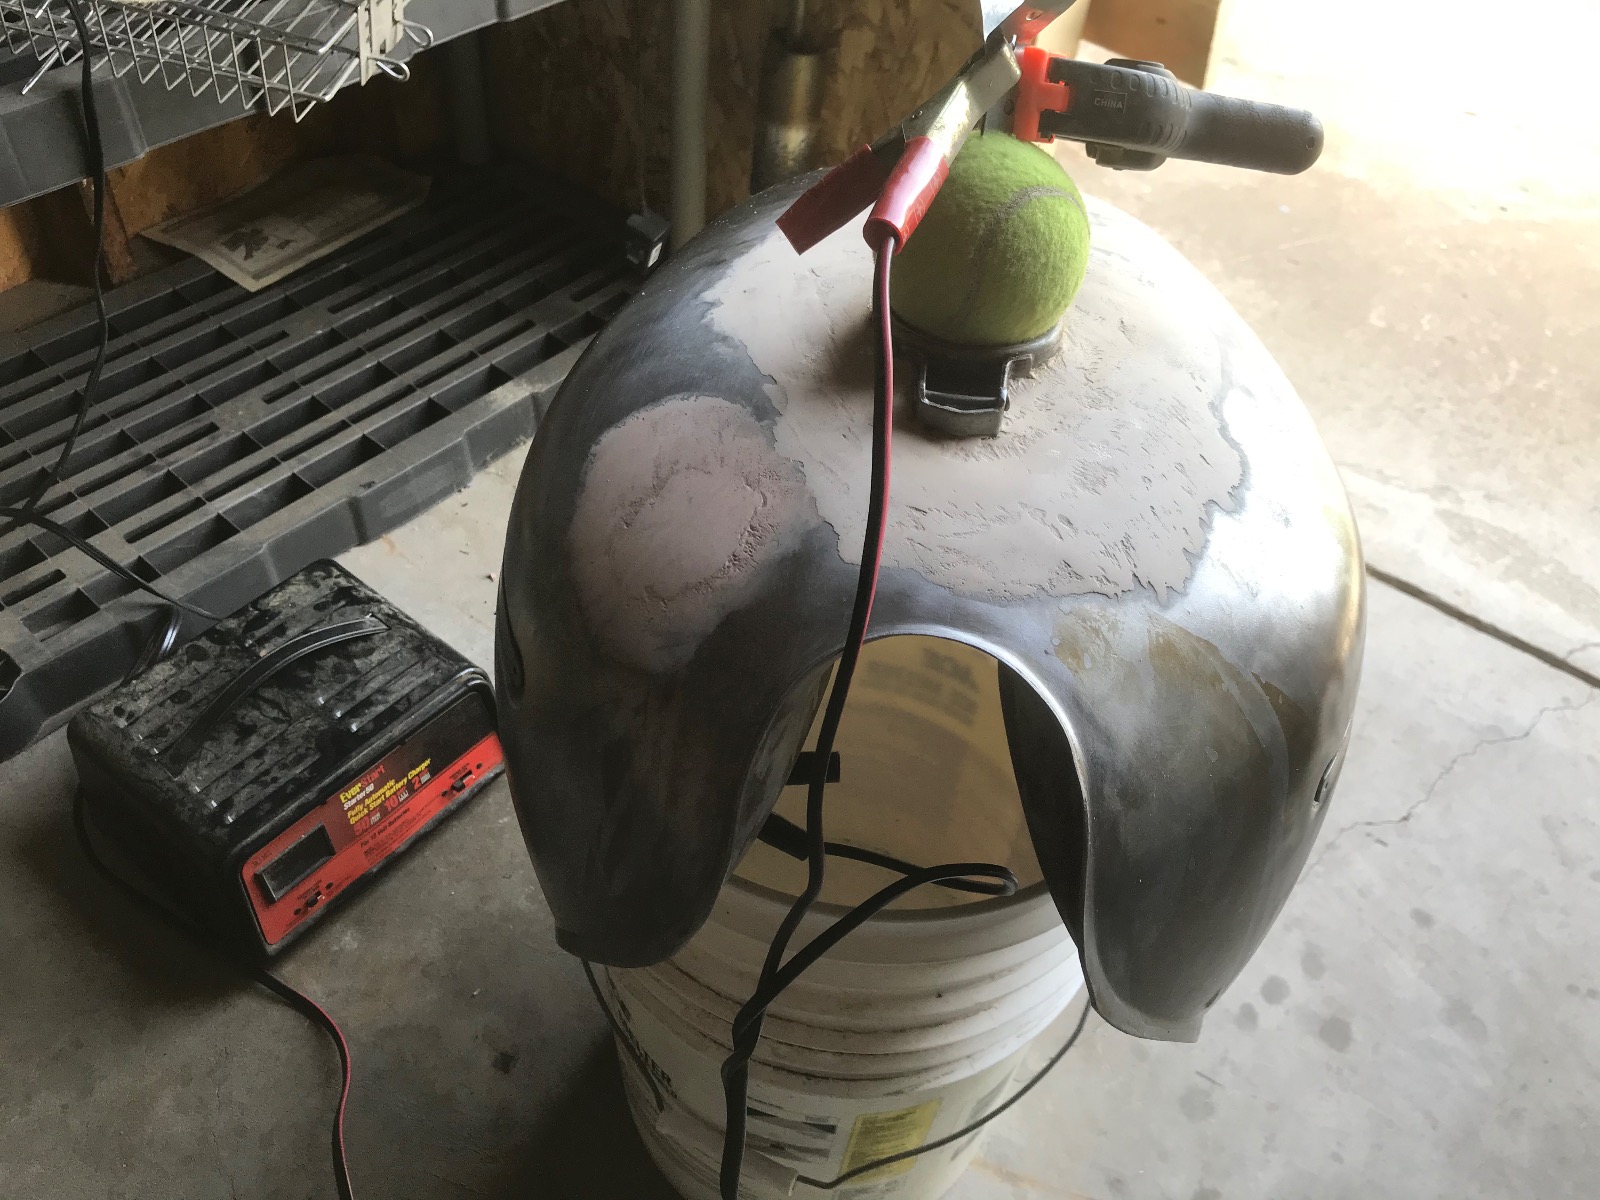
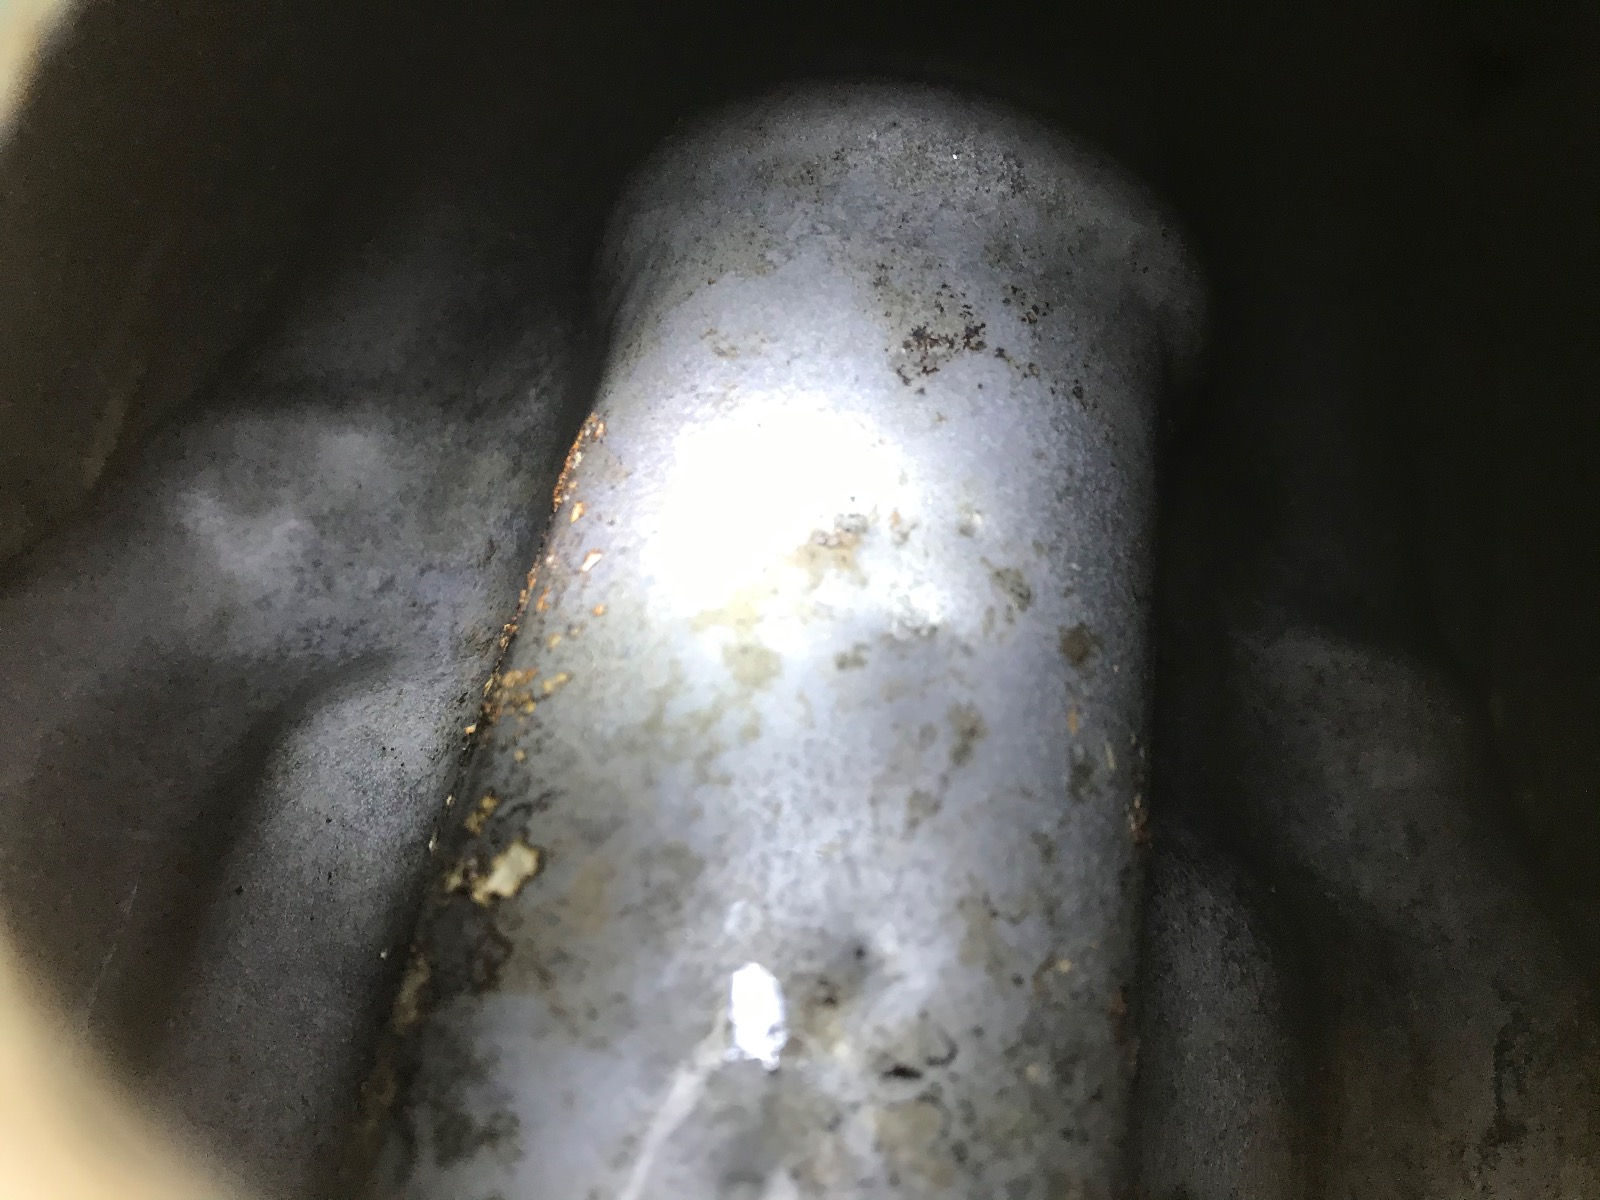
Spent some days as well getting the inside of the tank resealed, which was done with redkote because that’s what I could find. The inside seamed to be in good shape so I was hesitant to reapply a liner, but in the end did one as it was previously lined before I purchased it.
Next I put down a little bondo over the previous patches and did some rough shaping then sanding smooth.
Cleaned, degreased, and tack clothed the tank down after making sure no flash rust had crept in during the time I allowed the tank sealant to set. Put a light coat of etching primer down followed by a few runs of filler primer. After priming there were some areas of imperfection that popped out so I sanded down some of the bondo areas to get a cohesive look. Did a light sanding to take off any ‘orange peel’ or overspray and get a smooth finish to the primer.
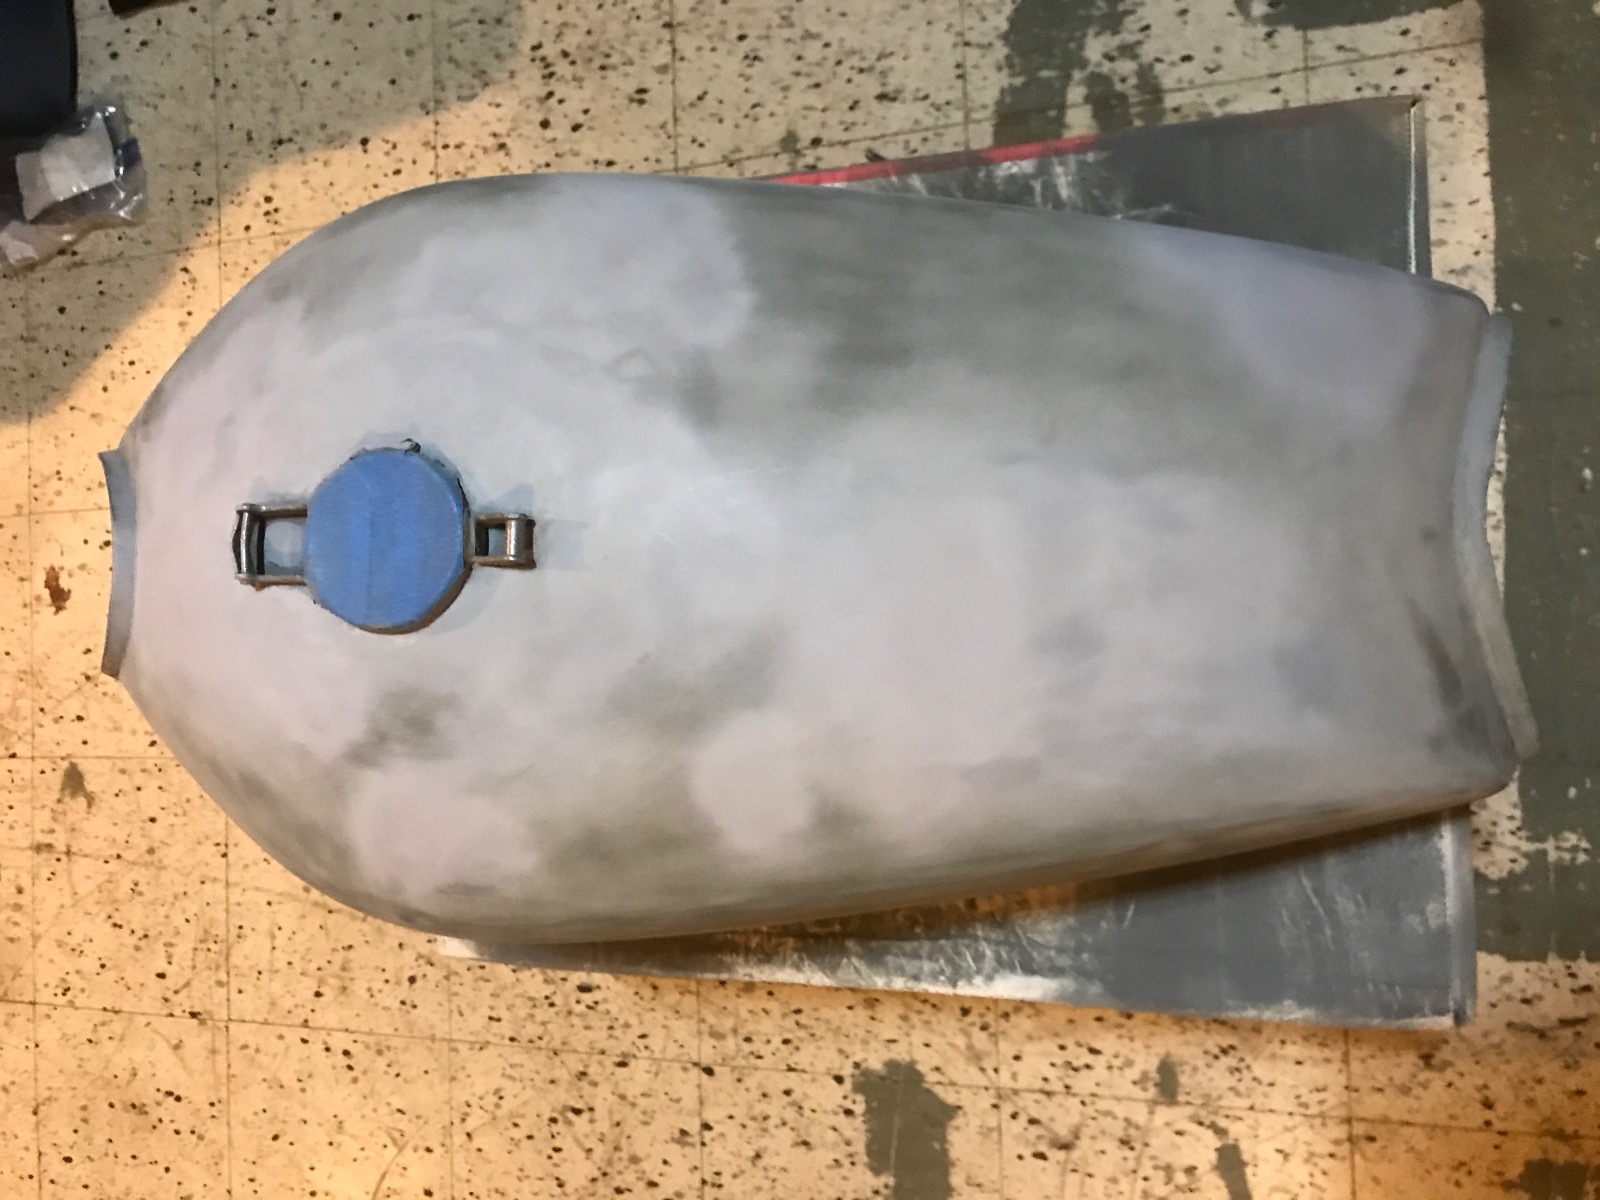
Will be looking for a color that I like and also see if I can find a 2K clear coat locally. Before I stared I was thinking black, but while doing the tank I found a coin sized flake of the original dark/midnight blue and am really enjoying the idea of that.
Spent some days as well getting the inside of the tank resealed, which was done with redkote because that’s what I could find. The inside seamed to be in good shape so I was hesitant to reapply a liner, but in the end did one as it was previously lined before I purchased it.
Next I put down a little bondo over the previous patches and did some rough shaping then sanding smooth.
Cleaned, degreased, and tack clothed the tank down after making sure no flash rust had crept in during the time I allowed the tank sealant to set. Put a light coat of etching primer down followed by a few runs of filler primer. After priming there were some areas of imperfection that popped out so I sanded down some of the bondo areas to get a cohesive look. Did a light sanding to take off any ‘orange peel’ or overspray and get a smooth finish to the primer.
Will be looking for a color that I like and also see if I can find a 2K clear coat locally. Before I stared I was thinking black, but while doing the tank I found a coin sized flake of the original dark/midnight blue and am really enjoying the idea of that.
1977 KZ1000 LTD B1 (needs minor fine tuning)
Last edit: 05 Jul 2020 14:06 by TheFlyingFreemole. Reason: Words & flipped a picture
Please Log in or Create an account to join the conversation.
- Mikaw
-
- Offline
- Sustaining Member
-
Registered
- Posts: 4825
- Thanks: 1852
Re: 1977 KZ1000 LTD
06 Jul 2020 07:04
Just read your pm. Posted picture here . Not able to put pictures in pm.
1976 KZ 900 A4
kzrider.com/forum/11-projects/613548-1976-kz-900-a4
1976 KZ 900 B1 LTD
1978 KZ 1000 B2 LTD
1980 KZ 750 E1
Kowledge Speaks, But Wisdom Listens.
Jimi Hendrix.
1976 KZ 900 B1 LTD
1978 KZ 1000 B2 LTD
1980 KZ 750 E1
Kowledge Speaks, But Wisdom Listens.
Jimi Hendrix.
The following user(s) said Thank You: TheFlyingFreemole
Please Log in or Create an account to join the conversation.
- TheFlyingFreemole
-
Topic Author
- Offline
- User
-
Registered
- Posts: 87
- Thanks: 8
Re: 1977 KZ1000 LTD
06 Jul 2020 10:00
Thanks for the response and picture Mikaw!
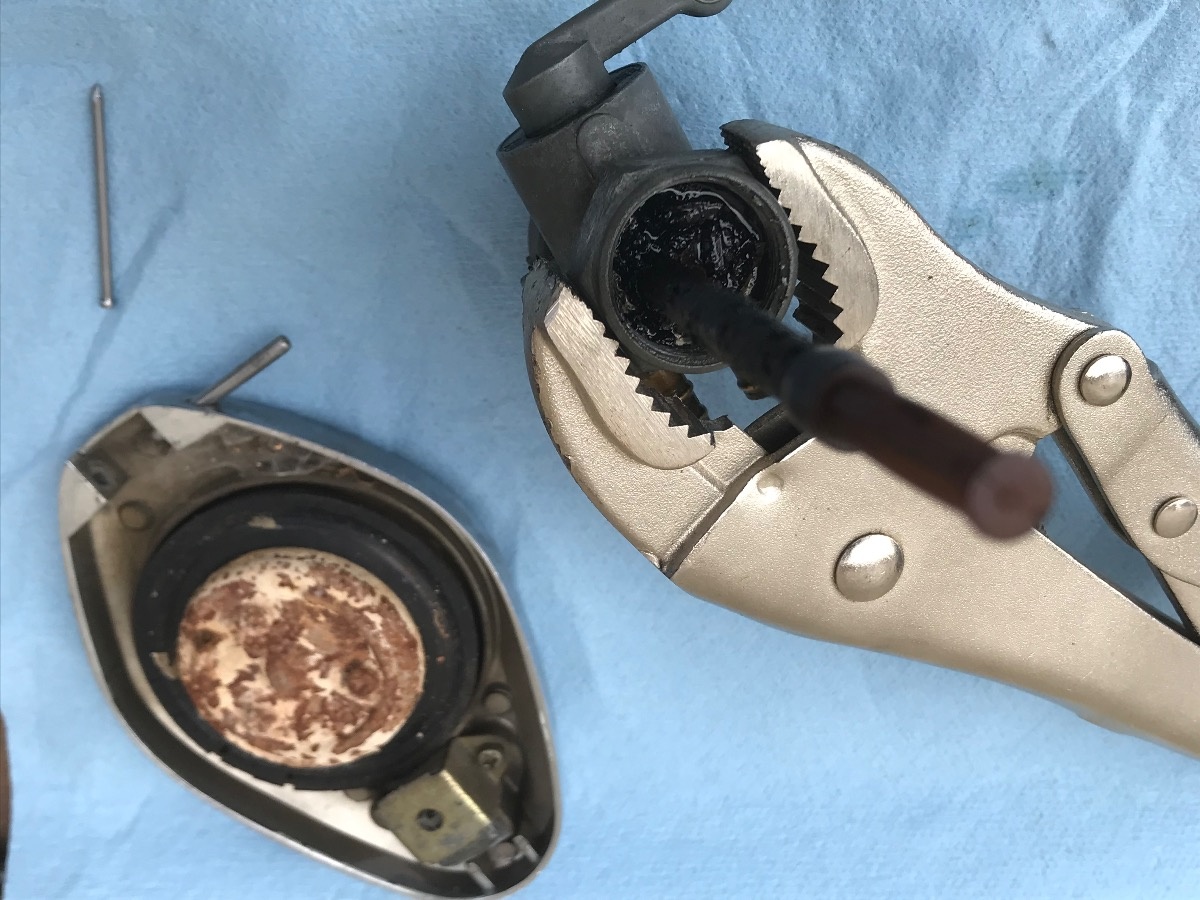
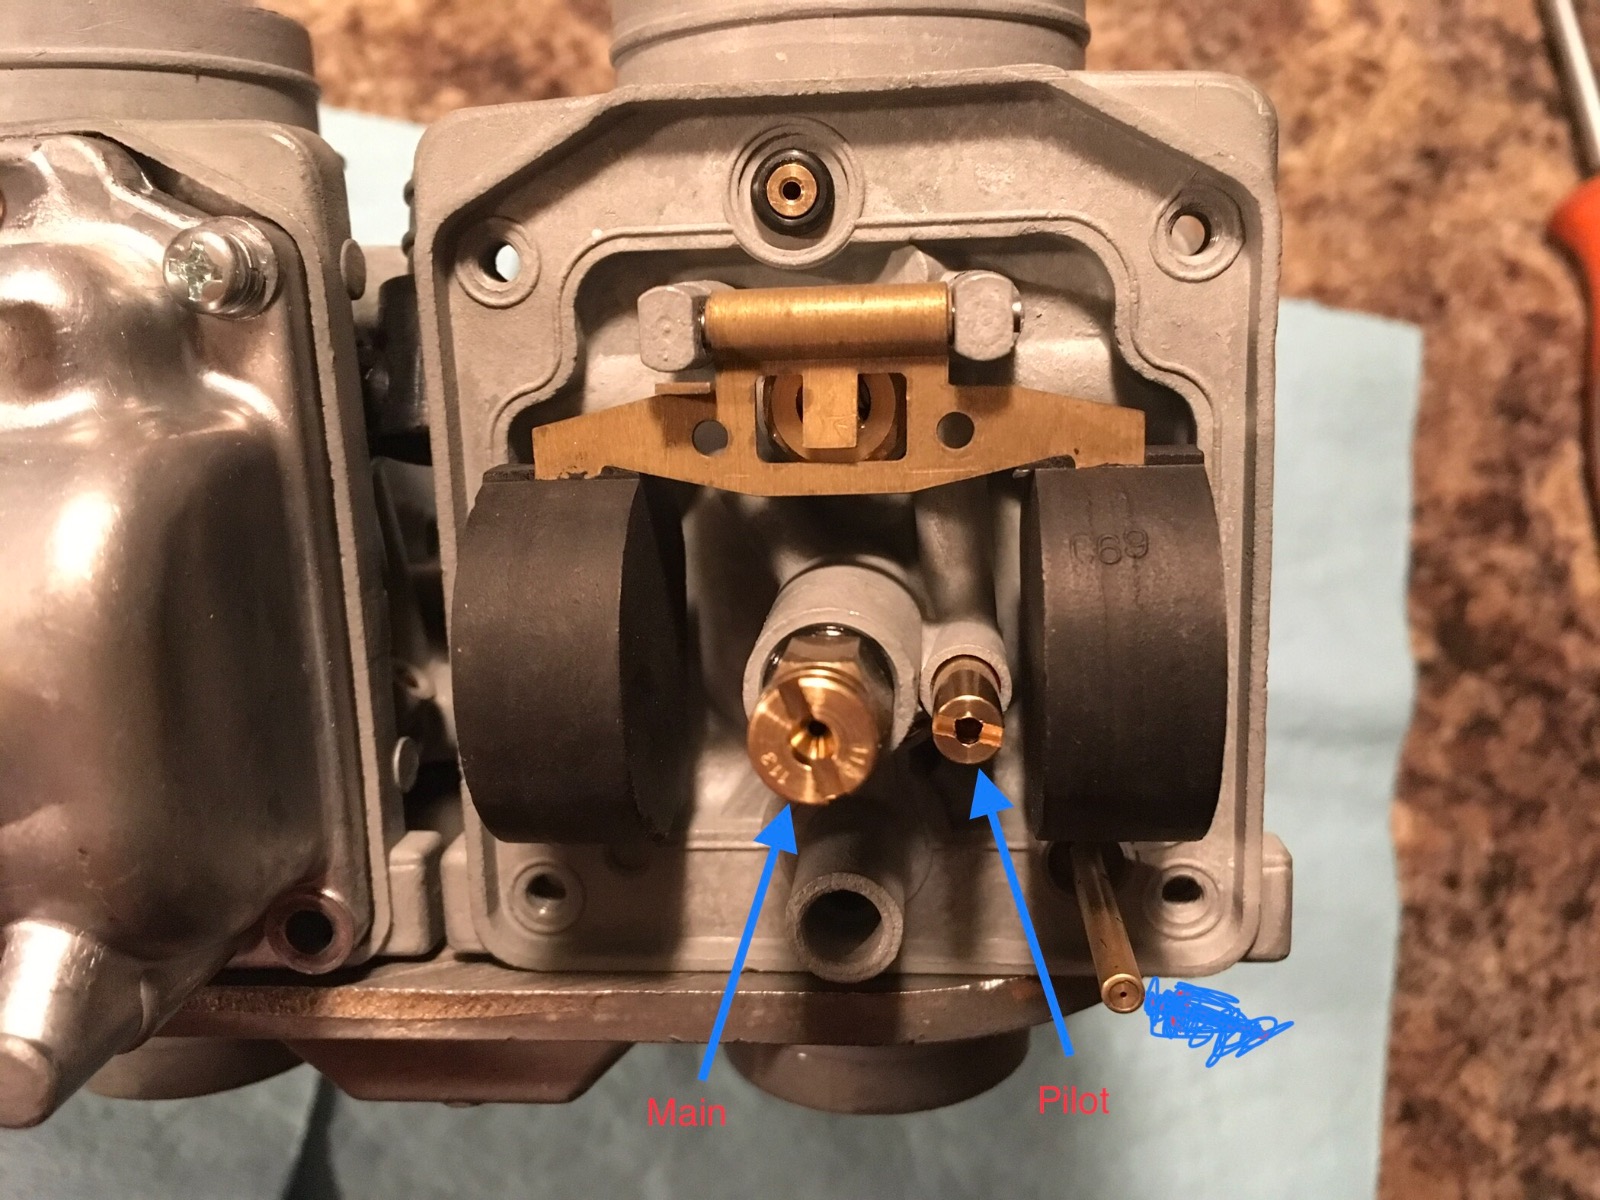
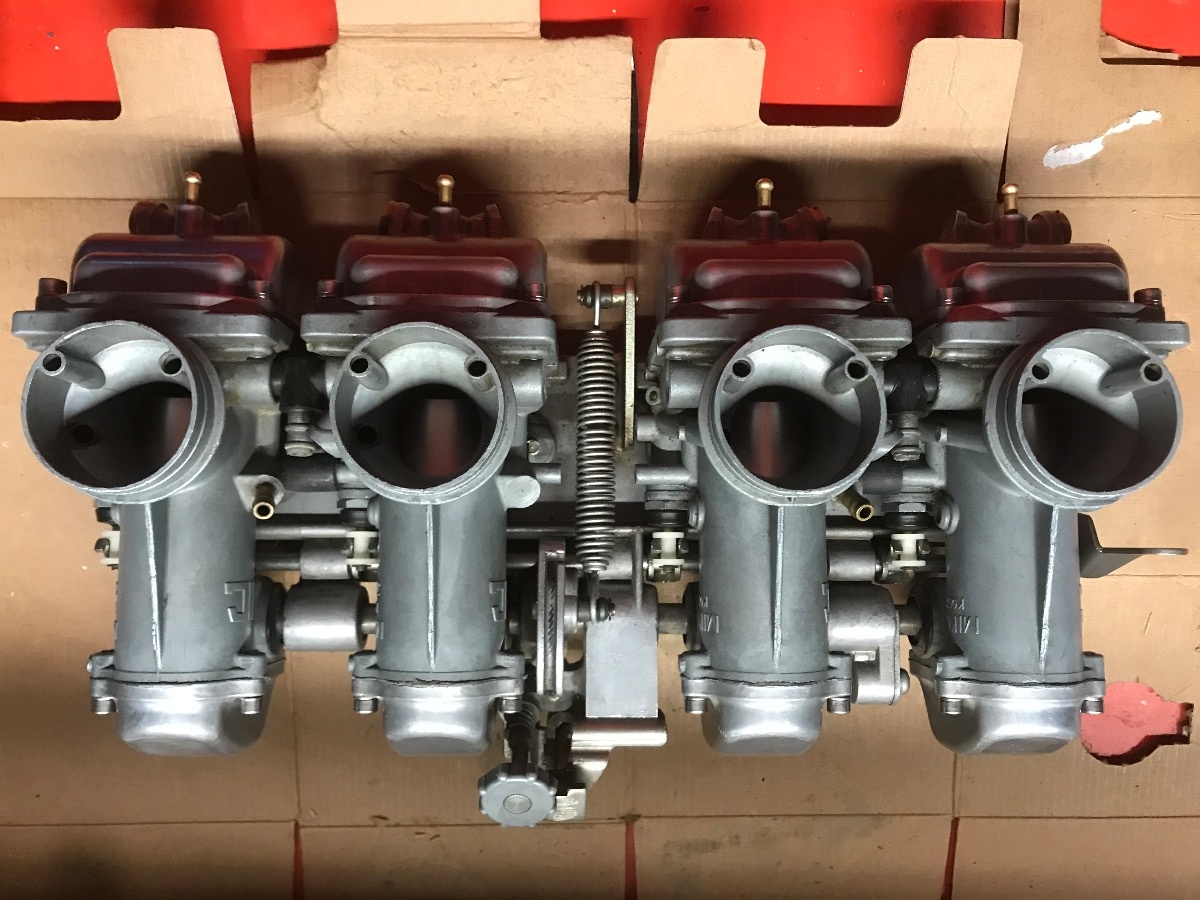
I removed the carburetors from the bike, I am assuming they are the original VM26ss slide type, but cannot find an identifier mark aside from the ‘Mikuni Kogyo Japan’ on them.
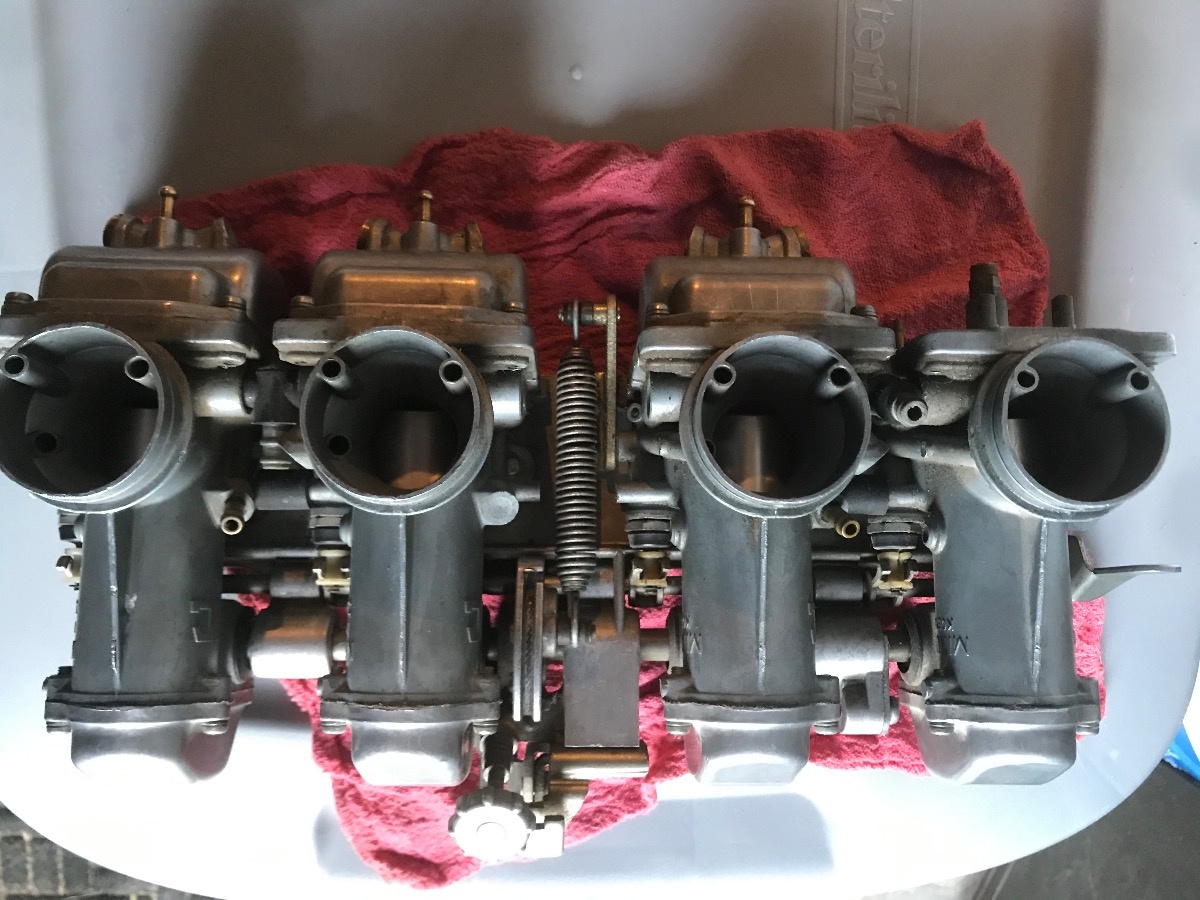
The manual says that the 77 kz ltd B1 carbs use a pilot fuel vs pilot air adjustment. So I have a different set up than most, and is why I reached out to Mikaw for a photo, but our LTD bikes are one year apart and that seems to have some differences still.
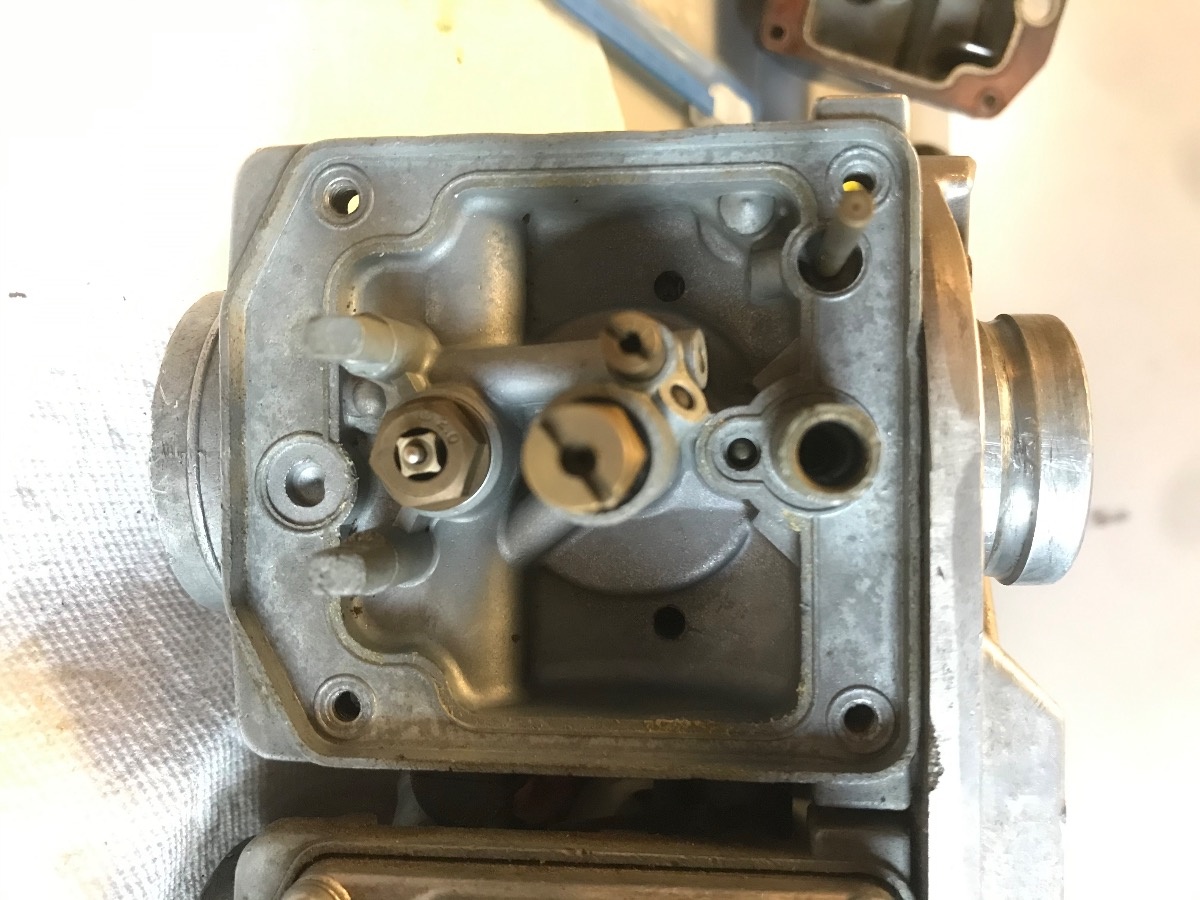
Here is my #4 with the float removed.
And all the parts from the bottom side (without releasing the last jet from the top slide). I simply wiped them down and haven’t done any real cleaning on them yet.
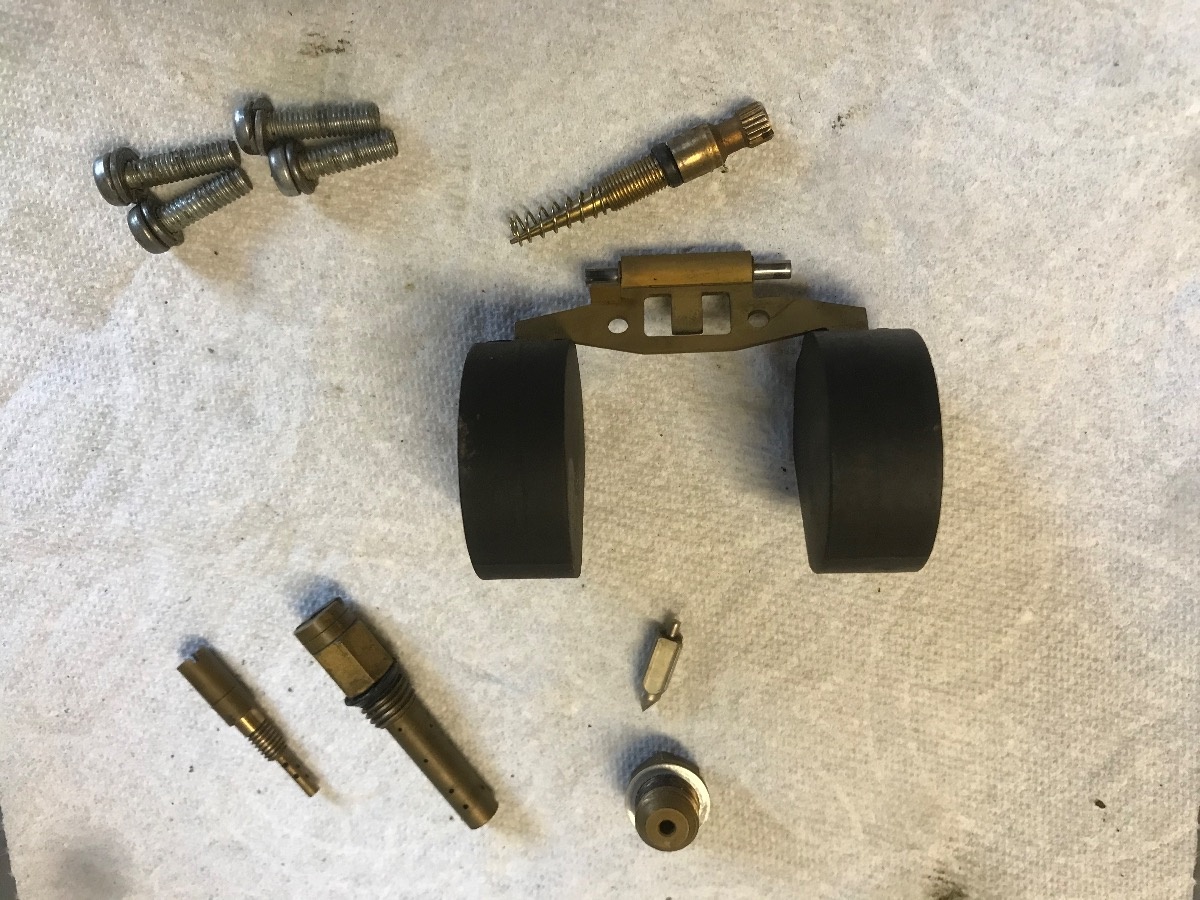
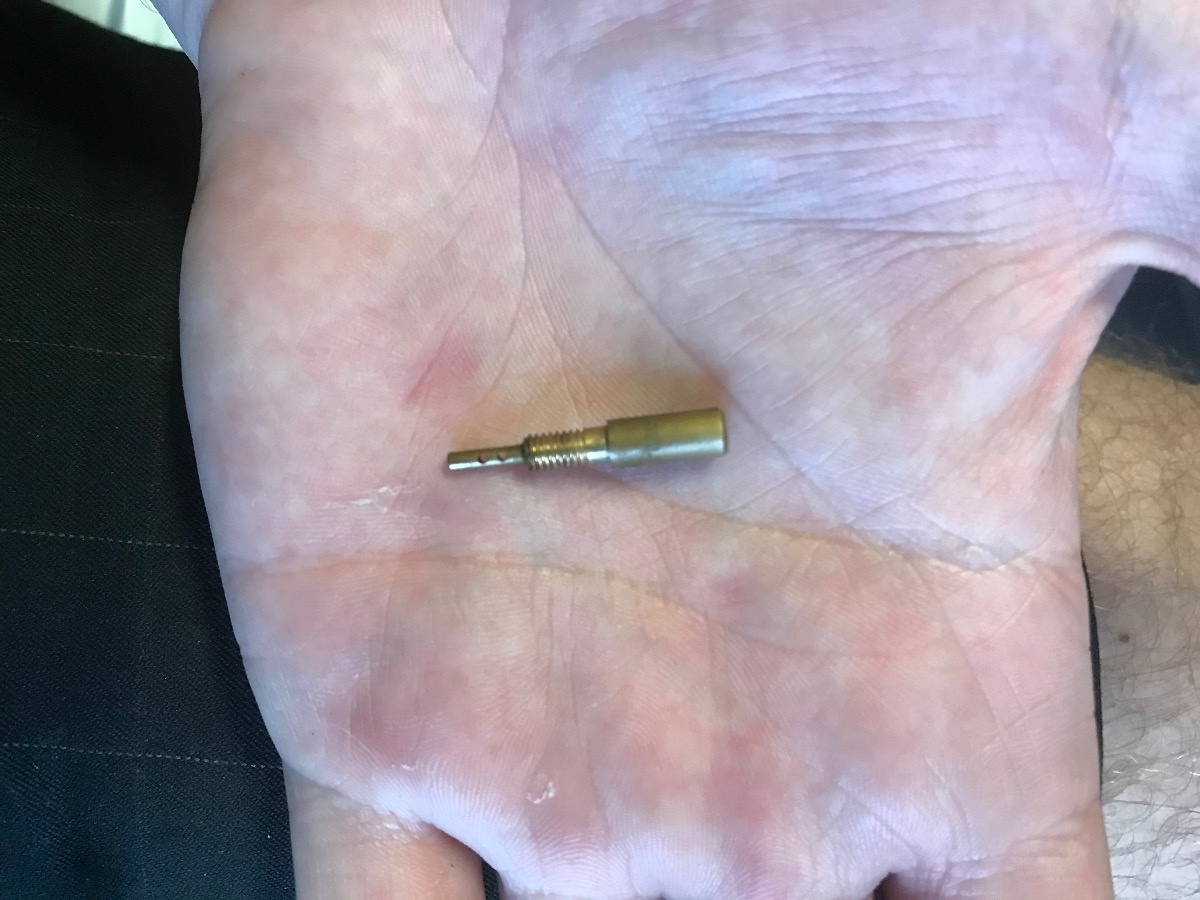
Some of my confusion came from looking for an O Ring, which appears not to be used on my pilot jet model.
I will need to get a set or rings for the main jet, and have the bowl gaskets on the way. Aside from that everything looks pretty good to just get cleaned down and put back. I also carefully counted how many turns out from a light seat all the screws were.
I removed the carburetors from the bike, I am assuming they are the original VM26ss slide type, but cannot find an identifier mark aside from the ‘Mikuni Kogyo Japan’ on them.
The manual says that the 77 kz ltd B1 carbs use a pilot fuel vs pilot air adjustment. So I have a different set up than most, and is why I reached out to Mikaw for a photo, but our LTD bikes are one year apart and that seems to have some differences still.
Here is my #4 with the float removed.
And all the parts from the bottom side (without releasing the last jet from the top slide). I simply wiped them down and haven’t done any real cleaning on them yet.
Some of my confusion came from looking for an O Ring, which appears not to be used on my pilot jet model.
I will need to get a set or rings for the main jet, and have the bowl gaskets on the way. Aside from that everything looks pretty good to just get cleaned down and put back. I also carefully counted how many turns out from a light seat all the screws were.
1977 KZ1000 LTD B1 (needs minor fine tuning)
Please Log in or Create an account to join the conversation.
- Mikaw
-
- Offline
- Sustaining Member
-
Registered
- Posts: 4825
- Thanks: 1852
Re: 1977 KZ1000 LTD
06 Jul 2020 10:29
1976 KZ 900 A4
kzrider.com/forum/11-projects/613548-1976-kz-900-a4
1976 KZ 900 B1 LTD
1978 KZ 1000 B2 LTD
1980 KZ 750 E1
Kowledge Speaks, But Wisdom Listens.
Jimi Hendrix.
1976 KZ 900 B1 LTD
1978 KZ 1000 B2 LTD
1980 KZ 750 E1
Kowledge Speaks, But Wisdom Listens.
Jimi Hendrix.
Please Log in or Create an account to join the conversation.
- Mikaw
-
- Offline
- Sustaining Member
-
Registered
- Posts: 4825
- Thanks: 1852
Re: 1977 KZ1000 LTD
06 Jul 2020 10:36 - 06 Jul 2020 11:48
I’d recommend at a minimum replacing the O-Rings on the choke plunger, loosen the cross head screws on the lifter forks. Remove the screw, tension spring and Teflon washer and the shaft will slide out the just remove the choke plungers. Nothing spring loaded to worry bout. Replace the O-Ring and reinstall.
1976 KZ 900 A4
kzrider.com/forum/11-projects/613548-1976-kz-900-a4
1976 KZ 900 B1 LTD
1978 KZ 1000 B2 LTD
1980 KZ 750 E1
Kowledge Speaks, But Wisdom Listens.
Jimi Hendrix.
1976 KZ 900 B1 LTD
1978 KZ 1000 B2 LTD
1980 KZ 750 E1
Kowledge Speaks, But Wisdom Listens.
Jimi Hendrix.
Last edit: 06 Jul 2020 11:48 by Mikaw.
Please Log in or Create an account to join the conversation.
- Mikaw
-
- Offline
- Sustaining Member
-
Registered
- Posts: 4825
- Thanks: 1852
Re: 1977 KZ1000 LTD
06 Jul 2020 10:44
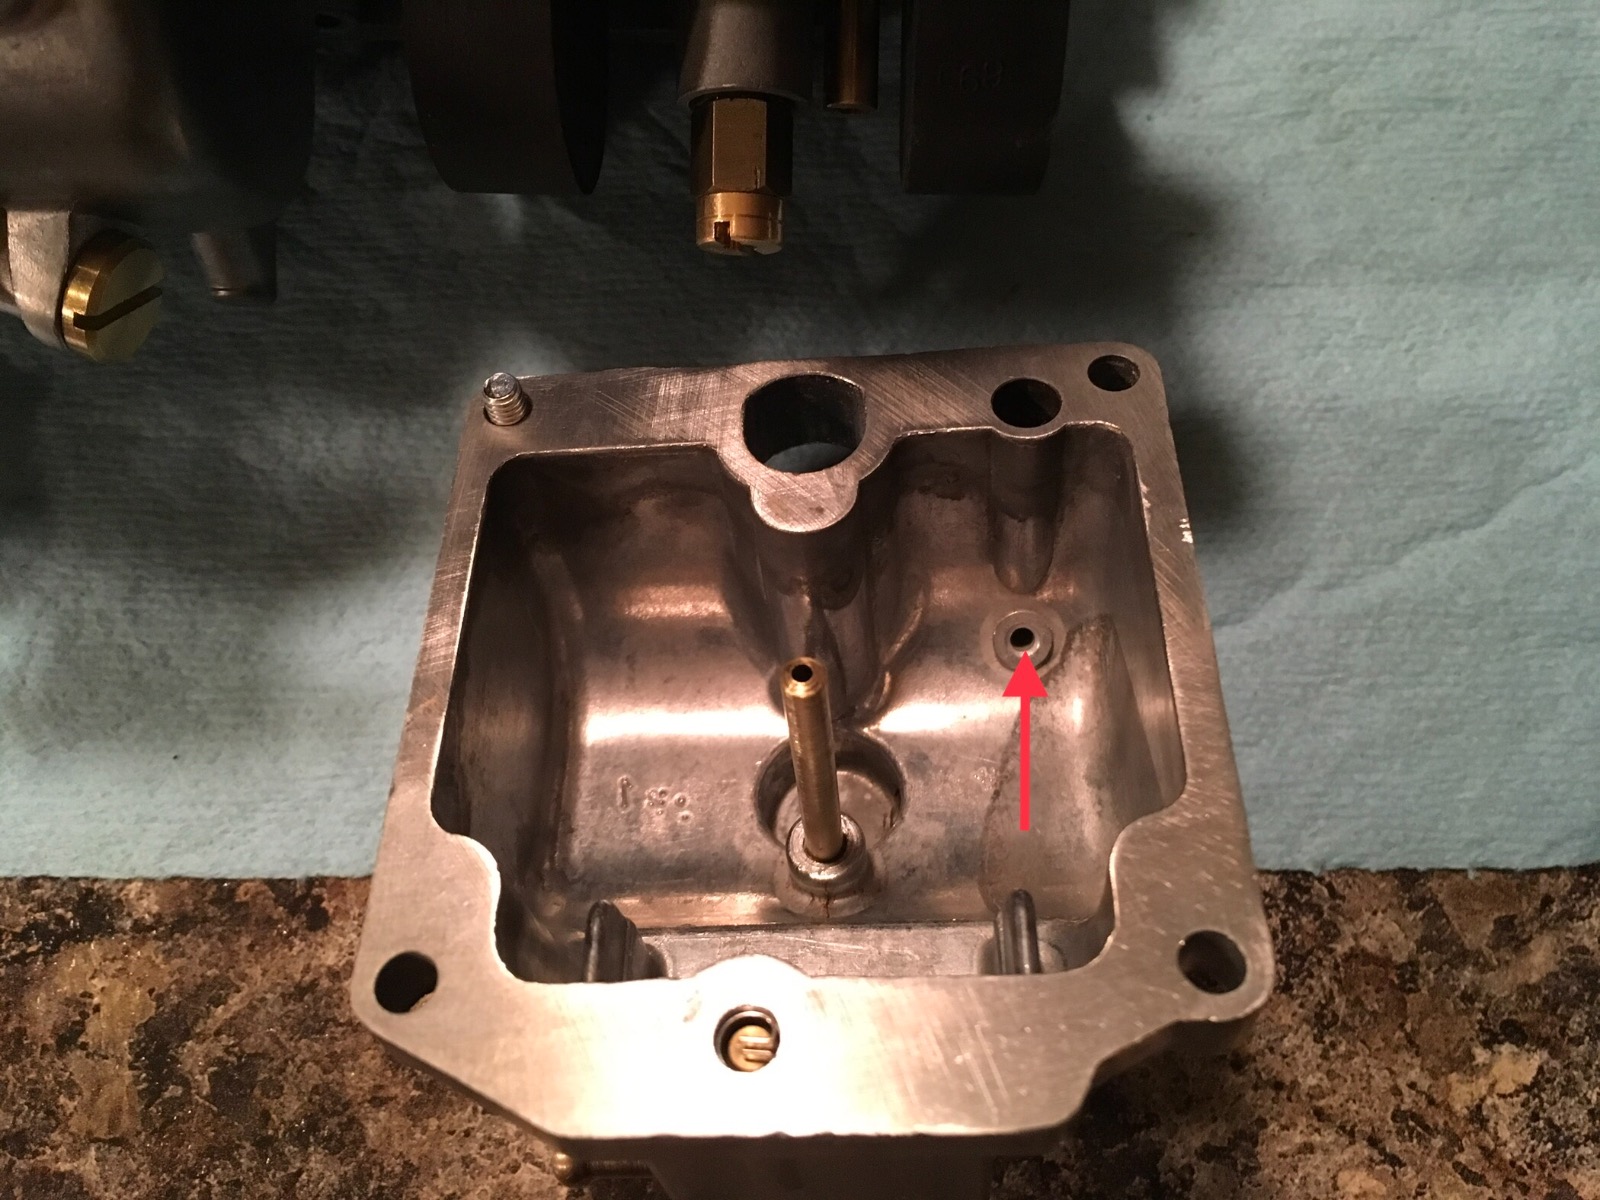
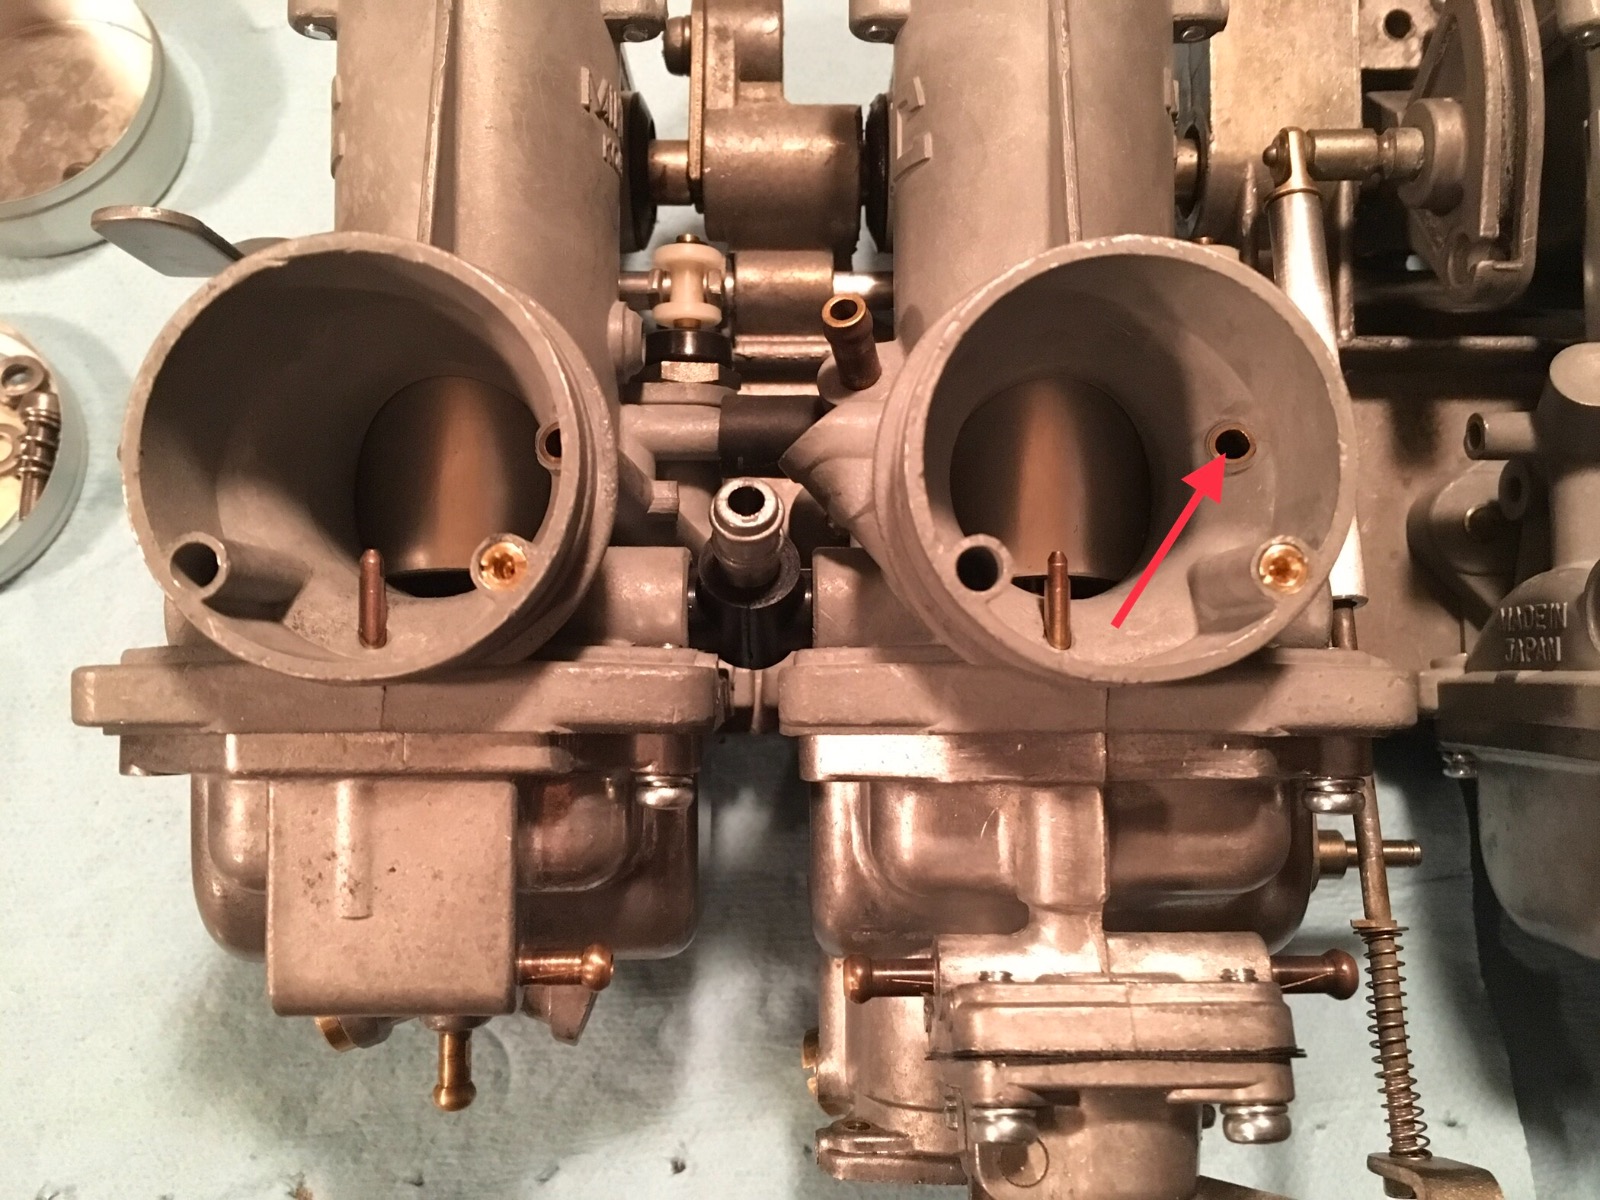
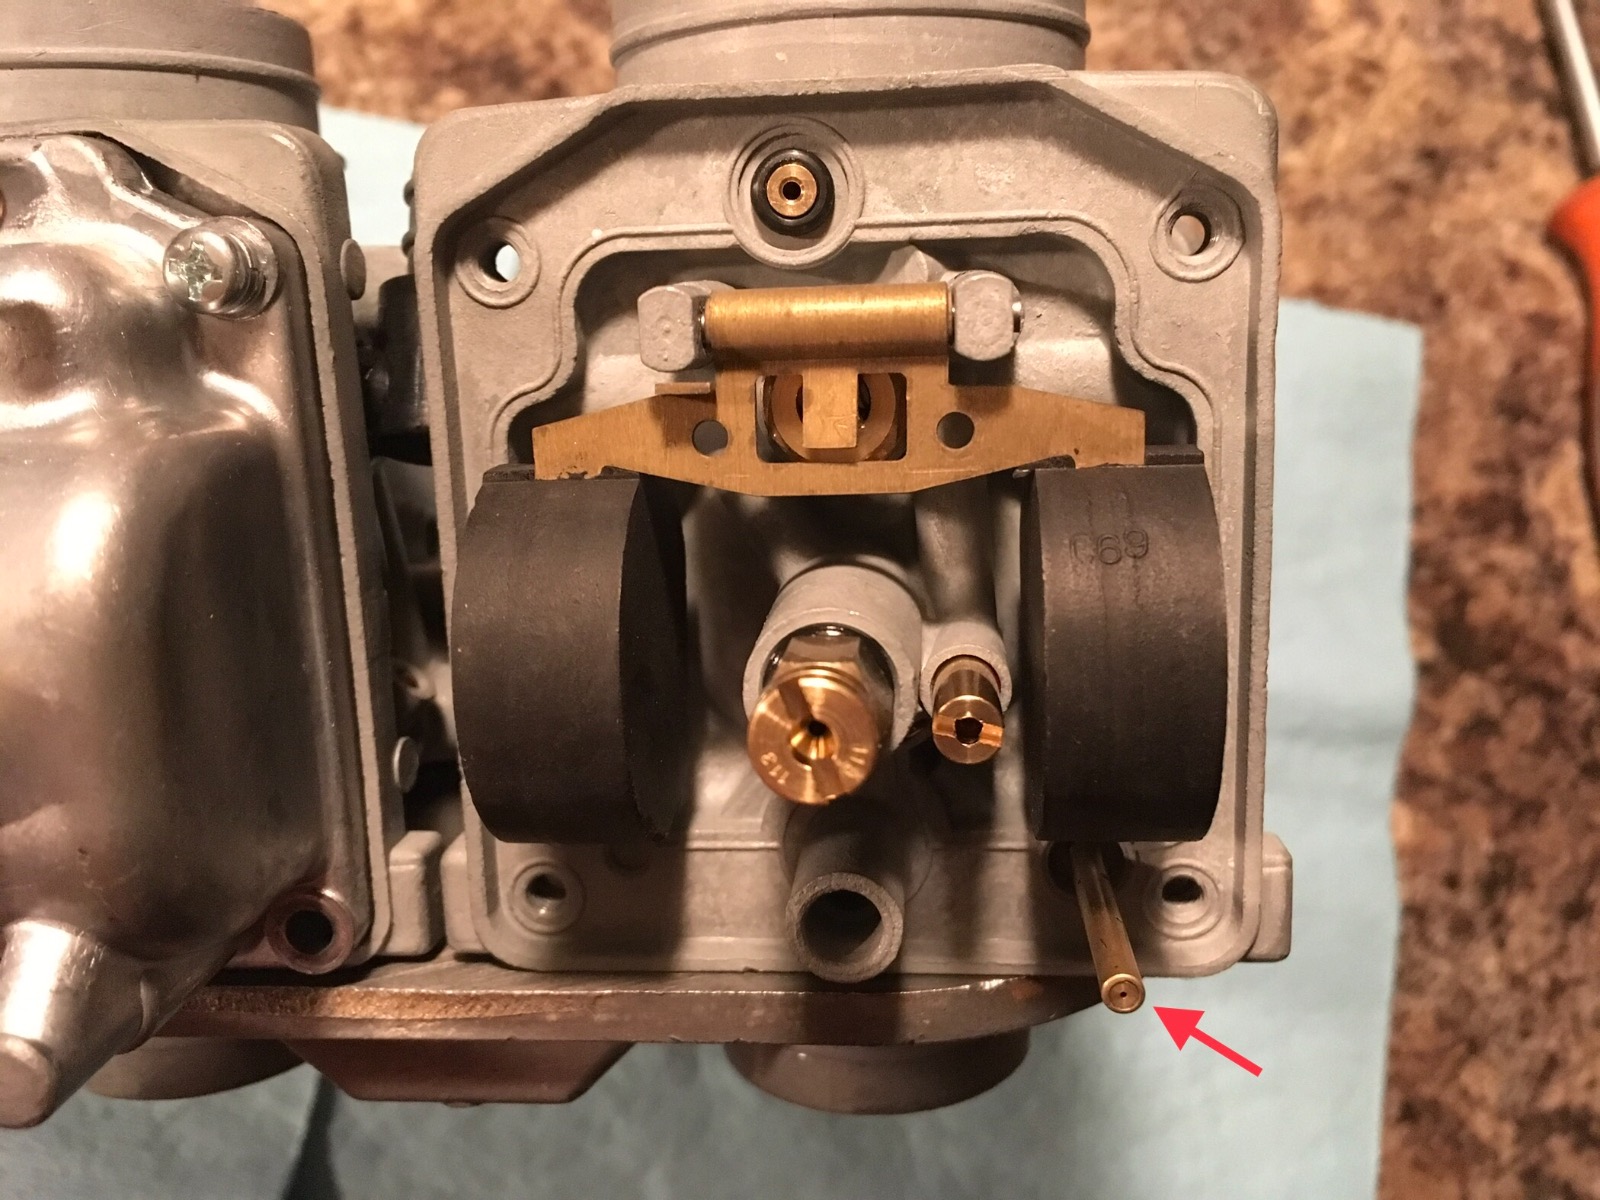
Sorry to piecemeal this as I don’t do partial rebuild. Make sure the choke enrichment circuit is clear.. see red arrows in attached pictures
1976 KZ 900 A4
kzrider.com/forum/11-projects/613548-1976-kz-900-a4
1976 KZ 900 B1 LTD
1978 KZ 1000 B2 LTD
1980 KZ 750 E1
Kowledge Speaks, But Wisdom Listens.
Jimi Hendrix.
1976 KZ 900 B1 LTD
1978 KZ 1000 B2 LTD
1980 KZ 750 E1
Kowledge Speaks, But Wisdom Listens.
Jimi Hendrix.
The following user(s) said Thank You: TheFlyingFreemole
Please Log in or Create an account to join the conversation.
- Scirocco
-
- Offline
- Premium Member
-

Registered
- Never change a running system
- Posts: 4397
- Thanks: 2260
Re: 1977 KZ1000 LTD
06 Jul 2020 11:42 - 06 Jul 2020 11:43
Pilot jets don´t Need any o-rings, only some sort of bleeder (air and fuel mixing) tubes were the main jet is screw on.

My 1975 Z 1 B 900 Project
www.kzrider.com/forum/11-projects/605133...ears-deep-sleep-mode
www.kzrider.com/forum/11-projects/605133...ears-deep-sleep-mode
Last edit: 06 Jul 2020 11:43 by Scirocco.
The following user(s) said Thank You: TheFlyingFreemole
Please Log in or Create an account to join the conversation.
- TheFlyingFreemole
-
Topic Author
- Offline
- User
-
Registered
- Posts: 87
- Thanks: 8
Re: 1977 KZ1000 LTD
16 Jul 2020 19:31
Thanks again MiKaw and Scirocco.
Have been spending my time getting intimate with a scotch pad and degreaser. It was a couple full days of scrubbing and and cleaning parts. On the upside everything off the bike is pretty close to being ready to put back on. This was also a good way to pass the time while I waited for part orders to arrive.
I ordered a set of carburetor O-Rings from cycleorings.com, which came to just over 20$ after shipping. The set contains jet/drain/plunger rings and has some extras, they fit slide type pre-80s and I can definitely recommend this kit if it fits your bike.
I cleaned everything down and then replaced all the O’s, choke collars, float gaskets, and changed the hardware over to hex heads. Afterwards got the floats adjusted so that the fuel level read to be as close to 3mm under the carb ‘lip’ as possible. Turned all fuel mix screws to be 1 1/4 under light seat as per the manual. Carburetors are finished until the bike is running and I can do a vacuum gauge fine tuning.
For my petcock I did a full O-Ring replacement and solder tacked my cracked primary fuel tube together. The solder would have been a pain to get a full seal so once tacked I used some JB Weld steel stick and formed a thin shell around the tube leaving a little uncoated space at the bottom in case of future procedures.
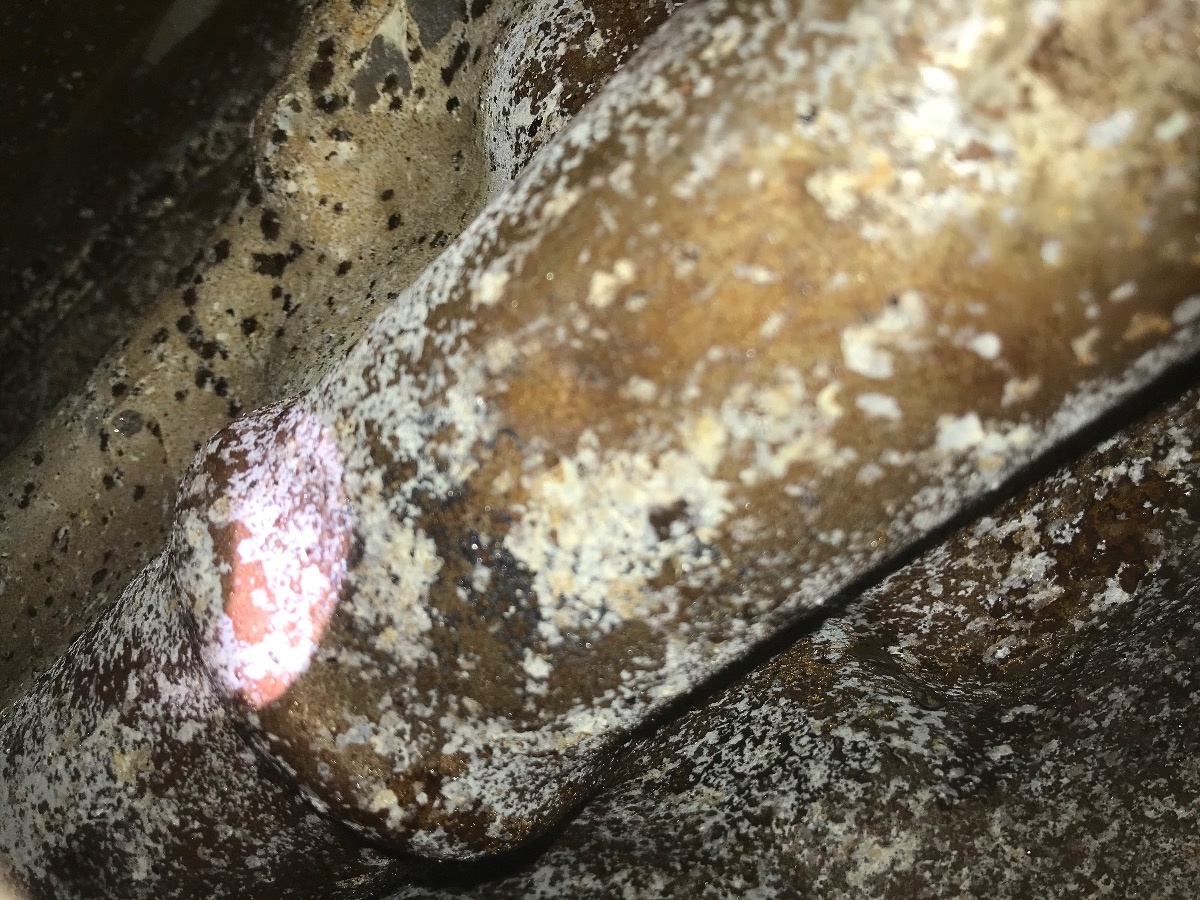
Pulled apart the rear of the bike, except removing the swing arm, and chased down and eliminated all rust spots on the frame. Have been doing some spot painting to help prevent future rust.
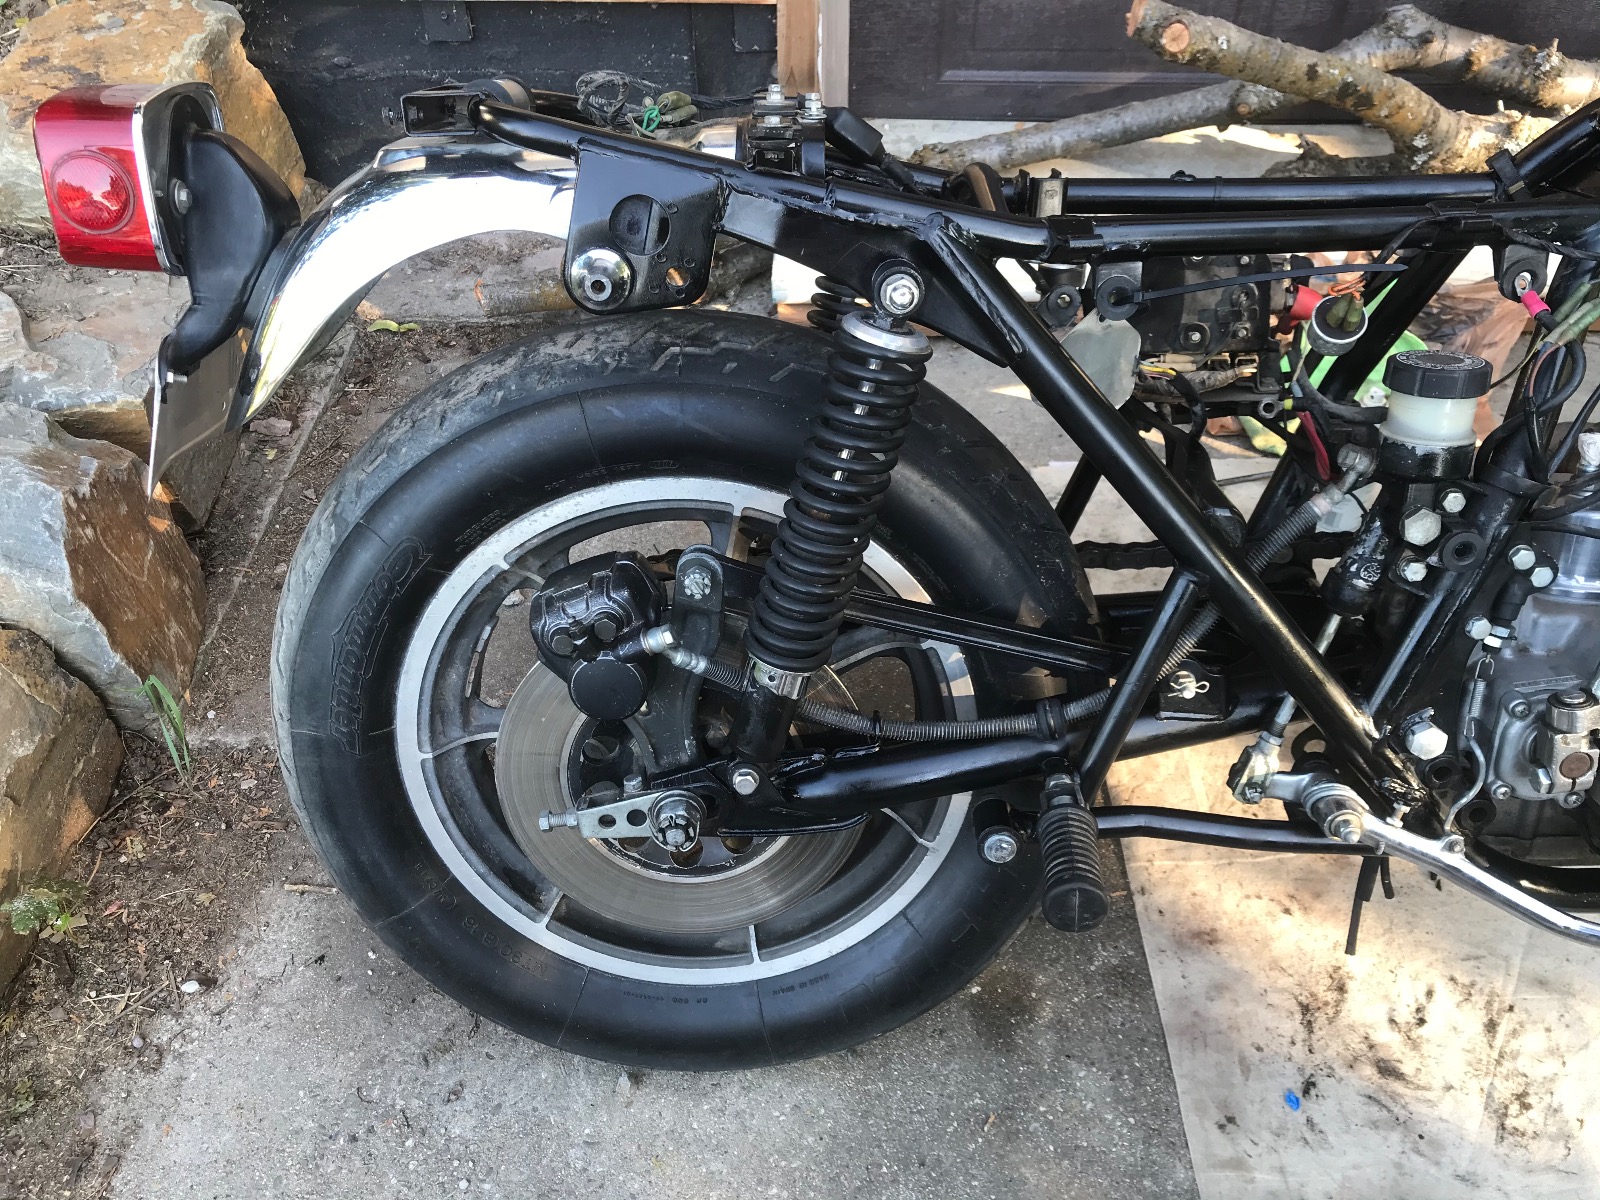
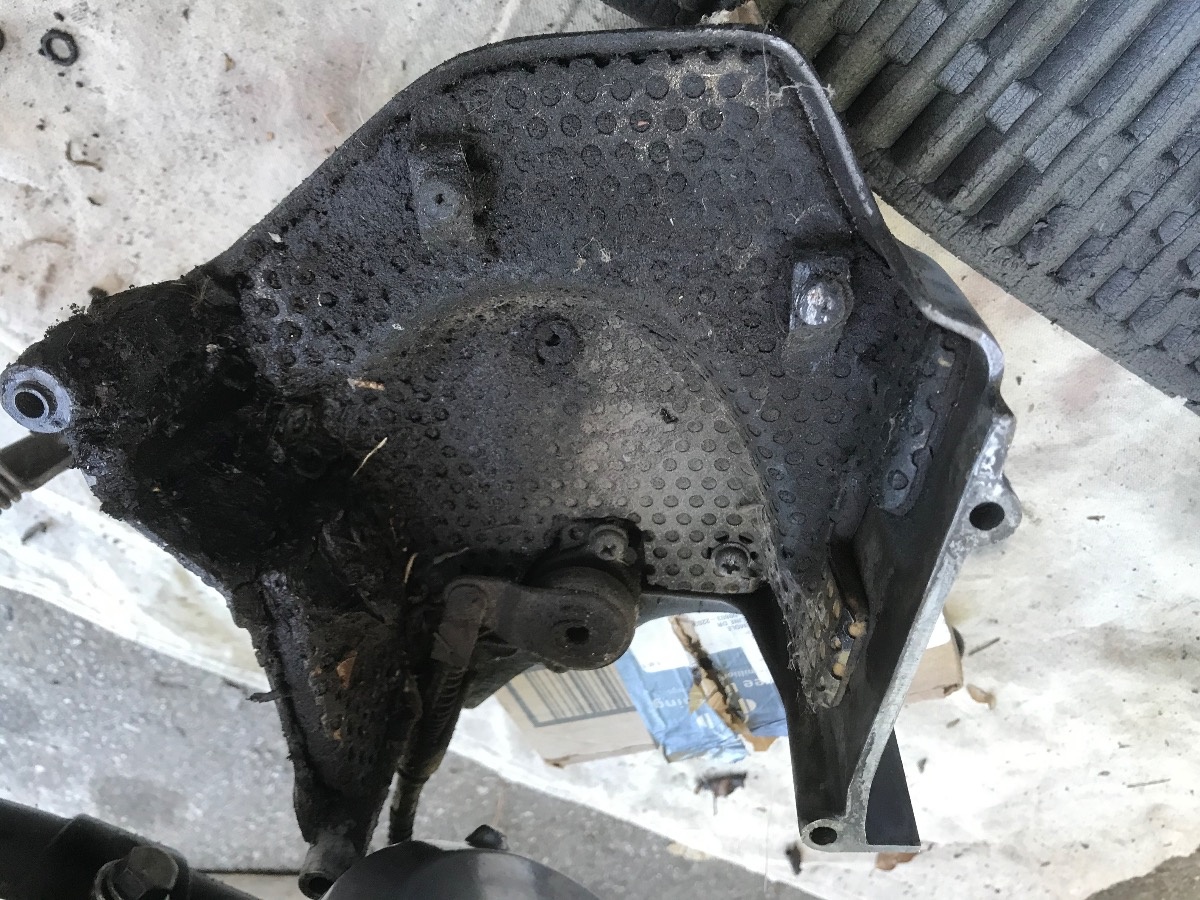
As far as the tear down goes I still need to remove the oil pan and alternator/stator cover for cleaning and gasket replacement. Haven’t attempted the oil pan yet, but so far the alternator cover screws have eluded removal for a couple days now, I soaked several times with penetrating oil, have tapped the screwdriver with a rubber mallet, applied heat via a propane torch all to no avail, not sure what else to do other than keep attacking them, I need to replace the stator grommet/seal as that was leaking in the past. That leak caused a mess of a time under the clutch/shifter cover!!!
Have been spending my time getting intimate with a scotch pad and degreaser. It was a couple full days of scrubbing and and cleaning parts. On the upside everything off the bike is pretty close to being ready to put back on. This was also a good way to pass the time while I waited for part orders to arrive.
I ordered a set of carburetor O-Rings from cycleorings.com, which came to just over 20$ after shipping. The set contains jet/drain/plunger rings and has some extras, they fit slide type pre-80s and I can definitely recommend this kit if it fits your bike.
I cleaned everything down and then replaced all the O’s, choke collars, float gaskets, and changed the hardware over to hex heads. Afterwards got the floats adjusted so that the fuel level read to be as close to 3mm under the carb ‘lip’ as possible. Turned all fuel mix screws to be 1 1/4 under light seat as per the manual. Carburetors are finished until the bike is running and I can do a vacuum gauge fine tuning.
For my petcock I did a full O-Ring replacement and solder tacked my cracked primary fuel tube together. The solder would have been a pain to get a full seal so once tacked I used some JB Weld steel stick and formed a thin shell around the tube leaving a little uncoated space at the bottom in case of future procedures.
Pulled apart the rear of the bike, except removing the swing arm, and chased down and eliminated all rust spots on the frame. Have been doing some spot painting to help prevent future rust.
As far as the tear down goes I still need to remove the oil pan and alternator/stator cover for cleaning and gasket replacement. Haven’t attempted the oil pan yet, but so far the alternator cover screws have eluded removal for a couple days now, I soaked several times with penetrating oil, have tapped the screwdriver with a rubber mallet, applied heat via a propane torch all to no avail, not sure what else to do other than keep attacking them, I need to replace the stator grommet/seal as that was leaking in the past. That leak caused a mess of a time under the clutch/shifter cover!!!
1977 KZ1000 LTD B1 (needs minor fine tuning)
The following user(s) said Thank You: Bent Trigger
Please Log in or Create an account to join the conversation.
Moderators: Street Fighter LTD