
CSR1000 Project Build
- davido
-
 Topic Author
- Offline
- User
-

Registered
- Posts: 1580
- Thanks: 291
Re: CSR1000 Project Build
22 Jul 2023 10:53
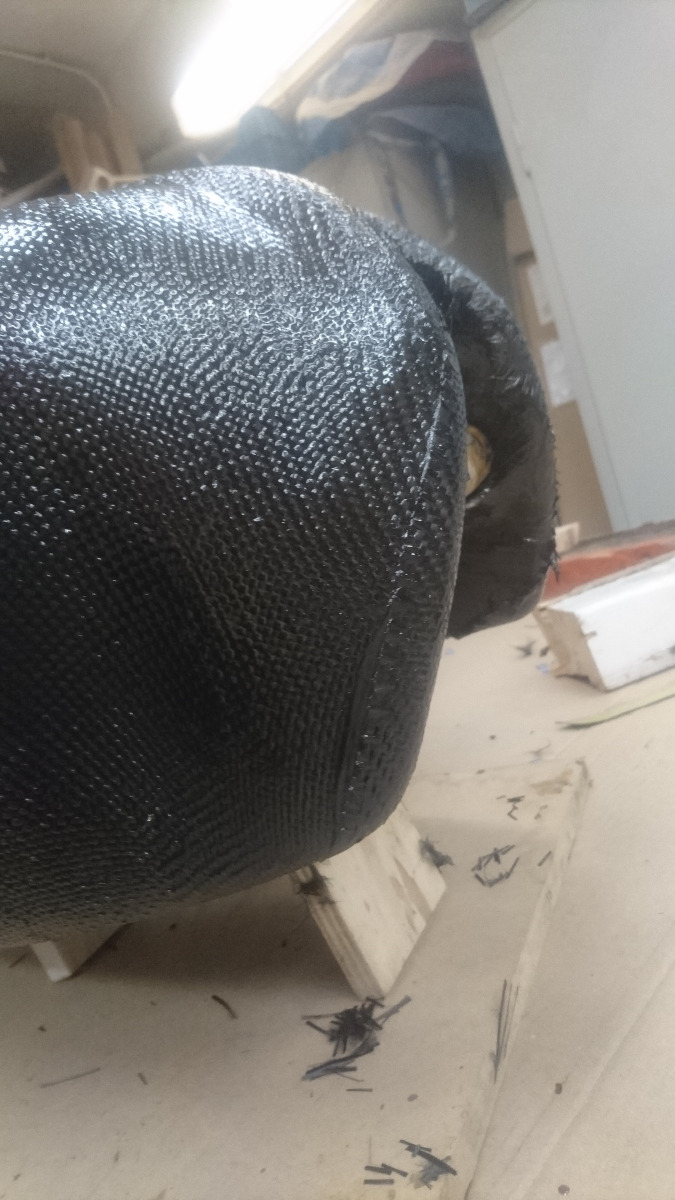
Ok. Latest update.The bottom is closed up and properly sealed with some more layers. So,that's done and out of the way. I filled the holes for the fuel tap with toilet paper and candle wax as I wanted to layer right over them to get a nice clean flat(ish) surface that I could sand back to give the tap O-ring something to seal against.Then I drilled them out;
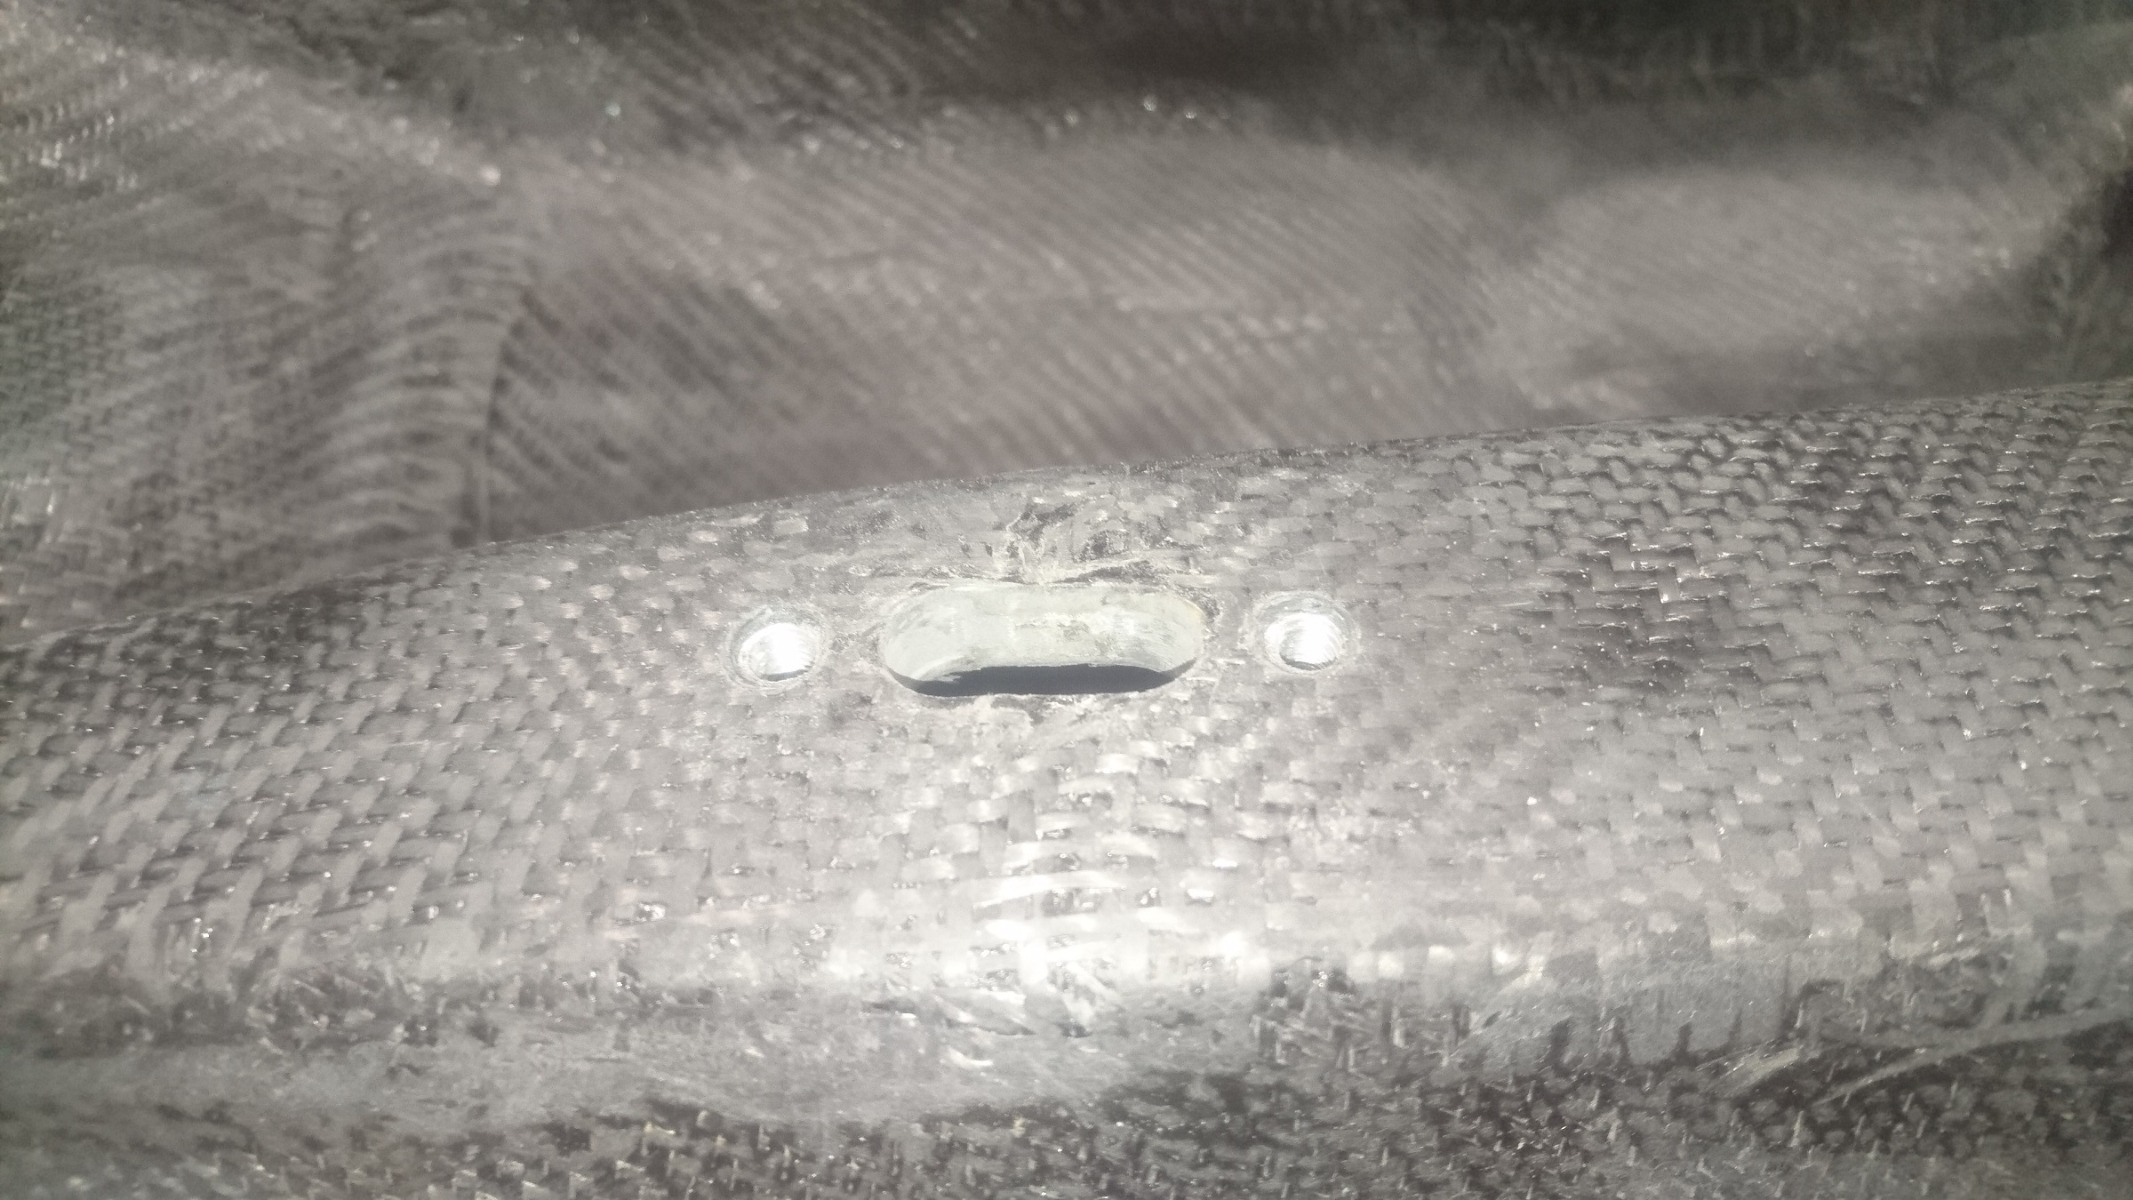
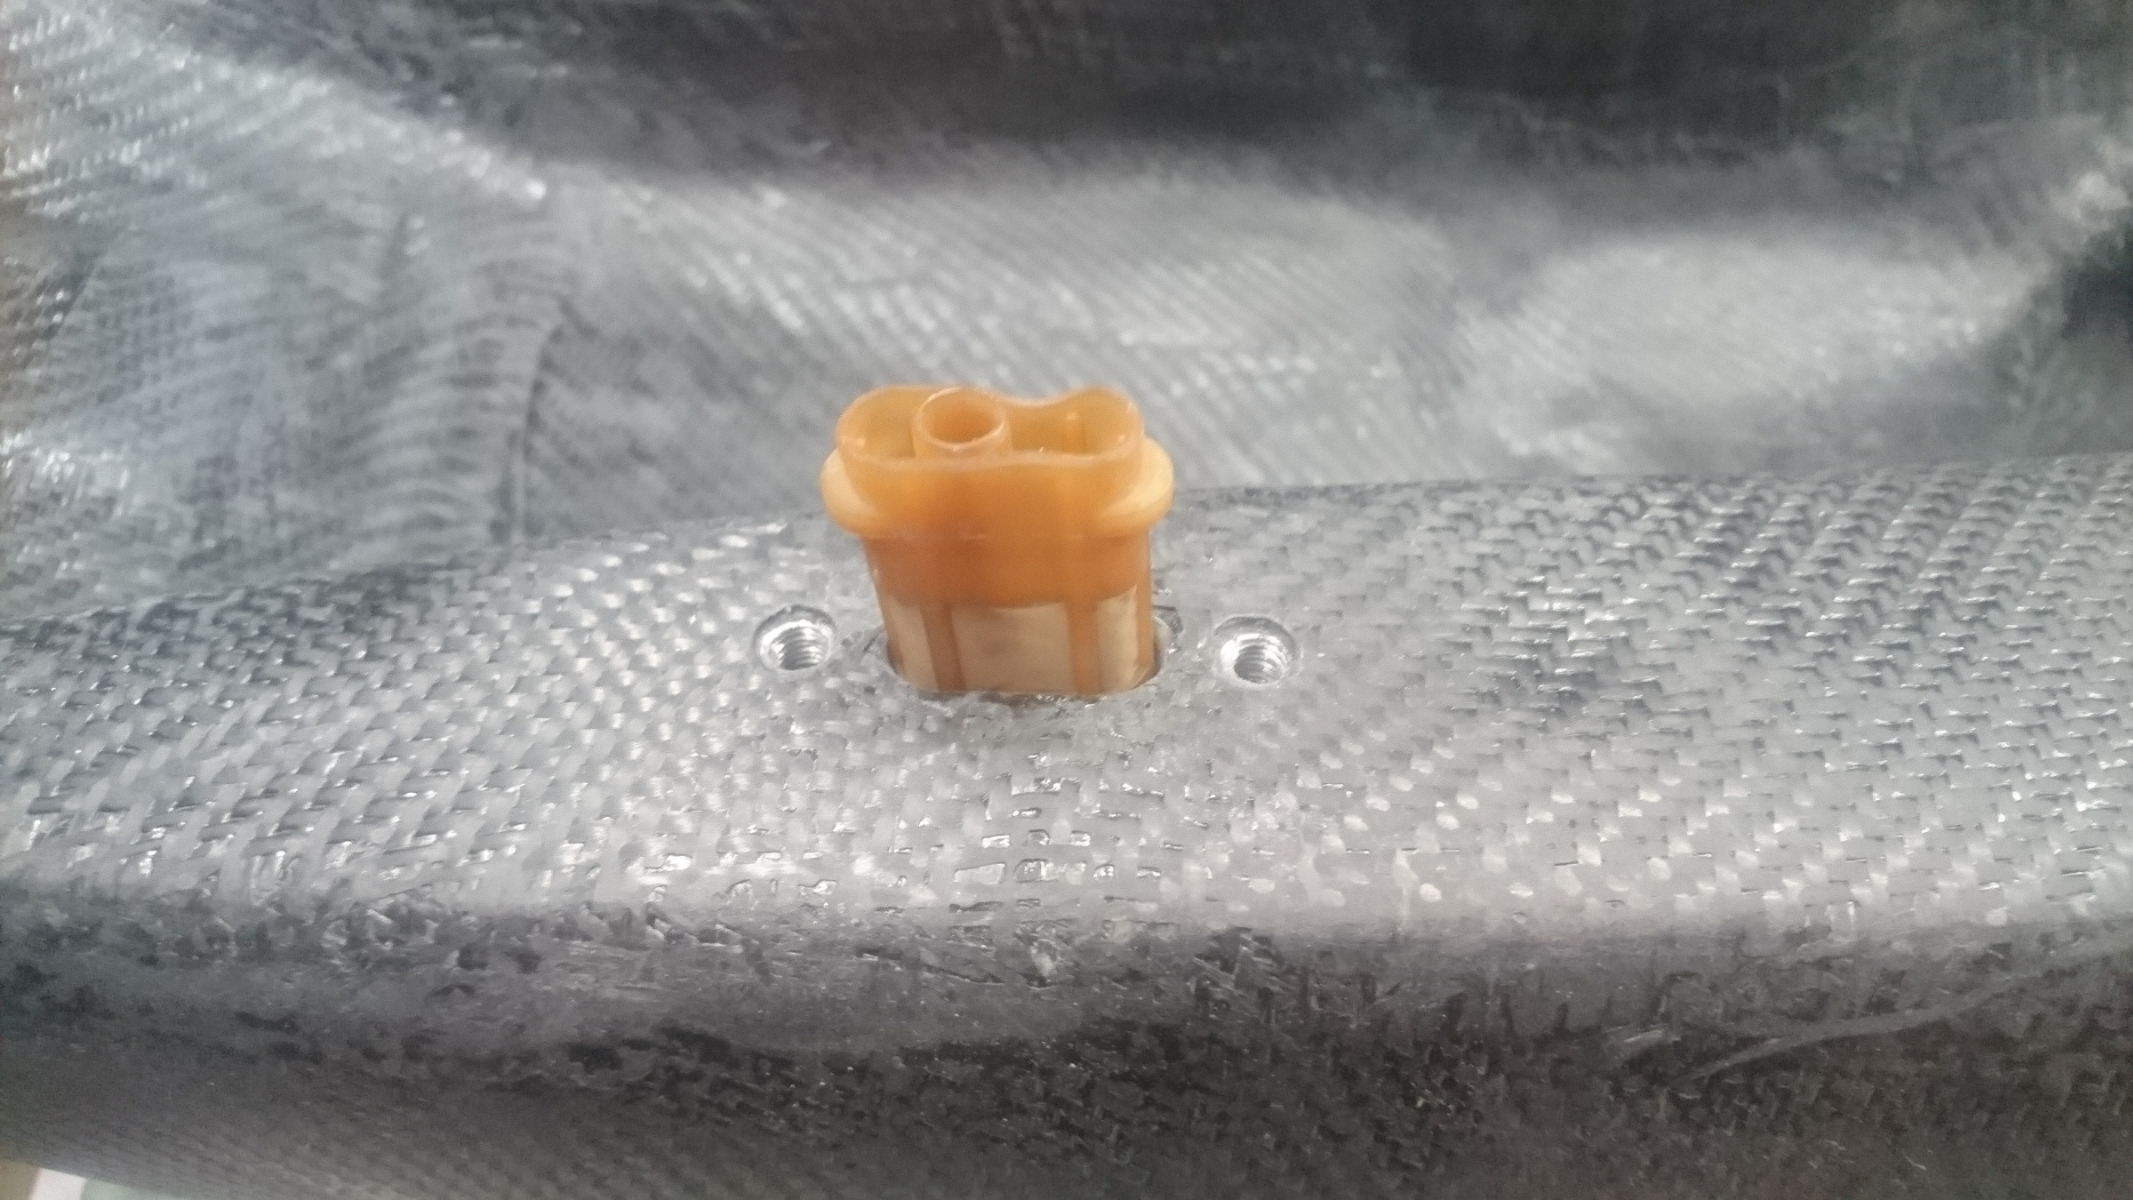
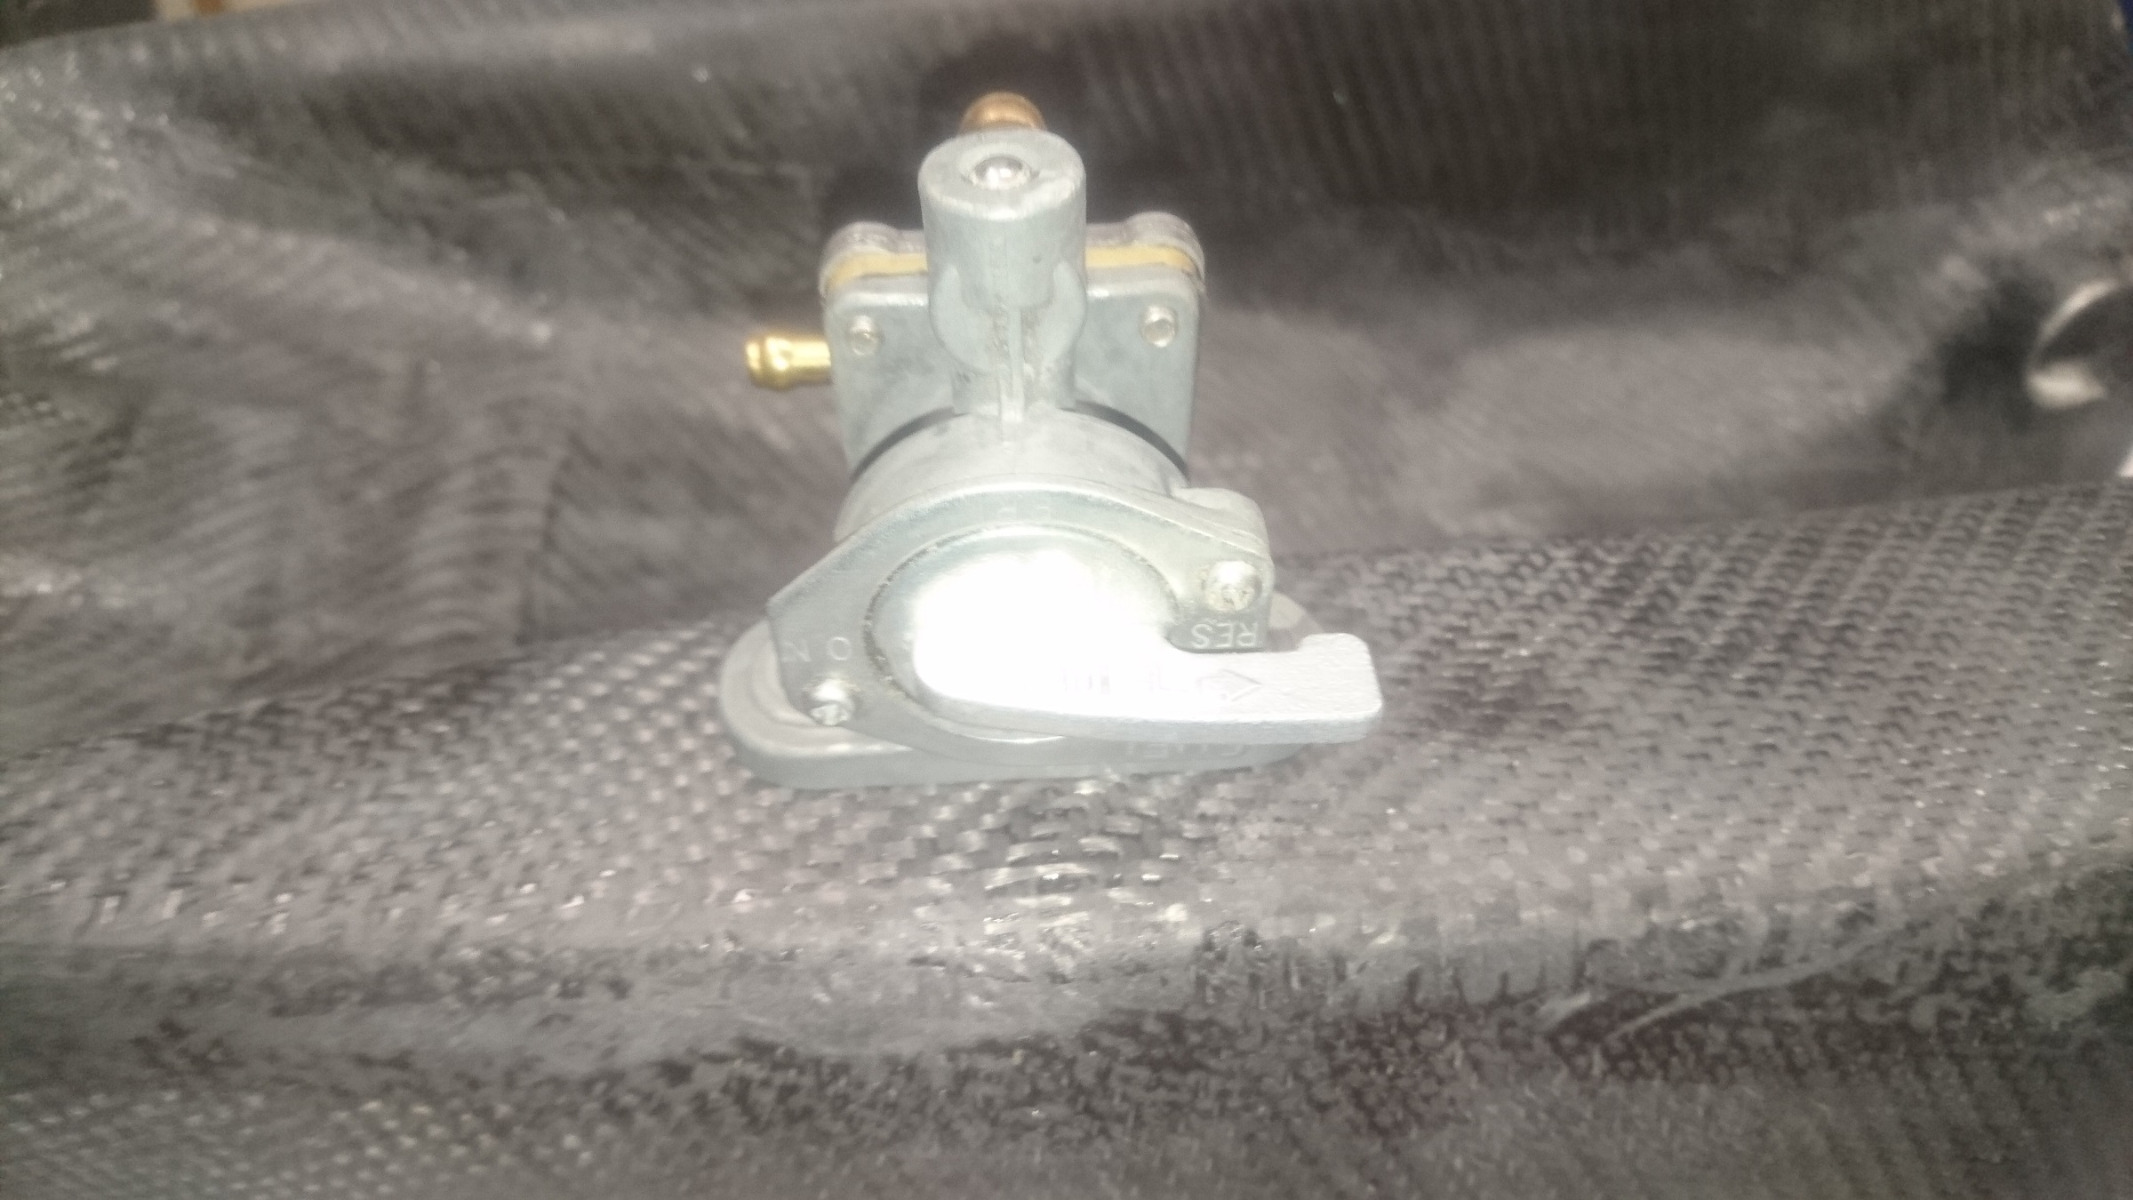
So, that all worked out. I managed to drill out the bolt holes without buggering up the threads. (Unfortunately,I then to covered over the whole thing again with the foldover from the top layer!! So, I'll have to drill it all out again.)
Anyway, I had measured up,cut out and set aside a piece of CF for the final, visual top layer. For the top of the tank. Somehow (????) it was too short and I had to patch a small piece at the front. A bit disappointing I have to say but not the end of the world.It will be hidden behind the right hand fork (I hope) and, I'm at the point now of just not caring;
So,the final layer is on and, in fact thats the end of the carbon fibering!! Finished. No more.Hoorah!
That was a couple of days ago and since then,I've been building up extra layers of resin to reach a thickness that will allow me to sand a nice smooth level surface ( I think they call it fairing in boat building terms) that I can sand and polish without going through to the fiber.
This was it yesterday ( I put another coat on this morning);
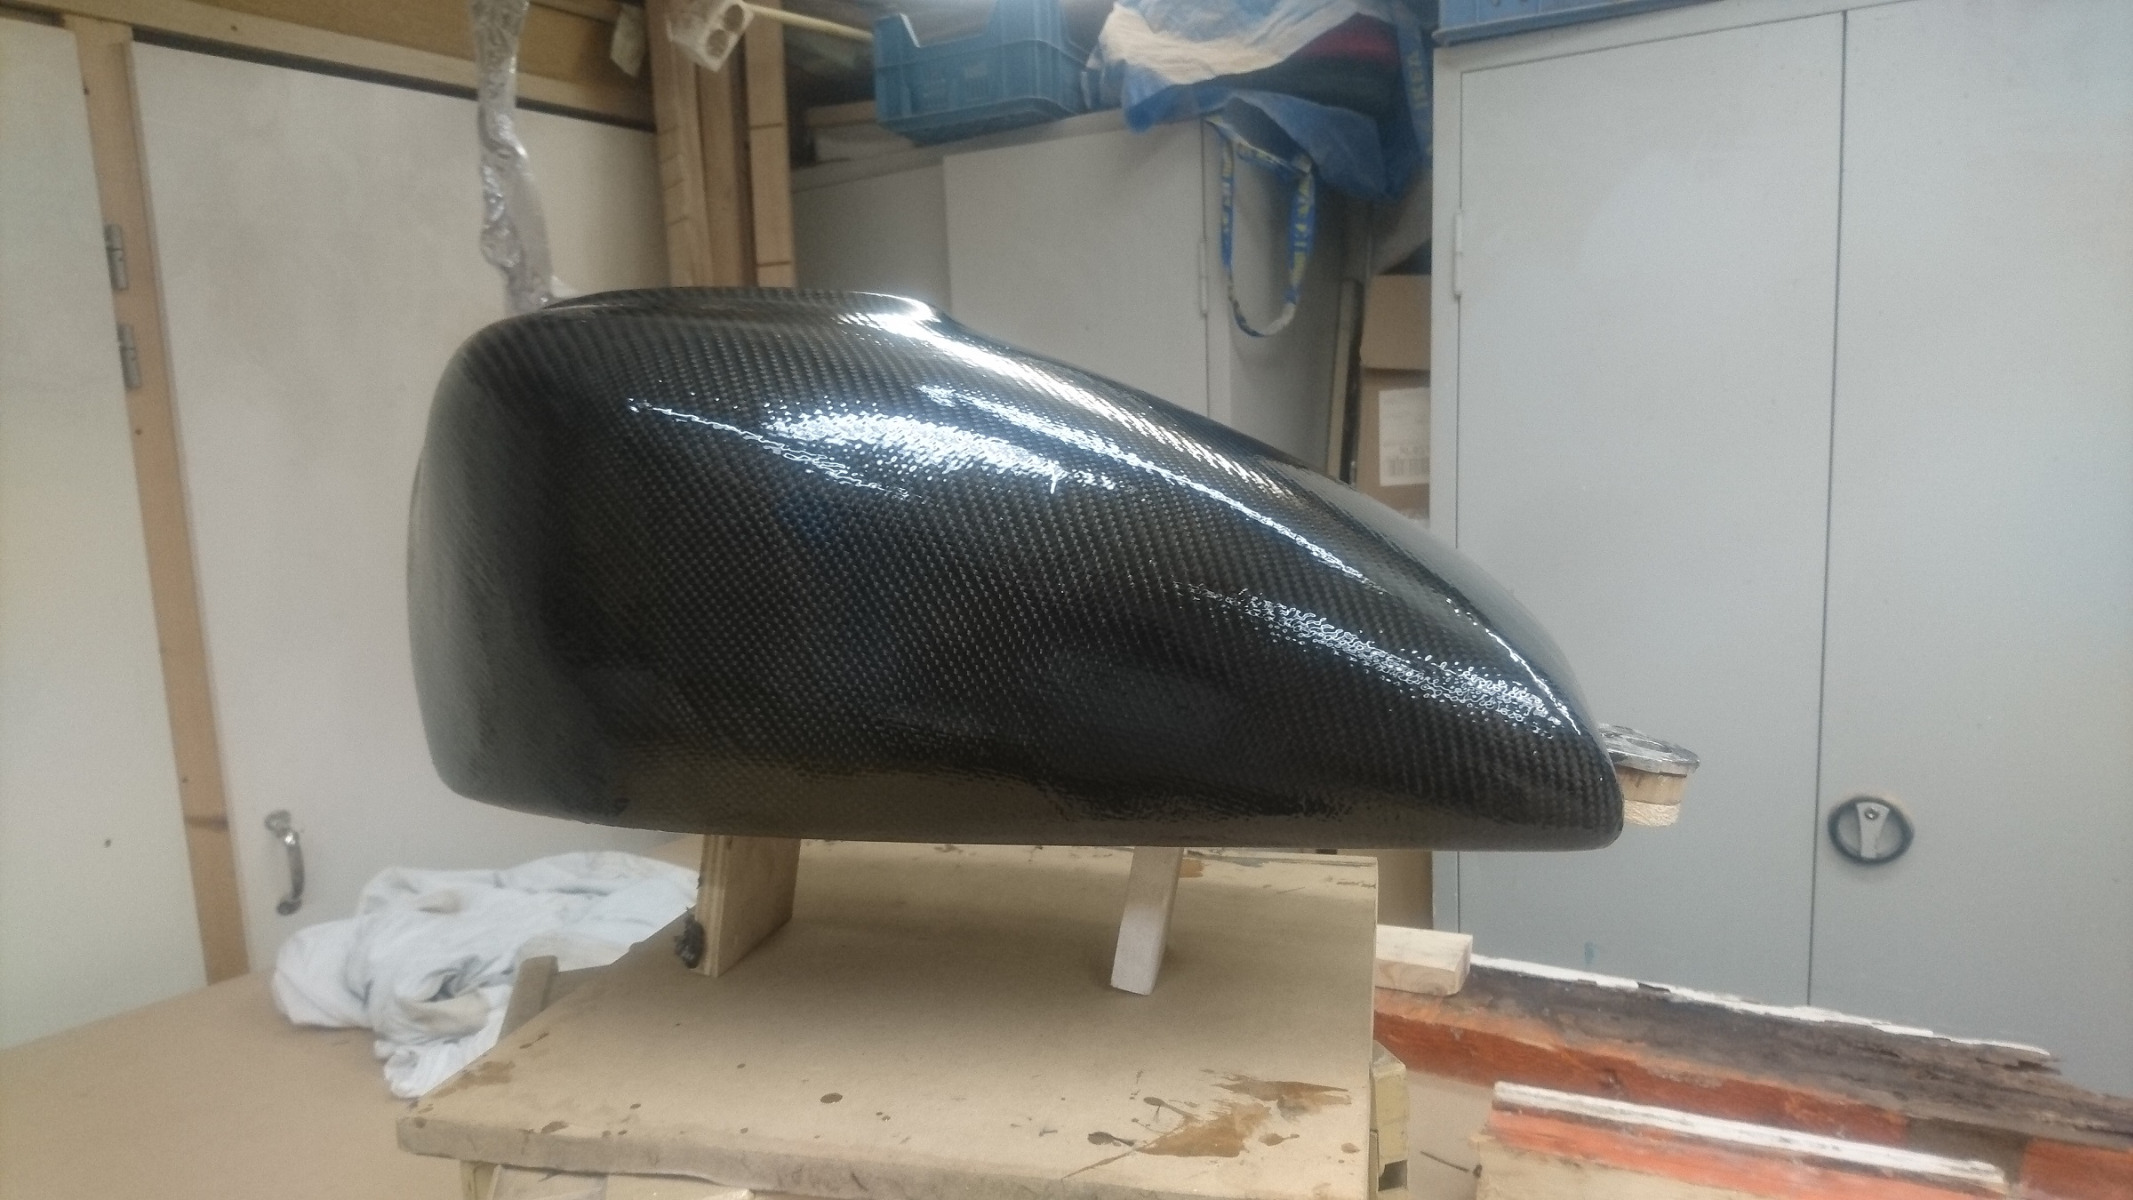
I'm hoping that that will be enough. I'll check tomorrow.
Next step is sanding level (fairing) sanding finer then wet sanding all the way down/up to a polishing stage.
So, that all worked out. I managed to drill out the bolt holes without buggering up the threads. (Unfortunately,I then to covered over the whole thing again with the foldover from the top layer!! So, I'll have to drill it all out again.)
Anyway, I had measured up,cut out and set aside a piece of CF for the final, visual top layer. For the top of the tank. Somehow (????) it was too short and I had to patch a small piece at the front. A bit disappointing I have to say but not the end of the world.It will be hidden behind the right hand fork (I hope) and, I'm at the point now of just not caring;
So,the final layer is on and, in fact thats the end of the carbon fibering!! Finished. No more.Hoorah!
That was a couple of days ago and since then,I've been building up extra layers of resin to reach a thickness that will allow me to sand a nice smooth level surface ( I think they call it fairing in boat building terms) that I can sand and polish without going through to the fiber.
This was it yesterday ( I put another coat on this morning);
I'm hoping that that will be enough. I'll check tomorrow.
Next step is sanding level (fairing) sanding finer then wet sanding all the way down/up to a polishing stage.
www.kzrider.com/forum/11-projects/594313-csr1000-project-build
CB550 (1978)
CB500/4 (1972)*
KZ1000CSR (1981)
XT 600E (1999)
TDM900 (2003)
CB550 (1978)
CB500/4 (1972)*
KZ1000CSR (1981)
XT 600E (1999)
TDM900 (2003)
The following user(s) said Thank You: Nessism, Skidmark, Wookie58
Please Log in or Create an account to join the conversation.
- davido
-
Topic Author
- Offline
- User
-
Registered
- Posts: 1580
- Thanks: 291
Re: CSR1000 Project Build
27 Jul 2023 10:03
Well,I've spent a lot of time trying to sand the surface flat and get rid of all the brush strokes and pin holes in the resin. What a job!! I tried every possible sanding method I could think of, sanding by hand, Festo rotex and palm sanders,everything was just melting the resin. I went through a ton of sandpaper. I set the machines on the lowest speed and some areas it was fine ,other areas the resin would melt and clog up into an extra layer that I would have to scrape off with a Stanley blade. Being a carpenter, I'm no stranger to sanding but I don't understand whats going on with this at all.
Anyway, I got it to the point of being reasonably flat (faired) ,wiped it off with MP cleaner and left it for the night.Next day, I could see the areas that I missed and went after them with the palm sander. No problems,no clogging of the paper, it all went peachy. I got rid of all the low spots that I missed and had a nice smooth to the touch surface. Then I noticed a couple of patches where the pattern of the CF stood out from the rest of the tank and I think that I was getting close to sanding through the resin into the fabric. So,rather than risk it for a biscuit,I decided to put another layer of resin on.(maybe I'll go for two). This time I decided to lay it on with a foam roller to avoid having to sand out brush strokes. All went well until I was at the stage of putting the finishing touches to it and I noticed the foam was disintegrating and blue specks were coming off onto the resin. Bugger! I managed to stop in time and I think I can sand them out without too much drama. Fingers crossed. I'll see tomorrow.
What a job this is!!!!!!!!!!!!
www.kzrider.com/forum/11-projects/594313-csr1000-project-build
CB550 (1978)
CB500/4 (1972)*
KZ1000CSR (1981)
XT 600E (1999)
TDM900 (2003)
CB550 (1978)
CB500/4 (1972)*
KZ1000CSR (1981)
XT 600E (1999)
TDM900 (2003)
Please Log in or Create an account to join the conversation.
- Wookie58
-

- Offline
- Moderator
-

Registered
- Posts: 6498
- Thanks: 4092
Re: CSR1000 Project Build
27 Jul 2023 12:02
Your tenacity is admirable Davido, sounds like it's been a nightmare. I have had a similar issue sanding some of the plastics with the surface softening if I stayed in one place for too long with the palm sander. Could it be that with multiple layers the resin hadn't cured fully? I'm looking forward to seeing the finished article (I'm sure you are too)

1982 KZ1000 Ltd
www.kzrider.com/forum/11-projects/617631...-82-begins?start=192
kzrider.com/forum/faq-wiki/616810-electr...-fault-finding-guide
www.kzrider.com/forum/11-projects/617631...-82-begins?start=192
kzrider.com/forum/faq-wiki/616810-electr...-fault-finding-guide
Please Log in or Create an account to join the conversation.
- davido
-
Topic Author
- Offline
- User
-
Registered
- Posts: 1580
- Thanks: 291
Re: CSR1000 Project Build
27 Jul 2023 13:17
Yeah,I was thinking that. Though the effect wasn't consistent. Some areas I would concentrate on and there was no problem and others I would just pass over and get the melting/clogging. I'm losing track of it now but I think it sat for at least 2 or 3 days before I started sanding, so It should be fully cured. I'll have to dig out the tech sheet for the resin and see if that gives any clue. Anyway,onward and upward.
www.kzrider.com/forum/11-projects/594313-csr1000-project-build
CB550 (1978)
CB500/4 (1972)*
KZ1000CSR (1981)
XT 600E (1999)
TDM900 (2003)
CB550 (1978)
CB500/4 (1972)*
KZ1000CSR (1981)
XT 600E (1999)
TDM900 (2003)
The following user(s) said Thank You: Wookie58
Please Log in or Create an account to join the conversation.
- Nessism
-

- Offline
- Sustaining Member
-

Registered
- Posts: 8115
- Thanks: 3498
Re: CSR1000 Project Build
27 Jul 2023 16:03
Wet sanding? It doesn't clog the paper as quickly.
Ed
Carb O-ring Kits : www.kzrider.com/forum/14-vendor-forum/62...rburetor-o-ring-kits
www.kzrider.com/forum/faq-wiki/618026-new-owner-things-to-know
1981 KZ750E2
www.kzrider.com/forum/11-projects/604901...z750e-project-thread
Carb O-ring Kits : www.kzrider.com/forum/14-vendor-forum/62...rburetor-o-ring-kits
www.kzrider.com/forum/faq-wiki/618026-new-owner-things-to-know
1981 KZ750E2
www.kzrider.com/forum/11-projects/604901...z750e-project-thread
Please Log in or Create an account to join the conversation.
- Wookie58
-
- Offline
- Moderator
-
Registered
- Posts: 6498
- Thanks: 4092
Re: CSR1000 Project Build
28 Jul 2023 00:51 - 28 Jul 2023 07:02Ed I don't think it's an issue of the paper "clogging" but more a case of the surface becoming "tacky" during sanding. I had this with some of the plastic work I have been doing, especially where I had used "gloop" (scraps of ABS plastic dissolved in acetone to make a paste) What I found was depending on the thickness although it was hard to the touch after 24 hours or less, for the acetone to have fully evaporated off and the paste to have fully hardened could take 3-4 days depending on temperature. When I was sanding it the surface softened from the heat generated by sanding and clogged the paper as well as depositing material on previously finished areasWet sanding? It doesn't clog the paper as quickly.
It looks like "patients" is the name of the came for the resin to fully harden if not "oven cured"
HOW LONG DOES 2-PART EPOXY TAKE TO DRY?The drying time for resin and hardeners varies. We recommend checking with the manufacturer’s instructions. If your shop is less than 70°F, it will take longer. To expedite curing, raise the temperature in the work area or apply additional heat to the project.TIMES IT TAKES FOR EPOXY RESIN TO BE FULLY CUREDDepending on the thickness of the epoxy resin and the other factors mentioned above, a complete cure can take anywhere from a few days to a few weeks. For most projects, you’ll want to wait at least two days for the thickest layer of epoxy to cure. To fully harden, you may need to wait at least two weeks.
1982 KZ1000 Ltd
www.kzrider.com/forum/11-projects/617631...-82-begins?start=192
kzrider.com/forum/faq-wiki/616810-electr...-fault-finding-guide
www.kzrider.com/forum/11-projects/617631...-82-begins?start=192
kzrider.com/forum/faq-wiki/616810-electr...-fault-finding-guide
Last edit: 28 Jul 2023 07:02 by Wookie58.
Please Log in or Create an account to join the conversation.
- davido
-
Topic Author
- Offline
- User
-
Registered
- Posts: 1580
- Thanks: 291
Re: CSR1000 Project Build
29 Jul 2023 10:02
Well I checked the tech sheet and for this Vinylester they reckon 24hours at the coldest end of the range.More heat faster cure time, of course. I honestly didn't consider wet and dry sanding at this stage.The surface was so rough and uneven from all the layers (brushed on) that it would have been a helluva job without machines. I was planning on knocking it back to a reasonable smoothness and start the wet and dry around 400 grit.
Now though,with the surface faired, the extra 2 layers (FINAL layers) have dried out pretty good. I put them on with rollers (the disintegrating foam roller first an epoxy proof fluffy roller for the second.) I got rid of the specks of blue foam from the first roll and the second roll went on very nicely. I reckon I can crack on with the sanding now from a 180 grit. Maybe even a 320.
I'll have at it tomorrow. By then it'll have had 48 hours dry time. Hopefully enough. We'll see.
www.kzrider.com/forum/11-projects/594313-csr1000-project-build
CB550 (1978)
CB500/4 (1972)*
KZ1000CSR (1981)
XT 600E (1999)
TDM900 (2003)
CB550 (1978)
CB500/4 (1972)*
KZ1000CSR (1981)
XT 600E (1999)
TDM900 (2003)
The following user(s) said Thank You: Wookie58
Please Log in or Create an account to join the conversation.
- Wookie58
-
- Offline
- Moderator
-
Registered
- Posts: 6498
- Thanks: 4092
Re: CSR1000 Project Build
29 Jul 2023 12:26
Hi Davido, I hope you don't think I am trying to be a "smart arse" but to the contrary am just trying to help you not "lose your mind" with this tank. I am assuming from the previous posts that you are intending to have a raw carbon finish as opposed to painting?
If this is the case then according to the below your final coat of resin needs an additional additive so that it is "tack free" and polishable (apologies if you already know this) might be worth checking with your supplier ref "final coat"
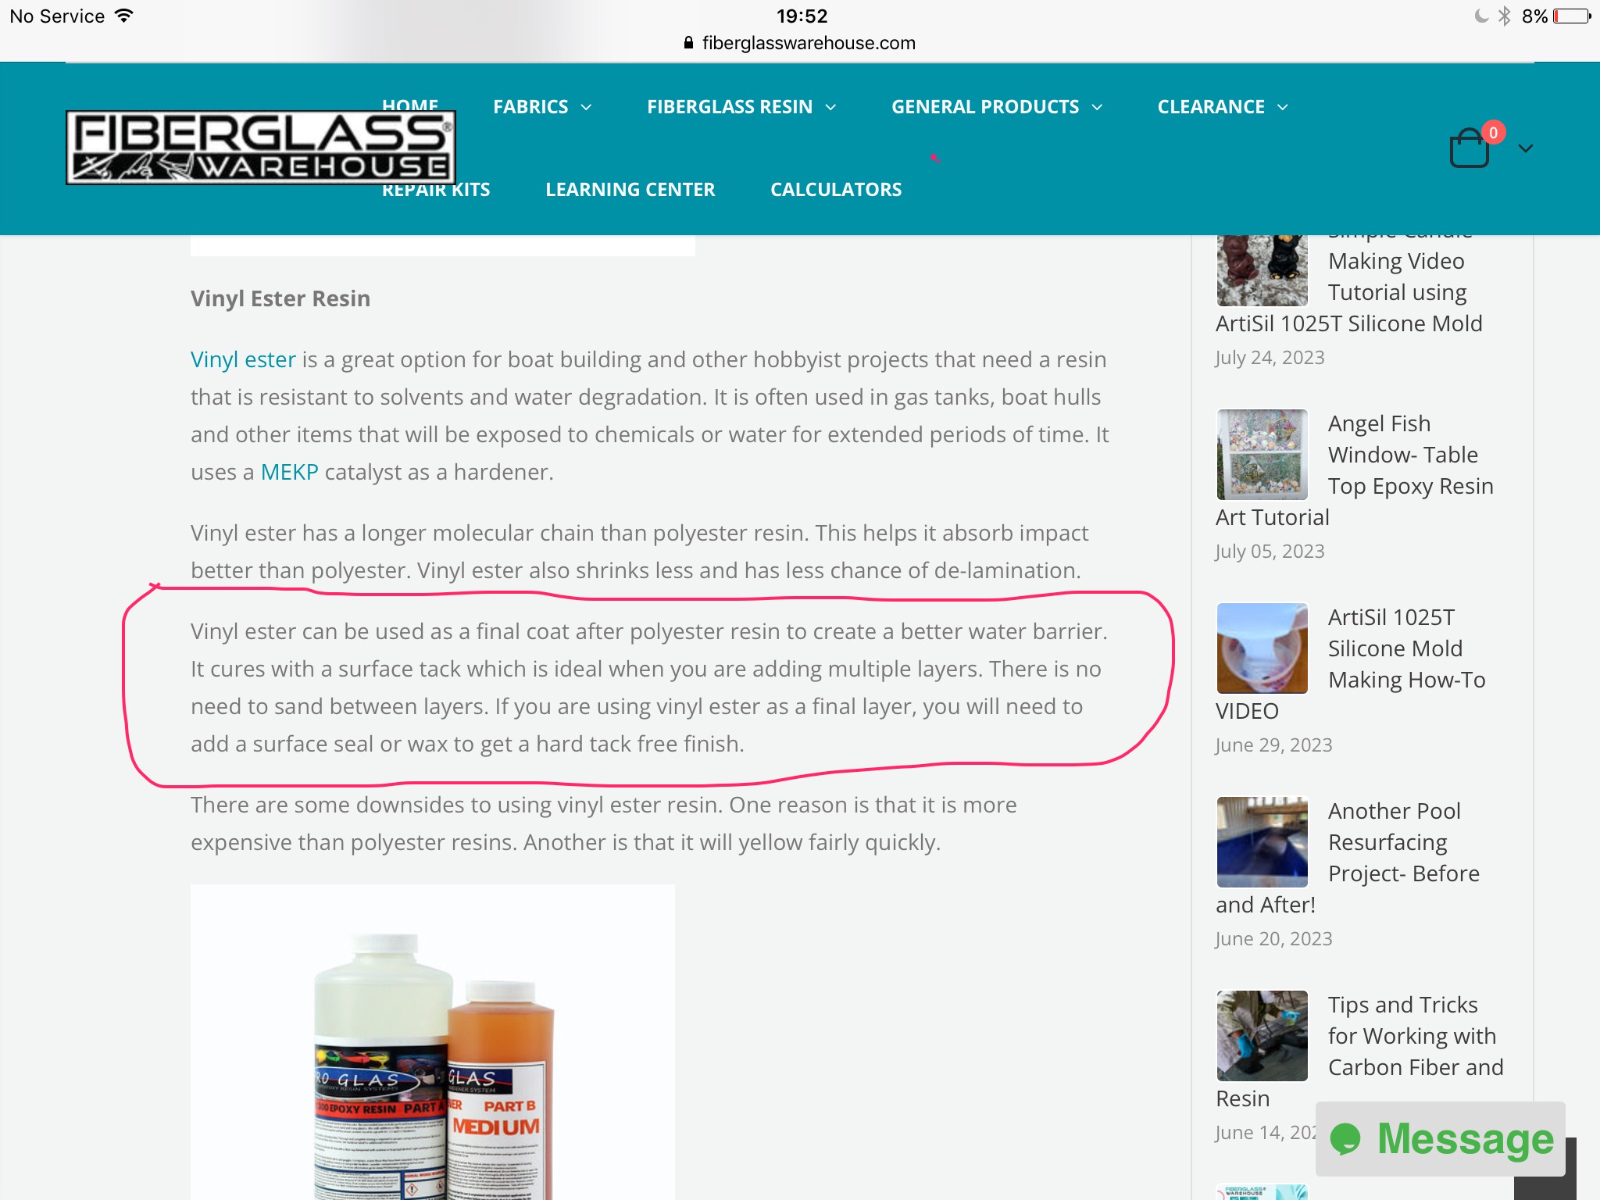
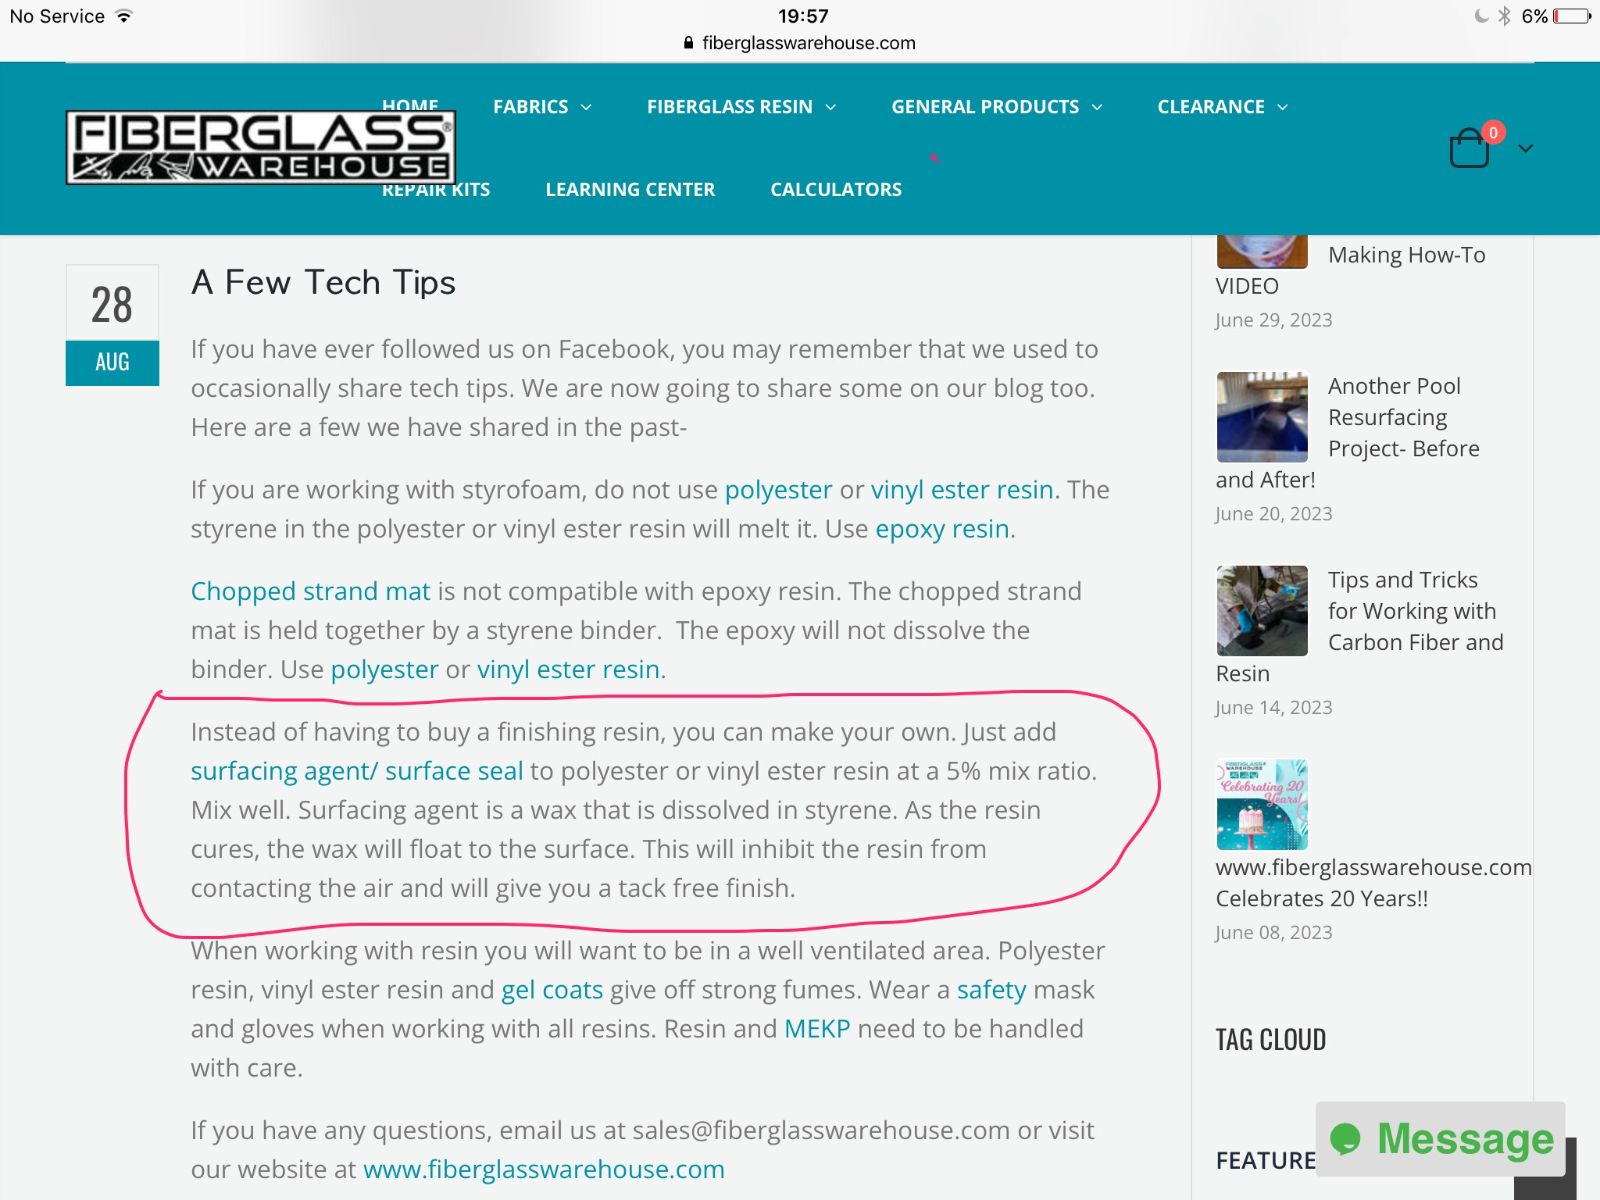
If this is the case then according to the below your final coat of resin needs an additional additive so that it is "tack free" and polishable (apologies if you already know this) might be worth checking with your supplier ref "final coat"
1982 KZ1000 Ltd
www.kzrider.com/forum/11-projects/617631...-82-begins?start=192
kzrider.com/forum/faq-wiki/616810-electr...-fault-finding-guide
www.kzrider.com/forum/11-projects/617631...-82-begins?start=192
kzrider.com/forum/faq-wiki/616810-electr...-fault-finding-guide
The following user(s) said Thank You: howardhb
Please Log in or Create an account to join the conversation.
- davido
-
Topic Author
- Offline
- User
-
Registered
- Posts: 1580
- Thanks: 291
Re: CSR1000 Project Build
30 Jul 2023 05:36
Hey Wookie' any advice is always welcome. A very interesting link,that. Thrown a spanner in the works I have to say but probably for the best. I was told by my resin 'dealer' that I should use a top coat of whats called DD Lak to finish with It would be sandable and polishable and give UV protection. But as its e40.00 a pot,I thought Mehhh,I've spent enough already. I'll just sand and polish the final Vinylester coat. Which I was just about to do. Today. Until reading your post!
Now I get the importance of UV protection. I don't want it turning yellow. I've seen yellowed CF and it doesn't look good.So, I'm going to have to fork out another e40,00 and get a pot of DD lak. From the tech sheet,I get that it takes 24-48 hours to cure and I will need 2 or 3 layers, its going to take a while. Also as I'll be away for most of the week, I wont be able to do much until next weekend or the following week. Bugger! I really had my hopes set on finishing it today.
Another thing to think about is the 'Kawasaki' tank stickers. They should go on under the final coat(s). Probably should go on now actually.I'll have to find and order a pair before I go away.
Then again.....Am I going to keep the CF look or paint over everything??? I have no idea. As I said before, I'm not a fan of the look on bikes. It always looks to me like a fashion accessory. Like the coloured anodizing on bikes in the 80s or flames and chrome on 70's customs. Having said that though. As a stand alone object the tank does look fantastic!!!
What to do? What to do??. I better order the stickers. I'll need them either way.
www.kzrider.com/forum/11-projects/594313-csr1000-project-build
CB550 (1978)
CB500/4 (1972)*
KZ1000CSR (1981)
XT 600E (1999)
TDM900 (2003)
CB550 (1978)
CB500/4 (1972)*
KZ1000CSR (1981)
XT 600E (1999)
TDM900 (2003)
Please Log in or Create an account to join the conversation.
- Wookie58
-
- Offline
- Moderator
-
Registered
- Posts: 6498
- Thanks: 4092
Re: CSR1000 Project Build
30 Jul 2023 16:01
I think before you buy the top coat you need to decide what the final finish is going to be. As I understand it vinylester will never full harden as long as it is contact with air. However if you go the paint route, as I understand it once you have applied a coat of high build ( which will block the surface from contact with the air) the resin will harden up under the filler coat after a couple of days so no need for sealing resin.
Are you planning to seal the inside ? apparently when used in boat building vinylester that has not been sealed absorbs water into the lay-up (I guess it will do the same with fuel ?)
Ref the decals- probably worth asking a sticker company if the resin will pickle the vinyl decals ? Alternatively when it's fully hardened you could apply the stickers and then a couple of coats of 2k lacquer (again worth checking you can apply 2k on the top coat - I would assume so since you can paint it)
1982 KZ1000 Ltd
www.kzrider.com/forum/11-projects/617631...-82-begins?start=192
kzrider.com/forum/faq-wiki/616810-electr...-fault-finding-guide
www.kzrider.com/forum/11-projects/617631...-82-begins?start=192
kzrider.com/forum/faq-wiki/616810-electr...-fault-finding-guide
Please Log in or Create an account to join the conversation.
- davido
-
Topic Author
- Offline
- User
-
Registered
- Posts: 1580
- Thanks: 291
Re: CSR1000 Project Build
21 Aug 2023 11:01
So, back at it. Upon reflection,I've decided to stop faffing around and just finish this thing. Paint,stickers and all the rest is just a distraction. I can decide on that anytime in the future. For now, I just want to finish the bugger.
I found some 120 wet'n'dry and went at the surface with that,then down to 180,then 240. Then I applied whats called 'DD Lak'. This is a UV protective lacquer. Hopefully it will stop the carbon from yellowing. Its a strange animal though. Two component. Mix and sit for 20 minutes before applying. 24 hours before sanding (@ 20c). I went back to it today and the tank is full of sags and loads of drips along the underside edges. What a job trying to sand them out!! I gave up.I'll go back to it tomorrow, after work. I obviously put way too much on.I was expecting it to behave something like the resin but.... Next layer will be a lot thinner for sure. Hopefully that wont sag. I need four or five layers apparently, for the best protection but this stuff is no fun to work with.(Spraying might be better but I don't have the gear)
Wookie,yes I will be using a tank sealer. I've never had much faith in them which is why I never tried to seal the original steel tank but I'm pretty confident that it wont have any problems sticking to the inside of this. I already sanded the inside before closing it up, so a good rinse out and it should be good to go.
Tomorrow,more sanding and hopefully a second coat.
www.kzrider.com/forum/11-projects/594313-csr1000-project-build
CB550 (1978)
CB500/4 (1972)*
KZ1000CSR (1981)
XT 600E (1999)
TDM900 (2003)
CB550 (1978)
CB500/4 (1972)*
KZ1000CSR (1981)
XT 600E (1999)
TDM900 (2003)
The following user(s) said Thank You: Wookie58
Please Log in or Create an account to join the conversation.
- davido
-
Topic Author
- Offline
- User
-
Registered
- Posts: 1580
- Thanks: 291
Re: CSR1000 Project Build
23 Aug 2023 10:21
Wow! This 'DD Lak' is serious stuff! I finally got all the drips and sags sanded out. Lots of patches where I'm sure I went through (the coating. Not to the fiber). I applied a 2nd coat. Much thinner. This afternoon,I went to check on it and all was well. No sags and just one drip on the underside, out of sight,no big deal. Lots of brush stokes though,which I suppose is to be expected but what a bugger to try and get them out! unbelievable how difficult this stuff is to sand.(more patches). I gave up again after an hour or so. Back to it again tomorrow but I'm pretty sure that I'm just laying it on and sanding it off again. This is not working. I'm going to look for someone who can spray the last couple of coats for me. Not happy about having to hand it off to someone else to finish (If I can find someone) but I dont see any alternative.Bugger!!
www.kzrider.com/forum/11-projects/594313-csr1000-project-build
CB550 (1978)
CB500/4 (1972)*
KZ1000CSR (1981)
XT 600E (1999)
TDM900 (2003)
CB550 (1978)
CB500/4 (1972)*
KZ1000CSR (1981)
XT 600E (1999)
TDM900 (2003)
Please Log in or Create an account to join the conversation.
Moderators: Street Fighter LTD