
Idle Mixture Screw Plug
- Shasta
-
 Topic Author
- Offline
- User
-

Registered
- Posts: 18
- Thanks: 1
Idle Mixture Screw Plug
11 Sep 2018 18:20
I have put off posting this till I had tried to do some research on my carbs. I received my Claymer Service Manual today and quickly went to the carburetor section. I was dissapointed that the whole book was great but two pages in this most important section are faded and poorly printed.
Anyway I confirmed with the manual that the Idle mixture screw is covered by a plug. I just wanted to get advice on how to remove this and replace it when done cleaning.
I also realize now that though I have pulled the carbs and disassembled them, I am missing a few key pieces. These carbs were very dirty after years of sitting. I am not able to get the main nozzle out from under the primary jet. I also was not able to get the needle jet out. Is there any advice on getting these free without damaging them? I am working on getting an air compressor that works to help in the cleaning process and hopefully will help in getting these pieces out as well.
Thanks for any advice. This is my first bike even though I passed the half century mark a couple of years ago. I am loving the process of working on this project and am very much looking forward to riding the bike once I have it running!!!
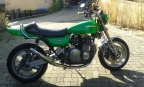
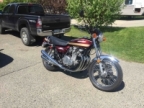
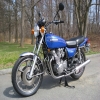
1981 KZ750E
Please Log in or Create an account to join the conversation.
- Scirocco
-
- Offline
- Premium Member
-

Registered
- Never change a running system
- Posts: 4397
- Thanks: 2260
Re: Idle Mixture Screw Plug
11 Sep 2018 23:17 - 11 Sep 2018 23:18
Read this Tutorial before you do anything on your carbs and use only high quality tools.
My 1975 Z 1 B 900 Project
www.kzrider.com/forum/11-projects/605133...ears-deep-sleep-mode
www.kzrider.com/forum/11-projects/605133...ears-deep-sleep-mode
Last edit: 11 Sep 2018 23:18 by Scirocco.
Please Log in or Create an account to join the conversation.
- TexasKZ
-

- Offline
- Platinum Member
-

Registered
- Posts: 8117
- Thanks: 2635
Re: Idle Mixture Screw Plug
12 Sep 2018 05:23
Please put the year and model of your motorcycle in the signature line so that it automatically appears in all your posts. This will assist others in providing specific help. There are surprising differences in the carbs between models and even in the same model across the years.
Also, the Cymer is certainly better than no manual. But it often omits some of the minor changes. A genuine factory service manual for yor specific model and year will fill in those blanks.
Look under the Articles tab on this websit to see if the one you need is available for free download .
If your bike has constant velocity carbs, the Suzuki tutorial can be a great help getting started. You will also need something more specific to the carbs you have.
If your bike has mechanical slide carbs, they will be quite different from the cvs.
1982 KZ1000 LTD parts donor
1981 KZ1000 LTD awaiting resurrection
2000 ZRX1100 not ridden enough
www.kzrider.com/11-projects/620336-anoth...uild-thread?start=24
1981 KZ1000 LTD awaiting resurrection
2000 ZRX1100 not ridden enough
www.kzrider.com/11-projects/620336-anoth...uild-thread?start=24
Please Log in or Create an account to join the conversation.
- hardrockminer
-
- Offline
- Sustaining Member
-
Registered
- Posts: 3107
- Thanks: 1220
Re: Idle Mixture Screw Plug
12 Sep 2018 05:41
The screws are not Phillips. They are JIC and you should use a JIC screwdriver to remove them.
I have several restored bikes along with a 2006 Goldwing with a sidecar.
Please Log in or Create an account to join the conversation.
- TexasKZ
-
- Offline
- Platinum Member
-
Registered
- Posts: 8117
- Thanks: 2635
Re: Idle Mixture Screw Plug
12 Sep 2018 05:45
Actually, JIS, but yes the correct screwdriver will greatly reduce problems and frustrations.
I cannot get Scirocco’s link to work, so I am reposting it.
thexscafedotcom.files.wordpress.com/2014...rebuild_tutorial.pdf
I cannot get Scirocco’s link to work, so I am reposting it.
thexscafedotcom.files.wordpress.com/2014...rebuild_tutorial.pdf
1982 KZ1000 LTD parts donor
1981 KZ1000 LTD awaiting resurrection
2000 ZRX1100 not ridden enough
www.kzrider.com/11-projects/620336-anoth...uild-thread?start=24
1981 KZ1000 LTD awaiting resurrection
2000 ZRX1100 not ridden enough
www.kzrider.com/11-projects/620336-anoth...uild-thread?start=24
Please Log in or Create an account to join the conversation.
- Shasta
-
Topic Author
- Offline
- User
-
Registered
- Posts: 18
- Thanks: 1
Re: Idle Mixture Screw Plug
12 Sep 2018 09:27
Thanks for the suggestions, tutorials and reference to the articles. All of these will help!
I know I have asked newb questions and I am going to try and limit them to ones I just can't find the answers to.
I know I have asked newb questions and I am going to try and limit them to ones I just can't find the answers to.
1981 KZ750E
Please Log in or Create an account to join the conversation.
- Nessism
-

- Offline
- Sustaining Member
-
Registered
- Posts: 8014
- Thanks: 3400
Re: Idle Mixture Screw Plug
12 Sep 2018 11:04Shasta wrote: I have put off posting this till I had tried to do some research on my carbs. I received my Claymer Service Manual today and quickly went to the carburetor section. I was dissapointed that the whole book was great but two pages in this most important section are faded and poorly printed.
Anyway I confirmed with the manual that the Idle mixture screw is covered by a plug. I just wanted to get advice on how to remove this and replace it when done cleaning.
I also realize now that though I have pulled the carbs and disassembled them, I am missing a few key pieces. These carbs were very dirty after years of sitting. I am not able to get the main nozzle out from under the primary jet. I also was not able to get the needle jet out. Is there any advice on getting these free without damaging them? I am working on getting an air compressor that works to help in the cleaning process and hopefully will help in getting these pieces out as well.
Thanks for any advice. This is my first bike even though I passed the half century mark a couple of years ago. I am loving the process of working on this project and am very much looking forward to riding the bike once I have it running!!!
First of all get a proper Kawasaki service manual. If you search the forum here you can find a free download link.
The parts under the Primary Main Jet are called Bleed Pipes. To get them out you need to push them out from inside the carb body. I use a sharp piece of wood dowel so as to not mark them up. Same thing for the Needle jet; push down from inside the carb throat.
I strongly recommend replacing all the various O-rings inside the carbs. I posted all the sizes in an older thread here so you may want to search for that info too. It will save you a bunch of time. I've even got most or all the various O-rings you may need so PM me if you can't find them local to you.
Good luck
Ed
Carb O-ring Kits : www.kzrider.com/forum/14-vendor-forum/62...rburetor-o-ring-kits
www.kzrider.com/forum/faq-wiki/618026-new-owner-things-to-know
1981 KZ750E2
www.kzrider.com/forum/11-projects/604901...z750e-project-thread
Carb O-ring Kits : www.kzrider.com/forum/14-vendor-forum/62...rburetor-o-ring-kits
www.kzrider.com/forum/faq-wiki/618026-new-owner-things-to-know
1981 KZ750E2
www.kzrider.com/forum/11-projects/604901...z750e-project-thread
Please Log in or Create an account to join the conversation.
- 650ed
-
- Offline
- User
-
Registered
- Posts: 15334
- Thanks: 2833
Re: Idle Mixture Screw Plug
12 Sep 2018 11:37 - 12 Sep 2018 11:37
The Kawasaki Service Manual in the link below covers the 1981 KZ750E2 and some other KZ750 models. Ed
www.kzrider.com/modules/ServiceManuals/KZ750E1&H1.pdf
www.kzrider.com/modules/ServiceManuals/KZ750E1&H1.pdf
1977 KZ650-C1 Original Owner - Stock (with additional invisible FIAMM horn)
Last edit: 12 Sep 2018 11:37 by 650ed.
Please Log in or Create an account to join the conversation.
- Nessism
-
- Offline
- Sustaining Member
-
Registered
- Posts: 8014
- Thanks: 3400
Re: Idle Mixture Screw Plug
12 Sep 2018 13:03 - 12 Sep 2018 13:18
No disrespect to Ed's link...but this copy of the manual is better...
www.750turbo.com/manuals/GPz750_Base%20Manual.pdf
Found an older thread about rebuilding that type of carb... www.kzrider.com/forum/3-carburetor/60297...rb-questions?start=0
Edit2:
Found this info about the O-rings posted in an earlier thread...
These are the O-rings you need...
Pilot Screw: 1.2 x 2.6
Pilot Plug: 1.5 x 2.8
Fuel Transfer Tubes: 2.0 x 5.5
Drain Screws: 1.4 x 4.0
Float Bowl: 2.0 x 67
BTW, industrial standard measurement method for O-rings is T (thickness) x ID (inside diameter), in this case ID is measured in mm.
Ed
Carb O-ring Kits : www.kzrider.com/forum/14-vendor-forum/62...rburetor-o-ring-kits
www.kzrider.com/forum/faq-wiki/618026-new-owner-things-to-know
1981 KZ750E2
www.kzrider.com/forum/11-projects/604901...z750e-project-thread
Carb O-ring Kits : www.kzrider.com/forum/14-vendor-forum/62...rburetor-o-ring-kits
www.kzrider.com/forum/faq-wiki/618026-new-owner-things-to-know
1981 KZ750E2
www.kzrider.com/forum/11-projects/604901...z750e-project-thread
Last edit: 12 Sep 2018 13:18 by Nessism.
The following user(s) said Thank You: 650ed, Shasta
Please Log in or Create an account to join the conversation.
- Shasta
-
Topic Author
- Offline
- User
-
Registered
- Posts: 18
- Thanks: 1
Re: Idle Mixture Screw Plug
12 Sep 2018 13:15
Thank you for the tips on how to get the bleed pipe and needle jet out. I think the only thing left besides being nervous about un-pairing them from the rack is how do you get the float seat out if it is stubborn?
1981 KZ750E
Please Log in or Create an account to join the conversation.
- Nessism
-
- Offline
- Sustaining Member
-
Registered
- Posts: 8014
- Thanks: 3400
Re: Idle Mixture Screw Plug
12 Sep 2018 13:20 - 12 Sep 2018 15:14Shasta wrote: Thank you for the tips on how to get the bleed pipe and needle jet out. I think the only thing left besides being nervous about un-pairing them from the rack is how do you get the float seat out if it is stubborn?
The float seat doesn't come out. Take a piece of gray scotchbrite and twist it up into a tube and clean the seat out with that. Look down into the seat when done and make sure it's all bright and shinny down all the way to where the needle seats.
The only hard part of unganging the carbs is keeping track of the choke actuation parts. Work slow and take photos as you go and everything should turn out okay. If you get stuck PM me. I know every part on those carbs after doing more than half dozen sets now.
Ed
Carb O-ring Kits : www.kzrider.com/forum/14-vendor-forum/62...rburetor-o-ring-kits
www.kzrider.com/forum/faq-wiki/618026-new-owner-things-to-know
1981 KZ750E2
www.kzrider.com/forum/11-projects/604901...z750e-project-thread
Carb O-ring Kits : www.kzrider.com/forum/14-vendor-forum/62...rburetor-o-ring-kits
www.kzrider.com/forum/faq-wiki/618026-new-owner-things-to-know
1981 KZ750E2
www.kzrider.com/forum/11-projects/604901...z750e-project-thread
Last edit: 12 Sep 2018 15:14 by Nessism.
The following user(s) said Thank You: Shasta
Please Log in or Create an account to join the conversation.
- Nessism
-
- Offline
- Sustaining Member
-
Registered
- Posts: 8014
- Thanks: 3400
Re: Idle Mixture Screw Plug
12 Sep 2018 13:40
These float needles are decent. I don't like using aftermarket parts but these are reasonably decent...
www.amazon.com/gp/product/B00NO5OMQG/ref...ilpage?ie=UTF8&psc=1
Better still is the OEM needles. Double the cost of the aftermarket parts though... www.jetsrus.com/individual_parts/018_880_su.html
Better still is the OEM needles. Double the cost of the aftermarket parts though... www.jetsrus.com/individual_parts/018_880_su.html
Ed
Carb O-ring Kits : www.kzrider.com/forum/14-vendor-forum/62...rburetor-o-ring-kits
www.kzrider.com/forum/faq-wiki/618026-new-owner-things-to-know
1981 KZ750E2
www.kzrider.com/forum/11-projects/604901...z750e-project-thread
Carb O-ring Kits : www.kzrider.com/forum/14-vendor-forum/62...rburetor-o-ring-kits
www.kzrider.com/forum/faq-wiki/618026-new-owner-things-to-know
1981 KZ750E2
www.kzrider.com/forum/11-projects/604901...z750e-project-thread
Please Log in or Create an account to join the conversation.
Moderators: Street Fighter LTD