
Carb Oring Replacement
- ric812
-
 Topic Author
- Offline
- User
-

Registered
- Posts: 94
- Thanks: 5
Carb Oring Replacement
10 Jul 2017 10:52
I have been told to clean the carbs and replace the orings. But after looking at the FSM I have it doesn't really cover replacing the orings. I also have not torn down the carbs yet except to clean them. I have tried searching the internet and the forum and could not find anything that clearly explains it but if it is fairly self explanatory when I start to tear down the carb then I am sorry. I have ordered a kit from cycleorings.com. I have attached the page from the FSM showing the carb breakdown I am lookng at.
Also with a stock airbox and stock exhaust is there any advantage to increasing jet size by 1 or 2 sizes? I have heard the factory jet setting is lean due to emissions. I am asking because the only information I can seem to find is about pods and jet changes.
The bike is a 1982 KZ750 twin CSR the carb are BS34 mikuni
1982 Kawasaki KZ750M Twin CSR
Please Log in or Create an account to join the conversation.
- Nessism
-

- Offline
- Sustaining Member
-

Registered
- Posts: 8016
- Thanks: 3400
Re: Carb Oring Replacement
10 Jul 2017 13:15
I applaud your desire to do the right thing and service your bike properly. I haven't gone through a set of those carbs before but I've done lots of sets of the regular model BS32 and BS34 and they are not difficult to work with.
Just break them down and remove all parts with rubber and plastic. You don't have to remove the throttle shafts though. Once you have them apart then soak the bodies and jets in carb dip to remove all varnish and sludge. Be sure to remove the pilot screws since the passages are very small and you need to allow the cleaner solution to get into the inner passages. You might want to read through the following tutorial to familiarize yourself with the cleaning process. Many of the elements are the same for your carbs.
Good luck.
zeus.mtsac.edu/~cliff/storage/gs/Mikuni_...Rebuild_Tutorial.pdf
Ed
Carb O-ring Kits : www.kzrider.com/forum/14-vendor-forum/62...rburetor-o-ring-kits
www.kzrider.com/forum/faq-wiki/618026-new-owner-things-to-know
1981 KZ750E2
www.kzrider.com/forum/11-projects/604901...z750e-project-thread
Carb O-ring Kits : www.kzrider.com/forum/14-vendor-forum/62...rburetor-o-ring-kits
www.kzrider.com/forum/faq-wiki/618026-new-owner-things-to-know
1981 KZ750E2
www.kzrider.com/forum/11-projects/604901...z750e-project-thread
The following user(s) said Thank You: GPz550D1
Please Log in or Create an account to join the conversation.
- ric812
-
Topic Author
- Offline
- User
-
Registered
- Posts: 94
- Thanks: 5
Re: Carb Oring Replacement
10 Jul 2017 13:47
Thank you nessism. I have the carbs off and I will.ise that guide to start getting them apart.
Any thoughts on the rejet for stock setup?
Any thoughts on the rejet for stock setup?
1982 Kawasaki KZ750M Twin CSR
Please Log in or Create an account to join the conversation.
- TexasKZ
-

- Offline
- Platinum Member
-
Registered
- Posts: 8117
- Thanks: 2635
Re: Carb Oring Replacement
10 Jul 2017 13:53
If the stock jetting is too lean, you can easily shim the needles up just a bit and fatten up the low speed by adjusting the mixture screws. There really is little to no gain to be had with a completely stock setup. I wouldn't mess with any of this before getting the factory setup dialed in. Once that is done, you can determine if further tweaking is called for.
1982 KZ1000 LTD parts donor
1981 KZ1000 LTD awaiting resurrection
2000 ZRX1100 not ridden enough
www.kzrider.com/11-projects/620336-anoth...uild-thread?start=24
1981 KZ1000 LTD awaiting resurrection
2000 ZRX1100 not ridden enough
www.kzrider.com/11-projects/620336-anoth...uild-thread?start=24
Please Log in or Create an account to join the conversation.
- TexasKZ
-
- Offline
- Platinum Member
-
Registered
- Posts: 8117
- Thanks: 2635
Re: Carb Oring Replacement
10 Jul 2017 14:00
P.S. It is also a good idea to insure that all the little parts go back to the particular carburetor body they came from. Things like the needle jet and jet needle wear together and should be kept together. A simple way to do that is to use two small containers. Old Cool Whip containers work pretty well. Label the containers 1 and 2. Put all the little bits from carb 1 into container 1, and likewise for number 2. Clean all the bits of each carb separately and all will be well.
1982 KZ1000 LTD parts donor
1981 KZ1000 LTD awaiting resurrection
2000 ZRX1100 not ridden enough
www.kzrider.com/11-projects/620336-anoth...uild-thread?start=24
1981 KZ1000 LTD awaiting resurrection
2000 ZRX1100 not ridden enough
www.kzrider.com/11-projects/620336-anoth...uild-thread?start=24
Please Log in or Create an account to join the conversation.
- ric812
-
Topic Author
- Offline
- User
-
Registered
- Posts: 94
- Thanks: 5
Re: Carb Oring Replacement
10 Jul 2017 17:48
Thank you Texaskz.
Here is some more questions.
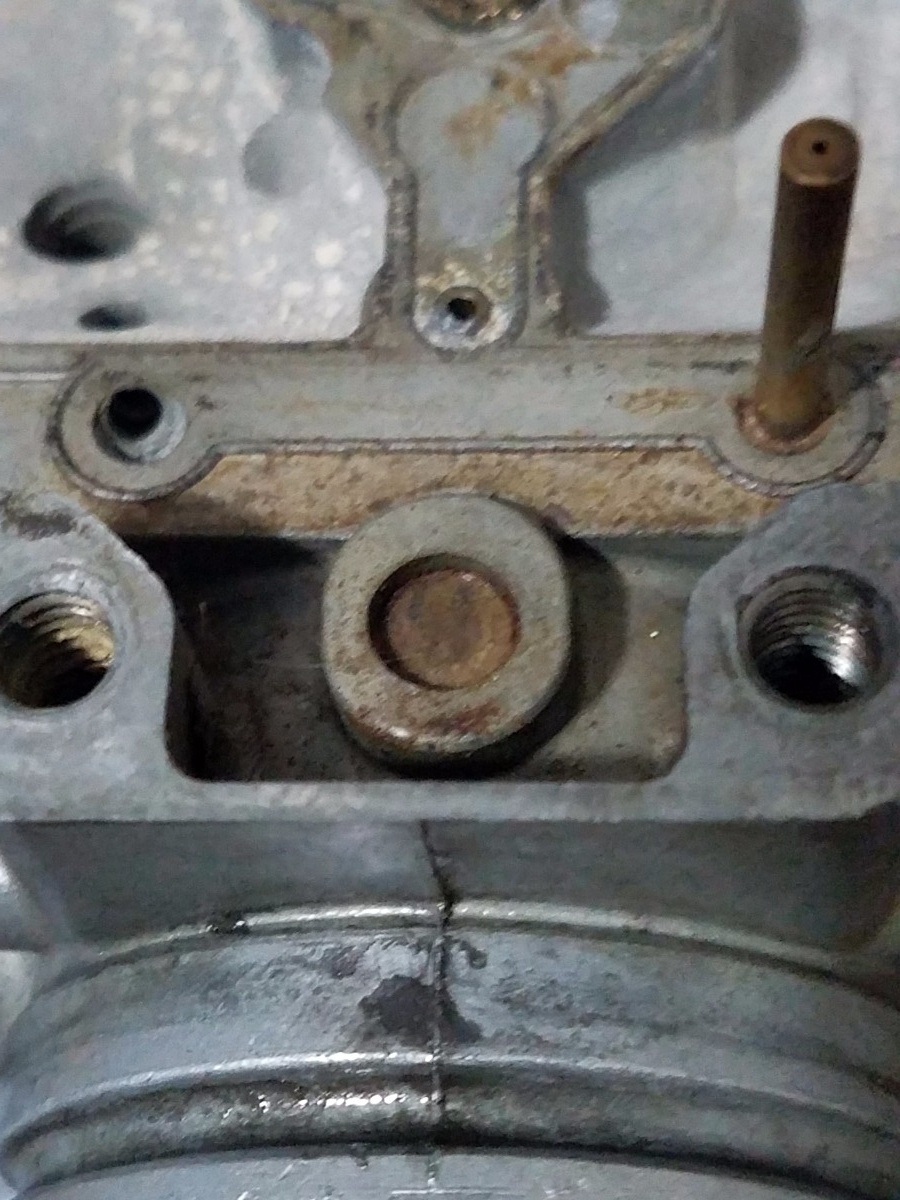
Does the attached picture show the pilot jet plug?

Here is some more questions.
Does the attached picture show the pilot jet plug?
1982 Kawasaki KZ750M Twin CSR
Please Log in or Create an account to join the conversation.
- ric812
-
Topic Author
- Offline
- User
-
Registered
- Posts: 94
- Thanks: 5
Re: Carb Oring Replacement
10 Jul 2017 17:50
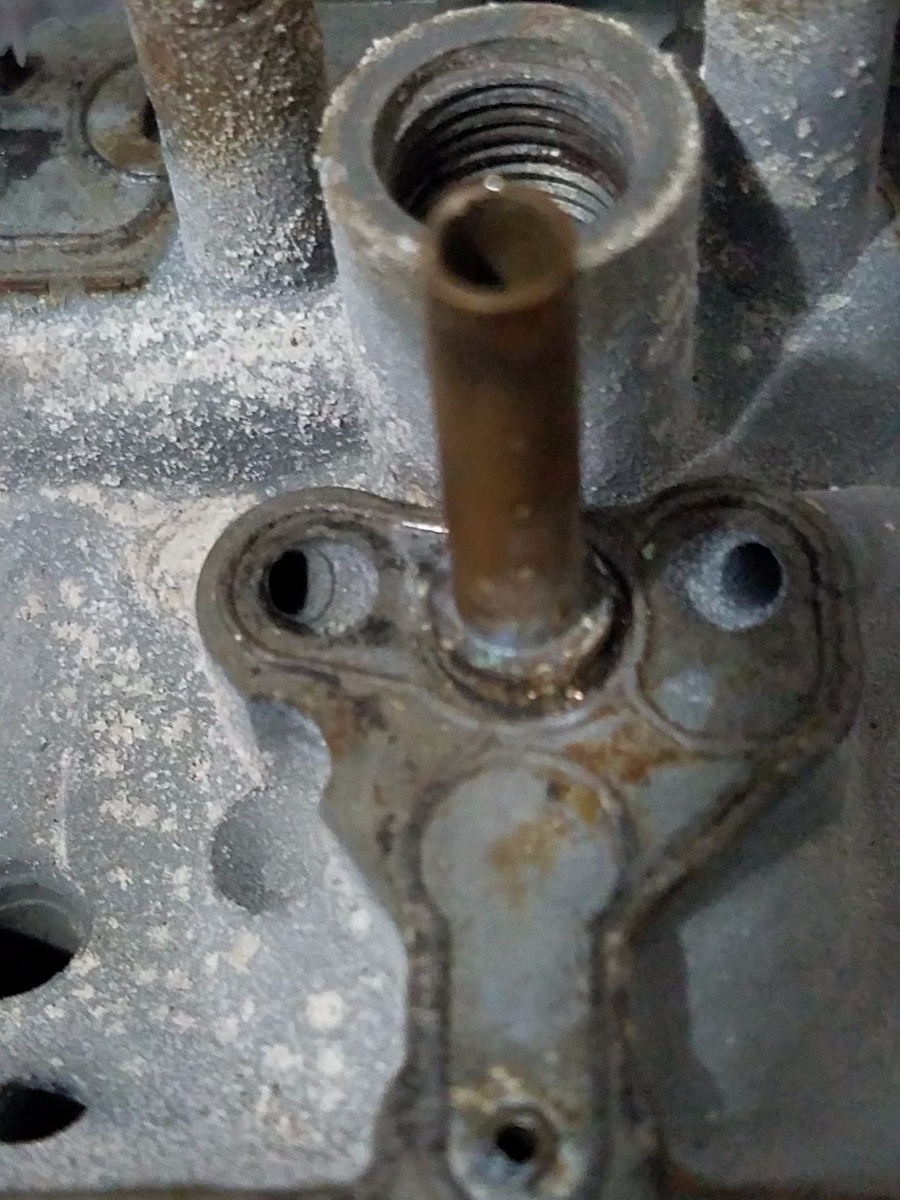
Also how do I remove the tube in the center of the carb.
1982 Kawasaki KZ750M Twin CSR
Please Log in or Create an account to join the conversation.
- Scirocco
-
- Offline
- Premium Member
-

Registered
- Never change a running system
- Posts: 4397
- Thanks: 2260
Re: Carb Oring Replacement
10 Jul 2017 18:15 - 10 Jul 2017 18:27
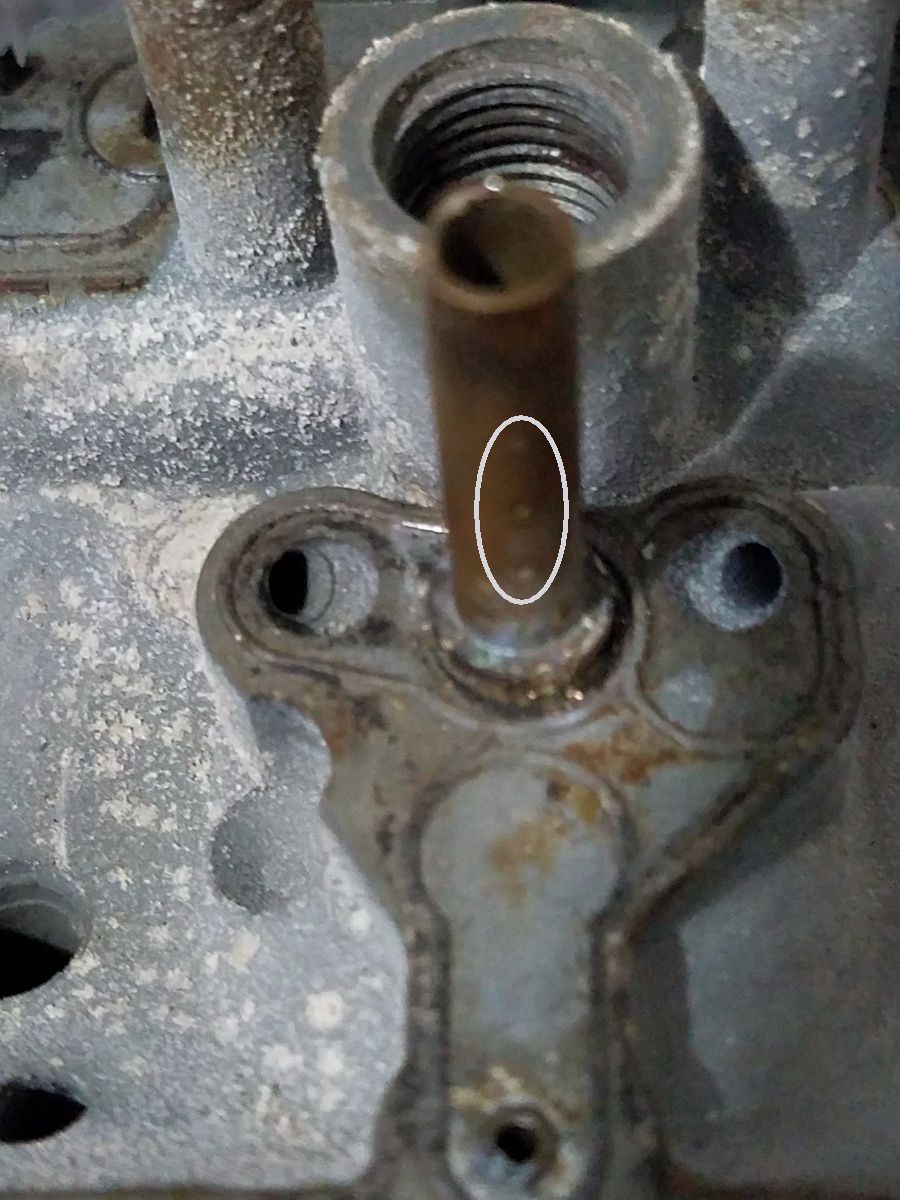
The tube can be push out from the throttle piston side with a plastic stamp with the same OD with very very light taps,
Do no unnecessary force to the brass needle jet. The o-ring hold it in position.
Before you go on do a bath in carb cleaner over night to loosen all the dirt and oxidations.
This makes some thing easier without destroying this rare peaces of metal.
The holes in the needle jet a totally filled with dirt
My 1975 Z 1 B 900 Project
www.kzrider.com/forum/11-projects/605133...ears-deep-sleep-mode
www.kzrider.com/forum/11-projects/605133...ears-deep-sleep-mode
Last edit: 10 Jul 2017 18:27 by Scirocco.
The following user(s) said Thank You: GPz550D1, ric812
Please Log in or Create an account to join the conversation.
- Scirocco
-
- Offline
- Premium Member
-
Registered
- Never change a running system
- Posts: 4397
- Thanks: 2260
Re: Carb Oring Replacement
10 Jul 2017 18:58 - 10 Jul 2017 19:01
BTW, the main jet and the starter jet are in the float bowls.
To remove them use an exact suitable screw driver to loosen the jets.
You can destroy the brass easily.
To remove them use an exact suitable screw driver to loosen the jets.
You can destroy the brass easily.
My 1975 Z 1 B 900 Project
www.kzrider.com/forum/11-projects/605133...ears-deep-sleep-mode
www.kzrider.com/forum/11-projects/605133...ears-deep-sleep-mode
Last edit: 10 Jul 2017 19:01 by Scirocco.
The following user(s) said Thank You: GPz550D1
Please Log in or Create an account to join the conversation.
Moderators: Street Fighter LTD