
And finally, Wookie's 82 begins !
- MFP-Joe
-

- Offline
- User
-

Registered
- forever 18 when on my bike ...!
- Posts: 624
- Thanks: 832
Re: And finally, Wookie's 82 begins !
01 Sep 2026 02:29 - 01 Sep 2026 02:36
Hi Guy,
Do tell us how—and with what—you managed to craft that well-made adapter sleeve for the throttle cable so nicely; it looks really good and clean!
(Using a thin cutting disc, or with a saw and file?)
Do tell us how—and with what—you managed to craft that well-made adapter sleeve for the throttle cable so nicely; it looks really good and clean!
(Using a thin cutting disc, or with a saw and file?)
Z1000 A1 1976
Z1000 A2 1977
Greetings, Joe
Z1000 A2 1977
Greetings, Joe
Last edit: 01 Sep 2026 02:36 by MFP-Joe.
Please Log in or Create an account to join the conversation.
- Wookie58
-
 Topic Author
- Offline
- Moderator
-

Registered
- Posts: 6796
- Thanks: 4284
Re: And finally, Wookie's 82 begins !
01 Sep 2026 02:39
As yesterday was a holiday in the UK I got back to it (Sunday my grandsons took me to a "tuner" car show for my birthday, some fantastic builds there in amongst the stuff that I'm too old to appreciate !!) completing the last few little jobs like finishing the battery leads etc and clearing all the crap in my garage so I could spin the lift around and point the noisy end at the door.
So first thing was that there are some interesting things happening electrically (this is the first time it's been powered up since building the wiring system) which I am hoping is down to configuring the electronics that I have installed. She cranked nicely, built oil pressure with no leaks from the cooler lines etc so let's go for a "start". I turned the fuel on and waited a few seconds for the carbs to fill, then noticed a familiar smell !! there was a puddle of gas forming under the bike !!!!!!!!!!!!!!!! #3 drain screw isn't sealing which is disappointing given that all four drain screws are new OEM items (when I did the float heights a couple of them were reluctant to close complete but after working the screws in and out a couple of times they seemed to be ok) So that's it for now - sort the electrical gremlins and fuel leak and she will be almost there (just need to sort the fuel sender and decals) then final spanner check and dial in the suspension sag etc. I guess it was a little optimistic to think that on a build like this I could "throw a battery on and fire it up"
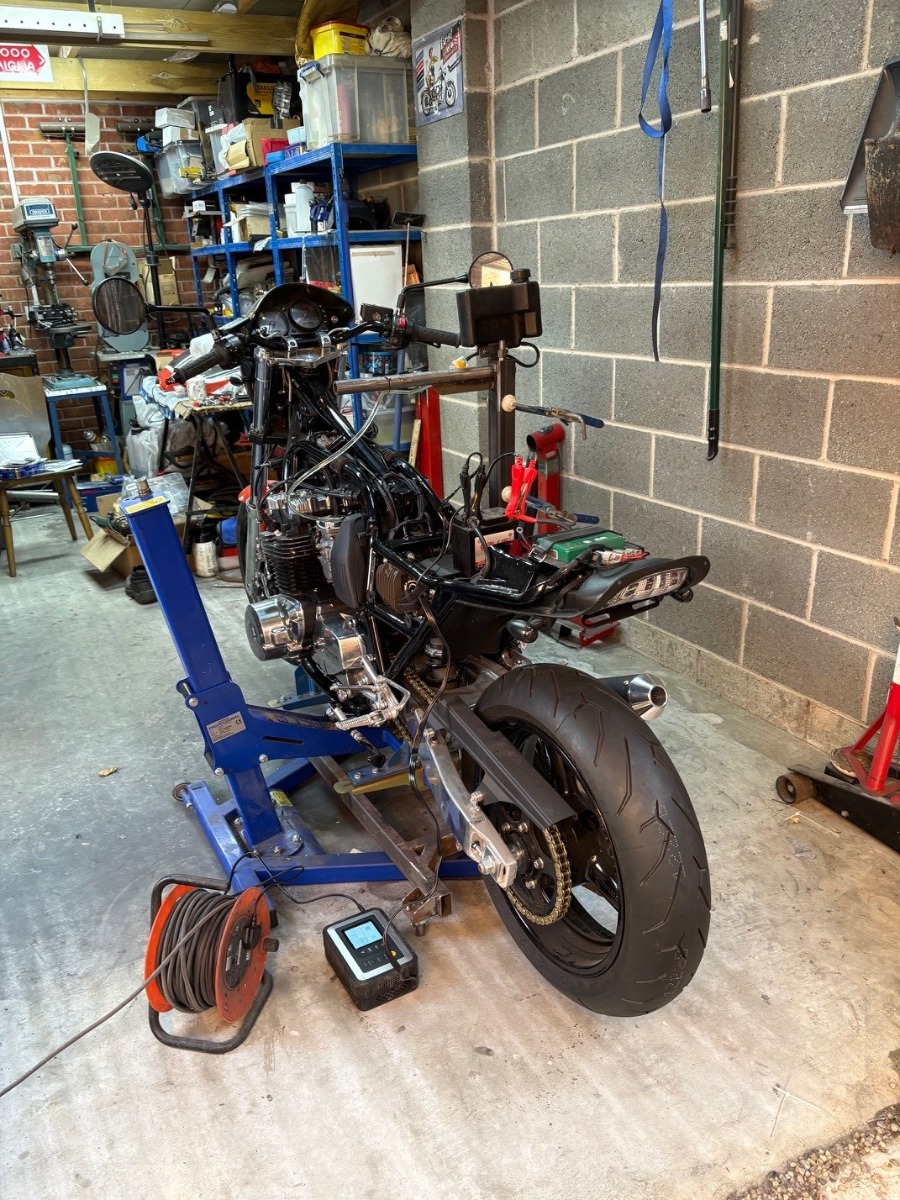
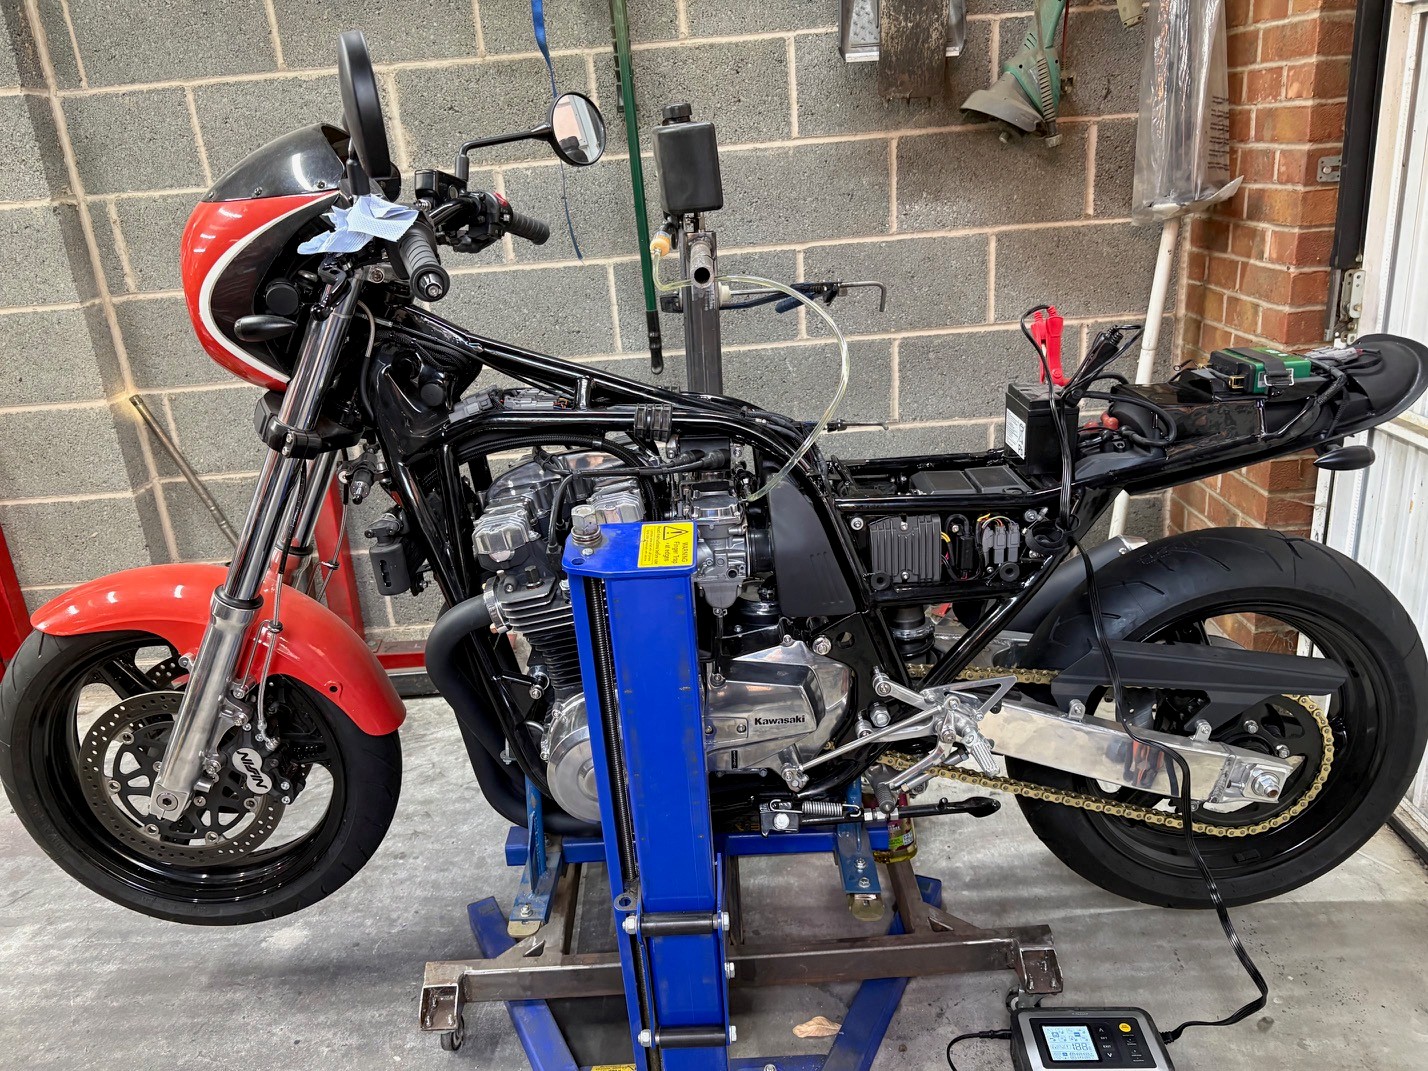
So first thing was that there are some interesting things happening electrically (this is the first time it's been powered up since building the wiring system) which I am hoping is down to configuring the electronics that I have installed. She cranked nicely, built oil pressure with no leaks from the cooler lines etc so let's go for a "start". I turned the fuel on and waited a few seconds for the carbs to fill, then noticed a familiar smell !! there was a puddle of gas forming under the bike !!!!!!!!!!!!!!!! #3 drain screw isn't sealing which is disappointing given that all four drain screws are new OEM items (when I did the float heights a couple of them were reluctant to close complete but after working the screws in and out a couple of times they seemed to be ok) So that's it for now - sort the electrical gremlins and fuel leak and she will be almost there (just need to sort the fuel sender and decals) then final spanner check and dial in the suspension sag etc. I guess it was a little optimistic to think that on a build like this I could "throw a battery on and fire it up"
1982 KZ1000 Ltd
www.kzrider.com/forum/11-projects/617631...-82-begins?start=192
kzrider.com/forum/faq-wiki/616810-electr...-fault-finding-guide
www.kzrider.com/forum/11-projects/617631...-82-begins?start=192
kzrider.com/forum/faq-wiki/616810-electr...-fault-finding-guide
The following user(s) said Thank You: Dragbike_Mike
Please Log in or Create an account to join the conversation.
- Wookie58
-
Topic Author
- Offline
- Moderator
-
Registered
- Posts: 6796
- Thanks: 4284
Re: And finally, Wookie's 82 begins !
01 Sep 2026 02:51I simply turned the shape from a piece of 12mm round bar then held in in a vice "end to end" and cut it with a 2mm cutting disc on my angle grinder. I then finished it with a small file (had to put it back in the lathe and run the drill bit through again to clear the internal burr from cutting)Hi Guy,
Do tell us how—and with what—you managed to craft that well-made adapter sleeve for the throttle cable so nicely; it looks really good and clean!
(Using a thin cutting disc, or with a saw and file?)
1982 KZ1000 Ltd
www.kzrider.com/forum/11-projects/617631...-82-begins?start=192
kzrider.com/forum/faq-wiki/616810-electr...-fault-finding-guide
www.kzrider.com/forum/11-projects/617631...-82-begins?start=192
kzrider.com/forum/faq-wiki/616810-electr...-fault-finding-guide
The following user(s) said Thank You: MFP-Joe
Please Log in or Create an account to join the conversation.
- MFP-Joe
-
- Offline
- User
-
Registered
- forever 18 when on my bike ...!
- Posts: 624
- Thanks: 832
Re: And finally, Wookie's 82 begins !
01 Sep 2026 02:53
Ooooh, those are just minor "malfunctions," Guy—,completely normal for such an extremely lengthy and complex conversion or new build!
The most important things—no oil leaks, good oil pressure, a starter motor that turns the engine over well, and a spark—are already fantastic results! Don't let yourself be put off by such minor, trivial issues....Everything will be fine.
The most important things—no oil leaks, good oil pressure, a starter motor that turns the engine over well, and a spark—are already fantastic results! Don't let yourself be put off by such minor, trivial issues....Everything will be fine.
Z1000 A1 1976
Z1000 A2 1977
Greetings, Joe
Z1000 A2 1977
Greetings, Joe
The following user(s) said Thank You: Wookie58
Please Log in or Create an account to join the conversation.
- asphalt900
-
- Offline
- Sustaining Member
-

Registered
- Posts: 1933
- Thanks: 1301
Re: And finally, Wookie's 82 begins !
01 Sep 2026 08:39
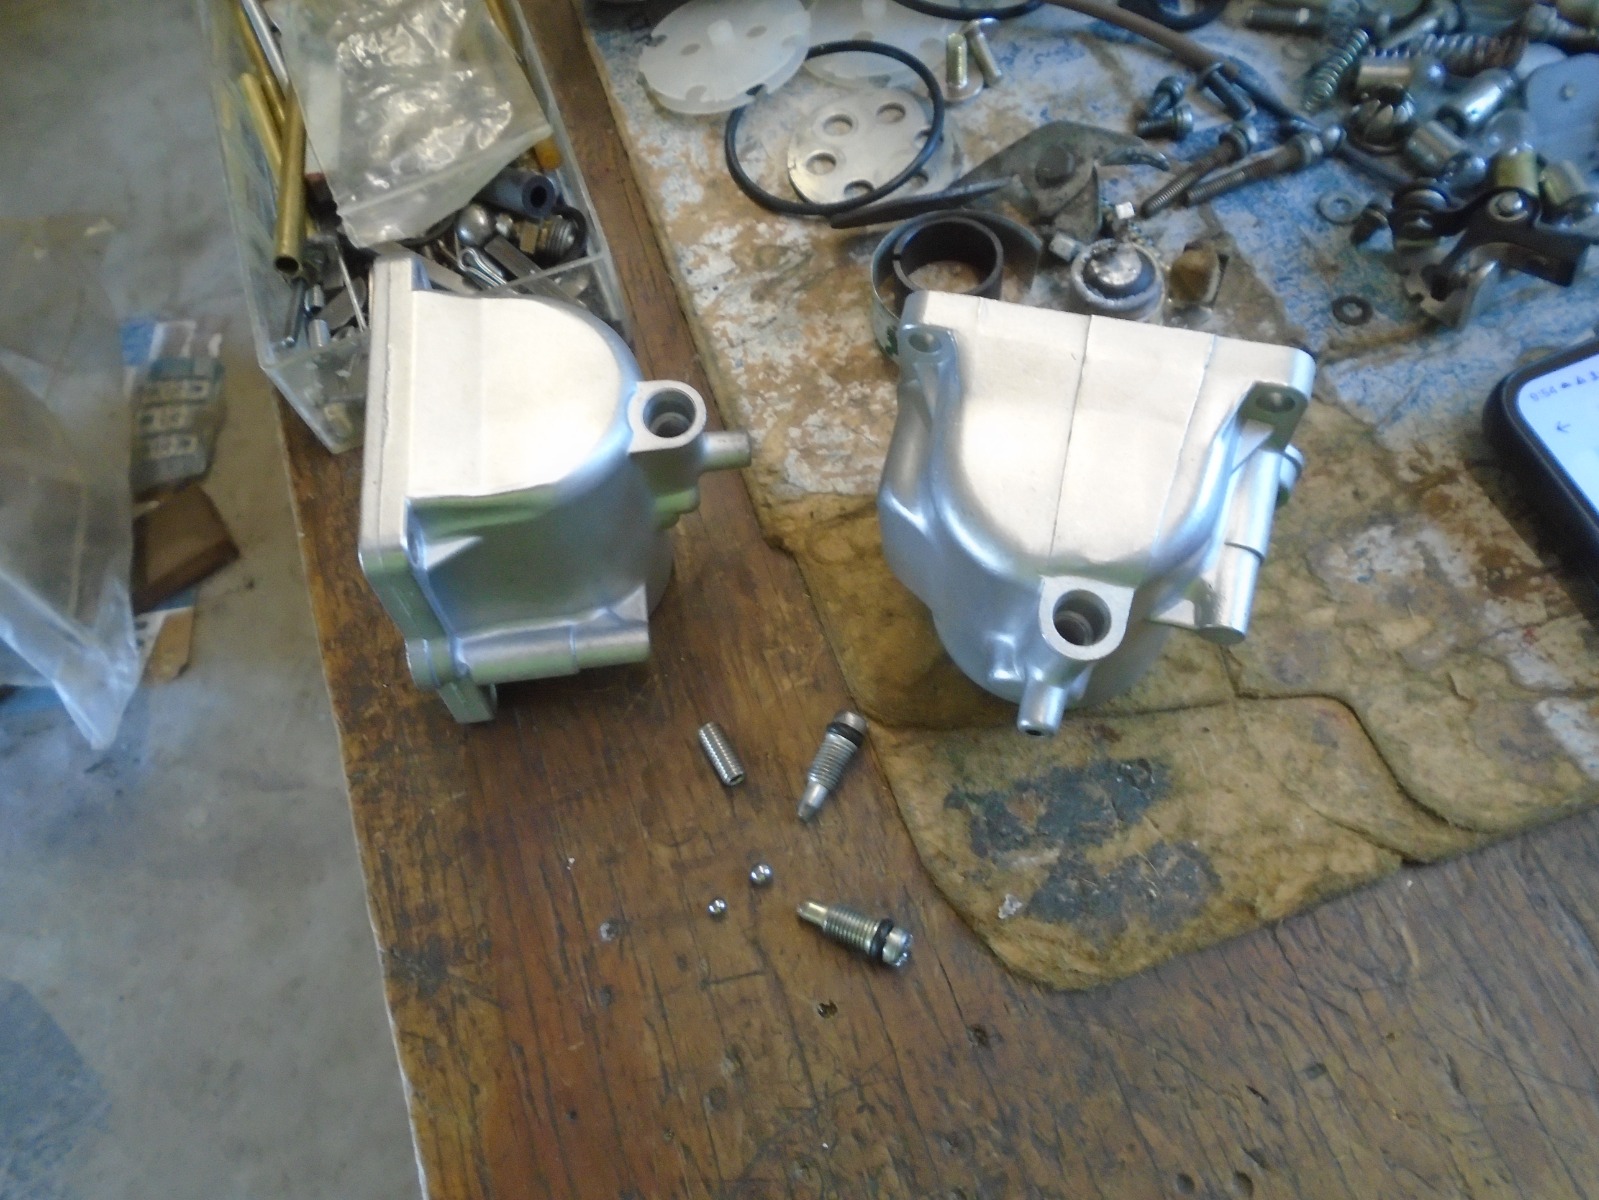
Wookie if you were closer, i'd just give you some bowls. But try this this if You get in a pickle. I can explain all the assortment of ball bearings if You've not already recognized what their intent is for. These BS bowls have, like ever bowl ever made, propensity to rot out at the bottom and subsequently stop sealing where drain taper screw goes. Fortunately, they are easy to source if you don't want to fiddle.
The following user(s) said Thank You: Wookie58
Please Log in or Create an account to join the conversation.
- Wookie58
-
Topic Author
- Offline
- Moderator
-
Registered
- Posts: 6796
- Thanks: 4284
Re: And finally, Wookie's 82 begins !
07 Sep 2026 00:34
So this weekend I have started working through the "teething problems" which I guess are to be expected. I started with the electrical issues, now one downside to using these weatherproof connectors is that it is virtually impossible to reliably "back pin" with out damaging the seals (you can stick a pin or paper clip in there but there is no guarantee that you will make a connection). Dealerships have a set of "break out" leads as part of their mandatory tool issue for testing with this kind of connector. I had bought spare connectors with a view to making up a set of these leads at some point (didn't expect it to be just yet !!!!)
These leads connect in series with the plug and allow you to use the "fly leads" to connect a meter, bridging link, test light etc. These have three functions
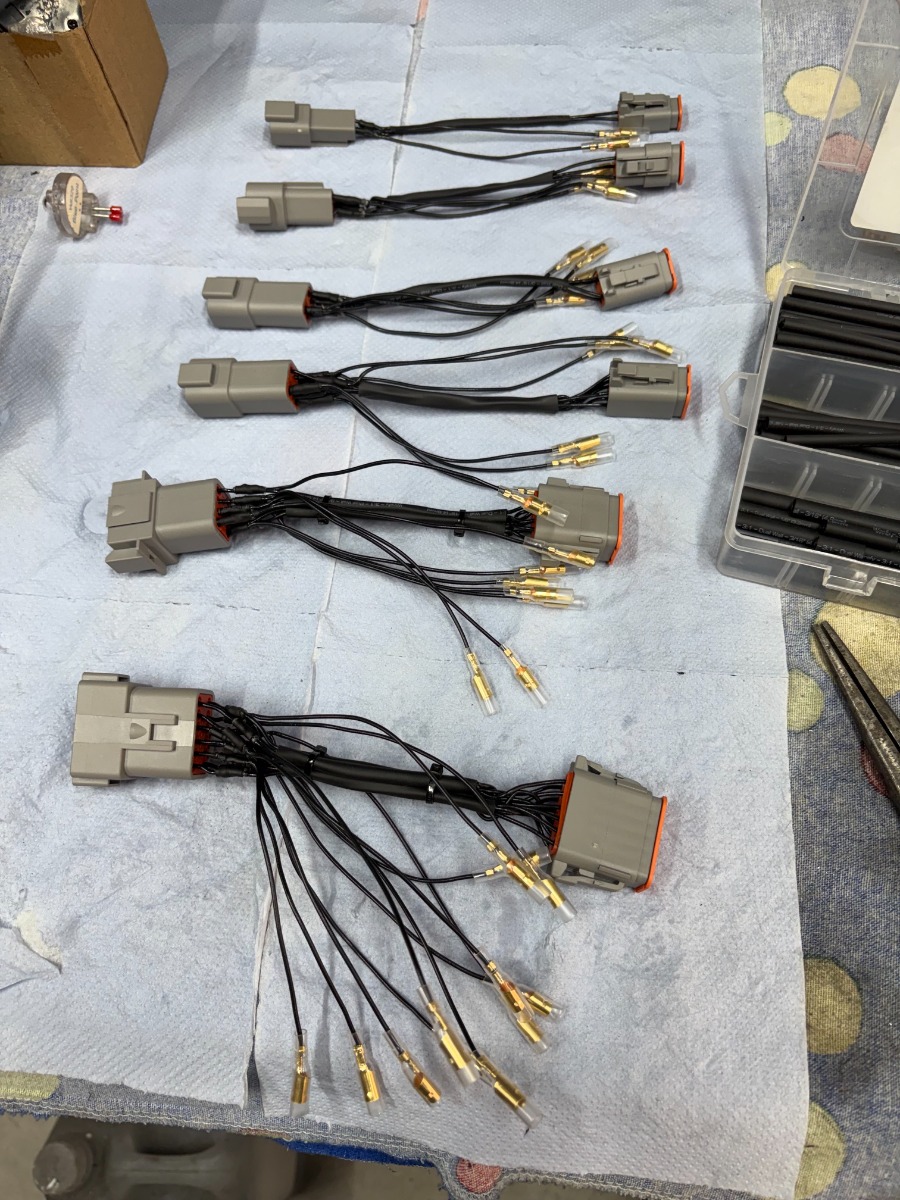
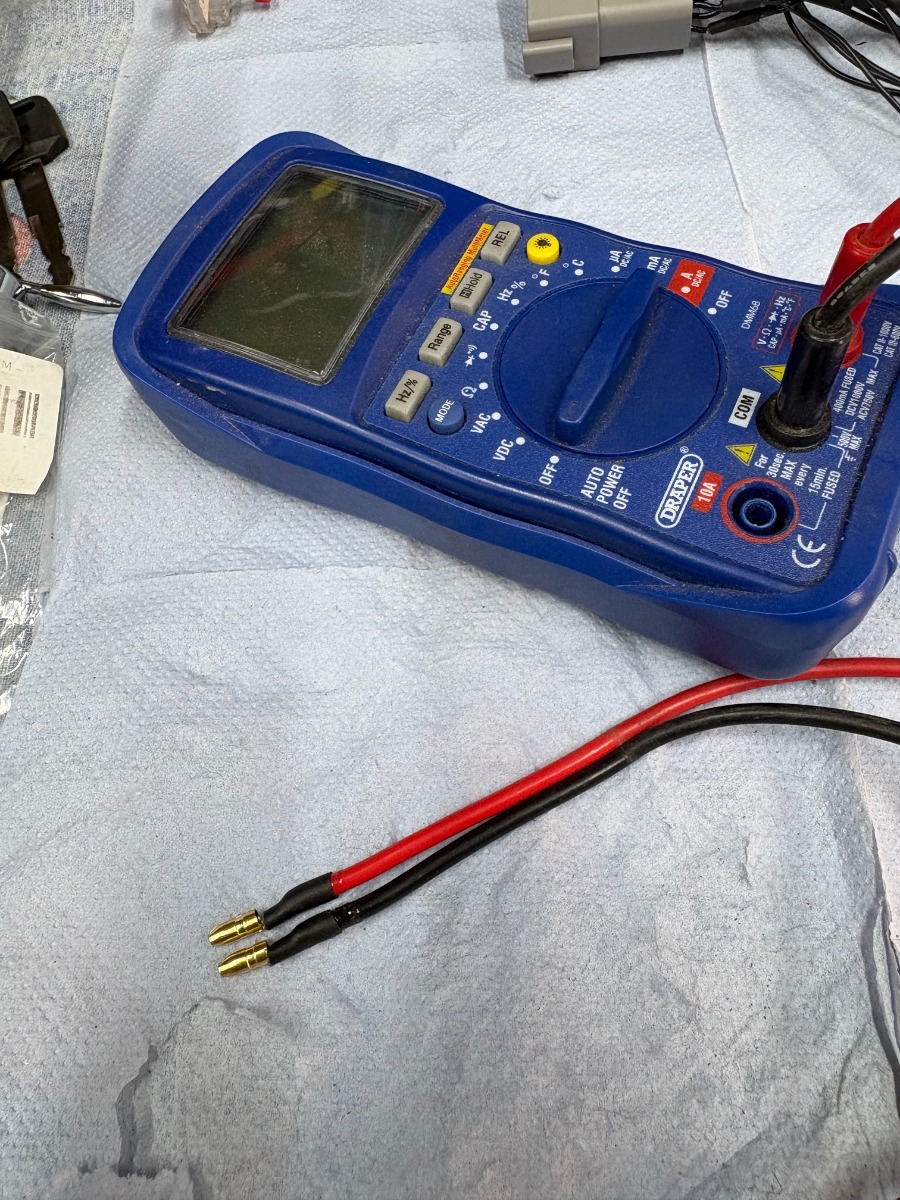
These leads connect in series with the plug and allow you to use the "fly leads" to connect a meter, bridging link, test light etc. These have three functions
- Connect in series to check voltages on a live circuit
- Connect to just the plug to check switch functions, component resistance etc
- Connect to just the socket to connect substitute consumers or to use "bridging links to by-pass a suspect switch etc
1982 KZ1000 Ltd
www.kzrider.com/forum/11-projects/617631...-82-begins?start=192
kzrider.com/forum/faq-wiki/616810-electr...-fault-finding-guide
www.kzrider.com/forum/11-projects/617631...-82-begins?start=192
kzrider.com/forum/faq-wiki/616810-electr...-fault-finding-guide
The following user(s) said Thank You: MFP-Joe, Dragbike_Mike, kimchella
Please Log in or Create an account to join the conversation.
- rich67
-

- Offline
- User
-
Registered
- Posts: 210
- Thanks: 61
Re: And finally, Wookie's 82 begins !
08 Sep 2026 16:42
Hey Guy, I have been traveling the last few weeks so hadn't gotten back to you, Man that's a nice bit of kit for the clutch, Now that ingenuity were theirs a will there's a way , Your close now and its amazing , I had a set back with my engine pulled the block out, last guy who bored my block went to far in clearance per Wisco its was at max. un acceptable for a new build , I could not get a good ring seat , so my lesson to all is when a machine service doesn't provide a phone # and will not respond to emails after they have your cash don't deal with them , I waited a month before I assembled , I gave up and assembled and wouldn't you know PROBLEMS , any way your bike is bike of the century , Cheers
Please Log in or Create an account to join the conversation.
- Wookie58
-
Topic Author
- Offline
- Moderator
-
Registered
- Posts: 6796
- Thanks: 4284
Re: And finally, Wookie's 82 begins !
08 Sep 2026 23:16
Thanks for the kind words and encouragement Rich, That sucks with your block. Why is it so hard these days to find people to do good work !!! we see it with the younger generation that we train. When I was an apprentice I wanted to know everything and took pride in my work, these days many just want to get qualified and earn a technicians wage but don't care whether or not they can actually "do the job".
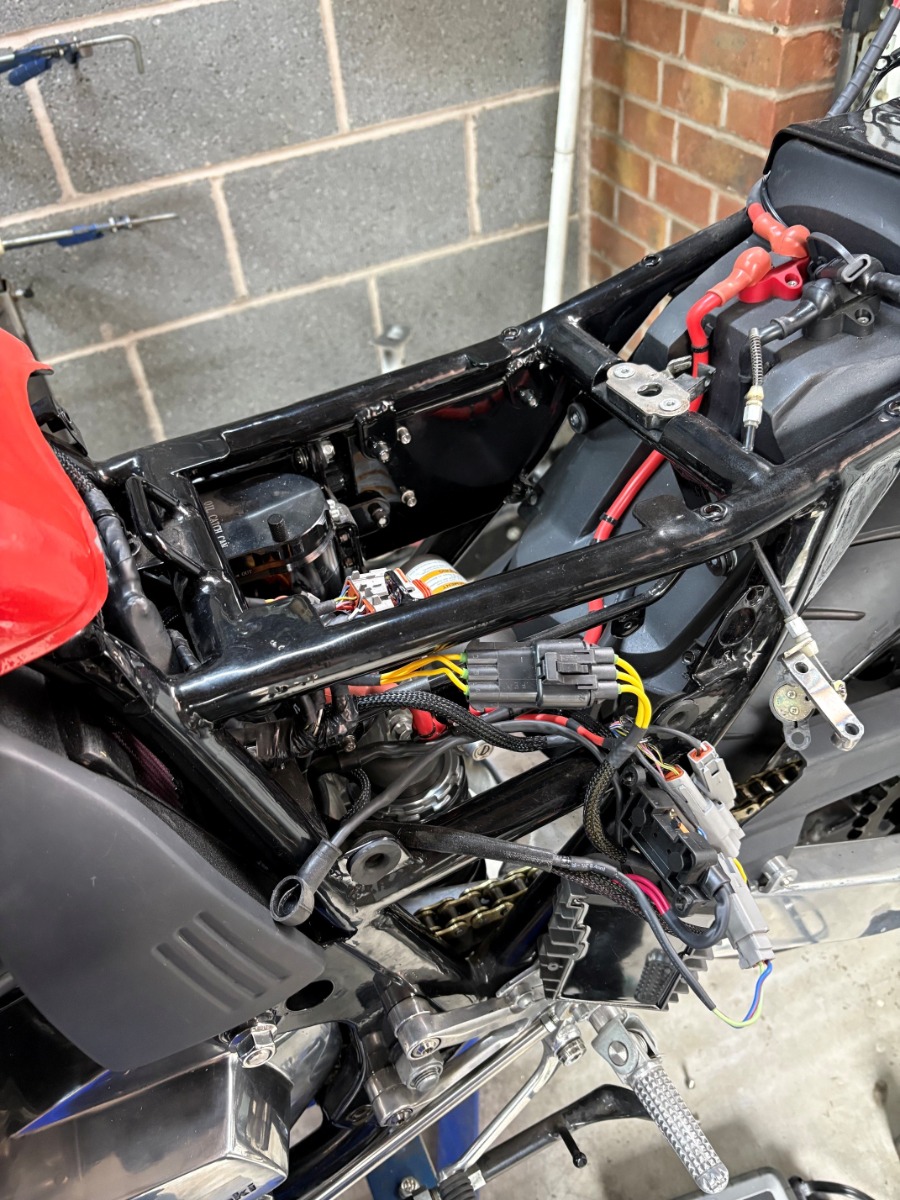
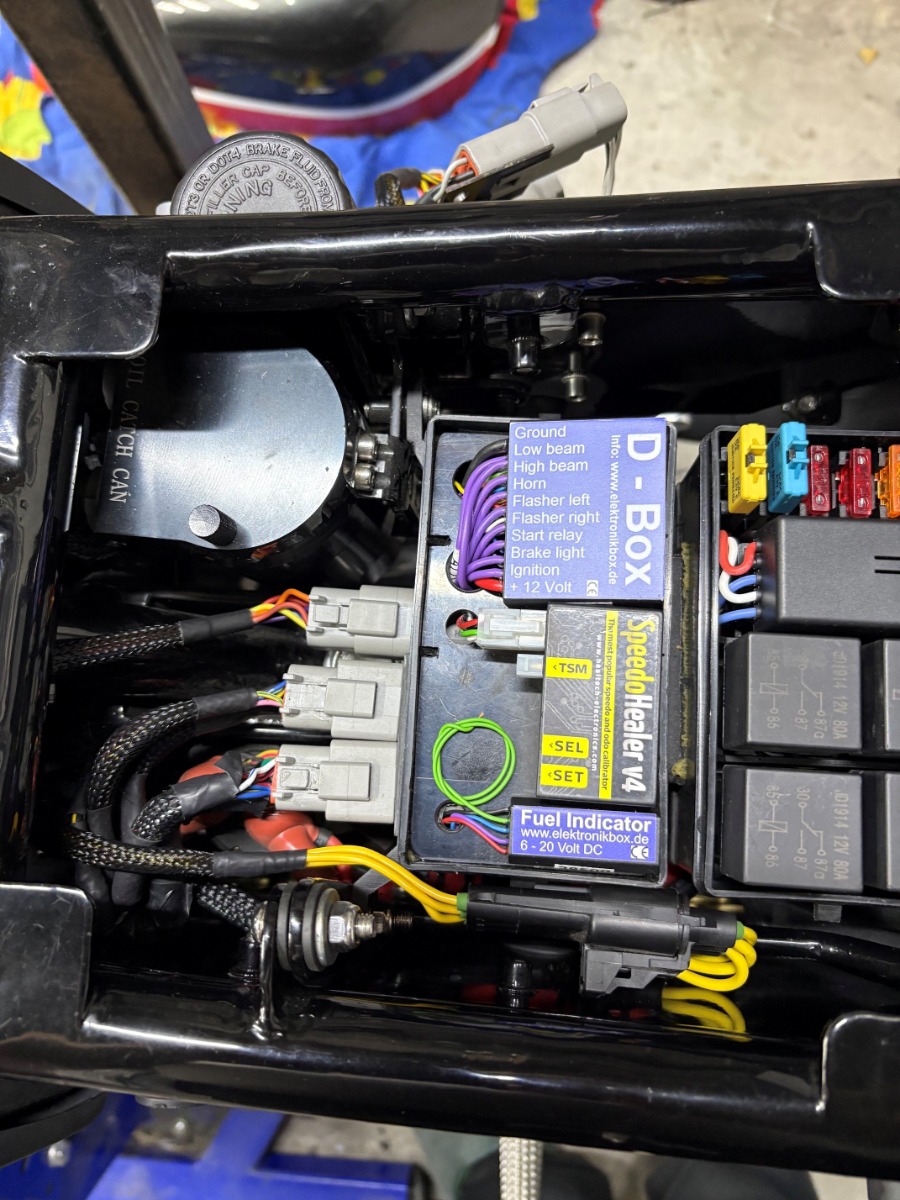
Back to the bike, I have picked myself up and am cracking on with preparing for the arrival of the new control unit. The new unit can't be used with the "data bus" module for the switchgear so I have had to run an additional 6 wire loom from the front coupling station down to the main elec box. Now I need to disassemble everything in the centre of the bike to remove the box so I can fit the new module when it arrives, also I need to add a third plug to the main box as there was only 2 spare wire locations in the existing set up. On the up side Axel has confirmed my idea of using a diode to allow the clutch switch to work with the box will function as intended. Let's hope the weather holds long enough for me to get some "seat time in before the winter sets in (it's getting colder and wetter by the day here)
Back to the bike, I have picked myself up and am cracking on with preparing for the arrival of the new control unit. The new unit can't be used with the "data bus" module for the switchgear so I have had to run an additional 6 wire loom from the front coupling station down to the main elec box. Now I need to disassemble everything in the centre of the bike to remove the box so I can fit the new module when it arrives, also I need to add a third plug to the main box as there was only 2 spare wire locations in the existing set up. On the up side Axel has confirmed my idea of using a diode to allow the clutch switch to work with the box will function as intended. Let's hope the weather holds long enough for me to get some "seat time in before the winter sets in (it's getting colder and wetter by the day here)
1982 KZ1000 Ltd
www.kzrider.com/forum/11-projects/617631...-82-begins?start=192
kzrider.com/forum/faq-wiki/616810-electr...-fault-finding-guide
www.kzrider.com/forum/11-projects/617631...-82-begins?start=192
kzrider.com/forum/faq-wiki/616810-electr...-fault-finding-guide
Please Log in or Create an account to join the conversation.
- Wookie58
-
Topic Author
- Offline
- Moderator
-
Registered
- Posts: 6796
- Thanks: 4284
Re: And finally, Wookie's 82 begins !
14 Sep 2026 05:55
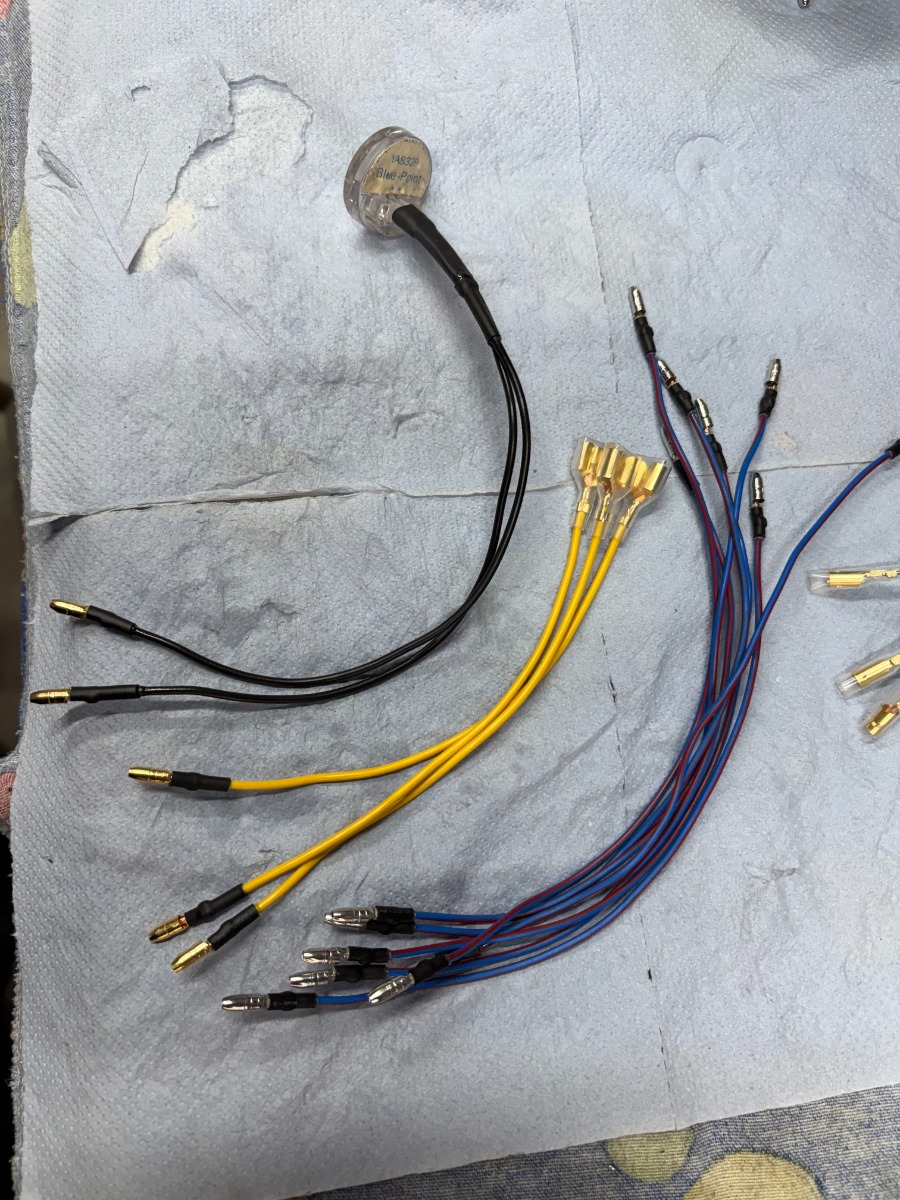
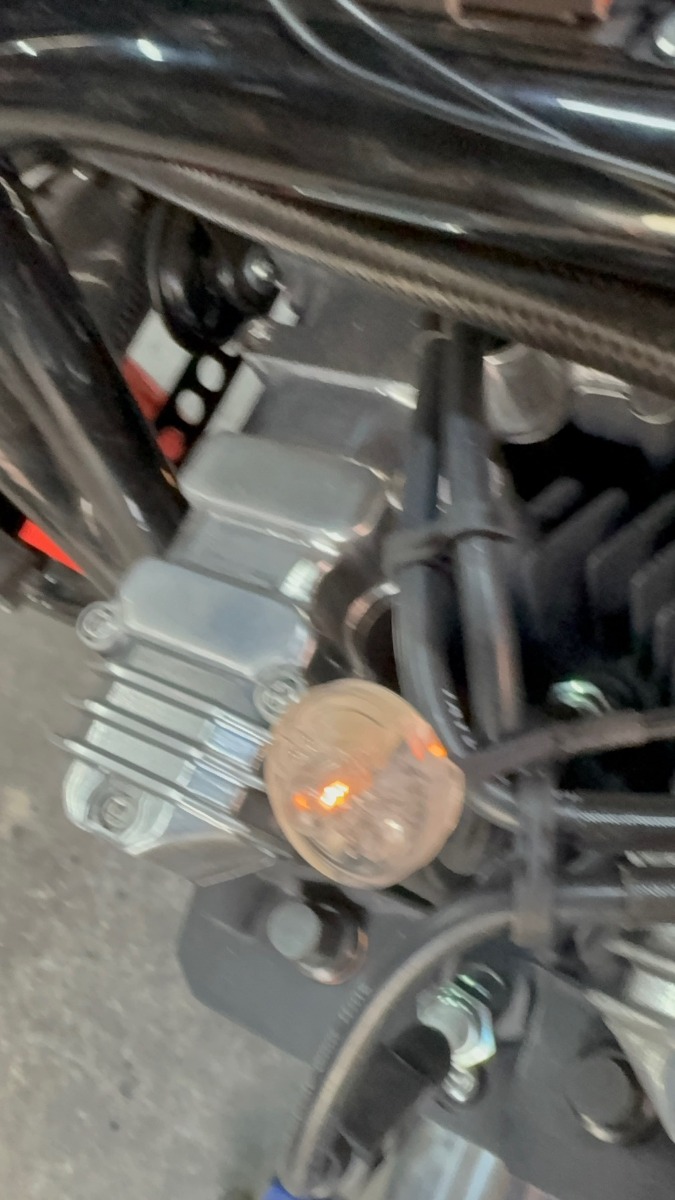
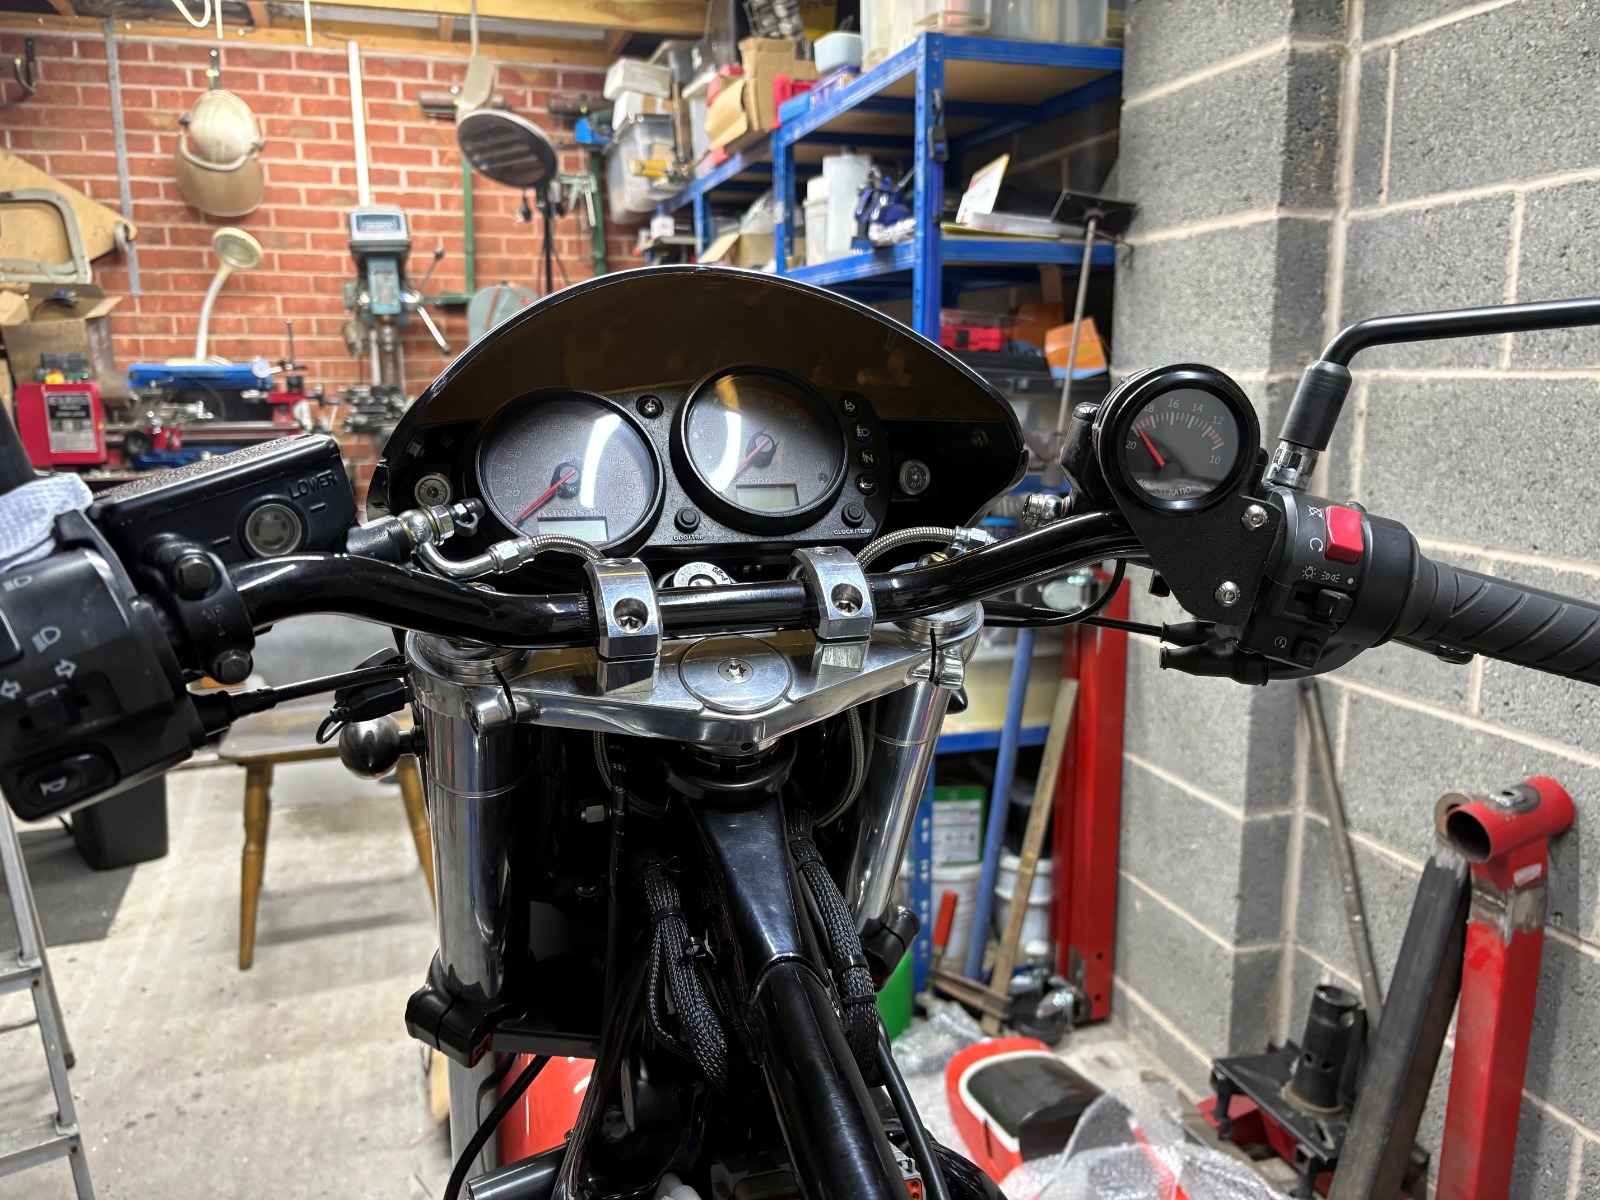
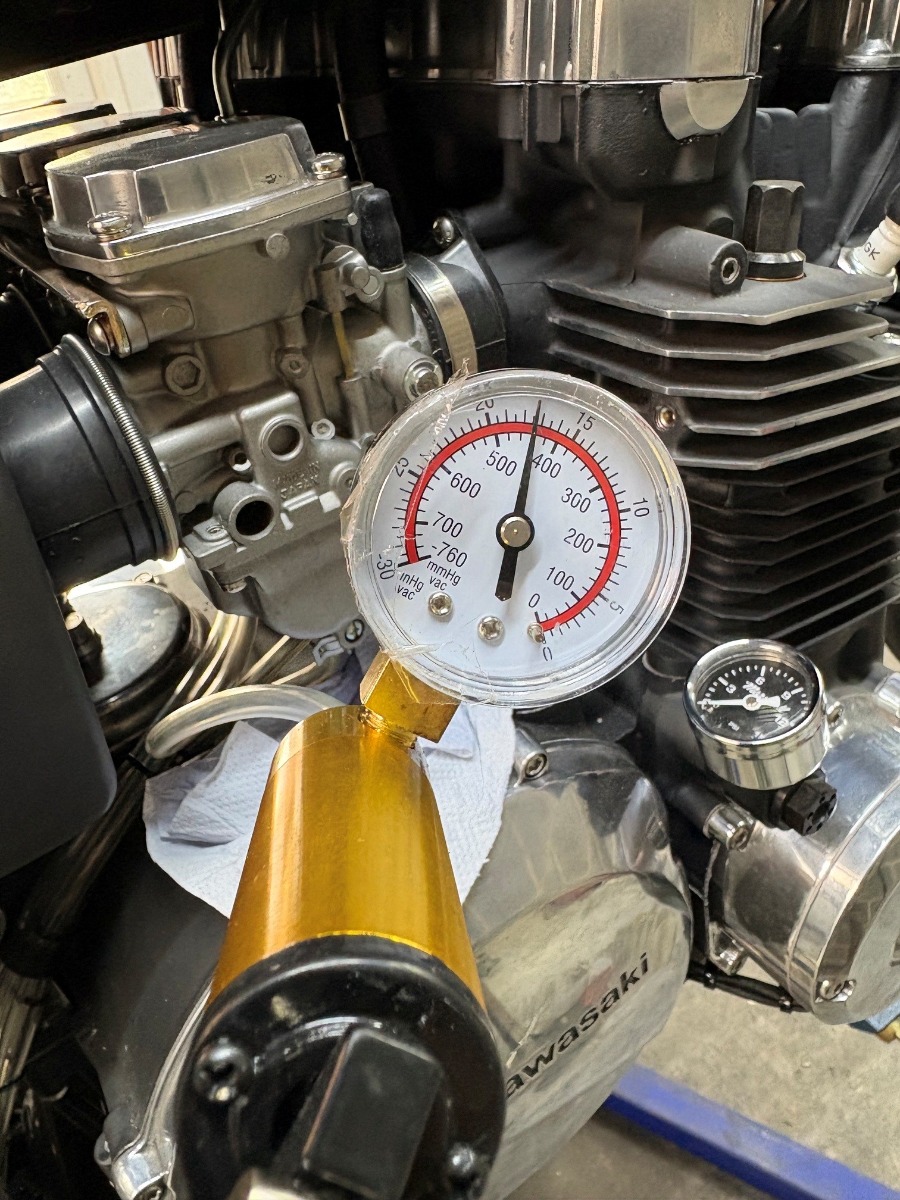
So I have been working through the "teething problems" with this old girl, first was the D-box which Axel Joost have replaced for me (I don't know if it was faulty or if it was just a conflict between the data bus adaptor and the box but he sent me a new one anyway. Replacing it was a bit of a mission as it involves removing the central electrics box, not too bad (about an hour to remove) and once it's on the bench easy to test all the main wiring, I also had to install a third plug for the additional handlebar wiring. One limitation with this D-box is the fact that if you activate the starter lockout linked to the neutral light then it will only allow the starter to spin when in neutral (not ideal if it stalls out) I have managed to change this function incorporating the clutch switch with a little "outside the box" thinking and a specific type of diode advised by Axel. Whilst I was waiting for parts to arrive I got the AFR gauge sorted (this is a temp fixture which plugs into the "split voltage" double USB socket by the H/Lamp mount) Then it was onto the fuel leak - Clay the "ball bearing" trick worked an absolute treat so thankyou my friend. Rather than keep having fuel all over the place I chose to use a vacum tester to check the seal on the drain screws (I figured if I can't pull air through it then atmospheric pressure can't push fuel through it either  )
)
So with the electrics re-assembled and the fuel leak resolved it was finally time to try and wake the old girl from her slumber !! "OR NOT"
When trying to start I got a lot of bangs from the exhaust and farts in the airbox but nothing more, to me this is classic signs of ignition timing or crossed leads but that isn't the case, the correct pick ups are triggering the correct coils and the timing is fixed (I am using the digital ignition from a late GPZ1100A2) I need to work through the ignition as the only non OEM components are the pick-up coils, the resistance is lower than GPZ spec and the air-gap is bigger than GPZ spec (I don't know how much effect that will have although the air gap etc is critical with this kind of sensor)
)So with the electrics re-assembled and the fuel leak resolved it was finally time to try and wake the old girl from her slumber !! "OR NOT"
When trying to start I got a lot of bangs from the exhaust and farts in the airbox but nothing more, to me this is classic signs of ignition timing or crossed leads but that isn't the case, the correct pick ups are triggering the correct coils and the timing is fixed (I am using the digital ignition from a late GPZ1100A2) I need to work through the ignition as the only non OEM components are the pick-up coils, the resistance is lower than GPZ spec and the air-gap is bigger than GPZ spec (I don't know how much effect that will have although the air gap etc is critical with this kind of sensor)
1982 KZ1000 Ltd
www.kzrider.com/forum/11-projects/617631...-82-begins?start=192
kzrider.com/forum/faq-wiki/616810-electr...-fault-finding-guide
www.kzrider.com/forum/11-projects/617631...-82-begins?start=192
kzrider.com/forum/faq-wiki/616810-electr...-fault-finding-guide
The following user(s) said Thank You: Nessism, MFP-Joe, Quofan
Please Log in or Create an account to join the conversation.
- MFP-Joe
-
- Offline
- User
-
Registered
- forever 18 when on my bike ...!
- Posts: 624
- Thanks: 832
Re: And finally, Wookie's 82 begins !
14 Sep 2026 09:23
Hi Guy, you’ve really designed and installed a huge amount of electronics there!
 !!!
!!!
—I’d never be able to make sense of it all... let alone figure it out if something went wrong. Hats off to your electronic knowledge and know-how!!! -
(I’m always happiest when the electrical setup is simple, easy followable and straightforward; that way, I stand a good chance of actually making it home on the bike. That’s also why I still like running points-based ignition systems on my Kawas.
 )
)
—I’d never be able to make sense of it all... let alone figure it out if something went wrong. Hats off to your electronic knowledge and know-how!!! -
(I’m always happiest when the electrical setup is simple, easy followable and straightforward; that way, I stand a good chance of actually making it home on the bike. That’s also why I still like running points-based ignition systems on my Kawas.
Z1000 A1 1976
Z1000 A2 1977
Greetings, Joe
Z1000 A2 1977
Greetings, Joe
The following user(s) said Thank You: Wookie58
Please Log in or Create an account to join the conversation.
Moderators: Street Fighter LTD