
1981 KZ1000 J-to-K build
- Shdwdrgn
-
 Topic Author
- Offline
- User
-

Registered
- Posts: 611
- Thanks: 24
Re: 1981 KZ1000 J-to-K build
24 Jun 2016 10:10
OK sounds like I should go ahead and peel the tape tonight after work... Just hope the clearcoat isn't still too soft resulting in fingerprints.
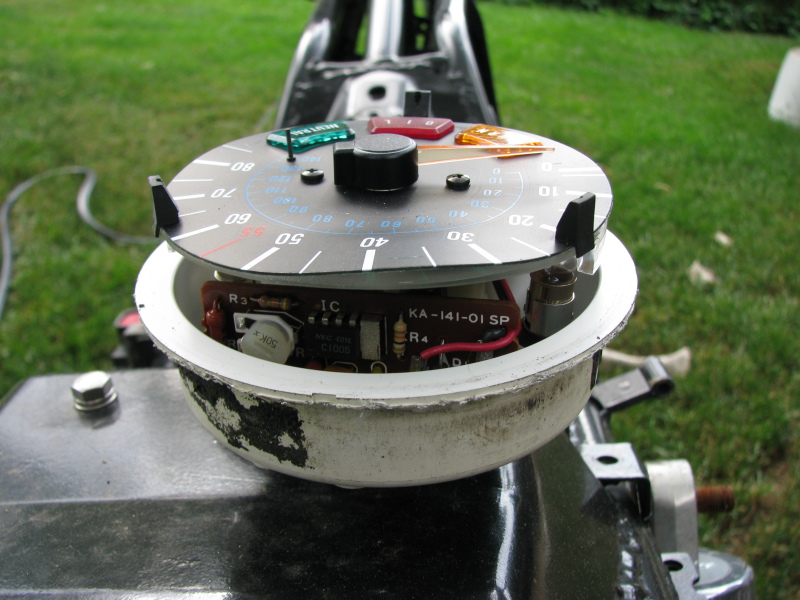
I'll get a pic of the dial face tonight to show everyone exactly the problem, but from what I remember there are three pieces around the parameter of the face that hold it in place and centered. The warp is just to the left of top-center and comes up about 1/8" above the rest of the face. It's not enough for the needle to hit it. I'm trying to remember, but don't recall there being anything underneath the face that I could try gluing the raised section to.
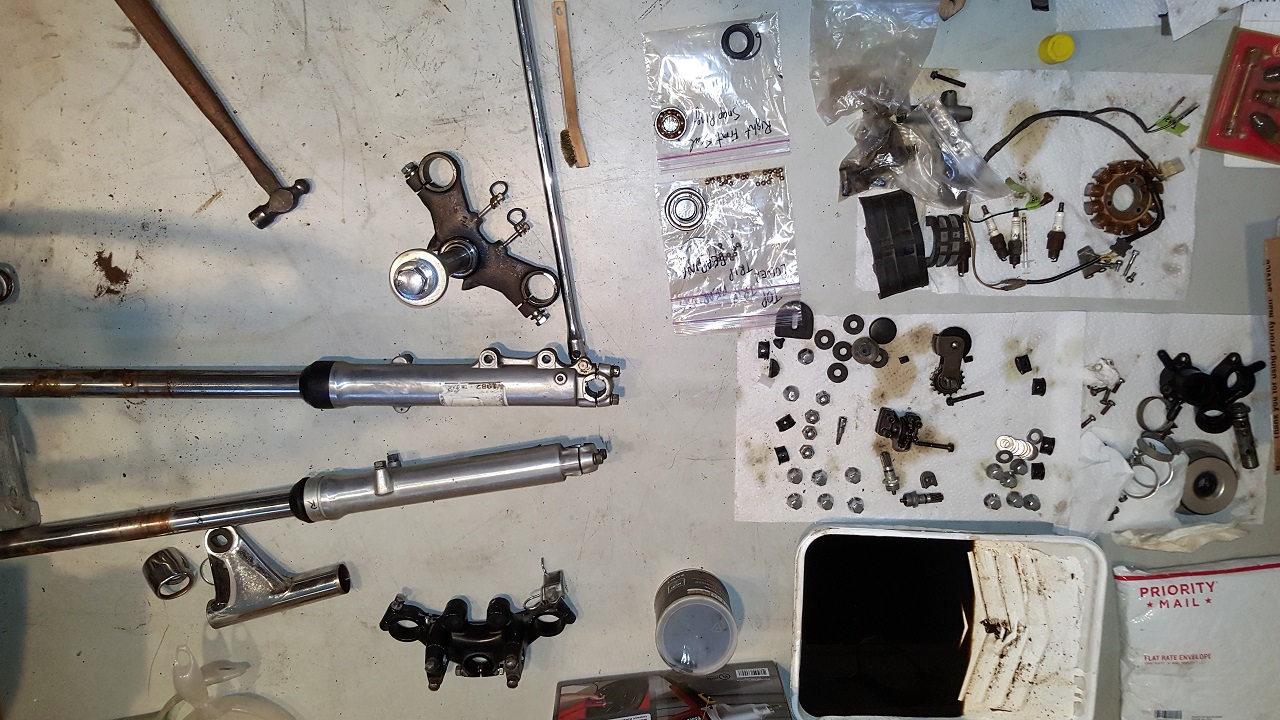
I should also grab a shot of my two-tiered workbench tonight.") Completely out of space everywhere, so I laid a sheet of plywood across everything on the workbench and laid all the freshly-painted engine parts on that. I keep claiming I'll clean my workbench some day, but it hasn't happened yet...
Completely out of space everywhere, so I laid a sheet of plywood across everything on the workbench and laid all the freshly-painted engine parts on that. I keep claiming I'll clean my workbench some day, but it hasn't happened yet...
I'll get a pic of the dial face tonight to show everyone exactly the problem, but from what I remember there are three pieces around the parameter of the face that hold it in place and centered. The warp is just to the left of top-center and comes up about 1/8" above the rest of the face. It's not enough for the needle to hit it. I'm trying to remember, but don't recall there being anything underneath the face that I could try gluing the raised section to.
I should also grab a shot of my two-tiered workbench tonight.
Completely out of space everywhere, so I laid a sheet of plywood across everything on the workbench and laid all the freshly-painted engine parts on that. I keep claiming I'll clean my workbench some day, but it hasn't happened yet...
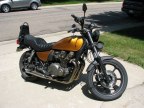
1981 KZ1000-JK1
She's a beautiful mess, and I've made her all mine
She's a beautiful mess, and I've made her all mine
Please Log in or Create an account to join the conversation.
- Shdwdrgn
-
Topic Author
- Offline
- User
-
Registered
- Posts: 611
- Thanks: 24
Re: 1981 KZ1000 J-to-K build
24 Jun 2016 16:57
Tape has been removed from the speedo -- if there was any bleeding I can't see it. Still need to wait a few days before I hit the glass with windex to clean it up. However the paint job on the front piece is beautiful, a real nice black-glass finish. Unfortunately the back side of the case didn't get such a good finish, it almost looks like I missed the clearcoat, even though I know I did hit it. Ah well, I'll clean it up and clear it again on Sunday.
Here's the pic of the clock face. There IS a backing piece, so there's a possibility of gluing it down flat, if there are no other ideas.
And finally, my disaster area of a workbench (the board is sitting on at least 6 inches of stuff)...
I also found my cylinder hone this morning. The thing has been used maybe once or twice in the last 25 years, so the stones are still practically new. Once I bake the jugs I'll get them set up on something and clean out the cylinder walls before knocking the pistons back in.
Ugh... and at some point I need to get some measurements to see if the crank bearings in the new case fit the old crankshaft. Or maybe I would just be better off removing the bearings from the old case? I assume the journals were bored the same size in all cases, and any differences were made up by different thicknesses of bearings?
1981 KZ1000-JK1
She's a beautiful mess, and I've made her all mine
She's a beautiful mess, and I've made her all mine
Please Log in or Create an account to join the conversation.
- wrenchmonkey
-
- Offline
- User
-
Registered
- Posts: 568
- Thanks: 75
Re: 1981 KZ1000 J-to-K build
24 Jun 2016 17:05
Is that gauge dial plastic or some kind of polymer? You could probably use a tiny drop of "crazy glue" and a clothes pin to hold it temporarily while the glue setup.
Hey it's refreshing to see that others here have a workbench that looks like mine! :laugh:
I have a sign for this that reads:
PLEASE DON'T CLEAN UP MY MESS!
YOU'LL CONFUSE ME AND SCREW UP MY WORLD!
Incredibly, it seems to work. Nobody messes with my mess")
Hey it's refreshing to see that others here have a workbench that looks like mine! :laugh:
I have a sign for this that reads:
PLEASE DON'T CLEAN UP MY MESS!
YOU'LL CONFUSE ME AND SCREW UP MY WORLD!
Incredibly, it seems to work. Nobody messes with my mess
Please Log in or Create an account to join the conversation.
- Shdwdrgn
-
Topic Author
- Offline
- User
-
Registered
- Posts: 611
- Thanks: 24
Re: 1981 KZ1000 J-to-K build
24 Jun 2016 17:17
I dunno, it looks like some kind of semi-transparent plastic. Unfortunately it's kinda like a ding in a door panel -- you can't just lay it flat again, the face seems to be stretched so no matter how I push it, there's still a bubble. I might just have to find a way to glue it down that's "good enough".
It gets worse... I actually have small piles of bolts laying on the garage floor between our cars, organized to go back into certain pieces of the engine. If I ever tripped over those piles, I'd be in big trouble.
It gets worse... I actually have small piles of bolts laying on the garage floor between our cars, organized to go back into certain pieces of the engine. If I ever tripped over those piles, I'd be in big trouble.
1981 KZ1000-JK1
She's a beautiful mess, and I've made her all mine
She's a beautiful mess, and I've made her all mine
Please Log in or Create an account to join the conversation.
- SWest
-

- Offline
- Sustaining Member
-

Registered
- 10 22 2014
- Posts: 23689
- Thanks: 3000
Re: 1981 KZ1000 J-to-K build
24 Jun 2016 17:50
Looks like the face plate warped with heat. Might be able to heat it up to make it relax. Electronic tach?
Steve
Steve
Z1b1000 1975 Z1b
kzrider.com/forum/11-projects/598262-kz-...-will-it-live#672882
kzrider.com/forum/2-engine/597654-poser?start=240#704229
kzrider.com/forum/11-projects/598262-kz-...-will-it-live#672882
kzrider.com/forum/2-engine/597654-poser?start=240#704229
Please Log in or Create an account to join the conversation.
- Shdwdrgn
-
Topic Author
- Offline
- User
-
Registered
- Posts: 611
- Thanks: 24
Re: 1981 KZ1000 J-to-K build
24 Jun 2016 18:39
I guess I could try passing over it with a heat gun to see if that relaxes it any. For all I can remember, I may have taken it off the bike after sitting out in the hot Summer sun, then threw it in a box while the face was soft. It's been almost three years since that was taken apart.
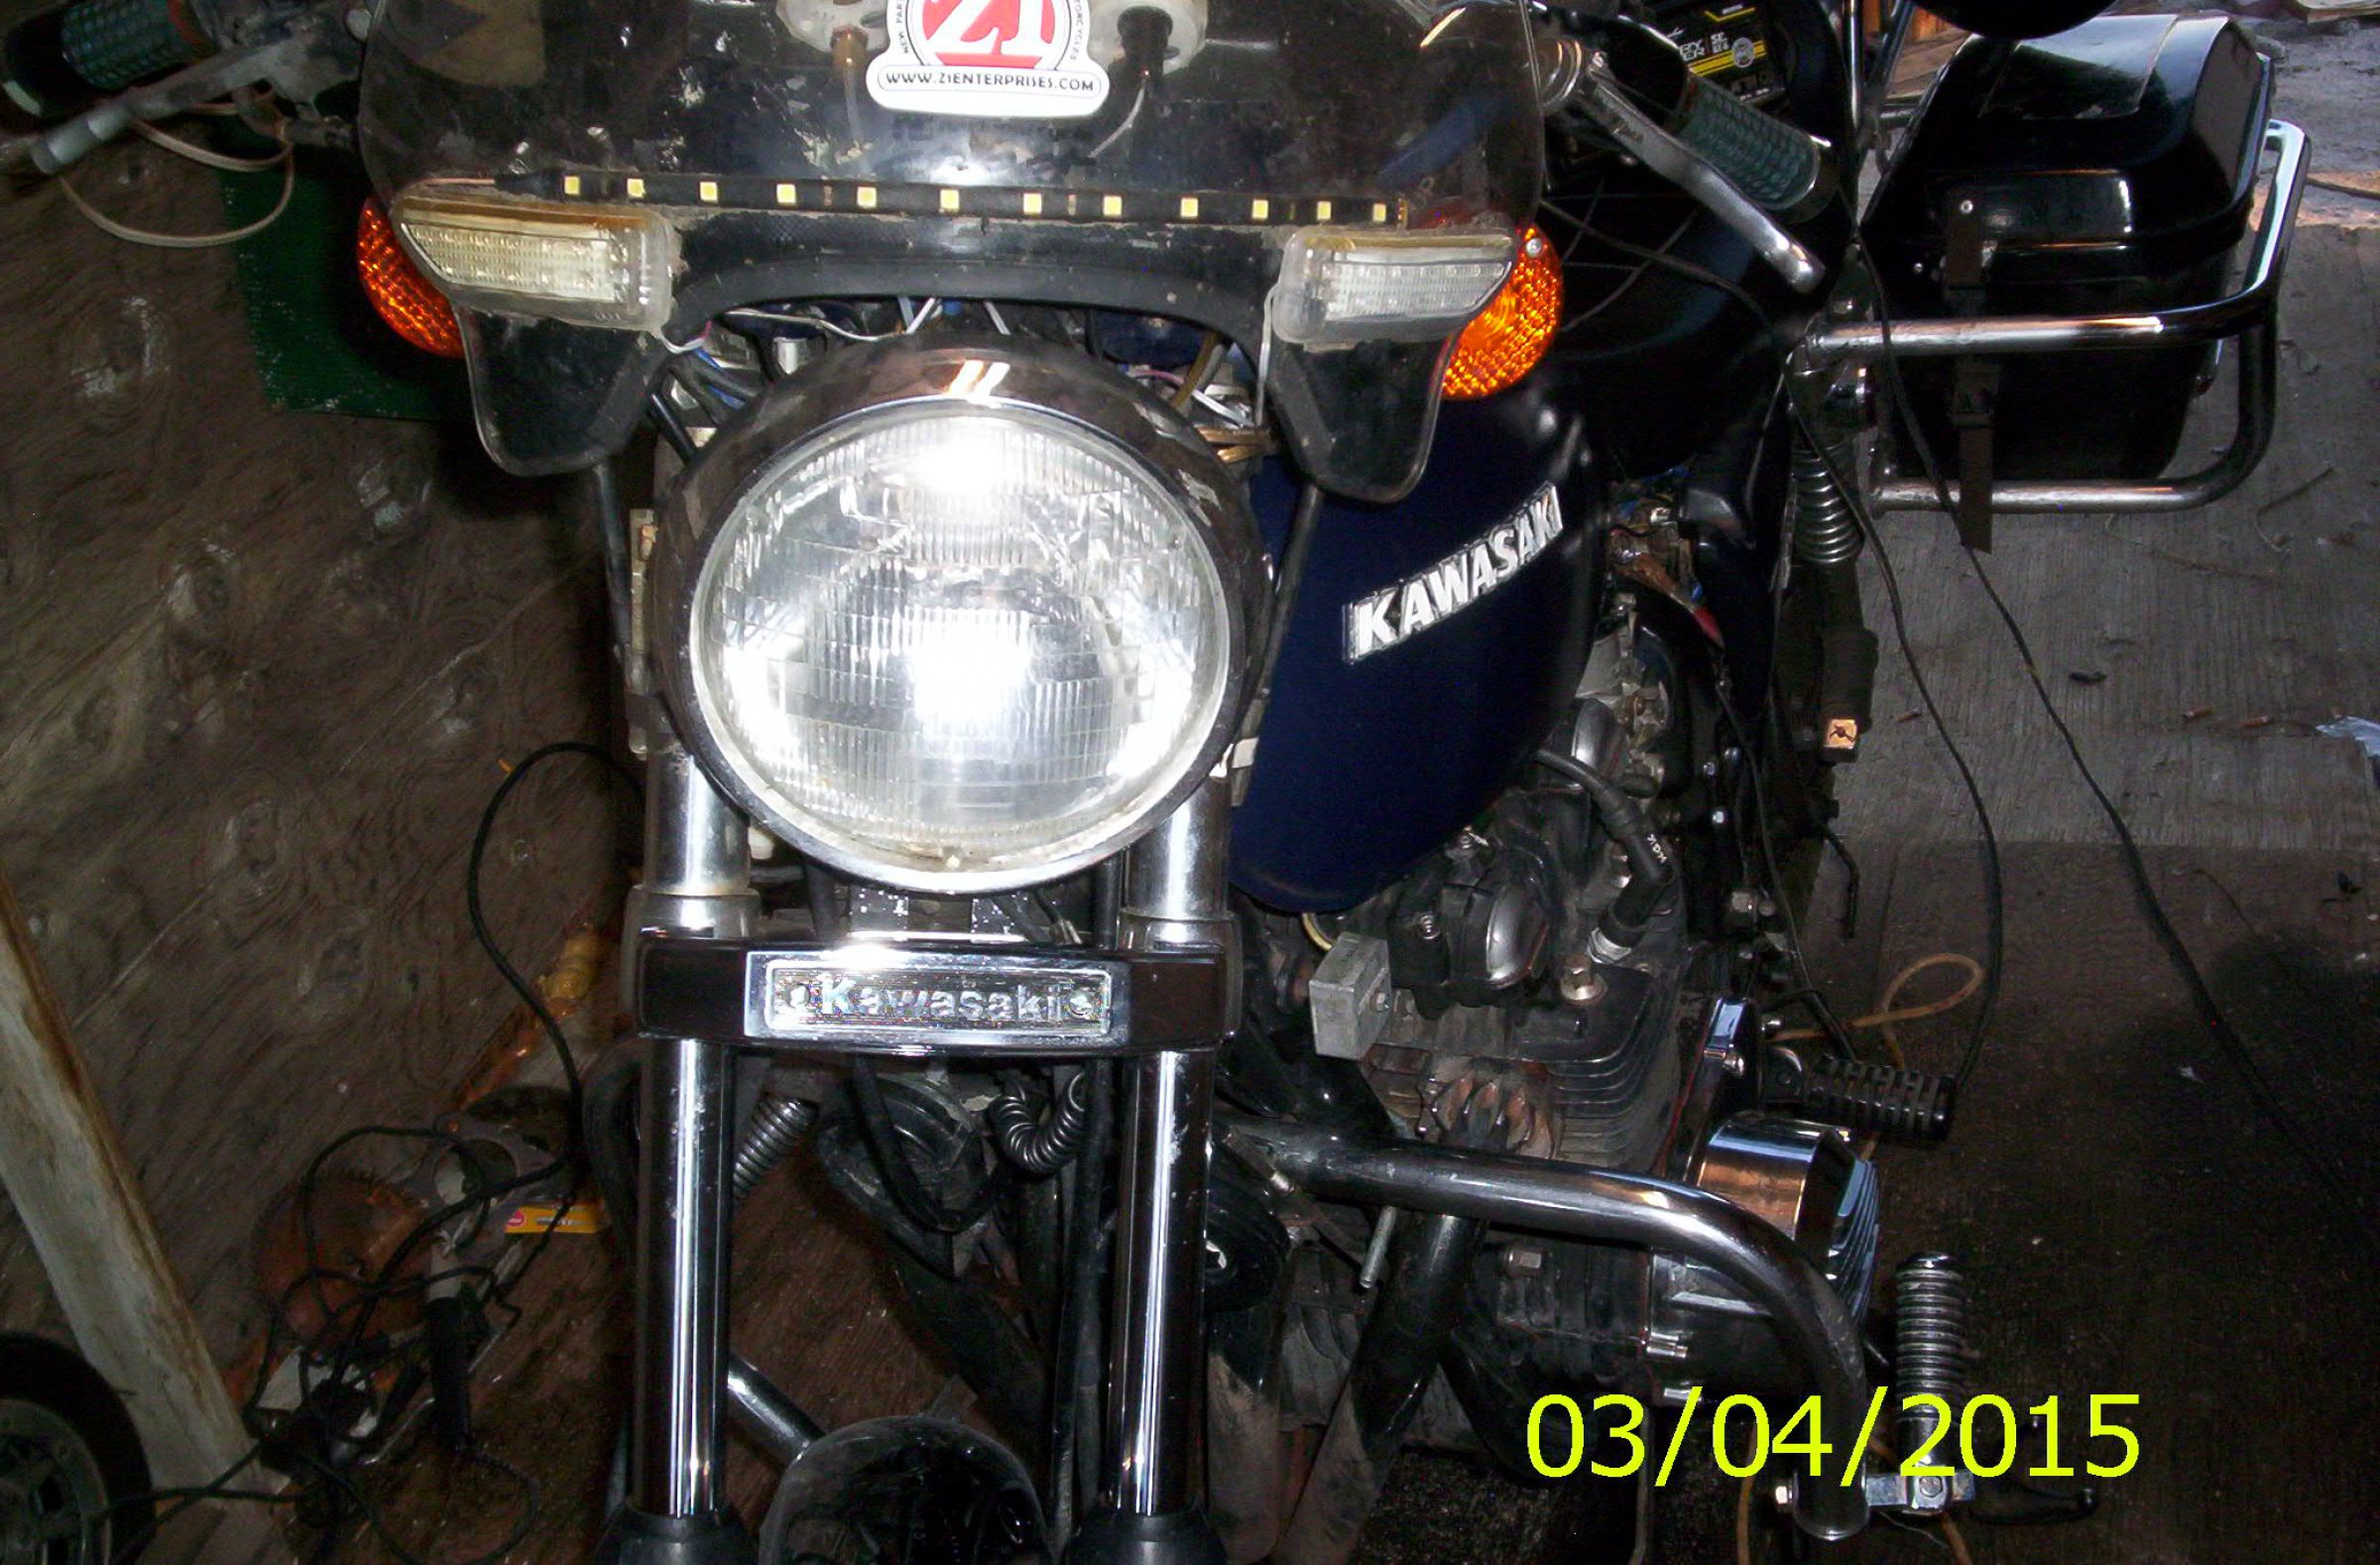
Yeah I'm pretty sure both the speedo and tach are electronic, there weren't any cables going up to them, just the wiring.
Yeah I'm pretty sure both the speedo and tach are electronic, there weren't any cables going up to them, just the wiring.
1981 KZ1000-JK1
She's a beautiful mess, and I've made her all mine
She's a beautiful mess, and I've made her all mine
Please Log in or Create an account to join the conversation.
- SWest
-
- Offline
- Sustaining Member
-
Registered
- 10 22 2014
- Posts: 23689
- Thanks: 3000
Re: 1981 KZ1000 J-to-K build
24 Jun 2016 18:42
I saw the circuit board. That may be what happened.
Steve
Steve
Z1b1000 1975 Z1b
kzrider.com/forum/11-projects/598262-kz-...-will-it-live#672882
kzrider.com/forum/2-engine/597654-poser?start=240#704229
kzrider.com/forum/11-projects/598262-kz-...-will-it-live#672882
kzrider.com/forum/2-engine/597654-poser?start=240#704229
Please Log in or Create an account to join the conversation.
- wrenchmonkey
-
- Offline
- User
-
Registered
- Posts: 568
- Thanks: 75
Re: 1981 KZ1000 J-to-K build
24 Jun 2016 18:55
Well, maybe you could try a blow dryer to warm up the plastic and hopefully it'll lay back down, soft, then clothes pin it in an inconspicuous place until it cools. I dunno. Just thinking aloud...
Oh you have that filing system for your bike's parts too?
Me too!")
Oh you have that filing system for your bike's parts too?
Me too!
Please Log in or Create an account to join the conversation.
- Shdwdrgn
-
Topic Author
- Offline
- User
-
Registered
- Posts: 611
- Thanks: 24
Re: 1981 KZ1000 J-to-K build
24 Jun 2016 21:25
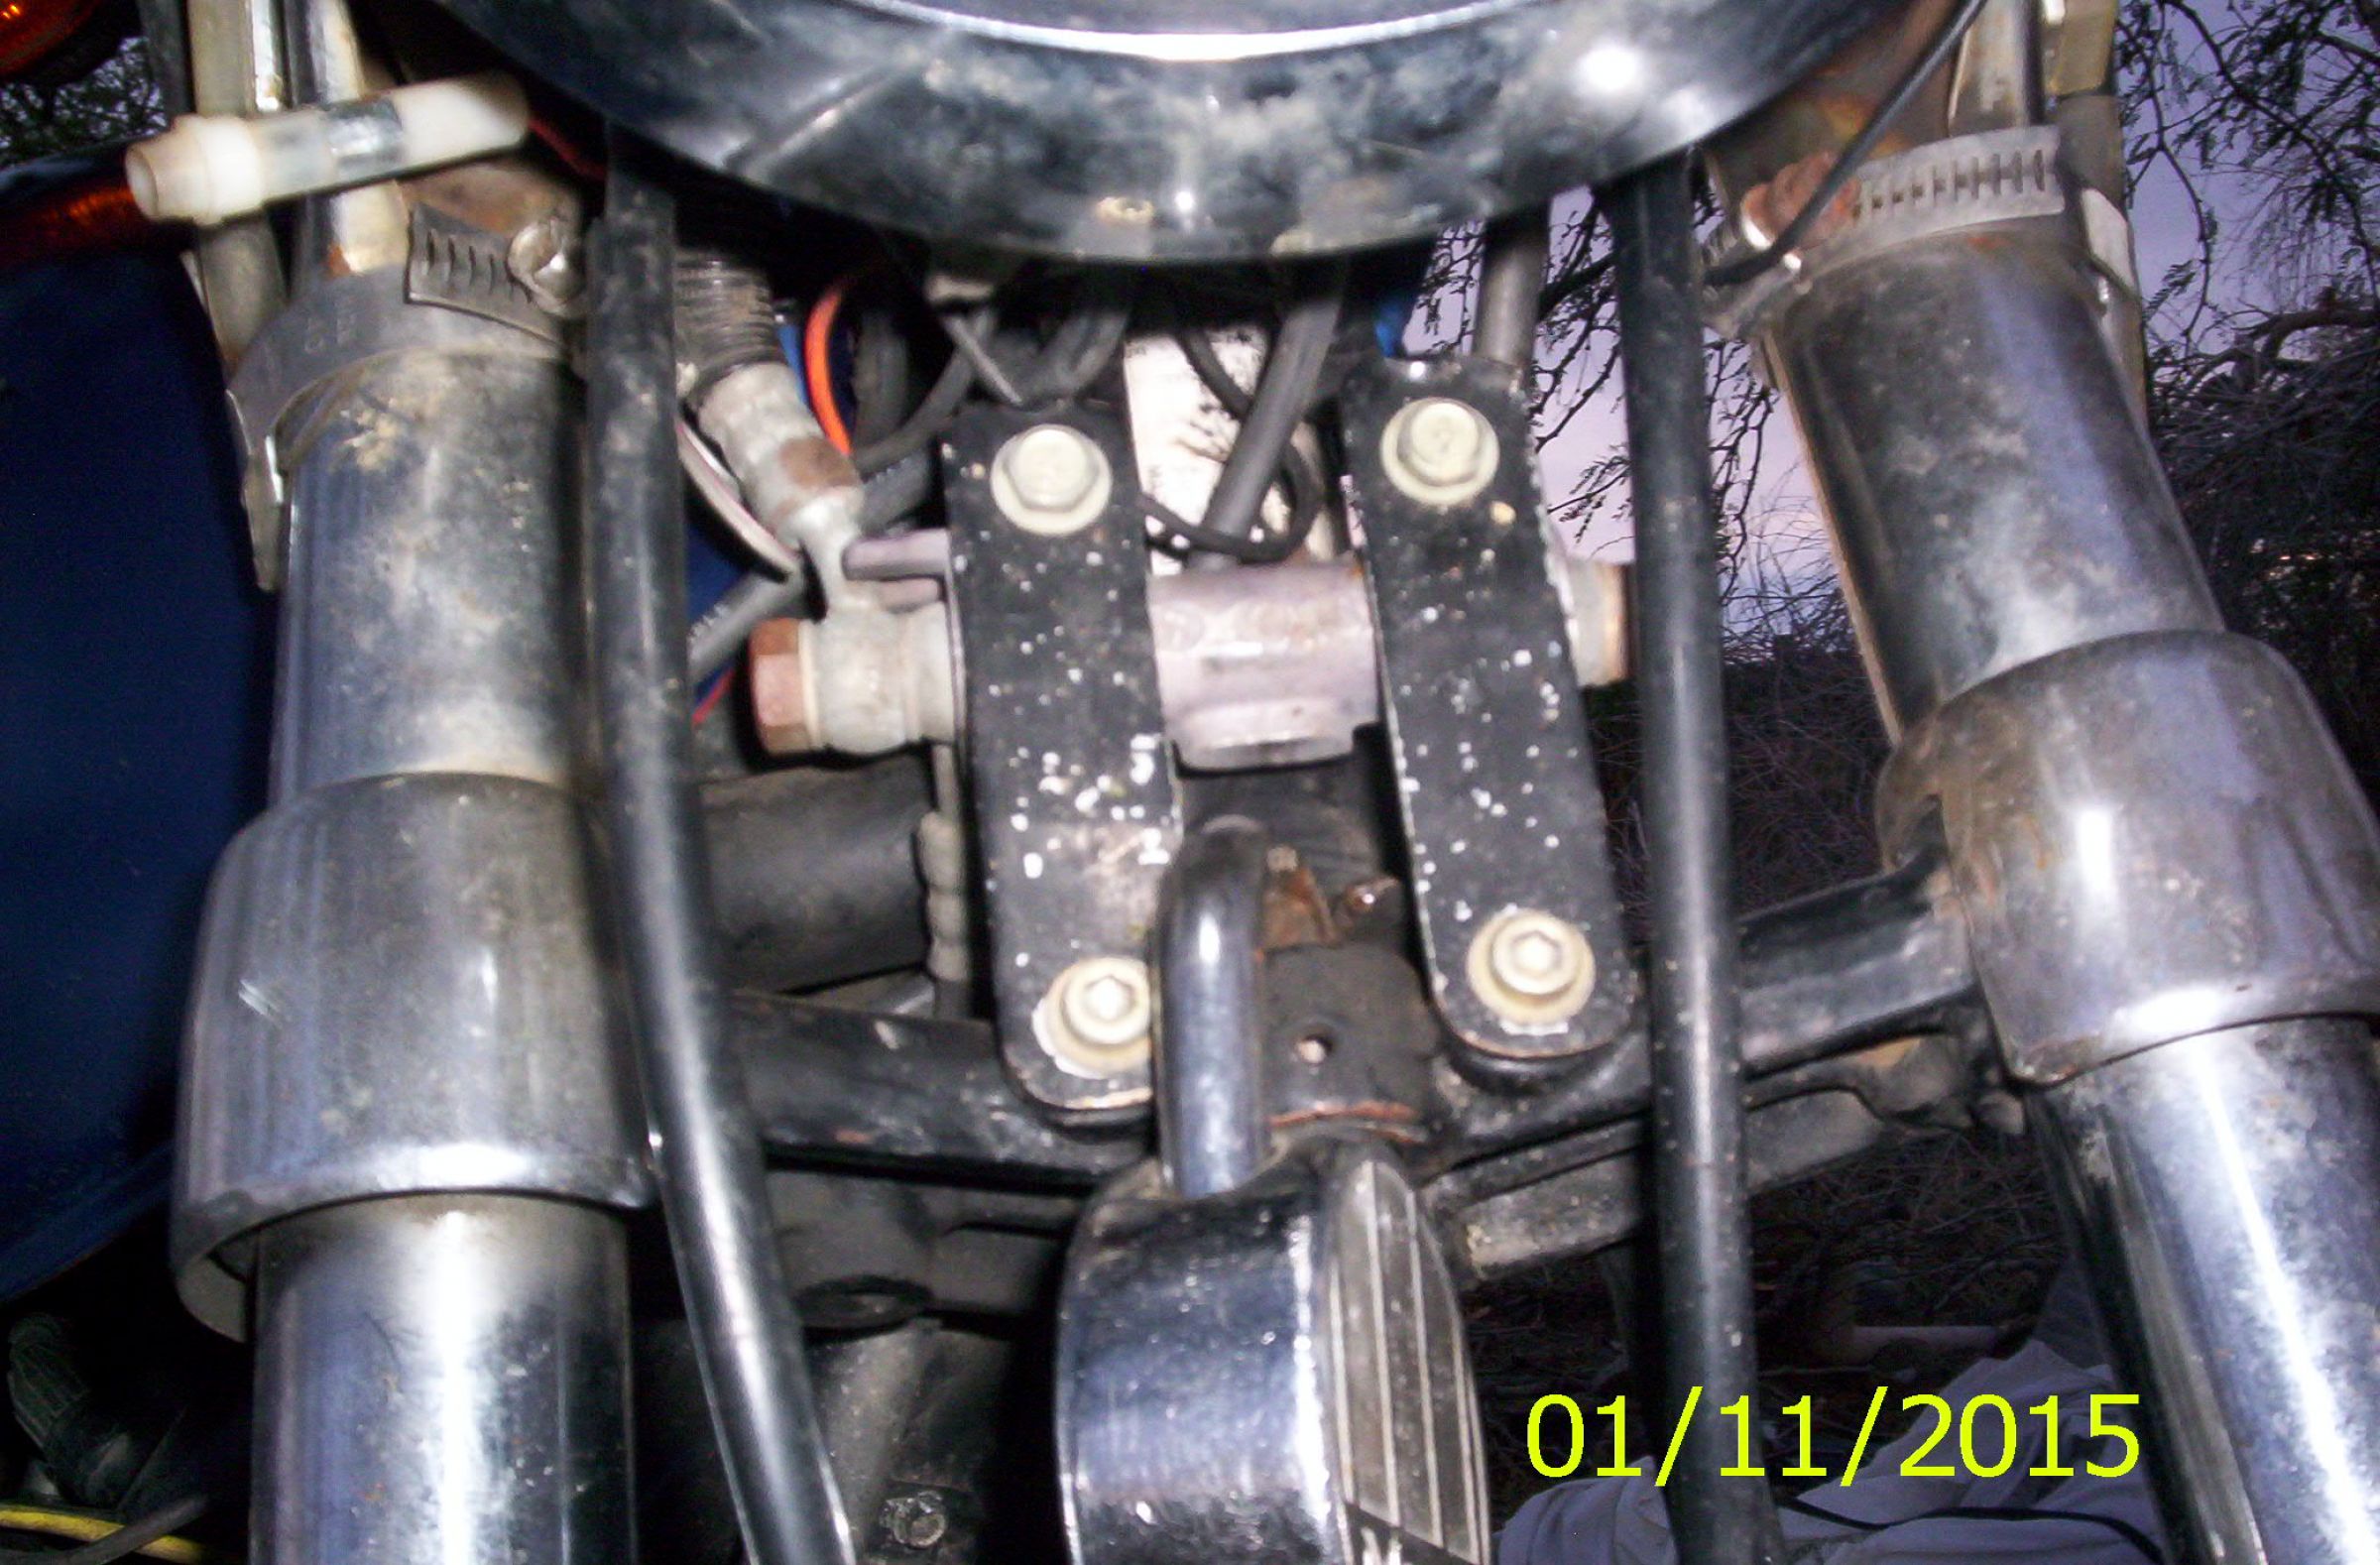
@wrenchmonkey - haha that looks familiar! Now put some parts on the patio, some parts behind the garage, hell spread a few through the house. Seriously, it's a miracle I can find anything at all, and yet somehow I do keep finding the parts I need, and somehow figure out where they're supposed to go (mostly). Luckily a lot of it is fairly self-explanatory, even though there's at least one area where I think I'm missing something and I still haven't figured out what... There's a Kaw tag on the forks, and behind that sits the splitter for the front brakes. The screws that hold the tag are only supposed to be 45mm, however I have nearly that much gap between the back of the tag and the front of the brake unit. There's no question how the tag is supposed to sit against the forks, and the brake unit seems to sit flush against the triple-tree, so I'm not sure what is supposed to fit in the gap.
Regarding the speedo, I slid the unit back inside the front face, and I can see a line on the raised portion of the face that was rubbing the inside of the glass, but it doesn't actually push the face back down flat when assembled. Because of that line, though, I'd say the face has been warped like that for awhile, so I'm a bit relieved that I didn't actually screw it up. I'm actually thinking now about the amount of heat it must have taken to warp that. Keep in mind these parts were made with the assumption that they would be left out in the sunlight, however I'm at high altitude so the effects of the sun are just a bit more focused. It will be really interesting to see what I find when I pull apart the tach.
Regarding the speedo, I slid the unit back inside the front face, and I can see a line on the raised portion of the face that was rubbing the inside of the glass, but it doesn't actually push the face back down flat when assembled. Because of that line, though, I'd say the face has been warped like that for awhile, so I'm a bit relieved that I didn't actually screw it up. I'm actually thinking now about the amount of heat it must have taken to warp that. Keep in mind these parts were made with the assumption that they would be left out in the sunlight, however I'm at high altitude so the effects of the sun are just a bit more focused. It will be really interesting to see what I find when I pull apart the tach.
1981 KZ1000-JK1
She's a beautiful mess, and I've made her all mine
She's a beautiful mess, and I've made her all mine
Please Log in or Create an account to join the conversation.
- wrenchmonkey
-
- Offline
- User
-
Registered
- Posts: 568
- Thanks: 75
Re: 1981 KZ1000 J-to-K build
25 Jun 2016 06:29
Hey Dragon
First the fork name plate issue. Look here:

This is a pic of my '82 KZ1000 CSR. There is this little plate which is bolted with the from hydraulic splitter to the forks and it has the receiver holes for those smaller screws which hold the name plate. So check those other organized piles of parts for it...
Funny thing is I looked for this part for hours one day for KZombie. The 650 didn't have this name plate when I got it so I figured it was just another part that was absconded with before I bought it (was missing many front end pieces) but after much searching through my organized mess and then some online hunting, I came to the realization that this particular model year of '650 didn't even come with a name plate here. :laugh: :laugh: :laugh: Ever feel like you're running on a treadmill? :pinch:
I may be wrong, as I often am, but this plate may also have a screw which secures to the base of the headlamp bucket too. Others here on the forum may be able to shed more light on this plate's exact setup when properly installed but I do know it holds that name plate in front of your hydraulic splitter assembly...
As to the "organized mess" of parts piled by like function; in the midst of my disassembly of the bike (and at the point where the bike couldn't be dismantled any further save for removing the wheels). We moved. So I had to pile all my organized mess into a 33gal plastic tub. Goodbye to my knowing which pile had which components! However, like you, I was still able to put humpty back together again by basically, pulling all those parts from the single tub (now at the new house) and making piles again but it did create one extra pile - The mystery pile - which I often had to refer to when assembling anything else later. "Dang it.. I know I had this fizzgig whatchamacallit? It's gotta be in the mystery pile!
First the fork name plate issue. Look here:
This is a pic of my '82 KZ1000 CSR. There is this little plate which is bolted with the from hydraulic splitter to the forks and it has the receiver holes for those smaller screws which hold the name plate. So check those other organized piles of parts for it...
Funny thing is I looked for this part for hours one day for KZombie. The 650 didn't have this name plate when I got it so I figured it was just another part that was absconded with before I bought it (was missing many front end pieces) but after much searching through my organized mess and then some online hunting, I came to the realization that this particular model year of '650 didn't even come with a name plate here. :laugh: :laugh: :laugh: Ever feel like you're running on a treadmill? :pinch:
I may be wrong, as I often am, but this plate may also have a screw which secures to the base of the headlamp bucket too. Others here on the forum may be able to shed more light on this plate's exact setup when properly installed but I do know it holds that name plate in front of your hydraulic splitter assembly...
As to the "organized mess" of parts piled by like function; in the midst of my disassembly of the bike (and at the point where the bike couldn't be dismantled any further save for removing the wheels). We moved. So I had to pile all my organized mess into a 33gal plastic tub. Goodbye to my knowing which pile had which components! However, like you, I was still able to put humpty back together again by basically, pulling all those parts from the single tub (now at the new house) and making piles again but it did create one extra pile - The mystery pile - which I often had to refer to when assembling anything else later. "Dang it.. I know I had this fizzgig whatchamacallit? It's gotta be in the mystery pile!
Please Log in or Create an account to join the conversation.
- SWest
-
- Offline
- Sustaining Member
-
Registered
- 10 22 2014
- Posts: 23689
- Thanks: 3000
Re: 1981 KZ1000 J-to-K build
25 Jun 2016 06:51
The earlier models didn't have the cover. I always hated looking at the splitter and wires so I got one for a 1100 and made my own bracket.
Steve
Steve
Z1b1000 1975 Z1b
kzrider.com/forum/11-projects/598262-kz-...-will-it-live#672882
kzrider.com/forum/2-engine/597654-poser?start=240#704229
kzrider.com/forum/11-projects/598262-kz-...-will-it-live#672882
kzrider.com/forum/2-engine/597654-poser?start=240#704229
Please Log in or Create an account to join the conversation.
- Shdwdrgn
-
Topic Author
- Offline
- User
-
Registered
- Posts: 611
- Thanks: 24
Re: 1981 KZ1000 J-to-K build
25 Jun 2016 08:35
Thanks guys, but yeah I do have that plate on top of the brake splitter, which is exactly what the nametag plate screws to. Note that I did *not* have the name plate with any of the bike parts I got, so I had to pick one up. I've re-checked several times on ebay, and all the ones I've found advertised for the '81 models (and the drawing in the parts diagram) look identical to the piece I have, and the parts diagram doesn't show anything else there which would make the brake splitter stick out further.. I'll try to get a good clean shot of that particular issue sometime today, but I can see from wrenchmonkey's that on your model the brake splitter sticks out in front of the forks, while mine with the plate in place are nearly flush with the front edge of the forks. Very odd.
1981 KZ1000-JK1
She's a beautiful mess, and I've made her all mine
She's a beautiful mess, and I've made her all mine
Please Log in or Create an account to join the conversation.
Moderators: Street Fighter LTD