
- Posts: 123
- Thank you received: 87
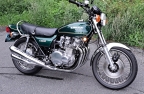
KZ 900 - 50 years later !
- Kaw-boy 900
-
 Topic Author
- Offline
- User
-

Registered
- Let the Good ''Old'' Time Roll !
Less
More
17 Jun 2025 08:33 #913789
by Kaw-boy 900
Kawasaki and other bike ownend.
S1 250 triple 1973
H1, 500 triple 1975
LTD 1000, 1982
Ninja 1000R 1987
Ninja ZX12R 2006
KZ900 1976. My BB !
Yamaha RD 350 1973
Ducati 1098 2007
Harley Softail 2009 For sale !
Replied by Kaw-boy 900 on topic KZ 900 - 50 years later !
I think that the bacfires (pop) issue has been solved ! The timing was off a bit. I just made a small ride and no pop at start up nor while running.This made a big difference in low-end acceleration.
But....there is alway something ! After completing the timing ajustement, I shut down the engine and left the petcock at on. Five min. later, there was a gas spill under the bike....RRRrrrrr !
I usaly close the petcock but this is not suppose to hapen. The carbs were cleaned and I smouth out the floats tang to insure that it can travel freely.
Kawasaki and other bike ownend.
S1 250 triple 1973
H1, 500 triple 1975
LTD 1000, 1982
Ninja 1000R 1987
Ninja ZX12R 2006
KZ900 1976. My BB !
Yamaha RD 350 1973
Ducati 1098 2007
Harley Softail 2009 For sale !
Please Log in or Create an account to join the conversation.
- Rolf1976_KZ900
-
- Offline
- Sustaining Member
-

Registered
Less
More
- Posts: 498
- Thank you received: 261
17 Jun 2025 13:46 #913796
by Rolf1976_KZ900
Replied by Rolf1976_KZ900 on topic KZ 900 - 50 years later !
Good to hear that you solved the popper ! about the leak ... one thing it can be is that the float rubs on the bowlgasket . I have some times had a leak after a
carb rebuild then first thing to try is to give the carbs a wack with a plastic hammer that can solve it.
carb rebuild then first thing to try is to give the carbs a wack with a plastic hammer that can solve it.
The following user(s) said Thank You: Kaw-boy 900
Please Log in or Create an account to join the conversation.
- Kaw-boy 900
-
Topic Author
- Offline
- User
-
Registered
- Let the Good ''Old'' Time Roll !
Less
More
- Posts: 123
- Thank you received: 87
27 Jun 2025 16:02 - 27 Jun 2025 16:03 #914159
by Kaw-boy 900
Kawasaki and other bike ownend.
S1 250 triple 1973
H1, 500 triple 1975
LTD 1000, 1982
Ninja 1000R 1987
Ninja ZX12R 2006
KZ900 1976. My BB !
Yamaha RD 350 1973
Ducati 1098 2007
Harley Softail 2009 For sale !
Replied by Kaw-boy 900 on topic KZ 900 - 50 years later !
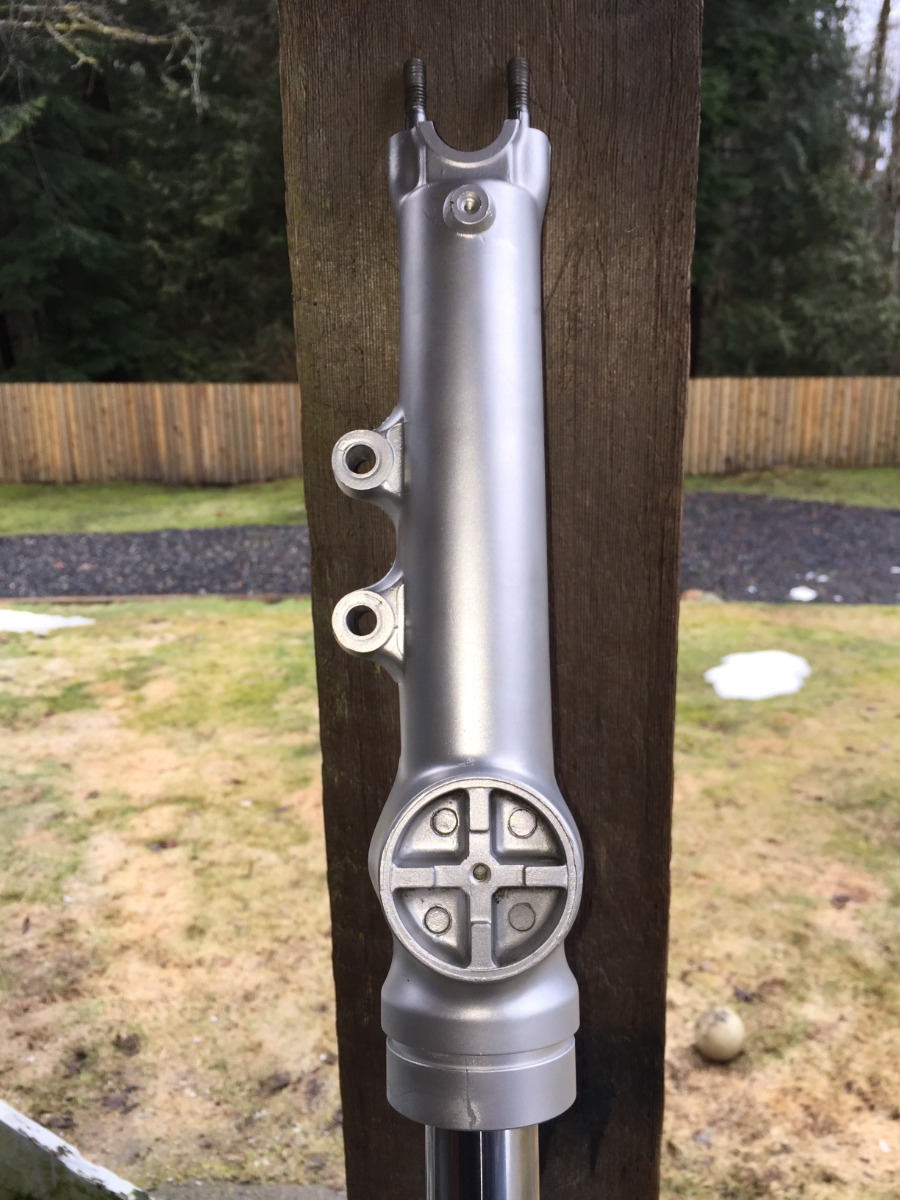
How to restore the lower parts of the fork when too polished? Hydro blast?? Can it be made assembled?
Kawasaki and other bike ownend.
S1 250 triple 1973
H1, 500 triple 1975
LTD 1000, 1982
Ninja 1000R 1987
Ninja ZX12R 2006
KZ900 1976. My BB !
Yamaha RD 350 1973
Ducati 1098 2007
Harley Softail 2009 For sale !
Last edit: 27 Jun 2025 16:03 by Kaw-boy 900.
Please Log in or Create an account to join the conversation.
- asphalt900
-
- Offline
- Sustaining Member
-
Registered
Less
More
- Posts: 1724
- Thank you received: 1168
28 Jun 2025 00:17 #914161
by asphalt900
Replied by asphalt900 on topic KZ 900 - 50 years later !
Addressing both issues. First that pesky flooding of bowl overflowing, hopefully not next to your water heater! Like Rolf mentioned, "could" be just some minute crap?? More likely though just worn assemblies. These Brass seat and steel needle assemblies never liked the constant pressure of fuel from the get-go. Especially after a ride, radiant heat from engine under the tank, tends to pressurize and exasperate the problem and/or find the weak points. I always just buy new. Mikuni VM26/26-2.0 or in the later used VM26/26-2.3. They are around 20-25 USD a piece and great insurance. I see a lot of fellas mentioning polishing them with toothpaste and q-tips, that does little good if any. Forks, were they over-polished? Blasting to even the tone of aluminum color/old clear coat removal is the initial step. Ya don't want glass beads for this initial cleaning, glass doesn't "bite" it bounces. I use a fine silica but i.m sure other products/media out there that could achieve the same. Then sanding, this is the part that takes the most time by far. Getting out all those knicks and gouges from years of service. Then polish. After that a scotchbrite pad will give you the "original" like brushed finish. Clearcoat after.
The following user(s) said Thank You: kimchella, Kaw-boy 900
Please Log in or Create an account to join the conversation.
- hardrockminer
-
- Offline
- Sustaining Member
-
Registered
Less
More
- Posts: 3136
- Thank you received: 1235
28 Jun 2025 04:58 #914168
by hardrockminer
I have several restored bikes along with a 2006 Goldwing with a sidecar.
Replied by hardrockminer on topic KZ 900 - 50 years later !
I do it as Clay mentions, starting with a rough paper, maybe 400 to remove scratches and dents, then finishing up with a high grit paper...2500 to 5000.
I have several restored bikes along with a 2006 Goldwing with a sidecar.
Please Log in or Create an account to join the conversation.
- slmjim+Z1BEBE
-

- Offline
- User
-
Registered
- Enjoy Life! IT HAS AN EXPIRATION DATE!
Less
More
- Posts: 1490
- Thank you received: 982
28 Jun 2025 05:38 #914169
by slmjim+Z1BEBE
1) Wet sanding. Start with fairly coarse, move progressively finer. Works well on broad, flat surfaces like clutch covers, gently-curved surfaces like chain covers & points housings. Time consuming & tedious on compound curves like dyno covers. Move to progressively finer until the target finish is achieved.
2) Fork lowers are a special case. Corrosion occurs under the OEM clearcoat that must be removed with fairly aggressive means. The OEM linishing marks are more apparent than on most any other Z1 aluminum. Finishing with more-coarse wet sanding works. There's another method slmjim experimented with ('cause he's an incurable tinkerer & tool junkie) that worked well on fork lowers:
There's a type of drill arbor that holds the ~5 1/2" dia. replaceable, very coarse & aggressive, flexible foam abrasive disks intended for rapid paint & rust removal. Remove the disk from the arbor if present. slmjim used 3/8" sisal rope for the next step 'cause that's what we had on the shelf, but poly might work as well. Cut two or three lengths of rope about 6", no longer than 10". Wrap them evenly spaced around the arbor & clamp in place to make a rotating flail. Trim the ends to even lengths.
For abrasives he tried the pumice powder available at paint stores for traction on steps, and also valve grinding compound. Use vegetable oil to make a thick slurry of abrasive paste to wipe onto the workpiece and also dip the tips of the flails. Wiping a thin coat of vegetable shortening on the workpiece as a binder & dusting the abrasive on it works too.
With the arbor in an electric drill, flail away; outside is preferable. Wear eye pro. slmjim sez, "Keep your mouth closed".
Either method will produce finishes indistinguishable from OEM given enough time & patience. Neither will remove deep pitting from corrosion.
Good Ridin'
slmjim & Z1BEBE
A biker looks at your engine and chrome.
A Rider looks at your odometer and tags.
1973 ('72 builds) Z1 x2
1974 Z1-A x2
1975 Z1-B x2
1993 CB 750 Nighthawk x2
2009 ST1300A
www.kawasaki-z-classik.com
A Forum tightly focused on all things Z1 and Z2.
Replied by slmjim+Z1BEBE on topic KZ 900 - 50 years later !
Over-polishing seems to be a thing for some so-called 'restorers'. It's much easier to do mirror-finish polishing than recreate Mama Kaw's correct OEM finish with the very fine 'linishing' marks that results in a 'gloss/satin/brushed' look, for lack of a better phrase. We've experimented with accomplishing correct OEM finish on over-polished and corroded aluminum two ways; both are time-consuming & tedious:Kaw-boy 900 post=914159 userid=81101How to restore the lower parts of the fork when too polished? Hydro blast?? Can it be made assembled?
1) Wet sanding. Start with fairly coarse, move progressively finer. Works well on broad, flat surfaces like clutch covers, gently-curved surfaces like chain covers & points housings. Time consuming & tedious on compound curves like dyno covers. Move to progressively finer until the target finish is achieved.
2) Fork lowers are a special case. Corrosion occurs under the OEM clearcoat that must be removed with fairly aggressive means. The OEM linishing marks are more apparent than on most any other Z1 aluminum. Finishing with more-coarse wet sanding works. There's another method slmjim experimented with ('cause he's an incurable tinkerer & tool junkie) that worked well on fork lowers:
There's a type of drill arbor that holds the ~5 1/2" dia. replaceable, very coarse & aggressive, flexible foam abrasive disks intended for rapid paint & rust removal. Remove the disk from the arbor if present. slmjim used 3/8" sisal rope for the next step 'cause that's what we had on the shelf, but poly might work as well. Cut two or three lengths of rope about 6", no longer than 10". Wrap them evenly spaced around the arbor & clamp in place to make a rotating flail. Trim the ends to even lengths.
For abrasives he tried the pumice powder available at paint stores for traction on steps, and also valve grinding compound. Use vegetable oil to make a thick slurry of abrasive paste to wipe onto the workpiece and also dip the tips of the flails. Wiping a thin coat of vegetable shortening on the workpiece as a binder & dusting the abrasive on it works too.
With the arbor in an electric drill, flail away; outside is preferable. Wear eye pro. slmjim sez, "Keep your mouth closed".
Either method will produce finishes indistinguishable from OEM given enough time & patience. Neither will remove deep pitting from corrosion.
Good Ridin'
slmjim & Z1BEBE
A biker looks at your engine and chrome.
A Rider looks at your odometer and tags.
1973 ('72 builds) Z1 x2
1974 Z1-A x2
1975 Z1-B x2
1993 CB 750 Nighthawk x2
2009 ST1300A
www.kawasaki-z-classik.com
A Forum tightly focused on all things Z1 and Z2.
The following user(s) said Thank You: Kaw-boy 900
Please Log in or Create an account to join the conversation.
- Kaw-boy 900
-
Topic Author
- Offline
- User
-
Registered
- Let the Good ''Old'' Time Roll !
Less
More
- Posts: 123
- Thank you received: 87
28 Jun 2025 11:44 - 28 Jun 2025 12:23 #914176
by Kaw-boy 900

Kawasaki and other bike ownend.
S1 250 triple 1973
H1, 500 triple 1975
LTD 1000, 1982
Ninja 1000R 1987
Ninja ZX12R 2006
KZ900 1976. My BB !
Yamaha RD 350 1973
Ducati 1098 2007
Harley Softail 2009 For sale !
Replied by Kaw-boy 900 on topic KZ 900 - 50 years later !
That look very nice ! Thanks for the informationsI do it as Clay mentions, starting with a rough paper, maybe 400 to remove scratches and dents, then finishing up with a high grit paper...2500 to 5000.
Kawasaki and other bike ownend.
S1 250 triple 1973
H1, 500 triple 1975
LTD 1000, 1982
Ninja 1000R 1987
Ninja ZX12R 2006
KZ900 1976. My BB !
Yamaha RD 350 1973
Ducati 1098 2007
Harley Softail 2009 For sale !
Last edit: 28 Jun 2025 12:23 by Kaw-boy 900.
Please Log in or Create an account to join the conversation.
- Kaw-boy 900
-
Topic Author
- Offline
- User
-
Registered
- Let the Good ''Old'' Time Roll !
Less
More
- Posts: 123
- Thank you received: 87
28 Jun 2025 12:15 - 28 Jun 2025 12:16 #914178
by Kaw-boy 900

Kawasaki and other bike ownend.
S1 250 triple 1973
H1, 500 triple 1975
LTD 1000, 1982
Ninja 1000R 1987
Ninja ZX12R 2006
KZ900 1976. My BB !
Yamaha RD 350 1973
Ducati 1098 2007
Harley Softail 2009 For sale !
Replied by Kaw-boy 900 on topic KZ 900 - 50 years later !
Seats and needles are almost new (Mikuni) and were cleaned with a Q-tip last winter. It was ok since. It could be some dirt even if the tank is clean and coated. I will put in gas filters and see if it happen again. Concerning the forks, they were restored but almost look chromed. Thanks you for the info's.Addressing both issues. First that pesky flooding of bowl overflowing, hopefully not next to your water heater! Like Rolf mentioned, "could" be just some minute crap?? More likely though just worn assemblies. These Brass seat and steel needle assemblies never liked the constant pressure of fuel from the get-go. Especially after a ride, radiant heat from engine under the tank, tends to pressurize and exasperate the problem and/or find the weak points. I always just buy new. Mikuni VM26/26-2.0 or in the later used VM26/26-2.3. They are around 20-25 USD a piece and great insurance. I see a lot of fellas mentioning polishing them with toothpaste and q-tips, that does little good if any. Forks, were they over-polished? Blasting to even the tone of aluminum color/old clear coat removal is the initial step. Ya don't want glass beads for this initial cleaning, glass doesn't "bite" it bounces. I use a fine silica but i.m sure other products/media out there that could achieve the same. Then sanding, this is the part that takes the most time by far. Getting out all those knicks and gouges from years of service. Then polish. After that a scotchbrite pad will give you the "original" like brushed finish. Clearcoat after.
Kawasaki and other bike ownend.
S1 250 triple 1973
H1, 500 triple 1975
LTD 1000, 1982
Ninja 1000R 1987
Ninja ZX12R 2006
KZ900 1976. My BB !
Yamaha RD 350 1973
Ducati 1098 2007
Harley Softail 2009 For sale !
Last edit: 28 Jun 2025 12:16 by Kaw-boy 900.
Please Log in or Create an account to join the conversation.
- Kaw-boy 900
-
Topic Author
- Offline
- User
-
Registered
- Let the Good ''Old'' Time Roll !
Less
More
- Posts: 123
- Thank you received: 87
28 Jun 2025 12:21 - 28 Jun 2025 12:21 #914179
by Kaw-boy 900

Kawasaki and other bike ownend.
S1 250 triple 1973
H1, 500 triple 1975
LTD 1000, 1982
Ninja 1000R 1987
Ninja ZX12R 2006
KZ900 1976. My BB !
Yamaha RD 350 1973
Ducati 1098 2007
Harley Softail 2009 For sale !
Replied by Kaw-boy 900 on topic KZ 900 - 50 years later !
Thank you ! I'm scared to do it....I might find the courrage next winter or find guys like you to do it
Over-polishing seems to be a thing for some so-called 'restorers'. It's much easier to do mirror-finish polishing than recreate Mama Kaw's correct OEM finish with the very fine 'linishing' marks that results in a 'gloss/satin/brushed' look, for lack of a better phrase. We've experimented with accomplishing correct OEM finish on over-polished and corroded aluminum two ways; both are time-consuming & tedious:Kaw-boy 900 post=914159 userid=81101How to restore the lower parts of the fork when too polished? Hydro blast?? Can it be made assembled?
1) Wet sanding. Start with fairly coarse, move progressively finer. Works well on broad, flat surfaces like clutch covers, gently-curved surfaces like chain covers & points housings. Time consuming & tedious on compound curves like dyno covers. Move to progressively finer until the target finish is achieved.
2) Fork lowers are a special case. Corrosion occurs under the OEM clearcoat that must be removed with fairly aggressive means. The OEM linishing marks are more apparent than on most any other Z1 aluminum. Finishing with more-coarse wet sanding works. There's another method slmjim experimented with ('cause he's an incurable tinkerer & tool junkie) that worked well on fork lowers:
There's a type of drill arbor that holds the ~5 1/2" dia. replaceable, very coarse & aggressive, flexible foam abrasive disks intended for rapid paint & rust removal. Remove the disk from the arbor if present. slmjim used 3/8" sisal rope for the next step 'cause that's what we had on the shelf, but poly might work as well. Cut two or three lengths of rope about 6", no longer than 10". Wrap them evenly spaced around the arbor & clamp in place to make a rotating flail. Trim the ends to even lengths.
For abrasives he tried the pumice powder available at paint stores for traction on steps, and also valve grinding compound. Use vegetable oil to make a thick slurry of abrasive paste to wipe onto the workpiece and also dip the tips of the flails. Wiping a thin coat of vegetable shortening on the workpiece as a binder & dusting the abrasive on it works too.
With the arbor in an electric drill, flail away; outside is preferable. Wear eye pro. slmjim sez, "Keep your mouth closed".
Either method will produce finishes indistinguishable from OEM given enough time & patience. Neither will remove deep pitting from corrosion.
Good Ridin'
slmjim & Z1BEBE
Kawasaki and other bike ownend.
S1 250 triple 1973
H1, 500 triple 1975
LTD 1000, 1982
Ninja 1000R 1987
Ninja ZX12R 2006
KZ900 1976. My BB !
Yamaha RD 350 1973
Ducati 1098 2007
Harley Softail 2009 For sale !
Last edit: 28 Jun 2025 12:21 by Kaw-boy 900.
Please Log in or Create an account to join the conversation.
Moderators: Street Fighter LTD