
Carburetor problem
- Danny Millhorn
-
 Topic Author
- Offline
- Sustaining Member
-

Registered
- Posts: 10
- Thanks: 0
Re: Carburetor problem
26 Jul 2019 10:27
The frame has the Z1F. The intake is stock, but the exhaust is a 4 into one header. I'll be going back into the carbs this weekend to see what the parts are. Thanks for the all info. Really helps.
Please Log in or Create an account to join the conversation.
- hardrockminer
-
- Offline
- Sustaining Member
-
Registered
- Posts: 3108
- Thanks: 1214
Re: Carburetor problem
26 Jul 2019 18:25 - 26 Jul 2019 18:37
You need to pull the carbs totally apart to get at the needle jet. When you look down from the top you can see the top sticking out into the carb throat. These jets are a tight fit and are held in place by the emulsion tube that screws into the underside of the carb. To take them out I use a piece of wooden dowel down the top of the carb with the carb upright on the bench. Tap it with a hammer and the jet should fall out the bottom. Be sure to check and clean the jet location after the jet is removed as there can be a good accumulation of crap around the bottom where the jet sits. Use carb cleaner and compressed air to finish up before installing the new jet.
With new jets and needles you will see a huge improvement in performance as well as gas mileage. My Z1B went from 40 mpg to 55 mpg. (Imperial gallons) My revs dropped from 4,000 to 3,700 at 60 mph. My bike is stock intake with a K&N air filter, stock carb settings and stock 4/4 exhaust.
With a header you might try lifting your needles to position #3 from #2 and increasing your pilot jet to 20 from 17.5. Air screws should be around 1 turn out from lightly seated. If you do that and you find that your bike struggles to accelerate at cruising speeds then return the needles to position #2.
When you reassemble everything and want to synch the carbs, follow this procedure.
1) adjust the fully open throttle screw so that every slide is above its carb throat.
2) totally unscrew all four synch screws.
3) unscrew your throttle idle adjustment screw so that it doesn't touch the idle adjustment bar.
4) screw in each synch screw until it just barely touches the ball on the chrome arm for each carb.
At this point you should see all four of your throttle slides totally closed.
5) Tighten each synch screw a half turn. Check to see if you have any gap on the throttle slide. If yes then tighten each screw another half turn and check again. Continue to do this until you see the opening between the throttle slide and the carb bottom almost close. You want about a half millimeter of gap. The book says 0.7 mm but I find a half mm to be ideal. When you have them all adjusted to a half mm then tighten down the top nuts but not too tight. Open and close your throttle mechanism a few times and let it snap shut. Check your throttle slides and adjust again if any of them seems to have moved.
I have several restored bikes along with a 2006 Goldwing with a sidecar.
Last edit: 26 Jul 2019 18:37 by hardrockminer.
Please Log in or Create an account to join the conversation.
- Danny Millhorn
-
Topic Author
- Offline
- Sustaining Member
-
Registered
- Posts: 10
- Thanks: 0
Re: Carburetor problem
31 Jul 2019 20:10
Having trouble finding some of the carb parts. I have the pilot jets (17.5). For the mains jets; I have 113 can't find 112.5. Jet needles, I have 5cn7 can't find 5J9's . See mostly kits on line that don't list numbers ( that's how I ended up with parts that are close, but no cigar). Been to Jetsrus but didn't see mains and on the needles, they have 5J9 listed but not sure what the numbers that follow after mean and don't want to pay $15-16 bucks a piece for the wrong ones. Advice is greatly appreciated.
Please Log in or Create an account to join the conversation.
- hardrockminer
-
- Offline
- Sustaining Member
-
Registered
- Posts: 3108
- Thanks: 1214
Re: Carburetor problem
01 Aug 2019 05:19
A "Y45" is the same as a 5J9. That's what Keyster uses.
I have several restored bikes along with a 2006 Goldwing with a sidecar.
The following user(s) said Thank You: Danny Millhorn
Please Log in or Create an account to join the conversation.
- Danny Millhorn
-
Topic Author
- Offline
- Sustaining Member
-
Registered
- Posts: 10
- Thanks: 0
Re: Carburetor problem
28 Aug 2019 16:31
Well, the saga continues. While my 900 is a 1975, the carbs are not stock. Not VM28ss like I thought they were. I've owned the bike since the early '80,s and my brother owned it before that so thought they were stock. Bringing this bike back to life after a 30 year snooze has been a little frustrating , but thanks to this forum I've learned a lot and I sure apperciate it. They're not 2 bolt tops. They have 3 bolt tops and look like 1976 carbs so went through them with kits for that year - also new plugs and points. It started right up with a little choke, but does not run right. Getting good spark to all four, but ran like it was hitting on two. Number two and four exhaust pipes were hot, number one and three just warm. Adjusted the needles and it reversed. Hooked up a sync tool and got it close before number four sucked most of the fluid out of gage #4 on the tool (suppose to be safe up to 3000rpm... sucked most of the fluid out of gage #4 at less than 2000 rpm before I could stop it). Mabe it's a vacuum leak, but I don't know. It teases like the strong running engine it was back in the day but not there yet. Any suggestions?
Please Log in or Create an account to join the conversation.
- hardrockminer
-
- Offline
- Sustaining Member
-
Registered
- Posts: 3108
- Thanks: 1214
Re: Carburetor problem
28 Aug 2019 17:23 - 28 Aug 2019 17:27
Interesting combination...many people, including me think the '76 VM26SS carbs are better than Z1 carbs. They are much easier to tune for one thing. They maybe give up a tad on top end speed but they are every bit as good otherwise.
I had a set on a Z1 that I restored but I didn't put the carbs back on because they weren't correct for the bike. Instead I bought a set of '75 carbs and rebuilt them.
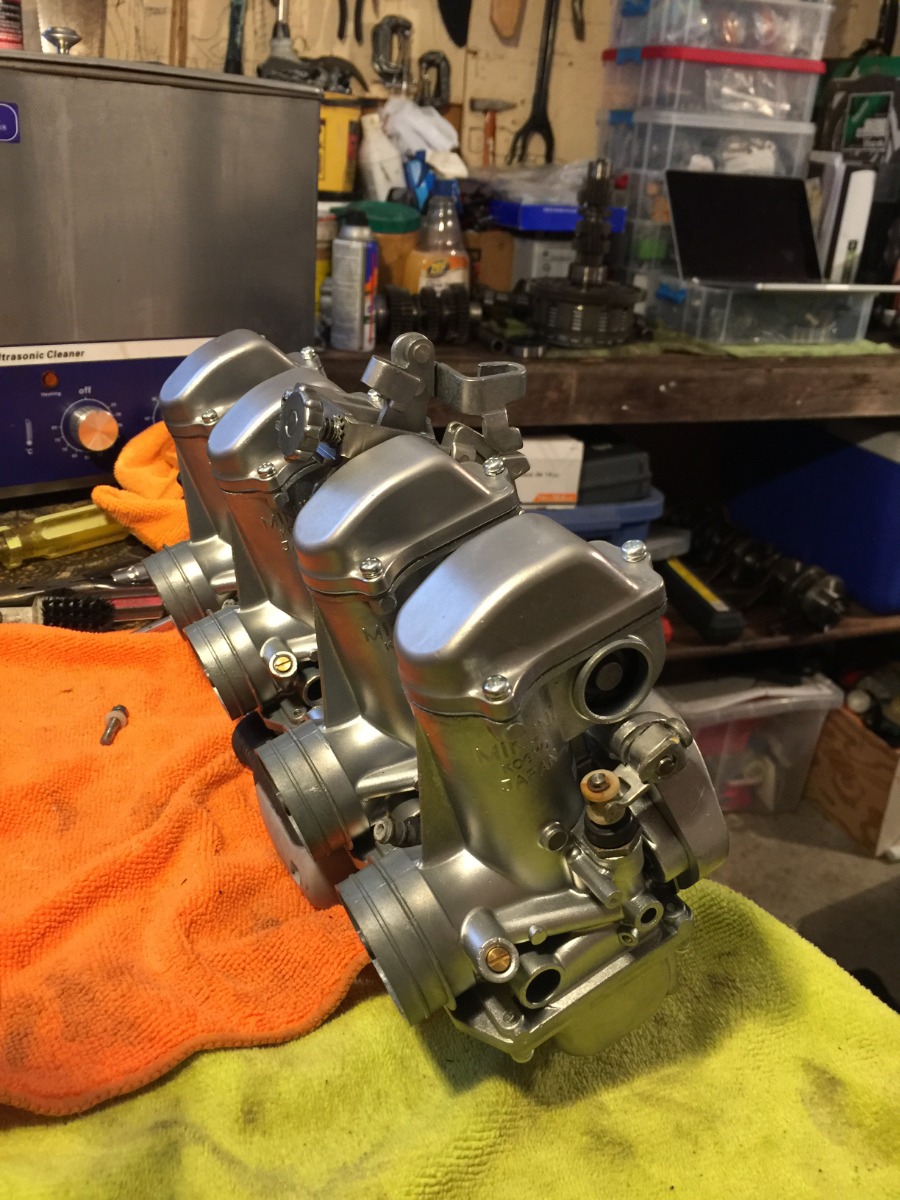
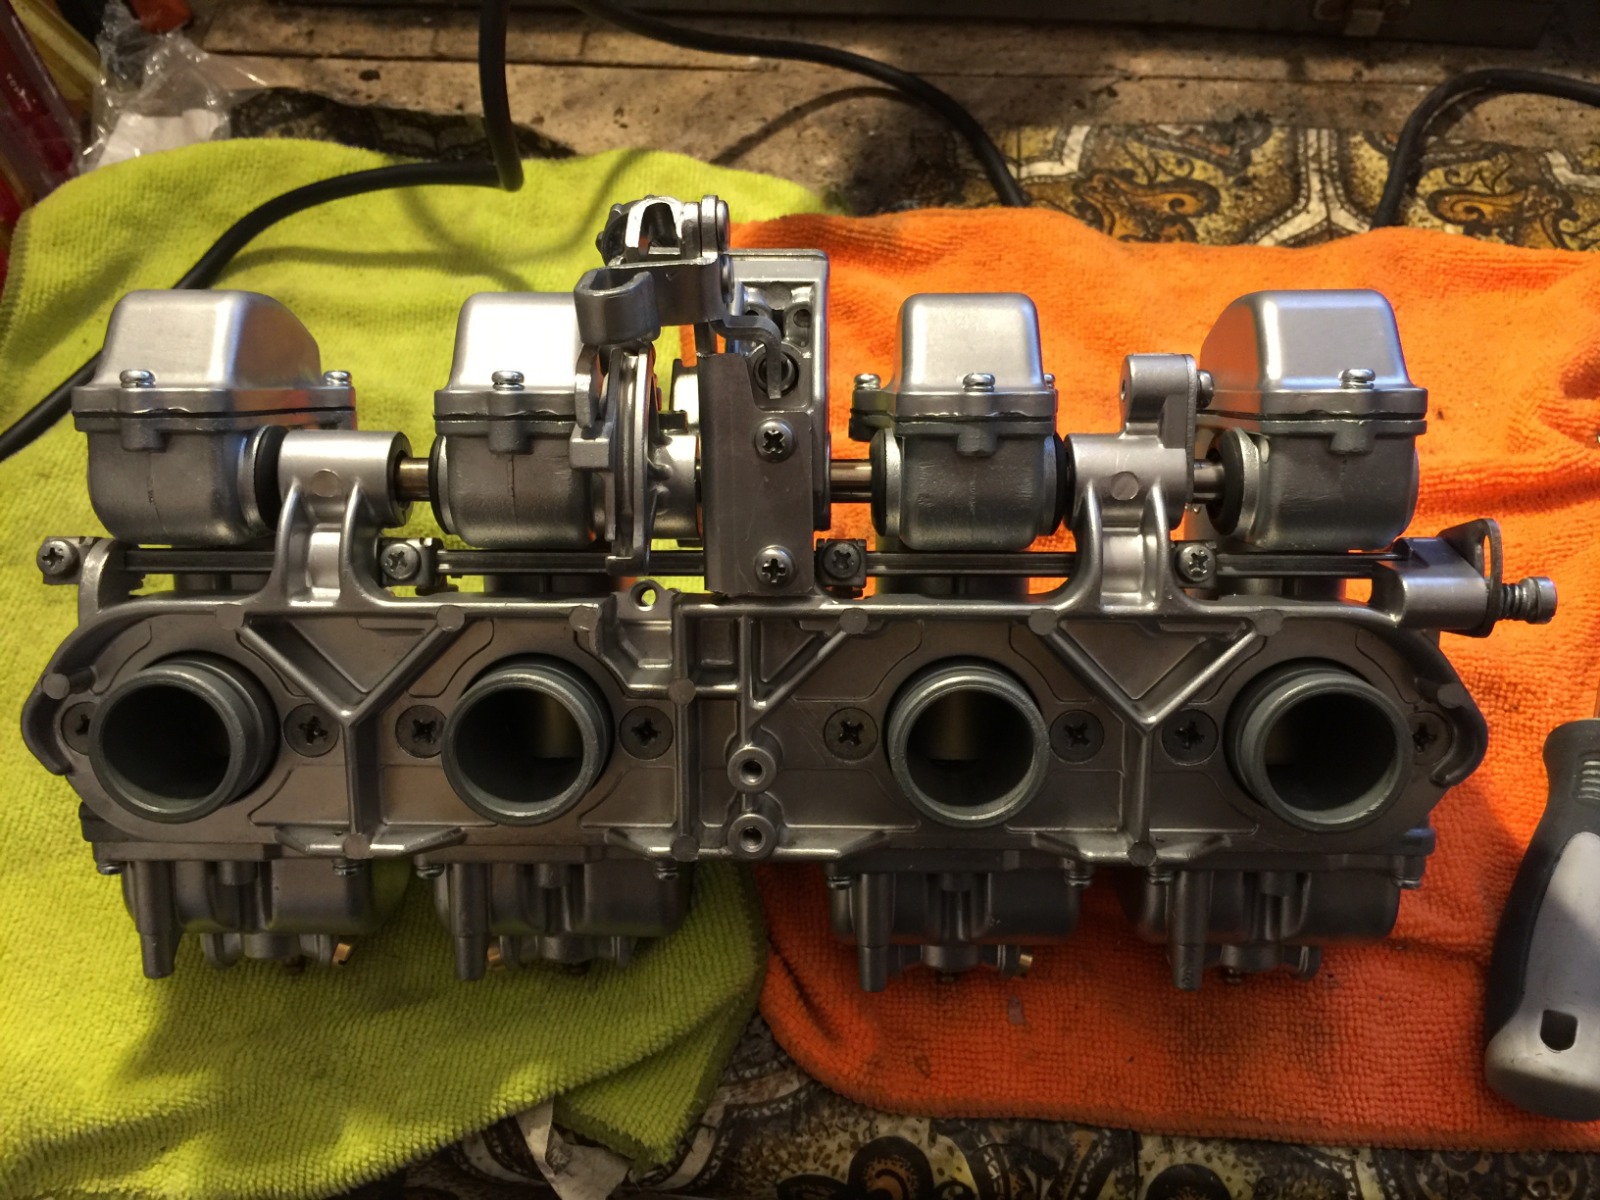
Stock VM26 SS carbs have different internals. The main jet is a 115 (larger than a Z1B) and the pilots are 17.5...the same as a Z1B. The needle jets are smaller...O6. The needles are a double taper 5DL31, set in position 3. Cutaway is the same at 1.5 mm. Air screw is normally set at about 1 3/8 turns out from lightly bottomed. The bowl fuel level is a bit tighter at 3 mm vs 3.5 mm for the Z1's.
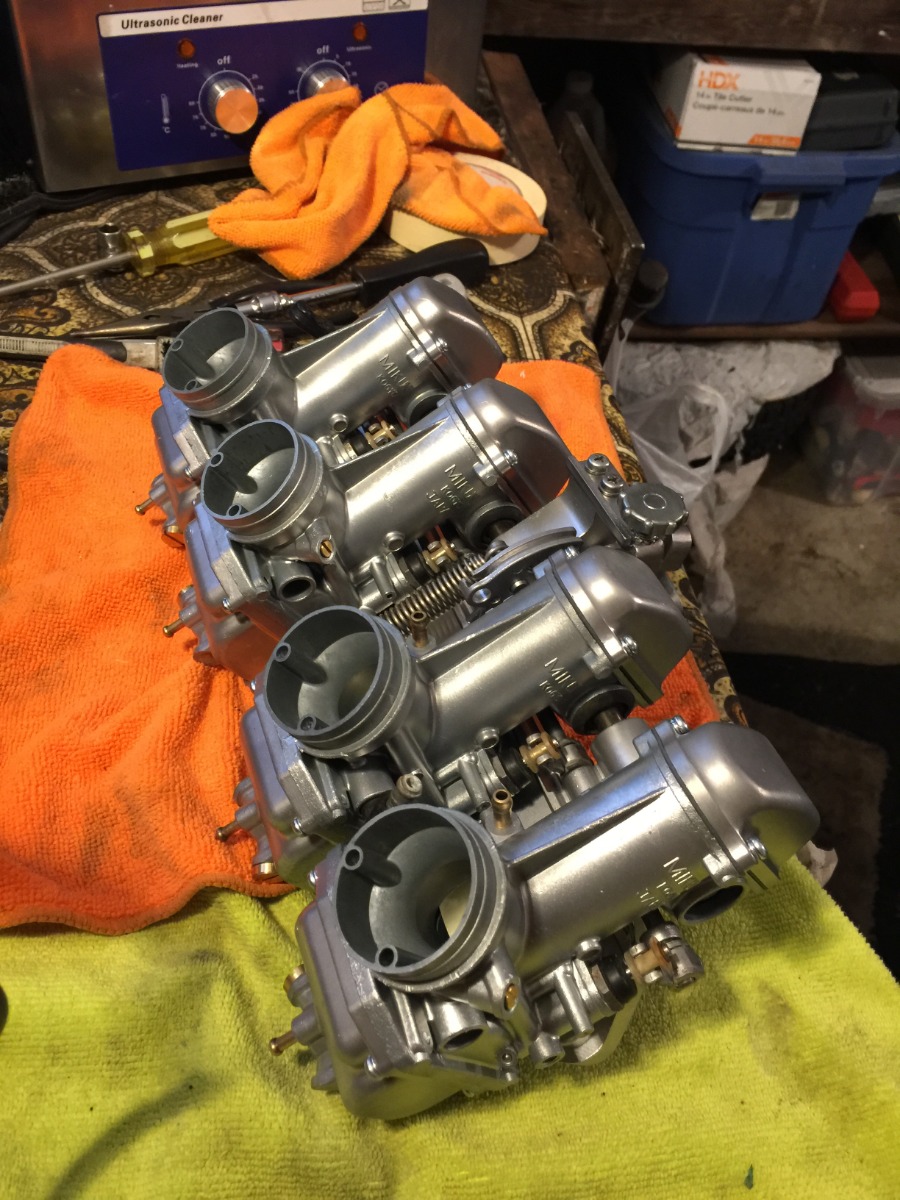
I've added some photos of my VM26SS carbs for you to check to see if they are the same as yours. If you look at them closely you will see that #2 and #3 are reversed....a silly mistake that I have made several times.
I would recommend that you rebuild them to stock internals, mechanically synch them and then give them a try. Check and double check the intake manifold boots for any air leaks. I use a bit of carb cleaner and listen for engine revs to change.
I had a set on a Z1 that I restored but I didn't put the carbs back on because they weren't correct for the bike. Instead I bought a set of '75 carbs and rebuilt them.
Stock VM26 SS carbs have different internals. The main jet is a 115 (larger than a Z1B) and the pilots are 17.5...the same as a Z1B. The needle jets are smaller...O6. The needles are a double taper 5DL31, set in position 3. Cutaway is the same at 1.5 mm. Air screw is normally set at about 1 3/8 turns out from lightly bottomed. The bowl fuel level is a bit tighter at 3 mm vs 3.5 mm for the Z1's.
I've added some photos of my VM26SS carbs for you to check to see if they are the same as yours. If you look at them closely you will see that #2 and #3 are reversed....a silly mistake that I have made several times.
I would recommend that you rebuild them to stock internals, mechanically synch them and then give them a try. Check and double check the intake manifold boots for any air leaks. I use a bit of carb cleaner and listen for engine revs to change.
I have several restored bikes along with a 2006 Goldwing with a sidecar.
Attachments:
Last edit: 28 Aug 2019 17:27 by hardrockminer.
Please Log in or Create an account to join the conversation.
- Danny Millhorn
-
Topic Author
- Offline
- Sustaining Member
-
Registered
- Posts: 10
- Thanks: 0
Re: Carburetor problem
28 Aug 2019 22:09
Thanks for the really great pixs. They're extremely helpful and my carbs are nearly identical to yours except yours are a couple of shades cleaner (that Ultrasonic bath is B.A.) and the idle adjust screw knob is slightly different. Plus my choke lever doesn't have a plastic handle. Mine is just metal with choke stamped on it (the plastic might have of come off somewhere along the way). Also mine do not have those brass screws at the base of the carb intake. Mine are sealed with no screws. And an observation; with 2 & 3 in the correct position, yours are paired with the screws two to the left and two to the right. Where the screws would be on mine are on the left side of the carb on all four. Finally on yours, with 2 & 3 reversed as they are wouldn't the fuel inlet port be on the sealed side or are these carbs interchangeable?
Please Log in or Create an account to join the conversation.
- hardrockminer
-
- Offline
- Sustaining Member
-
Registered
- Posts: 3108
- Thanks: 1214
Re: Carburetor problem
29 Aug 2019 05:20
These carbs were ultrasonic cleaned and then vapour blasted to give them that clean look.
Your carbs might be '77. If memory serves, the '77 version didn't have the air screw and they didn't have the plastic on the choke handle. I think the had a pilot screw on the front bottom of the carb to adjust low rpm fuel delivery.
There are fuel inlets on both sides of each carb, but one side is blocked. When installing them in their correct position the air screw is an indicator, along with the correct inlet for fuel.
Can you post photos of your carbs?
I have several restored bikes along with a 2006 Goldwing with a sidecar.
Please Log in or Create an account to join the conversation.
- asphalt900
-
- Offline
- User
-

Registered
- Posts: 1417
- Thanks: 910
Re: Carburetor problem
29 Aug 2019 05:22
Photos would Help. Sounds like Late 77 KZ1000 Carbs. Late 77 didn't use the connector plate from the KZ900 so the idle adjust was in a different position. Does it have air AND fuel adjust brass slotted screws? If that's the case then they would be Suzuki GS 1978. Last of the Choke Lever on carb, then they positioned choke thru triple tree.
The following user(s) said Thank You: Danny Millhorn
Please Log in or Create an account to join the conversation.
- gd4now
-
- Offline
- User
-
Registered
- Denco where did you go?
- Posts: 1595
- Thanks: 619
Re: Carburetor problem
29 Aug 2019 08:13
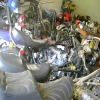
There should be an ID stamped on the flange just below the choke lever. If you post it we maybe will be able to help you ID them. Keep mind the attached is a set of vm24 carbs, but the ID should be stamped in the same location.
1977 KZ650 B1
Pods and Denco header
OLD KAW OWNERS SMILE ALOT
Pods and Denco header
OLD KAW OWNERS SMILE ALOT
Attachments:
The following user(s) said Thank You: Danny Millhorn
Please Log in or Create an account to join the conversation.
- kevski
-
- Offline
- User
-
Registered
- Posts: 438
- Thanks: 166
Re: Carburetor problem
29 Aug 2019 09:01 - 29 Aug 2019 09:03
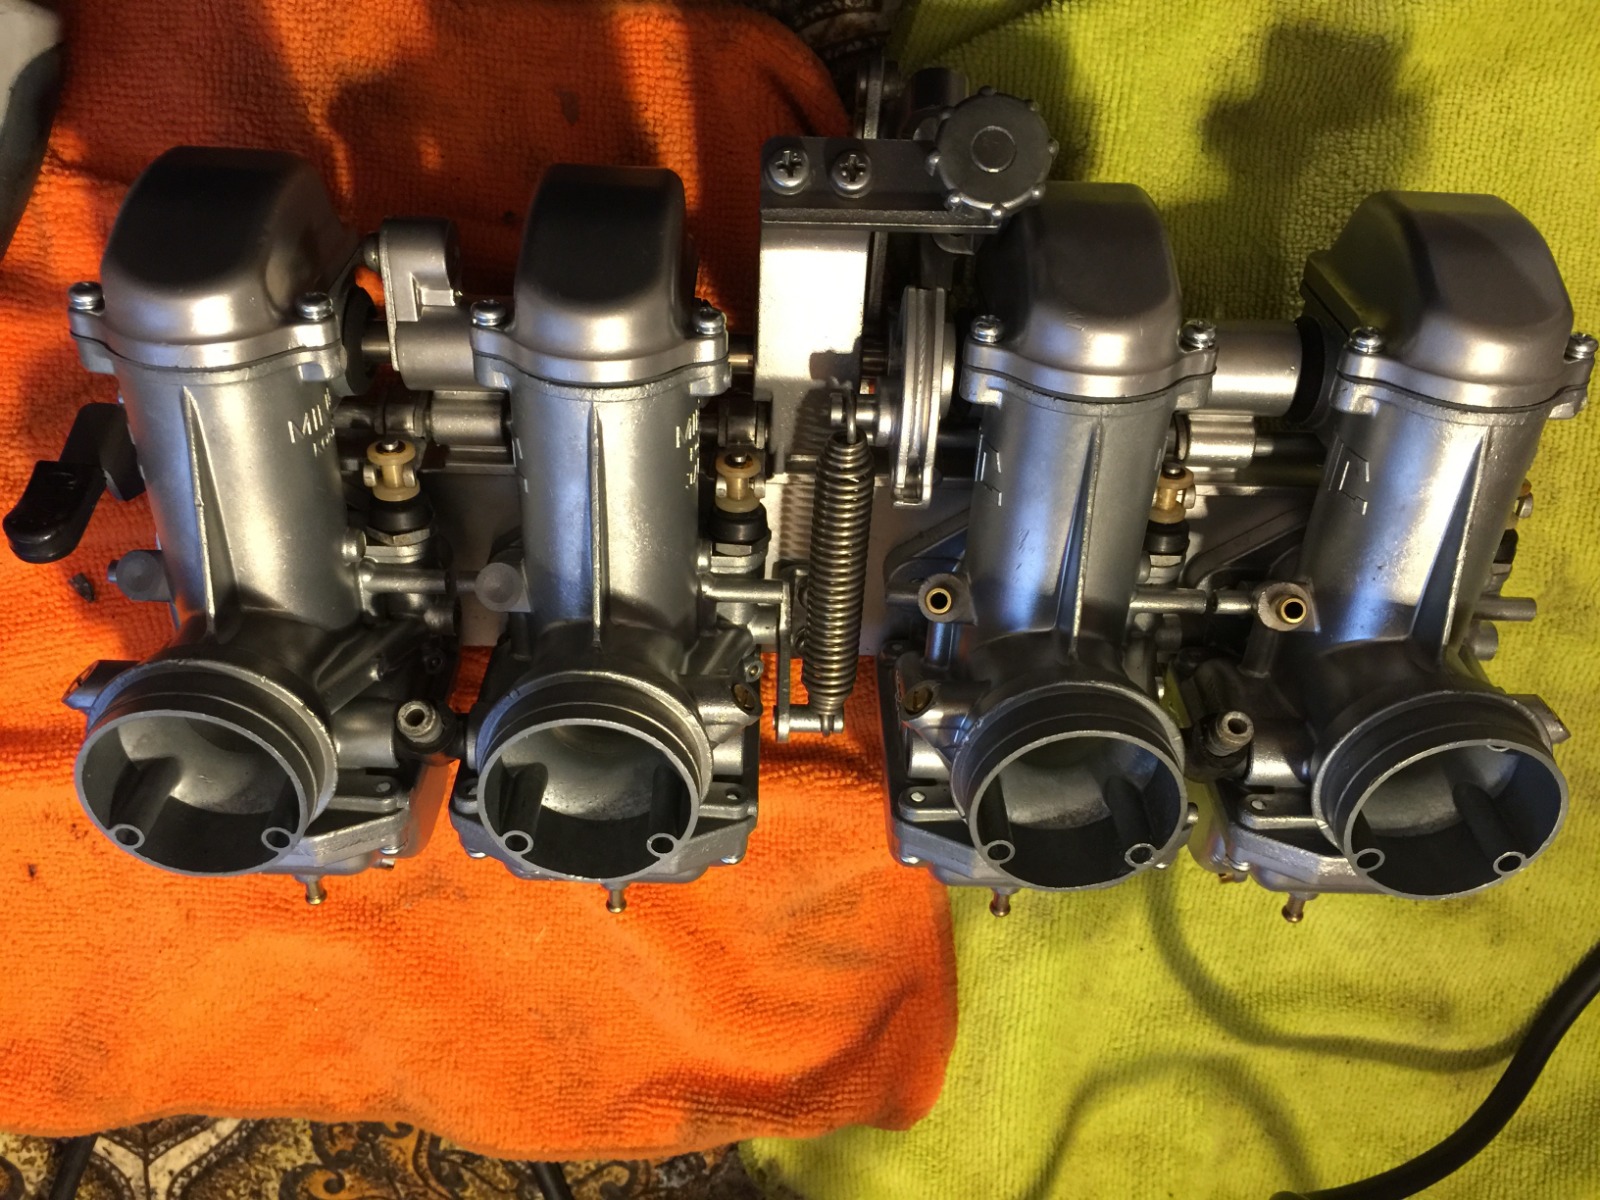
Hardrock miner, your carbs are not assembled correctly, in your third picture the two middle carbs are in the wrong place so now your left two are not vented, this also means the two pairs of carbs are not linked with the bridging hose for the vents.

Attachments:
Last edit: 29 Aug 2019 09:03 by kevski.
Please Log in or Create an account to join the conversation.
- SWest
-

- Offline
- Sustaining Member
-
Registered
- 10 22 2014
- Posts: 23576
- Thanks: 2955
Re: Carburetor problem
29 Aug 2019 09:04
He said that
Z1b1000 1975 Z1b
kzrider.com/forum/11-projects/598262-kz-...-will-it-live#672882
kzrider.com/forum/2-engine/597654-poser?start=240#704229
kzrider.com/forum/11-projects/598262-kz-...-will-it-live#672882
kzrider.com/forum/2-engine/597654-poser?start=240#704229
Please Log in or Create an account to join the conversation.
Moderators: Street Fighter LTD