
Z250 Single
- sham
-
 Topic Author
- Offline
- User
-

Registered
- Posts: 129
- Thanks: 1
Z250 Single
30 Jul 2011 11:31
Hey guys, first time I'm here, and first post - from Sydney, Australia. I actually just started a build thread over at DTT, so apologies for reposting, but I'd love the input of kawa riders. As I say in the rest of the post, I really don't know what I'm doing, but it's been fun so far.
Intro:
So, after having posted in various sections, inevitably asking for help of sorts, I thought I would start a build thread, seeing as this has been the first day I've attempted to see what's happening with this bike. I'm not sure where this will go, to be honest I have 0 experience in any of this and have 0 skills which could be of much use as of yet, but I'm hoping to at least get this bike running again and from there, I'd love to make it as cafe as possible.
I'm hoping to use this as a log from a complete noob point of view, so that if there is anyone else out there who decides to buy a non running bike and then have no idea what to do with it, hopefully this can be a point of reference - for better or worse though I'm not sure.
Bike background:
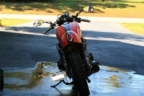
Got this bike from Scott's Motorcycles in Sydney for $750. I sent them an email asking if they had any project bikes lying around and this one one of them. It had been sitting in the garage for 2 years, having run well before that before succumbing to a CDI issue. From my point of view, it looked like it was in a pretty good condition compared to the other bikes I was looking at in that price range, so I got it.
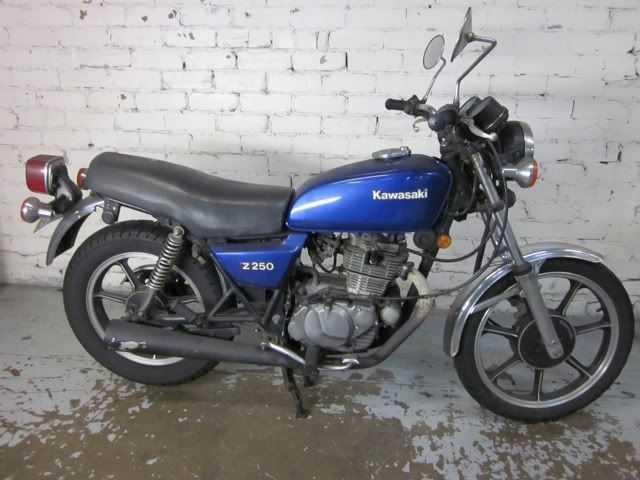
Photo of the bike as taken by the shop. I did see it in person, but honestly, it made no difference.
So once it was delivered, I had no idea where to start. The helpful people on the Australian DDT section definitely helped point me in the right direction. I was told to do the following:
Check if the motor turns - did this by seeing if I could roll the bike (slightly) while shifting through the gears. If the bike seized up, then the motor was no good.
This was fine, but I had a slight complication with the bike not going into first, but that was fixed by rolling it around more.
See if I had a spark - take the spark plug out, put it back on the lead, ground it against the engine and hit the starter.
No spark. I wasn't expecting this to work seeing as I'd been warned about the CDI, but I looked around anyways and found what I believe is the culprit...
I had no idea what this was, so I DDT'd it. Hillsy came up with a great diagram which showed it was most probably the CDI. Great. I knew I had a CDI problem, didn't expect not to have one...
If all that went well, put some fresh petrol in it and start it up.
Well, I haven't got up to this yet.
Progress so far
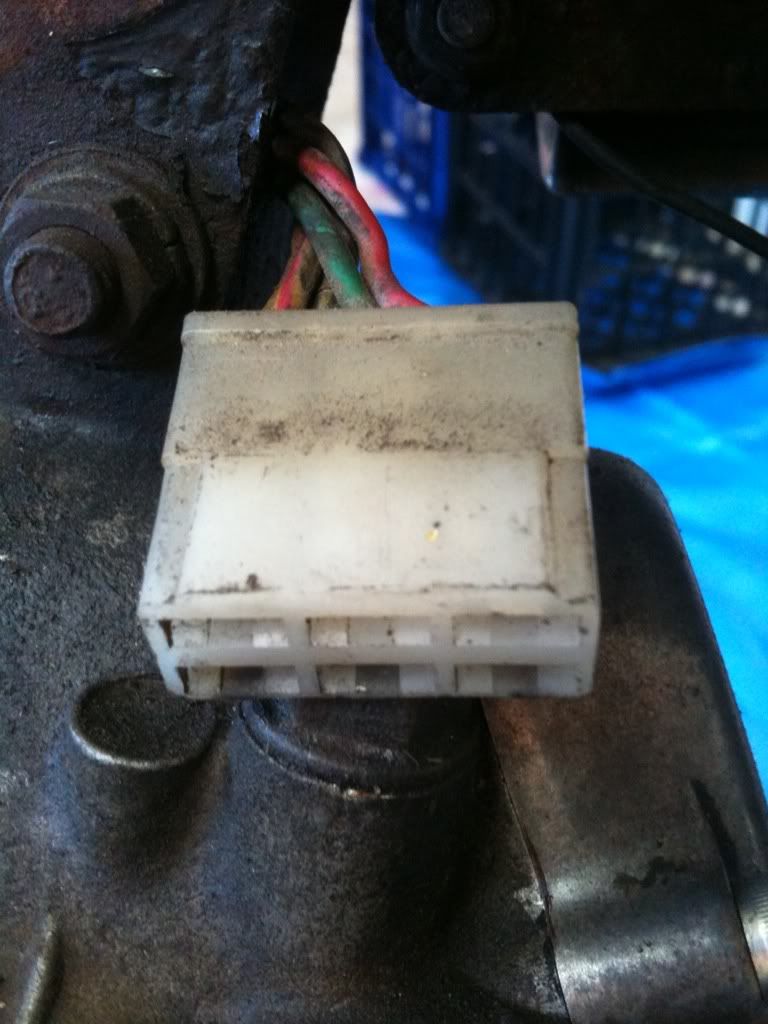
So as I was saying, today was the first day of the build. I had a friend over who helped me roll the bike into my house, which was super helpful. So first on the list - see if it was really the CDI, so I went and stripped the bike.
How she now stands...
So, turned out it was the CDI. After stripping off the seat and those side panel things (no idea what they're called), I found the regulator, which was what other people thought it might have been, so damn...I was going to pay the 456 euros for a new one, and seeing as there didn't seem to be any after market ones for my bike at a decent price, I thought I'd try Jaycar...they had a CDI kit online for 98 bucks, which I thought was a bargin if that's how much I was expected to pay for a second hand one which looked rather mangled. So off to the shops it was, for that and some brake cleaner. Again, this was from advice from the Australian DDT, and would be used to clean up carb.
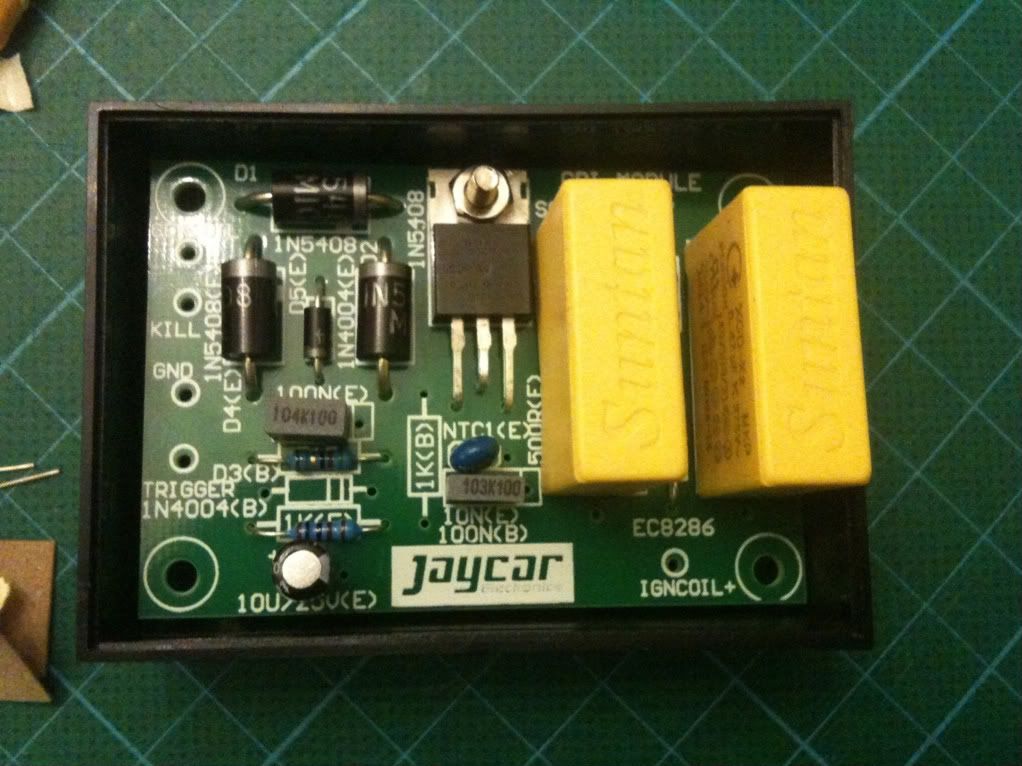
First up Jaycar. This is what a kit CDI looks like
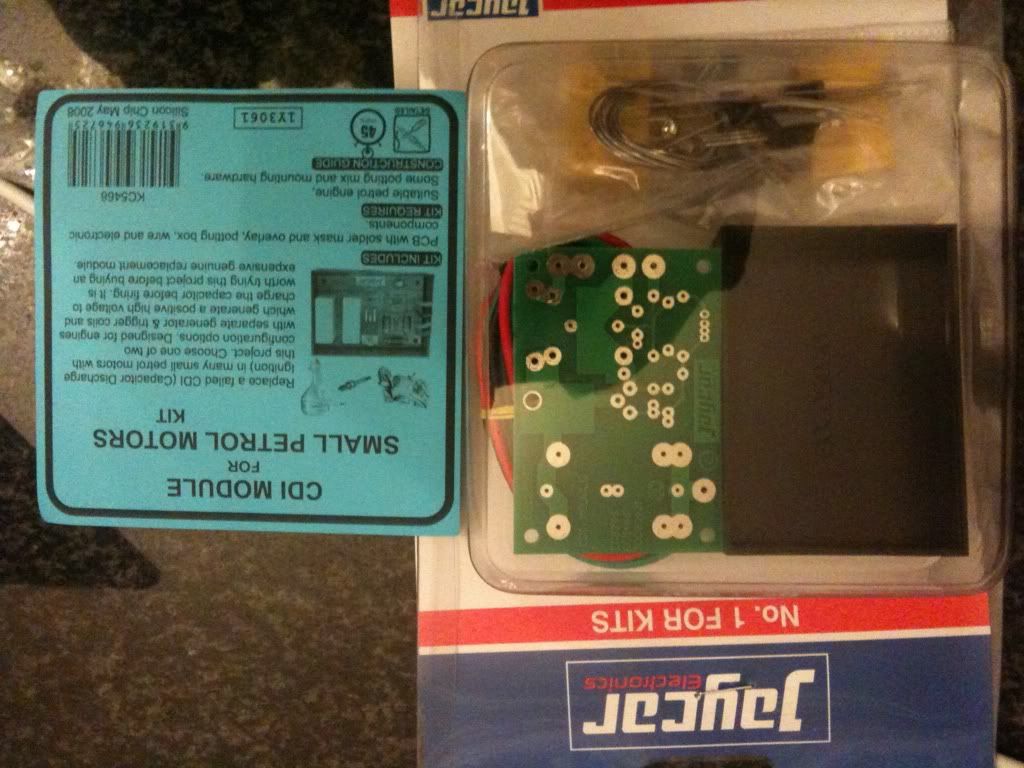
Looked simple enough if it had decent instructions (read lego instructions, or IKEA instructions, or anything which is step by step)...too bad the instructions came from some article on CDI's. It would be helpful to people who actually know anything about electronics - I believe someone did warn me last night. But here, I've put up the link for anyone interested, or is looking into making their own www.siliconchip.com.au/cms/A_110499/article.html
And seeing as it only turned out to be 20 bucks, I thought whatever, I'll give it a shot. Its a cheap stab in the dark. So I got that and a solder and I'm looking to try to put it together this weekend. I'm hoping my uncle can help me out, he's an engineer or sorts so I imagine he'd have more of a clue than me.
Up next was SuperCheapAuto, where I got some WD40 and brake cleaner.
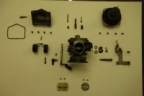
So, at this point, I have to say it again - if anyone has a pdf copy or a print copy of the 1980 - 1983 Kawasaki Z250 Single Manual Service Manual, please let me know and, if its a printed copy, I will be more than happy to pay for it. I went about trying to dismantle the carb following the Z250 Twins manual (which I do have and if anyone needs I can send them the link) but realized pretty quickly that things were slightly different. So I improvised and here are the results.
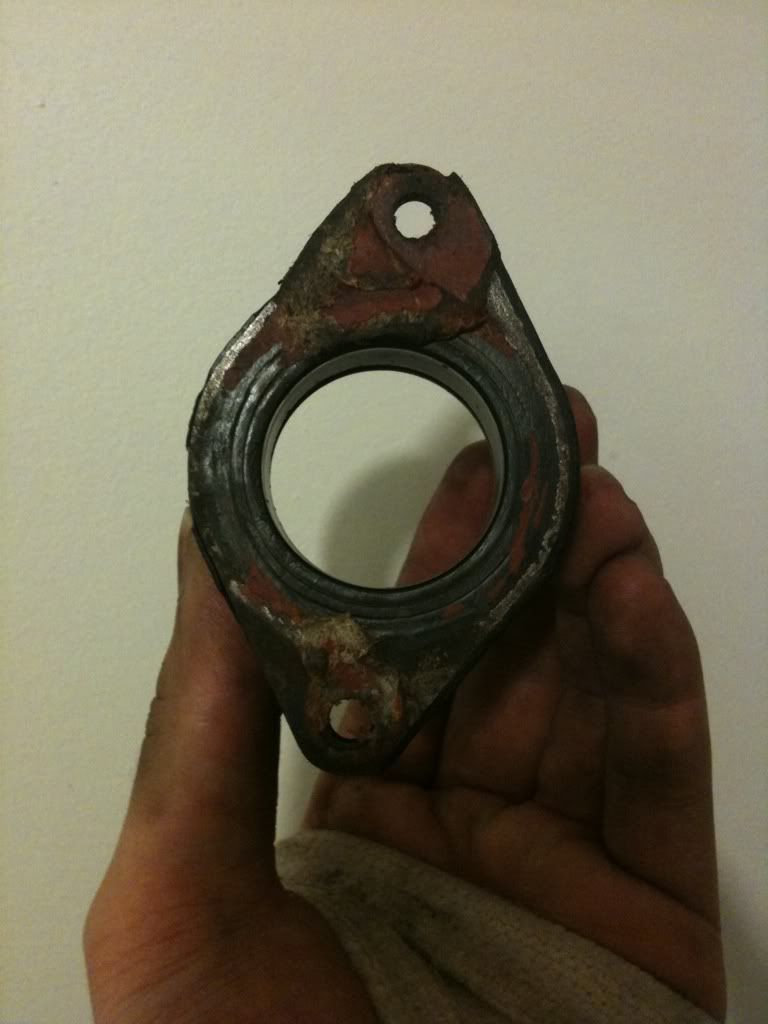
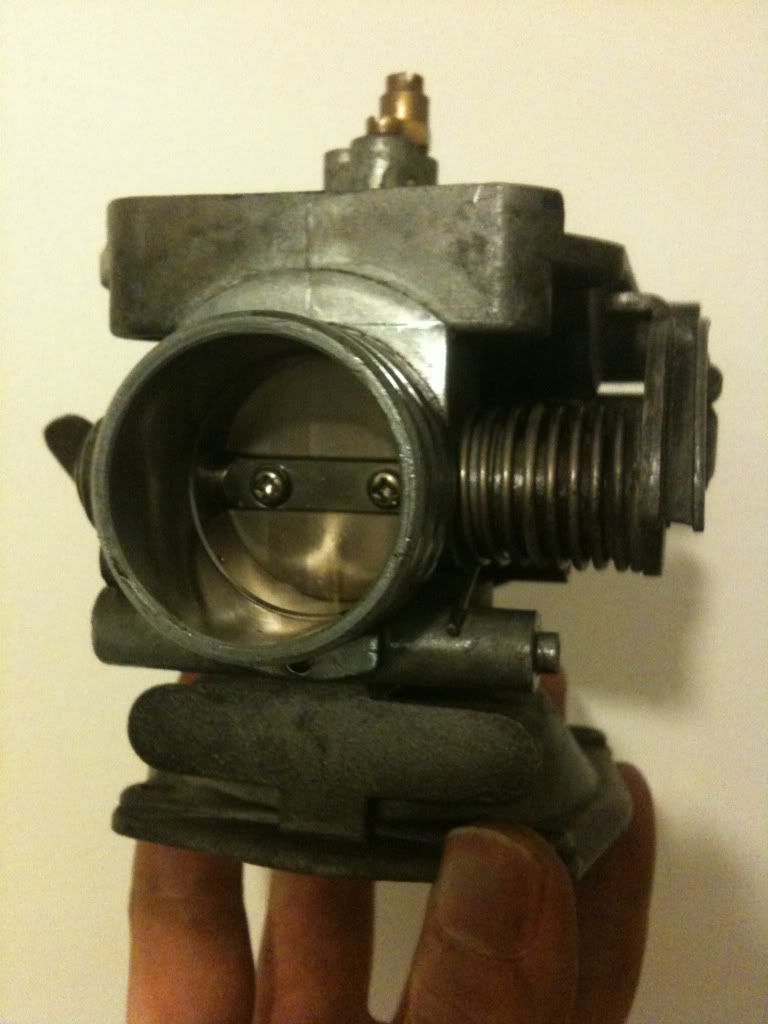
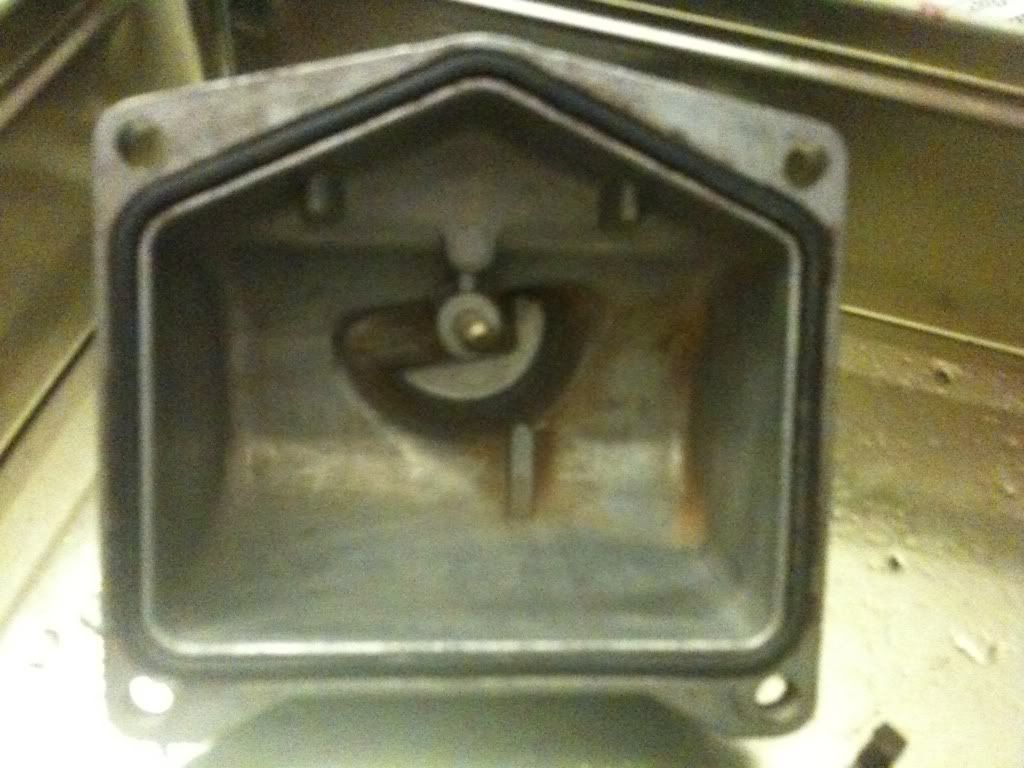
Now I was too scared to dismantle this bit - the manual said I needed to use special tools, but people on this site do talk about cleaning the jets and needles and all that, so if anyone could tell me how to dismantle it, if it needs to be dismantled and cleaned, that would be great.
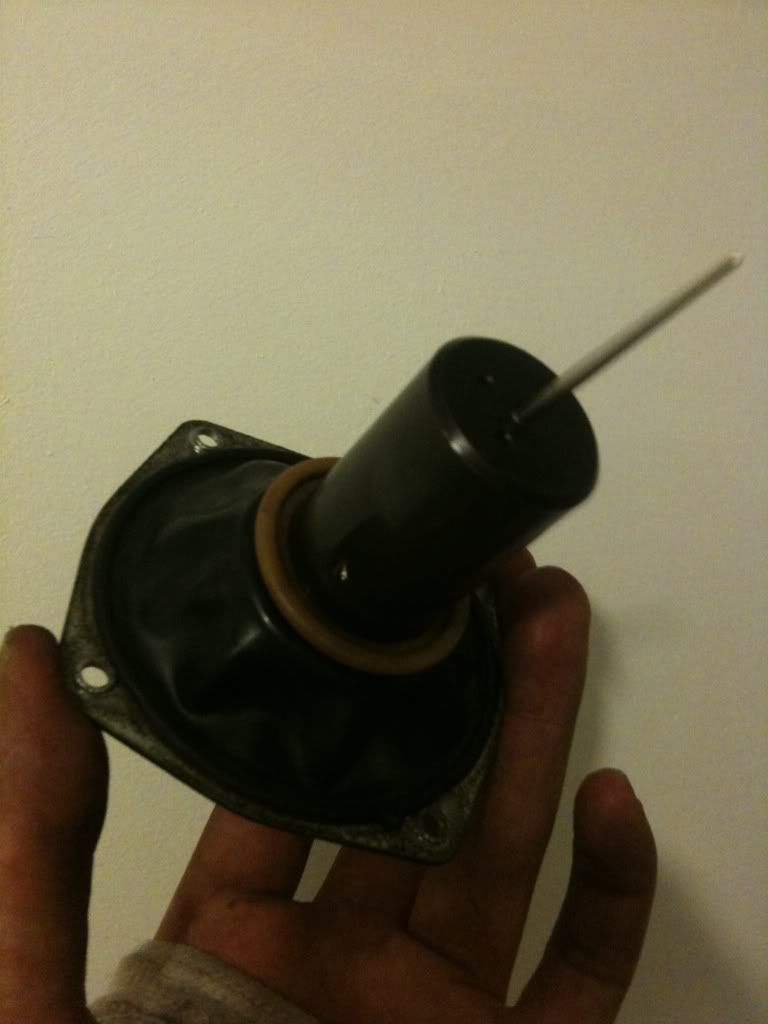
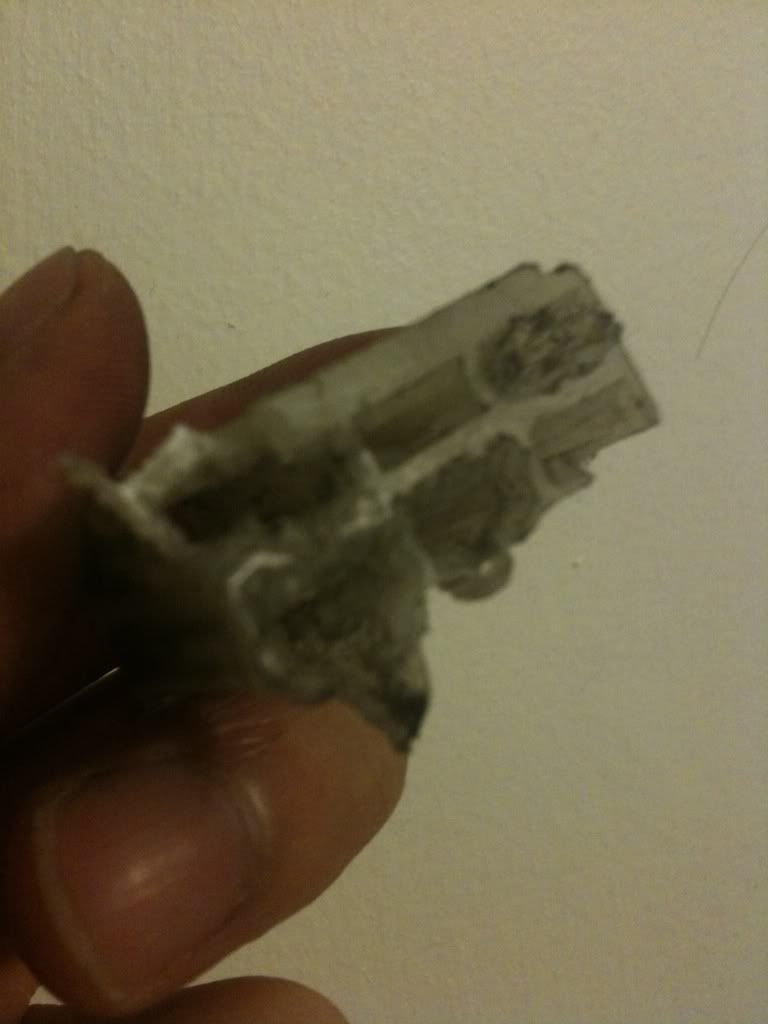
This seal thing caused me a lot of trouble - it attaches the 'butterfly valves' to the engine, but just wouldn't come off. You can also see the rubber has deteriorated pretty bad. Does anyone knows what this is called, and if I need to get a new one?
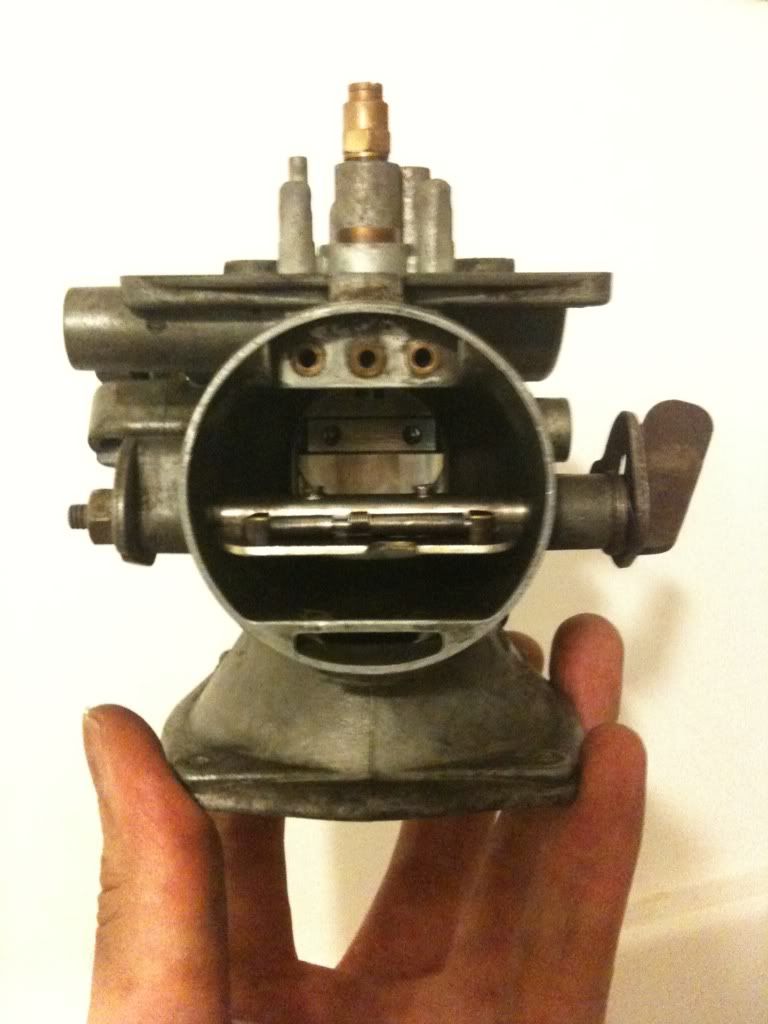
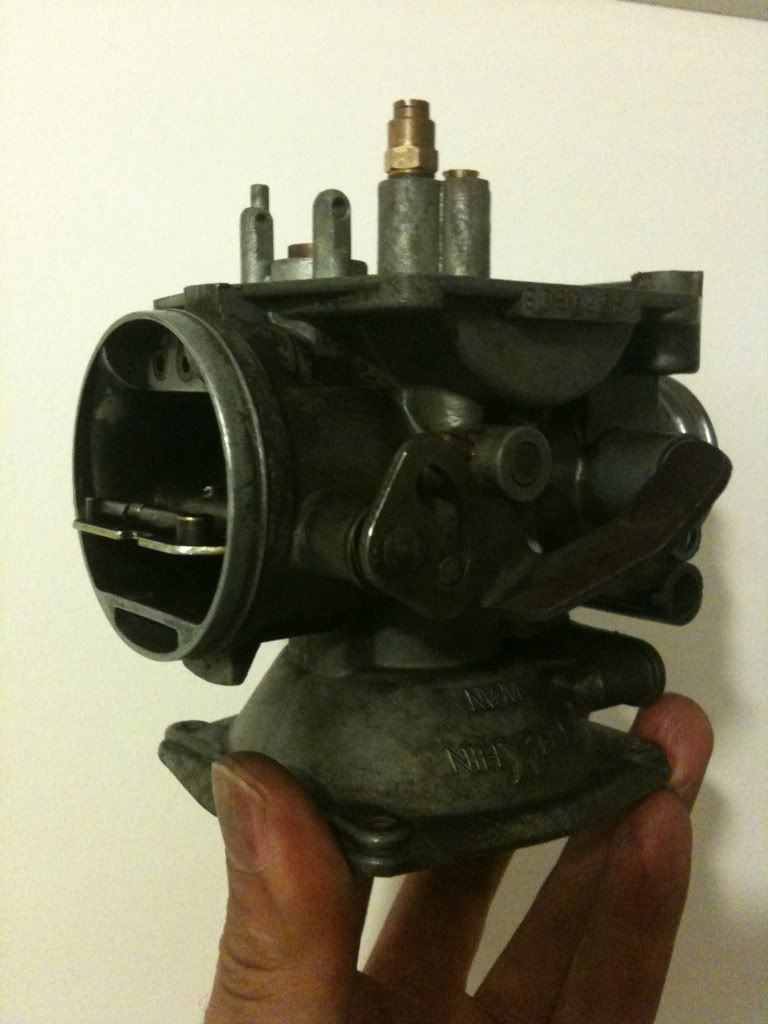

This is what I got it down to. I sprayed the other bits and pieces that were attached to it with brake cleaner, but I was wondering if this piece still needs to be dismantled further to be properly cleaned? It already looks pretty clean to me, but I do want to do a good job while I'm here. Another thing is that I'm not getting a very polished look other people are getting, just all the gunk is falling off it - is this what I can expect from brake cleaner? I saw another build where someone just soaked it in coke - is this a decent option? They're turned out pretty well, though I don't remember who it was, sorry.
I'm stuck on how to remove this tacho cable atm...according to the z250 twins manual, there should be a bolt and tacho pinion holder stop? I can't find it, but the cable definitely doesn't want to come out.

So that's pretty much where I'm at right now.
Really excited about all this. I realize its a bit of a ramble and there's a lot of unnecessary photos, but yeh.
A quick thanks to everyone who has already given me pointers and told me what to do, as by now you've probably realized I really don't know what I'm doing. My friend tried talking me out of it when he was over today, but just taking that carb apart got me excited. Ha.
Cheers,
Sham
Intro:
So, after having posted in various sections, inevitably asking for help of sorts, I thought I would start a build thread, seeing as this has been the first day I've attempted to see what's happening with this bike. I'm not sure where this will go, to be honest I have 0 experience in any of this and have 0 skills which could be of much use as of yet, but I'm hoping to at least get this bike running again and from there, I'd love to make it as cafe as possible.
I'm hoping to use this as a log from a complete noob point of view, so that if there is anyone else out there who decides to buy a non running bike and then have no idea what to do with it, hopefully this can be a point of reference - for better or worse though I'm not sure.
Bike background:
Got this bike from Scott's Motorcycles in Sydney for $750. I sent them an email asking if they had any project bikes lying around and this one one of them. It had been sitting in the garage for 2 years, having run well before that before succumbing to a CDI issue. From my point of view, it looked like it was in a pretty good condition compared to the other bikes I was looking at in that price range, so I got it.
Photo of the bike as taken by the shop. I did see it in person, but honestly, it made no difference.
So once it was delivered, I had no idea where to start. The helpful people on the Australian DDT section definitely helped point me in the right direction. I was told to do the following:
Check if the motor turns - did this by seeing if I could roll the bike (slightly) while shifting through the gears. If the bike seized up, then the motor was no good.
This was fine, but I had a slight complication with the bike not going into first, but that was fixed by rolling it around more.
See if I had a spark - take the spark plug out, put it back on the lead, ground it against the engine and hit the starter.
No spark. I wasn't expecting this to work seeing as I'd been warned about the CDI, but I looked around anyways and found what I believe is the culprit...
I had no idea what this was, so I DDT'd it. Hillsy came up with a great diagram which showed it was most probably the CDI. Great. I knew I had a CDI problem, didn't expect not to have one...
If all that went well, put some fresh petrol in it and start it up.
Well, I haven't got up to this yet.
Progress so far
So as I was saying, today was the first day of the build. I had a friend over who helped me roll the bike into my house, which was super helpful. So first on the list - see if it was really the CDI, so I went and stripped the bike.
How she now stands...
So, turned out it was the CDI. After stripping off the seat and those side panel things (no idea what they're called), I found the regulator, which was what other people thought it might have been, so damn...I was going to pay the 456 euros for a new one, and seeing as there didn't seem to be any after market ones for my bike at a decent price, I thought I'd try Jaycar...they had a CDI kit online for 98 bucks, which I thought was a bargin if that's how much I was expected to pay for a second hand one which looked rather mangled. So off to the shops it was, for that and some brake cleaner. Again, this was from advice from the Australian DDT, and would be used to clean up carb.
First up Jaycar. This is what a kit CDI looks like
Looked simple enough if it had decent instructions (read lego instructions, or IKEA instructions, or anything which is step by step)...too bad the instructions came from some article on CDI's. It would be helpful to people who actually know anything about electronics - I believe someone did warn me last night. But here, I've put up the link for anyone interested, or is looking into making their own www.siliconchip.com.au/cms/A_110499/article.html
And seeing as it only turned out to be 20 bucks, I thought whatever, I'll give it a shot. Its a cheap stab in the dark. So I got that and a solder and I'm looking to try to put it together this weekend. I'm hoping my uncle can help me out, he's an engineer or sorts so I imagine he'd have more of a clue than me.
Up next was SuperCheapAuto, where I got some WD40 and brake cleaner.
So, at this point, I have to say it again - if anyone has a pdf copy or a print copy of the 1980 - 1983 Kawasaki Z250 Single Manual Service Manual, please let me know and, if its a printed copy, I will be more than happy to pay for it. I went about trying to dismantle the carb following the Z250 Twins manual (which I do have and if anyone needs I can send them the link) but realized pretty quickly that things were slightly different. So I improvised and here are the results.
Now I was too scared to dismantle this bit - the manual said I needed to use special tools, but people on this site do talk about cleaning the jets and needles and all that, so if anyone could tell me how to dismantle it, if it needs to be dismantled and cleaned, that would be great.
This seal thing caused me a lot of trouble - it attaches the 'butterfly valves' to the engine, but just wouldn't come off. You can also see the rubber has deteriorated pretty bad. Does anyone knows what this is called, and if I need to get a new one?
This is what I got it down to. I sprayed the other bits and pieces that were attached to it with brake cleaner, but I was wondering if this piece still needs to be dismantled further to be properly cleaned? It already looks pretty clean to me, but I do want to do a good job while I'm here. Another thing is that I'm not getting a very polished look other people are getting, just all the gunk is falling off it - is this what I can expect from brake cleaner? I saw another build where someone just soaked it in coke - is this a decent option? They're turned out pretty well, though I don't remember who it was, sorry.
I'm stuck on how to remove this tacho cable atm...according to the z250 twins manual, there should be a bolt and tacho pinion holder stop? I can't find it, but the cable definitely doesn't want to come out.
So that's pretty much where I'm at right now.
Really excited about all this. I realize its a bit of a ramble and there's a lot of unnecessary photos, but yeh.
A quick thanks to everyone who has already given me pointers and told me what to do, as by now you've probably realized I really don't know what I'm doing. My friend tried talking me out of it when he was over today, but just taking that carb apart got me excited. Ha.
Cheers,
Sham
Please Log in or Create an account to join the conversation.
- 650ed
-
- Offline
- User
-
Registered
- Posts: 15334
- Thanks: 2833
Re: Z250 Single
30 Jul 2011 11:47
Welcome aboard! If you can't find a manual elsewhere there are some on eBay.
motors.shop.ebay.com/i.html?_nkw=kz250+single+manual
motors.shop.ebay.com/i.html?_nkw=kz250+single+manual
1977 KZ650-C1 Original Owner - Stock (with additional invisible FIAMM horn)
Please Log in or Create an account to join the conversation.
- Mcdroid
-

- Away
- User
-
Registered
- Gone Kwackers
- Posts: 6817
- Thanks: 457
Re: Z250 Single
30 Jul 2011 12:08
Welcome to KZR Sham...nice start to your post.
Michael
Victoria, Texas
1982 GPz750
1977 KZ1000A
1978 KZ1000A
1982 GPz1100
1975 Z2A
Victoria, Texas
1982 GPz750
1977 KZ1000A
1978 KZ1000A
1982 GPz1100
1975 Z2A
Please Log in or Create an account to join the conversation.
- Marneman
-

- Offline
- User
-
Registered
- Posts: 280
- Thanks: 5
Re: Z250 Single
30 Jul 2011 13:58
Welcome to the addiction Sham! It's great to see that you're willing to dive in head first. Many of us, including me, started our projects not knowing much about these bikes. I can say that this site has been an invaluable resource to me, and a great learning tool. Many helpful folks with good advice.
I'm sure member MFolks and Patton will be around here with some great generic carb cleaning tutorials. They are great about doing that. Be real careful with that rubber carb diaphram that your holding up in the pic. Real hard (impossible) to replace, and succeptible to damage from carb cleaner. Don't get it anywhere near it.
Good luck with your project, and we will be watching closely.
Regards,
77 KZ1000-A1 "Bushido" Project
82 KZ1000 LTD "Terri Lee"
You know what, I don't have a one to some other number of douche-bag scale. So.. Six!
82 KZ1000 LTD "Terri Lee"
You know what, I don't have a one to some other number of douche-bag scale. So.. Six!
Please Log in or Create an account to join the conversation.
- Marneman
-
- Offline
- User
-
Registered
- Posts: 280
- Thanks: 5
Re: Z250 Single
30 Jul 2011 14:10
One more thing, I would recommend checking/replacing the voltage regulator/rectifier at the same time as your CDI box, as over voltage is a common cause of failure for a CDI.
77 KZ1000-A1 "Bushido" Project
82 KZ1000 LTD "Terri Lee"
You know what, I don't have a one to some other number of douche-bag scale. So.. Six!
82 KZ1000 LTD "Terri Lee"
You know what, I don't have a one to some other number of douche-bag scale. So.. Six!
Please Log in or Create an account to join the conversation.
- TeK9iNe
-
- Offline
- User
-
Registered
- What did you do!?!
- Posts: 2436
- Thanks: 28
Re: Z250 Single
30 Jul 2011 15:31
Dont let carb or brake cleaner touch anything plastic/rubber/etc. Basically if it isnt metal, use only a gentle cleaner.
Agreed, obtain the manual for sure - also, personally I woulnt take anything apart, until it shows signs of failure or poor maintenence. Aside form the usual maintenence items in the manual, get those done and enjoy riding - or you could accidentally break something and be out of a part for many months of non-riding.
Perform the entire maintenence chapter. Check the battery voltage with the bike idling. Revving the bike or not, the voltage should not be lower than 13, and not higher than 15. It should at least reach 14 revving - this way you know the charging system is ok.
Good luck!
")
Agreed, obtain the manual for sure - also, personally I woulnt take anything apart, until it shows signs of failure or poor maintenence. Aside form the usual maintenence items in the manual, get those done and enjoy riding - or you could accidentally break something and be out of a part for many months of non-riding.
Perform the entire maintenence chapter. Check the battery voltage with the bike idling. Revving the bike or not, the voltage should not be lower than 13, and not higher than 15. It should at least reach 14 revving - this way you know the charging system is ok.
Good luck!
Motorcycle Shop Owner/Operator
79 Kawie Z1000 LTD
81 Kawie Z1000 CSR
83 Honda VT750C A
85 Kawie GPZ900 A2
86 Zukie GS1150 EG
93 Yamie XV1100 E
Lucky to have rolled many old bikes through my doors")
79 Kawie Z1000 LTD
81 Kawie Z1000 CSR
83 Honda VT750C A
85 Kawie GPZ900 A2
86 Zukie GS1150 EG
93 Yamie XV1100 E
Lucky to have rolled many old bikes through my doors
Please Log in or Create an account to join the conversation.
- sham
-
Topic Author
- Offline
- User
-
Registered
- Posts: 129
- Thanks: 1
Re: Z250 Single
31 Jul 2011 02:51
Thanks for the welcome guys,
TeK9iNe - I thought I'd take things apart cos the shop wasn't sure of the bike's condition, so I thought it would be good to make sure the engine and and all that are in a decent shape before doing too much and realizing it was all a lost cause. I guess at the moment I'm more focused on learning about the bike and the idea of building it rather than itching to ride, only cos I tore the cartilage in both my wrists and am suppose to not do much for 3 months anyways lol.
I'll definitely try to get the manual.
650ed - Thanks for the link. I'm new to ebay too...I didn't realize I was stuck on the Australian site which didn't show any US stuff. I think I'll have to just pay for it aye. I was hoping to get one for 20, as that's how much they were sold by Australian vendors, but noone seems to have one.
Marneman - I definitely suck with electronics lol. But I see there's more to check...thanks for the heads up.
Please Log in or Create an account to join the conversation.
- clutch
-
- Offline
- User
-
Registered
- I wish I had a tad more patience to do it better!
- Posts: 1051
- Thanks: 12
Re: Z250 Single
31 Jul 2011 03:54
Welcome! And nice find. My first bike was a 1980 kz250 D1 LTD, and it looked a lot like your z250. It was a great little starter bike, and got amazing gas mileage. I wish I still had it, but alas I traded it for my kz750...which is a better bike for the big guy that I am lol ")
Southern Maryland, USA
1980 KZ250 LTD (traded, but still missed)
1982 KZ750 E3 (Cafe Project) (Dyna-S, Dyna Coils, V&H 4-1, K&N Pods, 6 Sigma Jet Kit, Acewell Computer, Woodcraft Clip-ons, Custom Rewire)
1966 A1 Samurai (Restoration Project)
Wish List:
KZ1000 P (For a "touring" bike)
Z1 (need I...
1980 KZ250 LTD (traded, but still missed)
1982 KZ750 E3 (Cafe Project) (Dyna-S, Dyna Coils, V&H 4-1, K&N Pods, 6 Sigma Jet Kit, Acewell Computer, Woodcraft Clip-ons, Custom Rewire)
1966 A1 Samurai (Restoration Project)
Wish List:
KZ1000 P (For a "touring" bike)
Z1 (need I...
Please Log in or Create an account to join the conversation.
- sham
-
Topic Author
- Offline
- User
-
Registered
- Posts: 129
- Thanks: 1
Re: Z250 Single
31 Jul 2011 04:35
Lol, thanks clutch. I had the option of getting a xs500 I think for 800, but it had been sitting outside for 10 years, with exhaust rusted through. I thought I should stick to smaller bikes for now anyways, seeing as I'm still on my Ls.
I think reality's just hit. I had in my mind that I would take the bike apart, 'clean' it and reassemble...but thanks to TeK9iNe's comment on the maintenance chapter, I flipped through my z250 twins manual and wow. Ha, lots of work there aye...lots of measuring and checking, so I see I'm in for a lot more than I envisaged...
But all good, I'm taking the advice of not taking everything apart now and going a bit slow. I was open up to cylinder head when I thought it better to maybe slow down a bit and see what I actually needed to do.
So I'm gonna focus on just cleaning out the carbs and trying to get this CDI going. Hopefully that can be done by next weekend, by then hoping to have a copy of the right service manual, and then I'll take things slow from there.
Ha.
Please Log in or Create an account to join the conversation.
- sham
-
Topic Author
- Offline
- User
-
Registered
- Posts: 129
- Thanks: 1
Re: Z250 Single
31 Jul 2011 05:57 - 31 Jul 2011 05:59
So, the whole don't run before you learn to walk thing, and the 'remove all rubber before you soak your carbs in brake cleaner' thing...
Missed this obvious one.
Do I need to throw it out and order a new 'o' ring? I'm using spray on brake cleaner instead of soaking it in a tub if that makes a difference...
Feeling pretty stupid about this one lol.
Missed this obvious one.
Do I need to throw it out and order a new 'o' ring? I'm using spray on brake cleaner instead of soaking it in a tub if that makes a difference...
Feeling pretty stupid about this one lol.
Last edit: 31 Jul 2011 05:59 by sham.
Please Log in or Create an account to join the conversation.
- sham
-
Topic Author
- Offline
- User
-
Registered
- Posts: 129
- Thanks: 1
Re: Z250 Single
06 Aug 2011 05:01
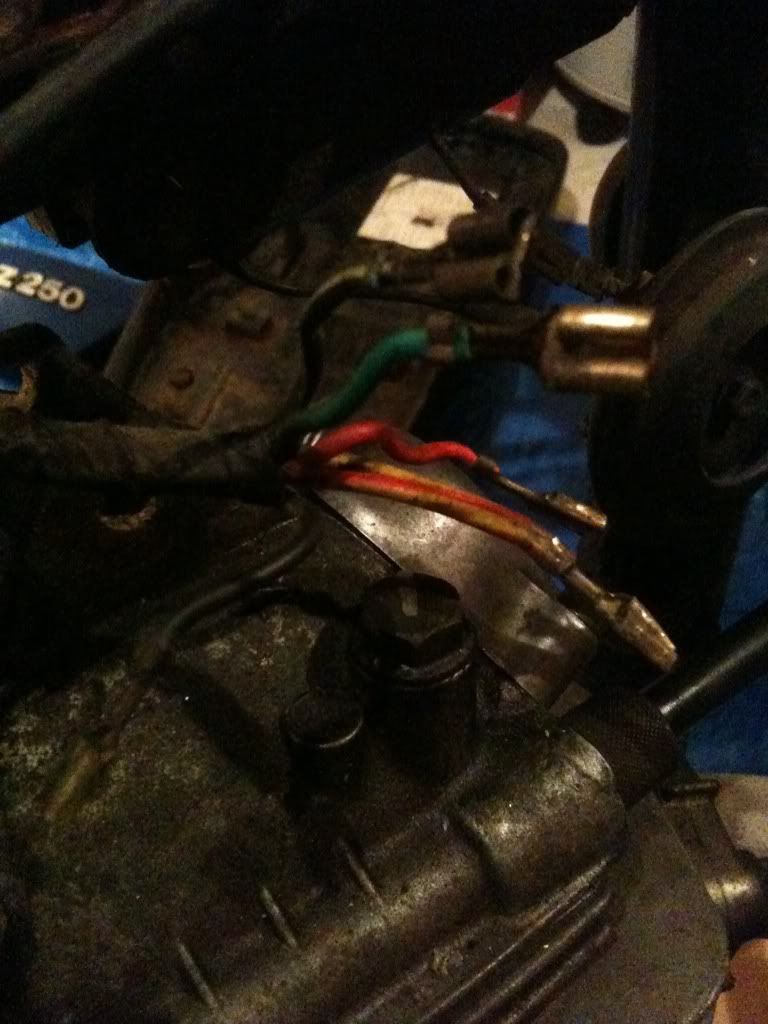
So the kit CDI has been completed, and I finally managed to get all the original wires out from the connector. I forgot to buy a crimper, so I'm gonna try to manually hook up the wires and see if the CDI will work. Just wondering if anyone has an english wiring diagram for the z250? I have a german one and this is how I understand it to be (from google translate):
red = page level relay
green = pulse encoder
black = ignition coil
black/yellow = circuit brake light beam indicator lights flashing control idle control
red/yellow = engine stop switch button starter switch headlights and ignition coil
And my guess as to how my CDI is suppose to hook up to that:
Generator coil = pulse encoder
Kill switch = engine stop switch button starter switch headlights and ignition coil
Chassis = circuit brake light beam indicator lights flashing control idle control
Trigger coil = page level relay
Ignition coil = ignition coil
Would that be right?
Anyways, some pics.
Please Log in or Create an account to join the conversation.
- sham
-
Topic Author
- Offline
- User
-
Registered
- Posts: 129
- Thanks: 1
Re: Z250 Single
10 Sep 2011 04:59
So, had been working on ignition module for quiet a while, but in the end it was fail, so decided to take a week off after that. At least I now understand a tiny bit more about electronics than I first started (the whole grounded and positive relationship was a start). Some good came from that little exercise - I found that the PO had a 15A fuse in place of a 20A fuse, and after replacing that, the left rear indicator worked fine =]
Was going to pursue the GM HEI modules as an alternate igniter, but was told that this would only work for mechanical advances, which I discovered (finally) my bike is not. So going back to the very start of this whole ignition journey, that Jaycar kit wouldn't have worked anyway if I understand the warning as being that it will not work for an electronic advance. So there. Fat waste of time that was lol.
So deciding to buy the OEM ignition module, which sells for around $400. But found a cheap, and more importantly, new module - half the price. The issue now is the seller will only ship within Germany...so if anyone lives there, or knows someone there who would be willing to ship it back to me, PLEASE let me know (preferably within the next 4 days).
My earlier haste also means that I will need a new 6 prong connector after I destroyed the original. Also on the list is a new air box filter, as mine is missing the "sponge element" which the manual insists on being a very important part of the whole set up...also need to get a 8AG 20A fuse, as the one I'm currently using (3AG) doesn't fit in the fuse box and I'm thinking of getting a new set of hand controls - the labels on mine are all faded, and I'm missing the horn button. Any suggestions? I read in a previous thread that OEM was the way to go due to the complexity of the wiring that could be integrated in these things.
So I guess I have a shopping list =]
Please Log in or Create an account to join the conversation.
Moderators: Street Fighter LTD