I was recently looking through some of my older photos and thought I'd share some info about how I go about painting a bike's body work. I'm not professing to be an expert, I just thought I'd share some photos, and my approach, for those that haven't
failed learned as much as me.
First step, is stripping the paint off the outside of the tank, including the inside at the frame tunnel. When doing this you will typically see all kinds of spider web rust, creeping under the old paint. To strip the paint, I use HD paint stripper. The good stuff that washes off with paint thinner, not water.
Next step, is derusting the tank, both inside and out. I like to use phosphoric acid, since it removes rust, and doesn't need to be neutralized. If you buy "metal prep", as sold by paint manufacturers, to be used before painting, it's phosphoric acid. Also, powder coaters use large dip tanks to prep parts, and one of the tanks is filled with phosphoric acid. This stuff is the "industrial standard" to prep metal before painting.
I then address any body work that needs to be done using body filler. Get the surface as perfect as you can.
At this point, the tank should have clean metal, and all major dents removed.
To seal the metal, I use epoxy primer. This stuff seals over all body work, and protects the metal. It is not a "filler", it's a sealer. Degrease using "wax and grease remover" before painting, of course.
Some guys follow the epoxy with a "fill primer" which is thick, and fills small imperfections, but I prefer to add an extra layer of epoxy, and try to avoid the filler, because that adds film build, which makes the bodywork more prone to chipping. "Glazing putty" can be used to fill minor imperfections (those too small to justify body mud.)
To flatten the primer, and prepare for base coat, I use a gray scotchbrite pad, or 600 grit sandpaper. Epoxy primers have what called a "critical recoat time", which means the top coat needs to go on pretty fast, typically 24-48 hours. Wait too long, and the paint layers don't bite into each other, and durability decreases.
Next is base coat. Three layers. Degrease the surface with paint "wax and grease remover" to be safe. The first paint layer goes on dry and thin, followed by two more full wet coats. No sanding on the base coat, because you can cut through, and when using pearls/metallics, you can skew the appearance by sanding.
3 layers of clear is next. I use urethane, because it's the most durable. After a day or so of drying, you can go back and color sand down the orange peel, and ready the surface for graphic stripes. At this point you can slow down; the surface will be sealed, and since you will be sanding the clear before the next step, the critical recoat times don't apply.
For graphic stripes, make sure to order fresh. 3M makes great pinstripes; they are sort of gummy, so they stretch well and lay down without lifting. Premade graphics, such as sold by Diabalo and similar, are water slide, or rub down, so take your time and get them placed properly. After placement, allow them to out-gas for a day or so before clearing.
Last step is another 2-3 layers of clear. Dust on the first coat, then follow with 2 more full "wet" coats. If you do it right, there shouldn't be need of color sanding and polishing, other than to remove dirt.
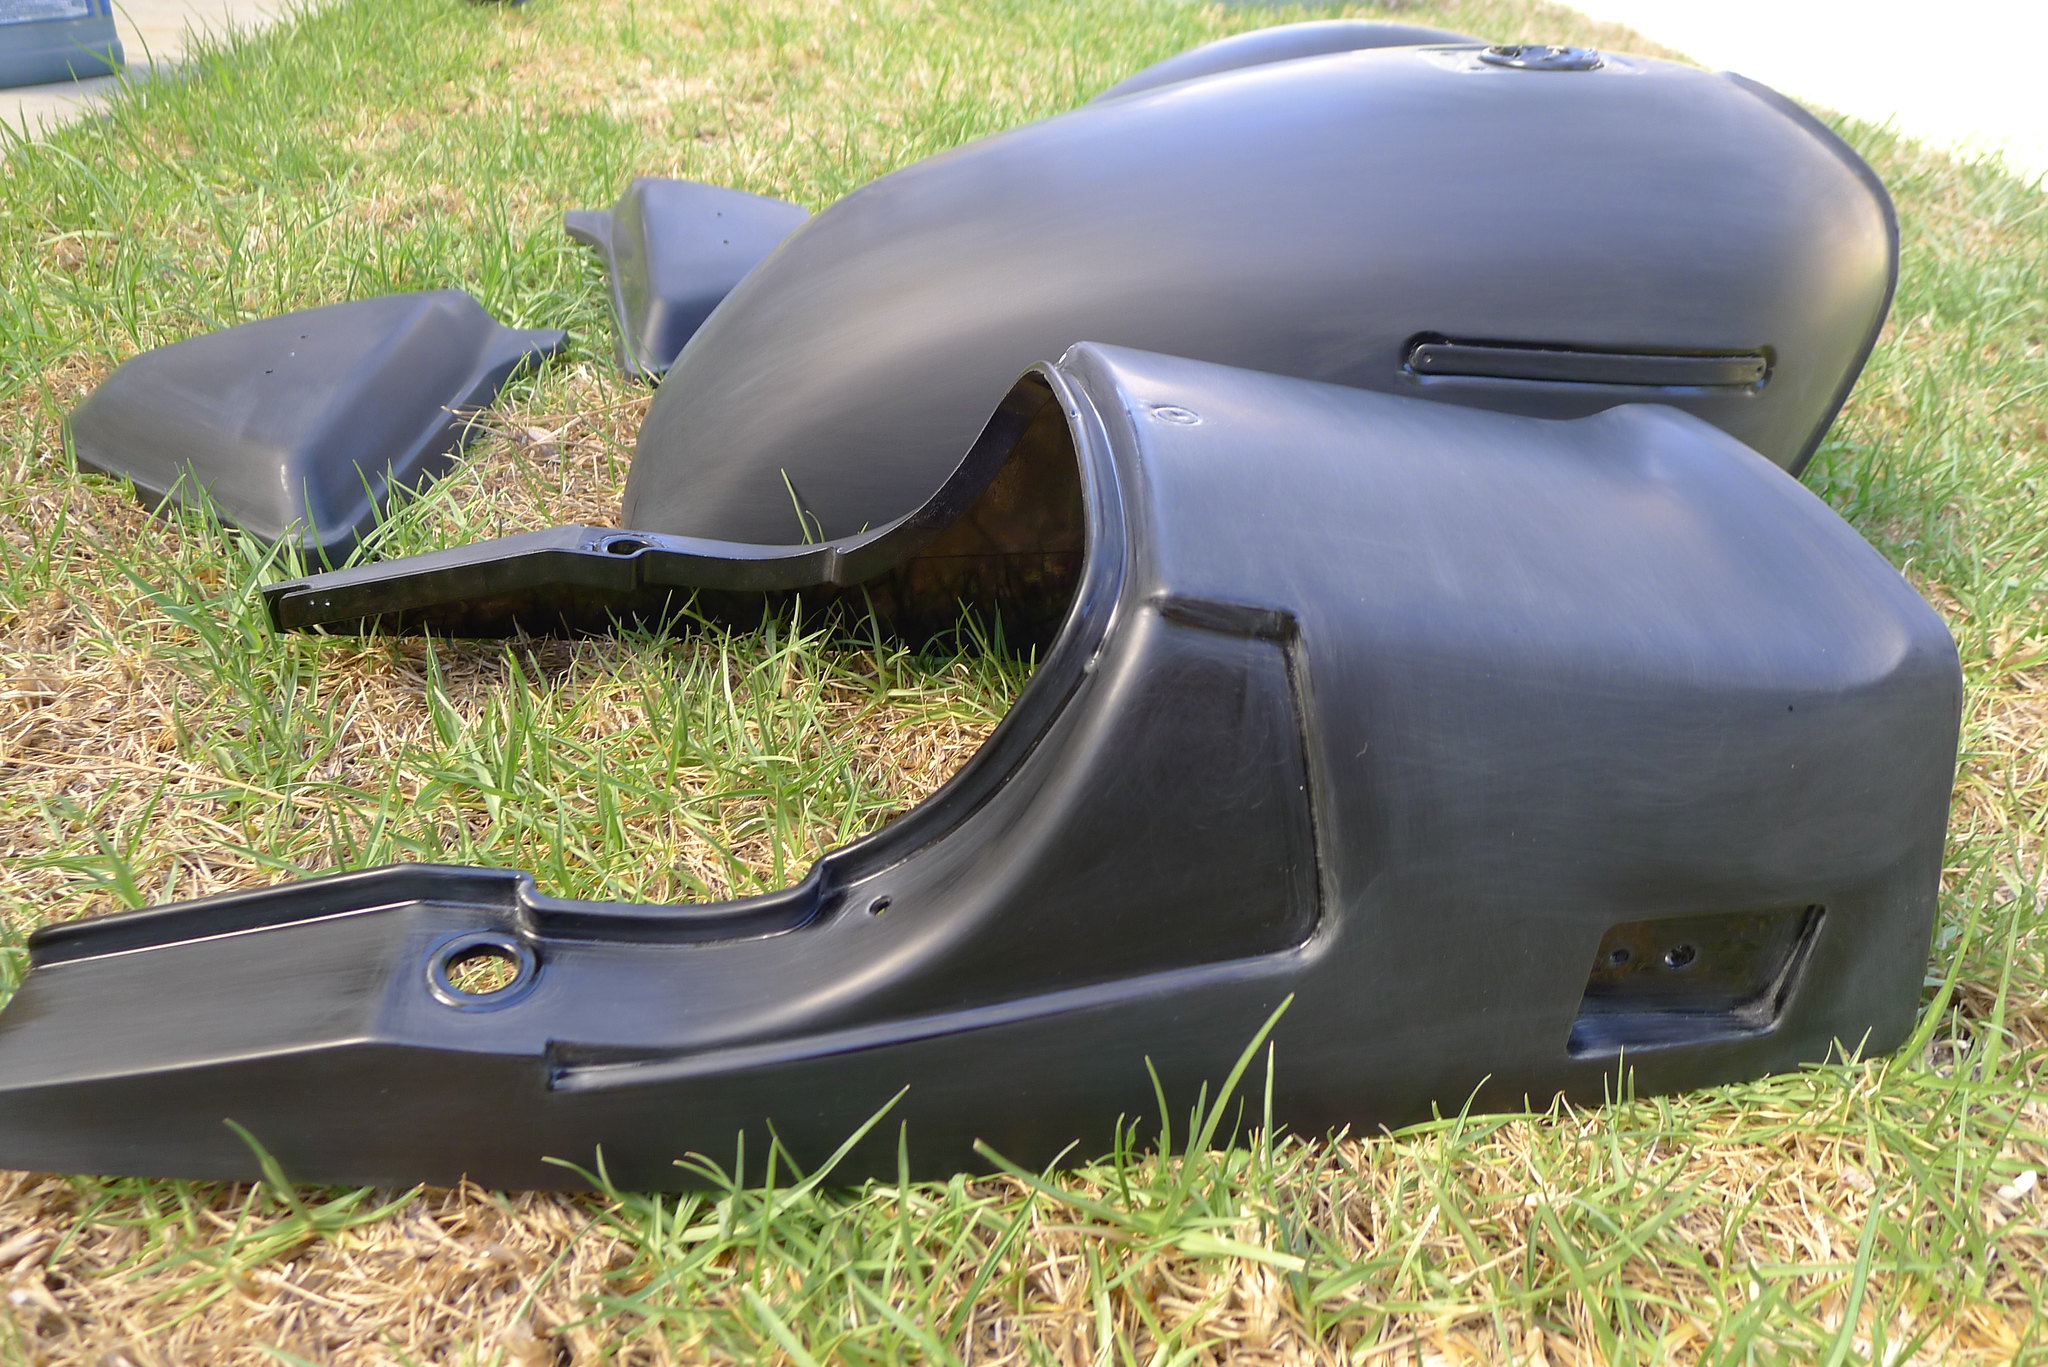
Bodywork done, epoxy primer applied, and color sanded flat...
Basecoat applied, clear sealer applied, and color sanded...
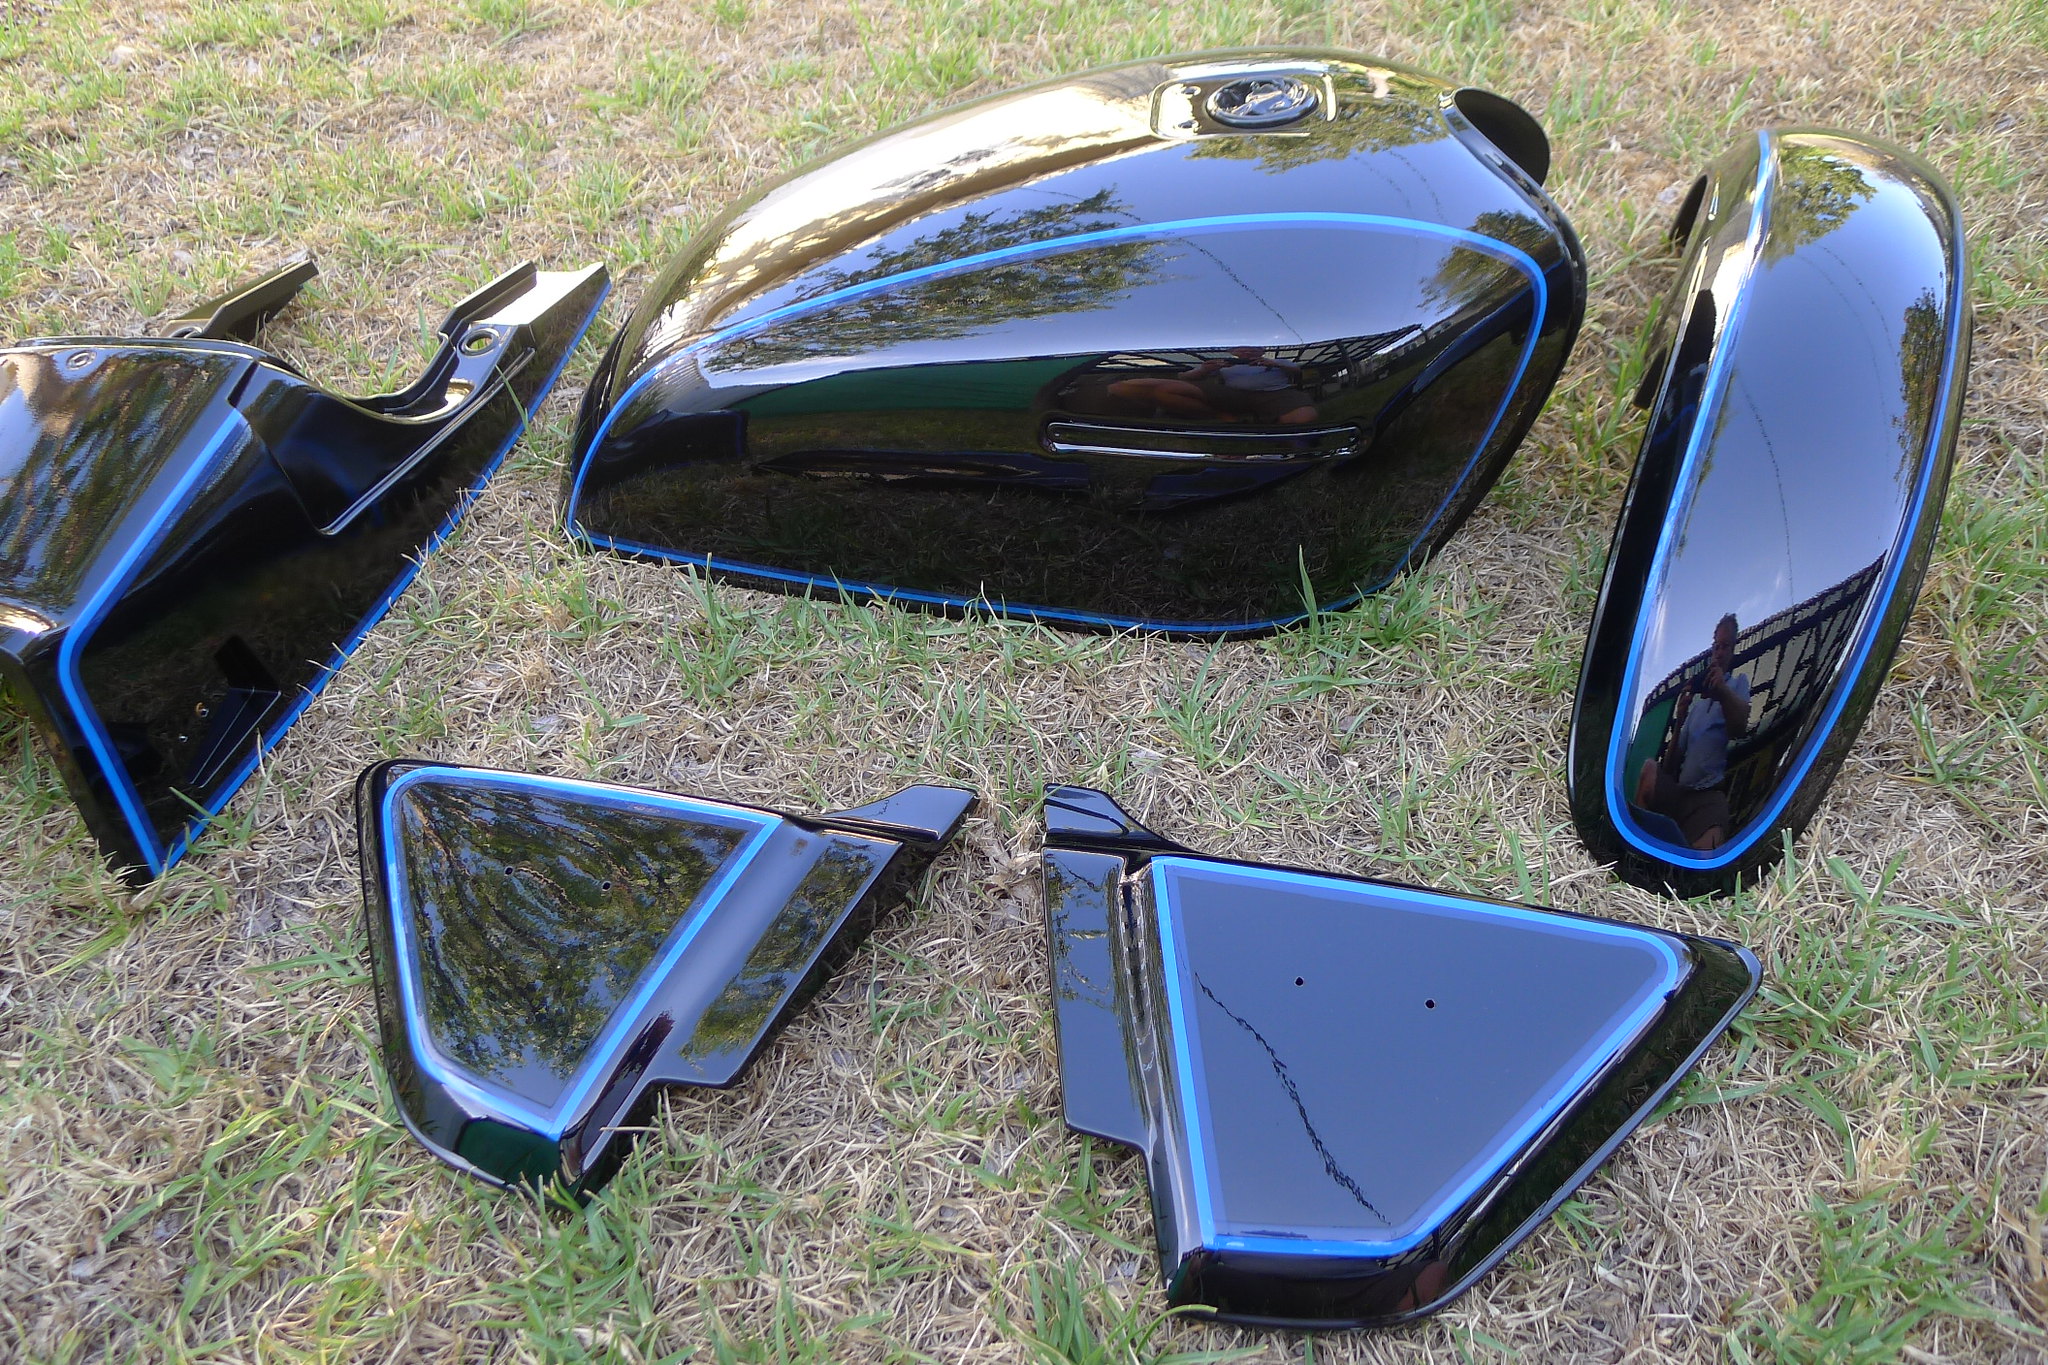
Stripes applied...
Final clear...