Welcome, Guest
Username: Password: Remember me

TOPIC:

I Know Zip About Motorcycles! (aka KZ750B4 bobber) 03 Sep 2011 10:19 #473988

  • pbmax
  • pbmax's Avatar Topic Author
  • Offline
  • User
  • Posts: 91
  • Thank you received: 1
Finally got the motor out. Wasn't too bad, just removing a bunch of bolts. But darn that thing is heavy. 200 lbs is my guess. After all the mounting bolts were off, I thought I could lift it out of there. The engine is aluminum- right? But the gears and whatnot are steel so it was a lot heavier than I hoped.

I grabbed a couch cushion from the living room (our couches are trashed anyway from our 4 rambunctious boys) and laid it down next to the bike. Then I tipped it over, the engine plopped out and I tipped the bike back up.


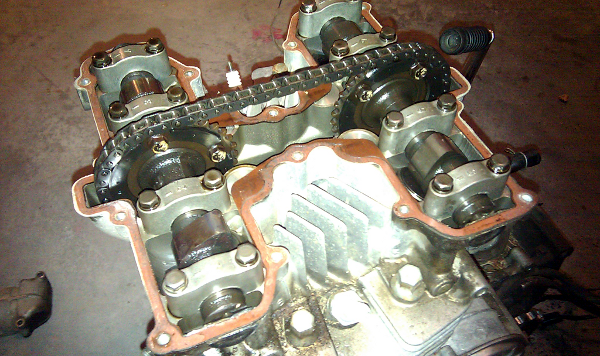
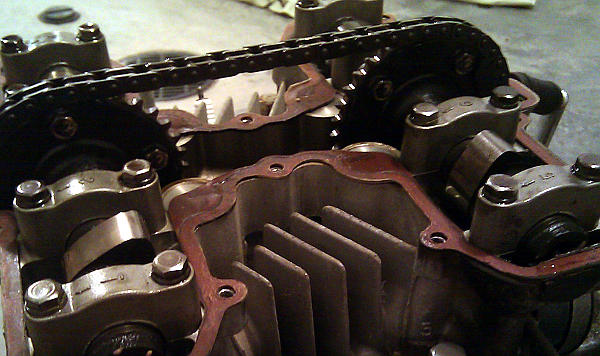
With the motor out, I had to take a peak under the cylinder head cover. Everything looked good as far as I could tell. No noticable wear and tear on the camshaft lobes. Evrything looked very clean. Sweet.

Funny to think that this might be the first time in 32 years the camshaft has seen the light of day.


Please Log in or Create an account to join the conversation.

Last edit: by pbmax.

I Know Zip About Motorcycles! (aka KZ750B4 bobber) 03 Sep 2011 10:30 #473990

  • pbmax
  • pbmax's Avatar Topic Author
  • Offline
  • User
  • Posts: 91
  • Thank you received: 1
Where to now? So much to do. I thought about taking the carbs apart, but I wasn't in the mood to deal with all those tiny parts. I went for the motor instead.

The camshafts were easy to remove. They were held on by caps bolted on top of them. Again, they seem to be in good shape (from the untrained eye anyway).


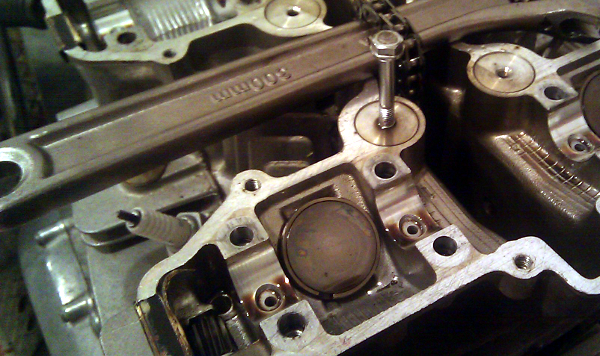
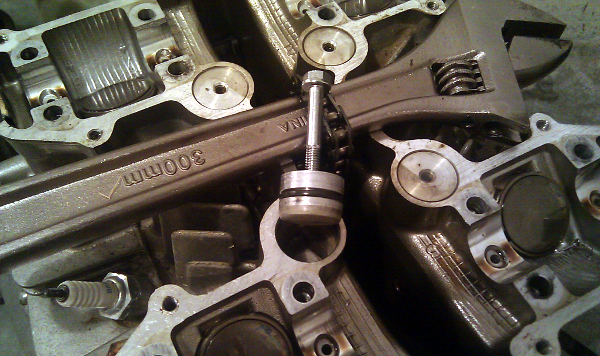
Next up according to the manual was removing 4 "blind caps". They must be called "blind" because I can't see what's under there and have know idea why I must take them off. Its the round thing with the bolt sticking out of it. Normally the bolt isn't there. You use that to pry it out.


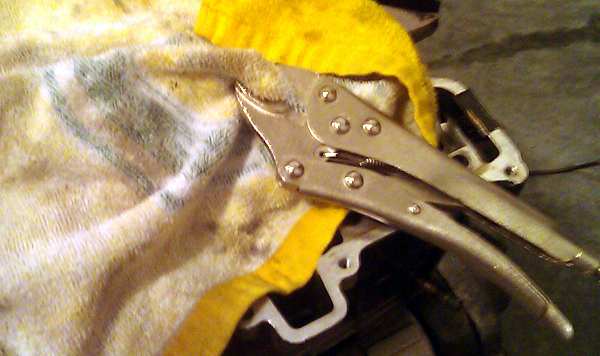
Aaaahh! These little buggers won't budge! The manual has a picture of a guy gently pulling these out with two fingers. Right. I sprayed some lubricant on them and then tried this...


Bingo! Free Packer rally towels to the rescue once again.


It definitely need that lube. They were dry as bone. It turns out that the bottom of these caps are exposed to the elements even though they appear to be sealed inside the engine. More on this later. Underneath the blind caps are long bolts that hold the cylinder together. Here we are removing the nuts off of them...


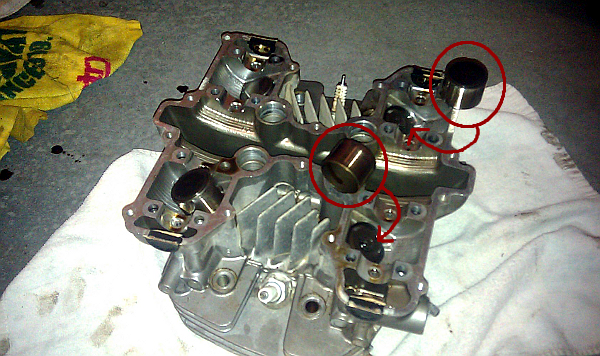
With all those removed, I pulled the cylinder head off and took a look underneath. Lots of carbon build up and why are the intake valves tan and not black like everything else?


What the hell are these things? They must have fell out when I turned over the cylinder head. Manual says they are "valve lifters" with shims seated at the top. It also says to keep track of which valve they came off of. Great. I've got a 50/50 chance. At least I know they are both from the exhaust side.


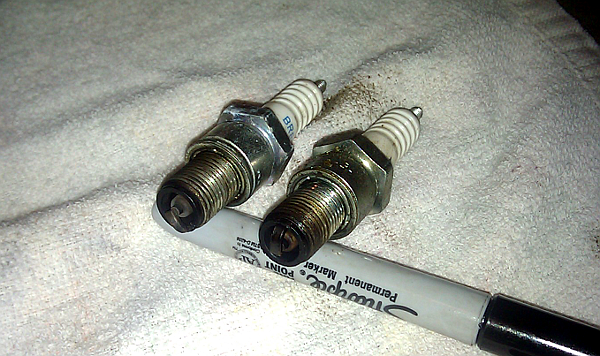
Some spark plugs. The left one looks pretty good, but what the hell do I know.


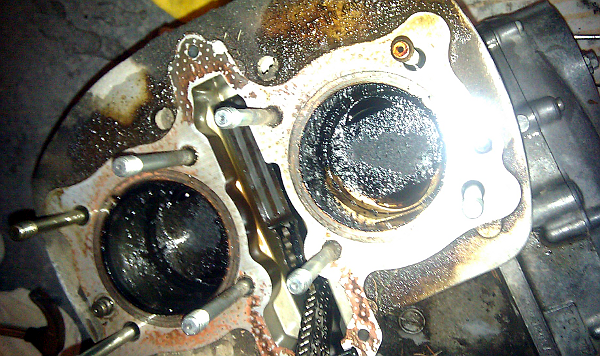
The pistons are at TDC by chance. I don't remember putting them that way. More carbon, but that's common on an old bike from what I'm reading on kz750 forums. Man, I can't wait to clean all this filth off. She's gonna shine up real good.


Next up was the cylinder block. Manual says to gently pry with a screw driver. Well, that didn't work. I shot some lubricant all around the seam and let it sit for awhile. Still no luck. Then I had the brilliant idea that perhaps the pistons were stuck to the sleeves. Sprayed those down with some lube and turned the crankshaft. I got the pistons freely moving which is a good sign. Here they are at bottom.


But still can't get the cylinder block to break free. I read that some lubricant down those long bolts can do the trick. Why? As mentioned above, these things are actually exposed to the elements. Dirt, sand, gunk, oil & water can pack in down there especially with the vibration of the engine. So I spayed a bunch in there to loosen it up. It worked. Look at all that crap. No wonder it was frozen together.


My parts baggies are piling up :)


At this point, I'm pleasantly amazed that I'm actually doing all this. Its going well so far. I know I'll hit some roadblocks at some point, but I have my late night garage buddies for support.

Please Log in or Create an account to join the conversation.

Last edit: by pbmax.

I Know Zip About Motorcycles! (aka KZ750B4 bobber) 03 Sep 2011 10:54 #473993

  • pbmax
  • pbmax's Avatar Topic Author
  • Offline
  • User
  • Posts: 91
  • Thank you received: 1
Next up was to remove the pistons. I got the two clips removed that hold the pin in place (pin circled in red). One pin punched out easy. A few taps with a hammer was all it took. Not so with the other one. I gave it a few good smacks but was afraid to go any harder. Yeah, I know there is a special tool for this, but I ain't got one.


Thank goodness I have the internet and all the good people out there posting their tips and tricks. A c-clamp can be used to get this pin out. Now off to the store I go to get one...

Please Log in or Create an account to join the conversation.

I Know Zip About Motorcycles! (aka KZ750B4 bobber) 03 Sep 2011 11:22 #473997

  • KZJOE900
  • KZJOE900's Avatar
  • Offline
  • Admin
  • Posts: 1972
  • Thank you received: 444
I admire your courage in even attempting this project. I have faith you will succeed. "Dammed the torpedoes, full speed ahead!". Just take your time once you have everything disassembled. This is your opportunity to take care of an problems with the cylinders and valves. Have a reputable shop inspect them for you and make recommendations on required service on these components. You will have a solid base for your rebuild. You need to have lots of engine parts ordered and available for your rebuilding process. Some parts like a gasket kit and valve seals and so forth are obvious. Others here can give you more specific recommendations for you type bike. Many other things you can do now for when you need them. Clean out your tank. This way it will be ready and waiting for you when you need it. I filled mine up vinegar for a couple of weeks. Does a nice job and nothing toxic to dispose of. Get your carbs cleaned and rebuilt. Seeing as you are not afraid to try, you can do this yourself. Research how to do it (need to order carb kits). Spend the money required on parts for the engine and parts. You won't be sorry. Once the engine is done, then you can use your creativity to make your vision come true. Looking forward to your postings. Cheers!
Current project 76 KZ900 (This was a Vetter model)
76 KZ900
81 XJ550H SECA (Current Project)
82 XJ550R SECA
Past:
86 FJ1200
74 Z1900
72 CB450

Please Log in or Create an account to join the conversation.

I Know Zip About Motorcycles! (aka KZ750B4 bobber) 03 Sep 2011 12:09 #474013

  • Patton
  • Patton's Avatar
  • Offline
  • KZr Legend
  • Posts: 18640
  • Thank you received: 2098

pbmax wrote: ...The camshafts were easy to remove. They were held on by caps bolted on top of them....


It's important that each cap be replaced in the same position from which it was removed.

Good Fortune! :)
1973 Z1
KZ900 LTD

Please Log in or Create an account to join the conversation.

Last edit: by Patton.

I Know Zip About Motorcycles! (aka KZ750B4 bobber) 03 Sep 2011 12:51 #474020

  • 650ed
  • 650ed's Avatar
  • Offline
  • User
  • Posts: 15344
  • Thank you received: 2829

pbmax wrote: Next up was to remove the pistons. I got the two clips removed that hold the pin in place (pin circled in red). One pin punched out easy. A few taps with a hammer was all it took. Not so with the other one. I gave it a few good smacks but was afraid to go any harder. Yeah, I know there is a special tool for this, but I ain't got one.


Thank goodness I have the internet and all the good people out there posting their tips and tricks. A c-clamp can be used to get this pin out. Now off to the store I go to get one...


Careful with that hammer. You can bend the connecting rods and deform the con rod bearings by hitting the wrist pins with a hammer. Ed
1977 KZ650-C1 Original Owner - Stock (with additional invisible FIAMM horn)

Please Log in or Create an account to join the conversation.

I Know Zip About Motorcycles! (aka KZ750B4 bobber) 03 Sep 2011 18:39 #474070

  • pbmax
  • pbmax's Avatar Topic Author
  • Offline
  • User
  • Posts: 91
  • Thank you received: 1

Patton wrote:

pbmax wrote: ...The camshafts were easy to remove. They were held on by caps bolted on top of them....


It's important that each cap be replaced in the same position from which it was removed.

Good Fortune! :)


roh, oh

Please Log in or Create an account to join the conversation.

I Know Zip About Motorcycles! (aka KZ750B4 bobber) 03 Sep 2011 20:18 #474083

  • 650ed
  • 650ed's Avatar
  • Offline
  • User
  • Posts: 15344
  • Thank you received: 2829

pbmax wrote:

Patton wrote:

pbmax wrote: ...The camshafts were easy to remove. They were held on by caps bolted on top of them....


It's important that each cap be replaced in the same position from which it was removed.

Good Fortune! :)


roh, oh


Take a look at the tops of the caps and compare them to your pictures. The caps are numbered so you should be able to see which go where with no problem. Ed
1977 KZ650-C1 Original Owner - Stock (with additional invisible FIAMM horn)

Please Log in or Create an account to join the conversation.

Last edit: by 650ed.

I Know Zip About Motorcycles! (aka KZ750B4 bobber) 04 Sep 2011 09:17 #474133

  • pbmax
  • pbmax's Avatar Topic Author
  • Offline
  • User
  • Posts: 91
  • Thank you received: 1

650ed wrote: Take a look at the tops of the caps and compare them to your pictures. The caps are numbered so you should be able to see which go where with no problem. Ed


Thanks. I looked at them and saw the numbers. Hopefully I can get them back on right.

Even with a c-clamp I can't get the second piston pin out. I'll have to shelved that and come back to that later.


.

Please Log in or Create an account to join the conversation.

I Know Zip About Motorcycles! (aka KZ750B4 bobber) 04 Sep 2011 10:02 #474143

  • Patton
  • Patton's Avatar
  • Offline
  • KZr Legend
  • Posts: 18640
  • Thank you received: 2098

pbmax wrote: ...Even with a c-clamp I can't get the second piston pin out....


Presupposing absolute certainty that both circlips are removed, and without any broken piece remaining inside the groove, would soak both ends in Kroil, PBBlaster, Liquid Wrench, or 50-50 atf/acetone solution, overnight or longer.

Could also try heating the piston with a propane torch or heat gun immediately before using the C-clamp, and perhaps also while using the C-clamp. And then repeat by pressing from the other end, as the pin might release if pressed in the opposite direction.

Good Fortune! :)
1973 Z1
KZ900 LTD

Please Log in or Create an account to join the conversation.

I Know Zip About Motorcycles! (aka KZ750B4 bobber) 12 Sep 2011 16:36 #476166

  • pbmax
  • pbmax's Avatar Topic Author
  • Offline
  • User
  • Posts: 91
  • Thank you received: 1
To get to the timing advancer, the "contact breaker cover" (just part of the engine cover) was pulled off, then the "contact breaker mounting plate" was pulled by removing 3 screws and finally the advacer mounting bolt was removed (which was not stuck!).

Here's what's left after all that:


The timing advancer is the thing with the small springs on it. Its supposed to just pull off, but its stuck. I sprayed it with some lubricant and I'll go back to it later.

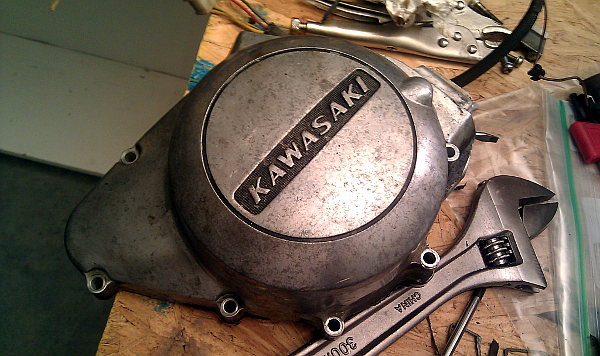
On the other side of the engine, I'm trying to get the armature off of the inside part of the engine cover. These allen screws are a bitch to unscrew. From start to end, they didn't want to turn. Thread lock maybe? I didn't see anything on them. I needed a little extra leverage.


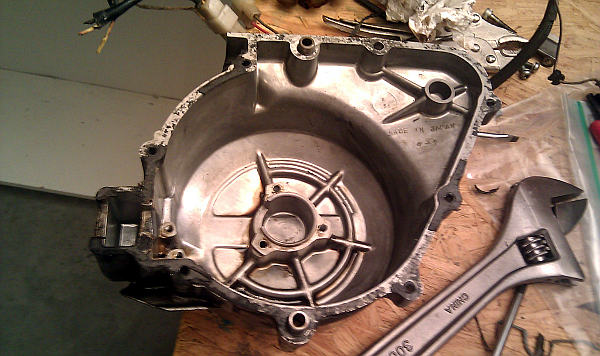
Here's the engine cover after I got the armature out.


Now I need to remove the large bolt in the center of the flywheel. Once again, another stuck bolt. This is a reverse threaded one too (which luckily I read that part of the manual before trying to crank on it).


I see an impact wrench in my immediate future. All these frozen nuts, screws and bolts are becoming a real pain.

Also in my immediate future is an engine stand. My lower back is getting awfully tight. I'll probably make one out of angle iron.

Please Log in or Create an account to join the conversation.

I Know Zip About Motorcycles! (aka KZ750B4 bobber) 12 Sep 2011 16:44 #476169

  • pbmax
  • pbmax's Avatar Topic Author
  • Offline
  • User
  • Posts: 91
  • Thank you received: 1
Clearly I need an engine stand of some sort. I've gotten as far as I could without one. I took some measurments of the engine and drew up a design in Sketchup.


Its got 2x4's and casters for the base, angle iron and 3/8" threaded rods for supports. I don't have many power tools so most of this was done the old fashion way as you'll see.

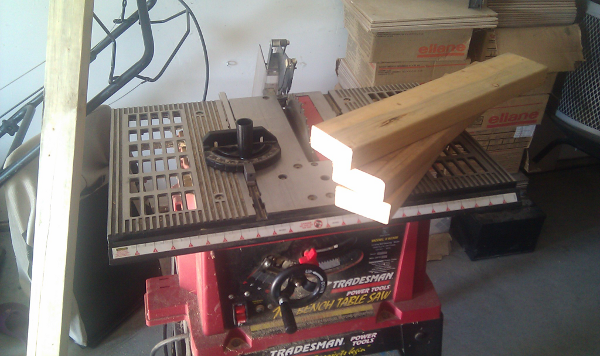
Making 2x4 cuts with my little table saw (one of the few power tools I've got).


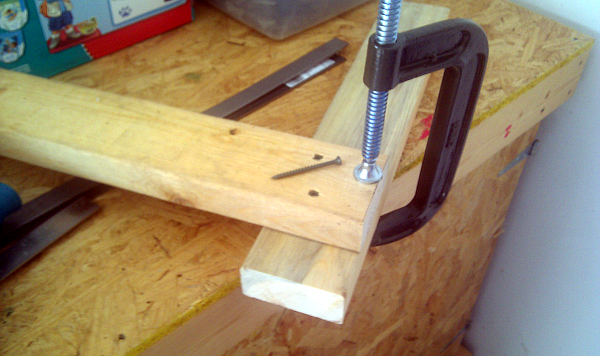
Using deck mate screws. I love these things. They zip right in there and hold tight.


This would make for a nice furniture roller, wouldn't it?


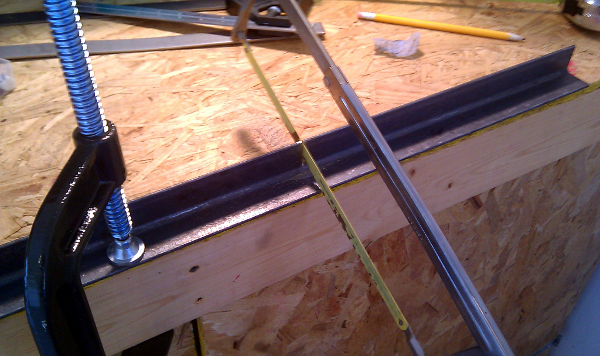
Hand sawing angle iron. I tried the dremmel but that was too slow. I thought about getting a power saw or an angle grinder, but for a small job like this I figured it wasn't really worth it.


This is a regular hand drill, not a drill press. I was worried about this part. I had some old drill bits but had no clue if they would bite into metal. It actually worked ok. I used the old engine oil for lubrication too. I'm gald I didn't dump it yet.


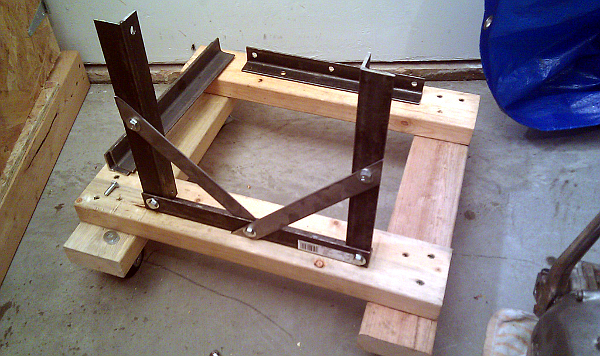
Assembly...


Finished product. Looks a lot like the sketchup model. Nice.


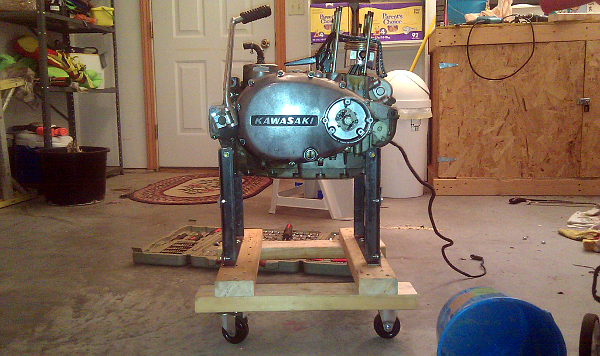
And mounted. I'll still have to sit on a stool to work on parts of the motor, but its 100x times better than having it (and my butt) sit on the floor.


Yeah, the angle iron drilling and cutting sucked. I love the end result though. It turned out almost better than expected.

Please Log in or Create an account to join the conversation.

Last edit: by pbmax.
Powered by Kunena Forum