
Search Results (Searched for: soften hard rubber)
Rebuilding carb stix & a question for old timers about same. was created by slmjim+Z1BEBE
20 Mar 2024 19:03
We've had a set of ancient Vance & Hines mercury carb stix for decades.


The four silicone rubber vacuum tubes have been removed in the both pics, and the back cover removed from the housing to show the bottom reservoir & tops of the capillary tubes sans rubber tubes.
The past few years we've been seeing occasional, random air bubbles / voids in the mercury columns.
The voids run anywhere from 2 to 4 mm long. They can appear in different positions in the column if vacuum is removed & reapplied. Or not at all. Occasionally there may be two voids in a column. It's very random. The reservoir is full to the top & the vent is unobstructed. We decided to clean & rebuild.
Drained the reservoir & filtered the merc through a tiny hole in a paper filter, a method we found researching how to clean a small quantity of merc. We did so because a layer of oxidation that looks like slag sat on top of the merc. The paper caught the layer of oxidation & held it on the sides of the paper filter while clean, shiny liquid merc dropped into the glass storage vial. The glass lab vial, capped & set aside. It's about 2 fl.oz., or 59ml. In volume.
Removed the cap from the reservoir, and the capillary tubes from the cap. Cleaned the inside of the reservoir tub and the outside of the capillary tubes.
Capillary passages themselves appeared clean, which is a good thing. At about 0.025”, or 0.635mm, we'd have no way to clean the minuscule passages, and they're capped at the top with some sort of porous sealant anyway. More on that later.
Reassembled & resealed the cap to the reservoir tub with a two part adhesive suitable for polyethylene. Reinsert the tubes evenly into the reservoir cap & seal with blue RTV. Inserted the tube/reservoir assembly into the housing. Pressed the silicone vacuum tubes onto the top of the capillary tubes after warming them to soften. Refilled the reservoir with the cleaned merc using a pipette to introduce it into the vertical vent tube a tiny portion at a time. Tedious. Test for vacuum leaks with a vacuum pump set to hold vacuum to make sure there were no vacuum leaks. No voids were seen. Vacuum held constant on all 4 tubes.
Bag & take everything that touched merc to the local HazMat disposal site.
Done.
All work was done safely & cleanly as possible outdoors wearing nitrile gloves. There were no spills or gottaway beads.
A curiosity question for the old-timers:
When we removed the silicone rubber vacuum tubes from the tops of the glass capillary tubes we noticed white material of some sort covering the top 10mm or so of each tube. It's quite hard & very well adhered to the glass itself. Won't scratch with a fingernail. Seems ceramic-like. It has to be porous, because it flows air. Otherwise no mercury could be drawn into the capillaries by vacuum.
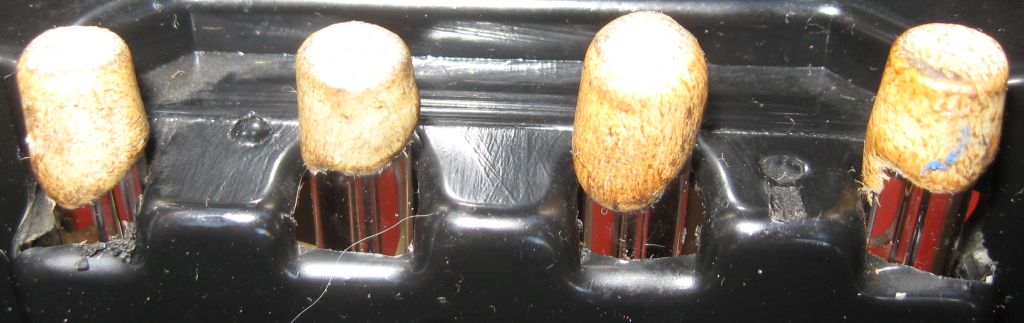
Out best guess is, it's there to keep mercury from being drawn out the top of the tubes. We're not gonna attempt to remove it, but we're curious; anyone know what the white material is?
Good Ridin'
slmjim & Z1BEBE
The four silicone rubber vacuum tubes have been removed in the both pics, and the back cover removed from the housing to show the bottom reservoir & tops of the capillary tubes sans rubber tubes.
The past few years we've been seeing occasional, random air bubbles / voids in the mercury columns.
The voids run anywhere from 2 to 4 mm long. They can appear in different positions in the column if vacuum is removed & reapplied. Or not at all. Occasionally there may be two voids in a column. It's very random. The reservoir is full to the top & the vent is unobstructed. We decided to clean & rebuild.
Drained the reservoir & filtered the merc through a tiny hole in a paper filter, a method we found researching how to clean a small quantity of merc. We did so because a layer of oxidation that looks like slag sat on top of the merc. The paper caught the layer of oxidation & held it on the sides of the paper filter while clean, shiny liquid merc dropped into the glass storage vial. The glass lab vial, capped & set aside. It's about 2 fl.oz., or 59ml. In volume.
Removed the cap from the reservoir, and the capillary tubes from the cap. Cleaned the inside of the reservoir tub and the outside of the capillary tubes.
Capillary passages themselves appeared clean, which is a good thing. At about 0.025”, or 0.635mm, we'd have no way to clean the minuscule passages, and they're capped at the top with some sort of porous sealant anyway. More on that later.
Reassembled & resealed the cap to the reservoir tub with a two part adhesive suitable for polyethylene. Reinsert the tubes evenly into the reservoir cap & seal with blue RTV. Inserted the tube/reservoir assembly into the housing. Pressed the silicone vacuum tubes onto the top of the capillary tubes after warming them to soften. Refilled the reservoir with the cleaned merc using a pipette to introduce it into the vertical vent tube a tiny portion at a time. Tedious. Test for vacuum leaks with a vacuum pump set to hold vacuum to make sure there were no vacuum leaks. No voids were seen. Vacuum held constant on all 4 tubes.
Bag & take everything that touched merc to the local HazMat disposal site.
Done.
All work was done safely & cleanly as possible outdoors wearing nitrile gloves. There were no spills or gottaway beads.
A curiosity question for the old-timers:
When we removed the silicone rubber vacuum tubes from the tops of the glass capillary tubes we noticed white material of some sort covering the top 10mm or so of each tube. It's quite hard & very well adhered to the glass itself. Won't scratch with a fingernail. Seems ceramic-like. It has to be porous, because it flows air. Otherwise no mercury could be drawn into the capillaries by vacuum.
Out best guess is, it's there to keep mercury from being drawn out the top of the tubes. We're not gonna attempt to remove it, but we're curious; anyone know what the white material is?
Good Ridin'
slmjim & Z1BEBE
Replied by Stereordinary on topic Project: 1990 ZR550 Zephyr (yes, another one)
16 Apr 2023 23:38
Project update!
Overall we're in pretty good shape here, and I'm still optimistic about it. It's taking every bit of my patience as an endless tinkerer not to tear it all down, clean it up, and repaint everything before putting it back together, but I want to follow the tried and true method of "see if it runs first" before I do any of that. With that as my ethos, I've now got the throttle and clutch cables reinstalled, did some cleaning, and I'm currently trying to cram the carbs back in. The rubbers on the engine side are stiff as all hell, and giving me a hard time. I might grab my girlfriend's hair dryer tomorrow while she's at work to soften them.
Anyway, here's a photo.
considering they fell out in both carbs, perhaps they were not given a final tighten for the main jets. For the plugs, oil of wintergreen will soften rubber and even swell the part back to original size. But if too much is used you can over do it. I have no idea if the rubber items its applied too eventually shrinks back down to size or how long that may take. I have used it before and it works great on "restoring" rubber that has hardened but generally in good condition start with. Not sure about new rubber plug availability. Another method may be using something like Permatex brand "Permashield Gasket Dressing and Flange Sealant" applied above the end of the plug that goes into the carb first that may secure it and seal. You'd want a small amount that will not squeeze out visibly anywhere, but covering the circumference of the rubber.
Hi, Gray. I'm in UK.Hi Guys, at the risk of appearing silly im going to ask what may be deemed a silly question.
As per original poster im in a similar position in that ive stripped the engine to have it vapour blasted, obviously going through everything before reassembly to ensure its within tollerence before refitting.
which leads me to the question.
On the chain tensioner rollers theres blocks of hard rubber, (6 in total)how hard should they be ie when new are they pliable between fingers? Now i could just replace them all with new, however for what they are they arn't cheap, nor are there many options in uk, on ebay they are all from US, with extortionate postage to UK seems you guys get all the good stuff! Bigger country, more choice and competition, keeps prices keen.
anyway can anyone advise how hard they should be when new. Even tried dipping in hot water to see if it softened the rubber, no change tending to indicate they should be hard? Dont want to replace for the sake of it! Same applies to top tensioner wheel blocks too.
imcidentally before strip, bike ran fine with no excess noise or smoke
Many Thanks
They should be firm but soft and they will need replacing if rock hard.
The rubber in the Idler wheels is very likely to be the same.
Get them from ZPOWER . Z-POWER
They are based in Huddersfield.
Join the Z1OWNERS GB forum for better advice on UK suppliers.
I'm on there too.
 Gray17
Hi Guys, at the risk of appearing silly im going to ask what may be deemed a silly question.
As per original poster im in a similar position in that ive stripped the engine to have it vapour blasted, obviously going through everything before reassembly to ensure its within tollerence before refitting.
which leads me to the question.
On the chain tensioner rollers theres blocks of hard rubber, (6 in total)how hard should they be ie when new are they pliable between fingers? Now i could just replace them all with new, however for what they are they arn't cheap, nor are there many options in uk, on ebay they are all from US, with extortionate postage to UK seems you guys get all the good stuff! Bigger country, more choice and competition, keeps prices keen.
anyway can anyone advise how hard they should be when new. Even tried dipping in hot water to see if it softened the rubber, no change tending to indicate they should be hard? Dont want to replace for the sake of it! Same applies to top tensioner wheel blocks too.
imcidentally before strip, bike ran fine with no excess noise or smoke
Many Thanks
Replied by Nessism on topic 1980 kz650 ltd not starting
18 Dec 2022 16:22These old z 650s were hard to start in the cold even when they were new speaking from experience. Be methodical and try the easy stuff before pulling the carbs off. If you have to remove them pour hot soapy water over the air intake rubbers to soften them up first as they usually split when being pulled off. Or a hair dryer. Good luck.
If the boots are hard to the point that they crack when removing the carbs, it's time to change them. Regarding filling the carbs with some cleaner sauce, just say NO. The only way I'd even consider that is if you rebuilt the carbs yourself, replacing all the rubber O-rings and fuel Tee's, fairly recently. In that case, it would be worth a try. With a bike that has sat, and likely has never had a proper carb rebuild in its life, I strongly recommend pulling the carbs and rebuilding them properly before even attempting to start the bike. Even if it runs, the carbs are full of rock hard O-rings, which should be replaced regardless.
Replied by Wii Willy on topic 1980 kz650 ltd not starting
18 Dec 2022 13:04
These old z 650s were hard to start in the cold even when they were new speaking from experience. Be methodical and try the easy stuff before pulling the carbs off. If you have to remove them pour hot soapy water over the air intake rubbers to soften them up first as they usually split when being pulled off. Or a hair dryer. Good luck.
I'm thinking that this will cover the topic of "Pods and why you shouldn't"
So you've removed the carbs for a proper cleaning and now you're having problems getting the boots between the carbs and the air box back on. You’re thinking If I just get some pod filters I wouldn’t have to be messing around trying to get these rubber boots over the carbs and into the air box, and that would be correct, except that you’re now on your own as far as tuning and airflow go.
The stock box provides a reliable and smooth airflow in all types of weather conditions, not so with pod filters which can experience different air flows caused by wetting from rain and exposure to side winds.
The airbox and stacks provide a stable smooth laminar flow to and through the carbs, the rubbers (boots) that go into the airbox from the carbs are part of this. CV's can be a nightmare to set up with pods, usually requiring a jet kit and a lot of screwing around to get close to right, If some sort of velocity stack is used it is easier. The VM's are a bit easier to set up but again, stacks of some sort make it much easier.
Folks here at KZR know that it’s better to just buy new stacks (rubber boots between the carbs) and airbox, or just soak your stiff ones in wintergreen oil to soften them up, adding some acetone to the wintergreen oil helps as well, as the stacks/rubbers harden due to out gassing, the acetone restores a bit of that.
Replied by 750 R1 on topic Stock Air Box VS Pod Filters
16 Dec 2020 14:27
The airbox and stacks provides a stable smooth laminar flow to and through the carbs, the rubbers that go into the airbox from the carbs are part of this. CV's can be a nightmare to set up with pods, usually requiring a jet kit and a lot of screwing around to get close to right, If some sort of velocity stack is used it is easier. The VM's are a bit easier to set up but again, stacks of some sort make it much easier. If I were you I'd just buy new stacks/rubbers between the carbs and airbox, or just soak your stiff ones in wintergreen oil to soften them up, adding some acetone to the wintergreen oil helps as well, as the stacks/rubbers harden due to out gassing, the acetone restores a bit of that..
Replied by TexasKZ on topic Rejuvenate diaphragms on CV carbs?
01 Oct 2020 17:33
I have read about guys trying desperately to soften up the air box to carburetor boots by soaking them in a wild variety of concoctions. The best result I have seen made them softer for a bit, but they soon became hard again. So far as I can tell, once rubber gets hard, it stays that way.
Displaying 1 - 10 out of 70 results.