
My first project (550 LTD?)
- TS
-
 Topic Author
- Offline
- User
-

Registered
- Posts: 42
- Thanks: 0
Re: My first project (550 LTD?)
13 Jul 2012 17:42
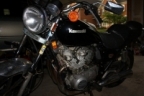
Engine is out! Time to start some deep cleaning, and check out whether or not I have a blown head gasket.
Attachment IMG_3630.JPG not found
Attachment IMG_3627.JPG not found
1982 KZ550 LTD C3
Please Log in or Create an account to join the conversation.
- TS
-
Topic Author
- Offline
- User
-
Registered
- Posts: 42
- Thanks: 0
Re: My first project (550 LTD?)
13 Jul 2012 17:44
Thank you loudhvx, I cannot wait to get it clean and back on the road.
1982 KZ550 LTD C3
Please Log in or Create an account to join the conversation.
- TS
-
Topic Author
- Offline
- User
-
Registered
- Posts: 42
- Thanks: 0
Re: My first project (550 LTD?)
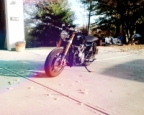
08 Sep 2013 21:12
A year and some change later, the bike has been disassembled, and now most of the components are back in place. We are stuck on the electrical wiring stage of the rebuild. I need help trying to figure out the correct connections and positions for these wires. So close yet, still s far. Any suggestions will be appreciated. I have taken a look at some of the diagrams, but have a very hard time trying to make use of them.
Thank you,
Tom
Thank you,
Tom
Attachment Forum_6913.jpg not found
Attachment Forum_6914.jpg not found
Attachment Forum_6916.jpg not found
1982 KZ550 LTD C3
Please Log in or Create an account to join the conversation.
- D.Nel928
-
- Offline
- User
-
Registered
- Posts: 184
- Thanks: 18
Re: My first project (550 LTD?)
09 Sep 2013 23:12
Can't help you much with wiring besides a diagram, but I look forward to seeing more of this!
'78 KZ650 Custom thingy turned turbo build
www.kzrider.com/forum/11-projects/520339...z650-fighter-project
www.kzrider.com/forum/11-projects/520339...z650-fighter-project
Please Log in or Create an account to join the conversation.
- TS
-
Topic Author
- Offline
- User
-
Registered
- Posts: 42
- Thanks: 0
Re: My first project (550 LTD?)
09 Sep 2013 23:49
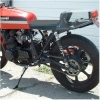
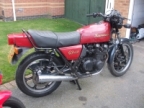
More before pictures...replacing gaskets, and inspecting for cracks.
Attachment Forum_3706.jpg not found
Attachment Forum_3716.jpg not found
Attachment Forum_3717.jpg not found
Attachment Forum_3722.jpg not found
1982 KZ550 LTD C3
Please Log in or Create an account to join the conversation.
- TS
-
Topic Author
- Offline
- User
-
Registered
- Posts: 42
- Thanks: 0
Re: My first project (550 LTD?)
09 Sep 2013 23:51
I just need to know where to start at this point. The wiring diagram makes me dizzy, I appreciate the comment.
1982 KZ550 LTD C3
Please Log in or Create an account to join the conversation.
- D.Nel928
-
- Offline
- User
-
Registered
- Posts: 184
- Thanks: 18
Re: My first project (550 LTD?)
10 Sep 2013 00:21TS wrote: I just need to know where to start at this point. The wiring diagram makes me dizzy, I appreciate the comment.
Honestly, it's easier to do what I did and make a wiring harness. If you have a decent understanding of wiring\electronics it can be very very simple.
This is the harness I use on my 650, and one will be made for my 550 LTD very shortly. The 550 will need some changes though.

simple harness by Dennis Nelson Photography , on Flickr
'78 KZ650 Custom thingy turned turbo build
www.kzrider.com/forum/11-projects/520339...z650-fighter-project
www.kzrider.com/forum/11-projects/520339...z650-fighter-project
The following user(s) said Thank You: TS
Please Log in or Create an account to join the conversation.
- crusierlover
-

- Offline
- User
-
Registered
- Posts: 163
- Thanks: 6
Re: My first project (550 LTD?)
10 Sep 2013 02:59
I think I can be of some help,maybe.You need the battery grounded,with 12 ga black wire.The regulator /rectifier should have a ground wire and at least one red wire on most bikes.Most bikes also have a main fuse and then a secondary fuse panel.You get the battery grounded to the frame,not some battery box.Also run the good ground to that of the r/r.Then from the positive side of the battery run a 12 ga red wire from it, to the main fuse, to the rd wire of the r/r,and finally up to the ignition switch.I have never seena 550 diagram,just telling you what works on many bikes.Once the red wire is run from the battery to the other places you have power to the ignition switch.The fuse panel however many it has usually has a plastic cover with labels like head,tail,signal,ign.The red wire from ign switch to fuse panel powers up the panel.You also need another hot wire from the fuse panel down to each of the coils and cdi/tci/whichever it has.It can be 16 gauge.This same wire needs to go to the positive side of the solenoid.The positive cable from the batery goes to the solenoid.The first red 12 ga wire from the battery to the fuse,the r/r, the ign switch powers the fuse panel.The 16 ga makes the circuit from the fuse panel to the coils, to cdi, to solenoid,completing the ign circuit and starting circuit,except for the starter button on the handlebar.A positive wire from the fuse panel goes to the red wire of the button.I am assuming the bike has red positive wires.There should b another wire from the starter button that grounds the solenoid.It goes from the button and winds its way down to the negative post of the solenoid.With power to the button and solenoid, and switch, the bike should start.I can easily be found wrong, but this is a forumula that works with many bikes.it is also possible to eliminate the killswitch while wiring up.On the diagram from the fuse panel ther will be some color of wire that is common tha t powers up all the brake light switches,signals,flashers,horn,etc.Splice after splice.Sometimes if the r/r has a wire the same color of this common hot wire from the fuse panel, you have to run one of same color down to the r/r too.Some r/r have 2 wires,some have 3 or 4.I have found diagrams to be very complex.Starting from scratch as someone suggested is not a bad idea.Just pick one wire at a time and run it to all the things it powers up,then go onto the next.problem is with diagrams a wire might be brown coming into a component and yellow coming out,etc.if you do a from scratch harness you will find out you can eliminate about 30 wires.Also, good grounds are key.The main ground wire of the harness will have many splices into it.But the turn signals can have their own ground to a screw into the frame,self tapping type.The same for headlight,tailight,and any thing that was spliced can be on its own.
Proud owner of 1982 650csr again soon. keeping it this time
The following user(s) said Thank You: TS
Please Log in or Create an account to join the conversation.
- TS
-
Topic Author
- Offline
- User
-
Registered
- Posts: 42
- Thanks: 0
Re: My first project (550 LTD?)
07 May 2014 17:56
It is the point of my project where I have random parts laying in a box. It would be awesome if anyone could help find the right names and places for these pieces. We cannot remember where they are supposed to be on the bike.
Attachment IMG_8898.jpg not found
1982 KZ550 LTD C3
Please Log in or Create an account to join the conversation.
- loudhvx
-
- Offline
- KZr Legend
-

Registered
- Posts: 10863
- Thanks: 1622
Re: My first project (550 LTD?)
08 May 2014 07:16 - 08 May 2014 07:28#6 bolts on to the frame just behind where the tank presses into the frame. The plastic part presses down on the airbox. The two little circular cutouts hold the open-ended vent tubes from the carbs. The hoses just sit there open. It should have also had a smaller metal piece that goes on top of it that prevents the bolts from splitting the plastic. The metal piece would have held an auxiliary fuse holder for accessories. I'm not that familiar with the LTd, so the metal piece may have been #2 in your photo. On the standard frames, the metal piece looks like a small bracket with an arm sticking out of it.TS wrote: It is the point of my project where I have random parts laying in a box. It would be awesome if anyone could help find the right names and places for these pieces. We cannot remember where they are supposed to be on the bike.
Attachment IMG_8898.jpg not found
#5 goes on the back of the headlight to protect the connector on the bulb.
#7 looks like brackets for holding the airbox in place (but I could be wrong). They would bolt onto something near the battery box, and the tabs would slide into grooves on the airbox. The ones on the standard bike look similar, but shorter.
1981 KZ550 D1 gpz.
Kz550 valve train warning.
Other links.
Kz550 valve train warning.
Other links.
Last edit: 08 May 2014 07:28 by loudhvx.
The following user(s) said Thank You: TS
Please Log in or Create an account to join the conversation.
- chirpy999
-
- Offline
- User
-
Registered
- Posts: 52
- Thanks: 5
Re: My first project (550 LTD?)
08 May 2014 09:24
The spring in the photo is the rear brake pedal return spring
The following user(s) said Thank You: TS
Please Log in or Create an account to join the conversation.
- TS
-
Topic Author
- Offline
- User
-
Registered
- Posts: 42
- Thanks: 0
Re: My first project (550 LTD?)
04 Jun 2014 21:28
We are now trying to find the correct front master cylinder piston rebuild kit. I ordered #43020-1023 from
www.partsnmore.com
, but the piston was too large. The piston is actually in pretty good shape, we are just looking to find replacement o-rings, mine are worn and damaged. We figured it would be easier to just purchase a new piston rebuild kit, instead of trying to just hunt for the o-rings separately. For my 1982 KZ550 (C) LTD, I am trying to find the correct part, but there are a few variations of part #43020. The bottom of the MC denotes my piston as a 1/2". Can anyone provide the correct part number, and/or link for purchasing the replacement parts?
Cheers,
Cheers,
1982 KZ550 LTD C3
Please Log in or Create an account to join the conversation.
Moderators: Street Fighter LTD